Deploy Dataedo Portal with Agent in Azure App Services
This guide explains how to deploy the Dataedo Portal with Agent using Azure App Services.
Step 1: Create and configure Azure Web App
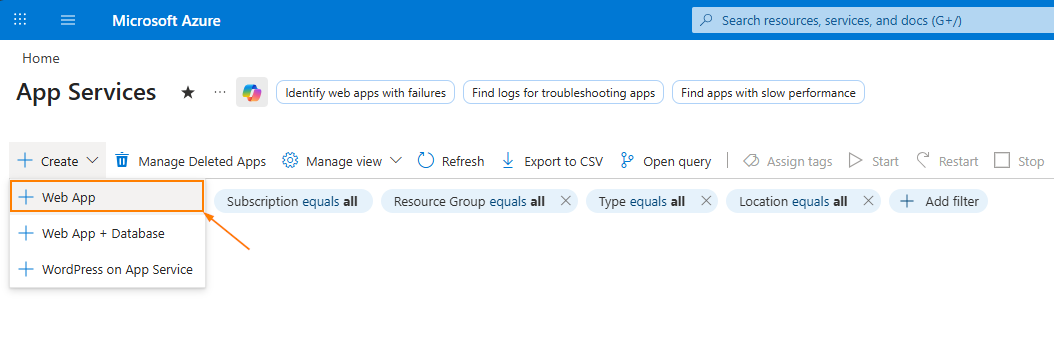
- Log in to the Azure portal and navigate to App Services.

- Click the Create button, then choose Web app:
-
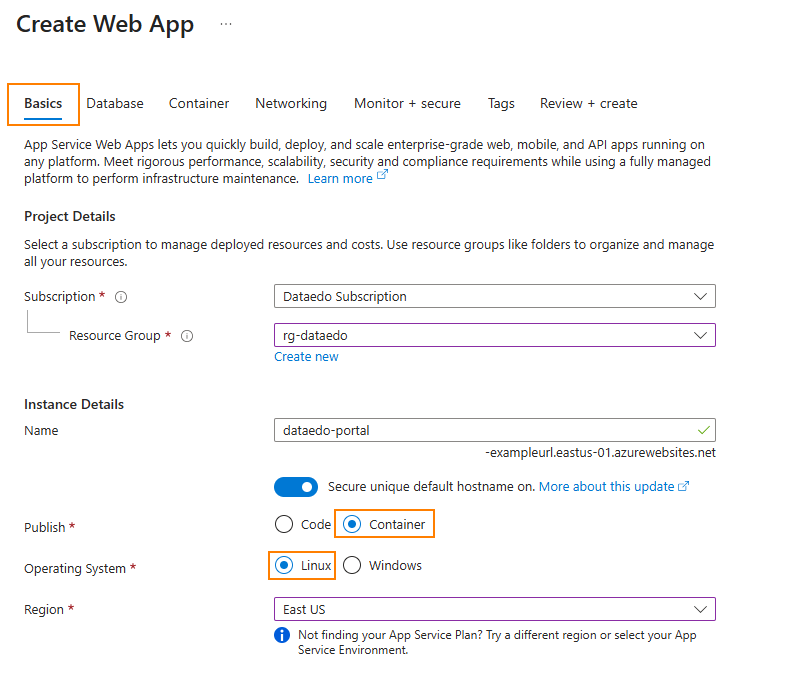
The Create Web App page appears. In the Basics tab, provide the following details:
- Subscription: Select your Azure subscription.
- Resource group: Create a new one or choose an existing one.
- Name: Enter a unique name for your app.
- Publish: Select Container.
- Operating system: Choose Linux.
- Region: Select a region according to your needs.
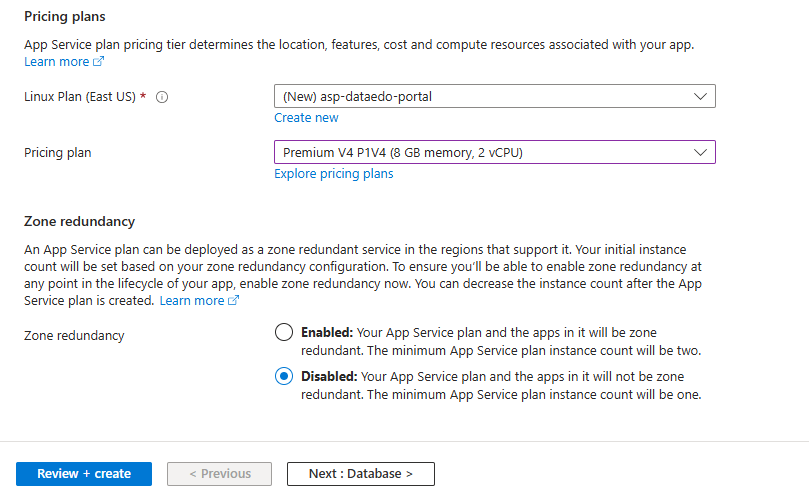
- Linux Plan: Pick an existing or create new plan.
- Pricing Plan: Pick a plan according to your needs.
infoFor Dataedo Portal with Agent, we recommend at least 2 vCPUs and 8 GB RAM.
 useful tip
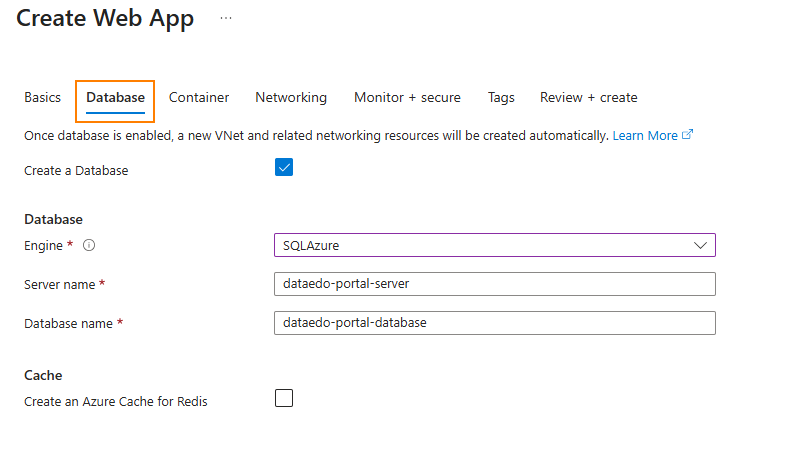
Optionally, you can create a database to use with your app. Select the Database tab and configure it according to your needs:
-
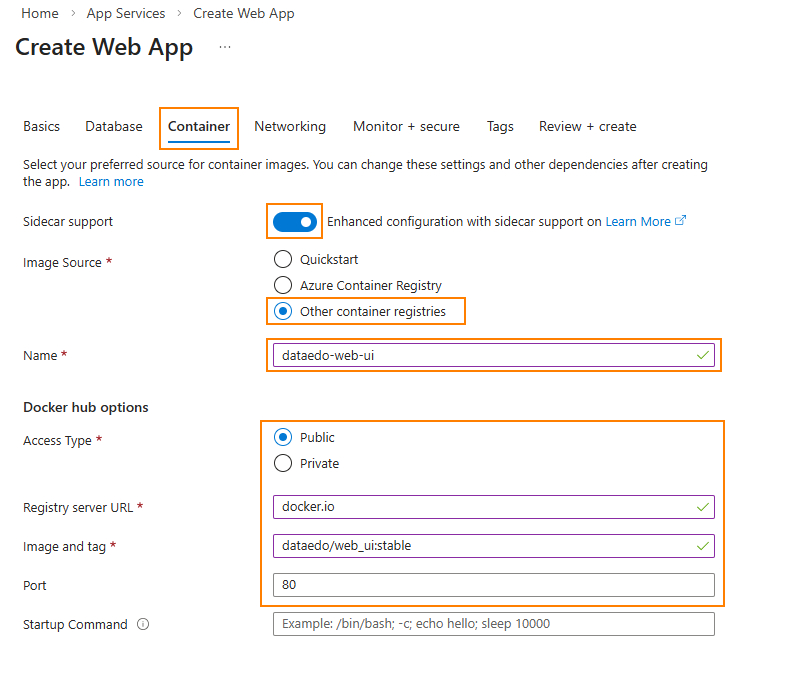
Proceed to the Container tab. Configure it as follows:
infoIn this setup, we will use the Web UI container as the main container, and the API and Agent containers as sidecar containers.
- Sidecar support: Enabled
- Image Source: Other container registries
- Name: Enter a unique name for the main container.
- Access Type: Public
- Registry server URL:
docker.io - Image and tag:
dataedo/web_ui:stable - Port: 80
-
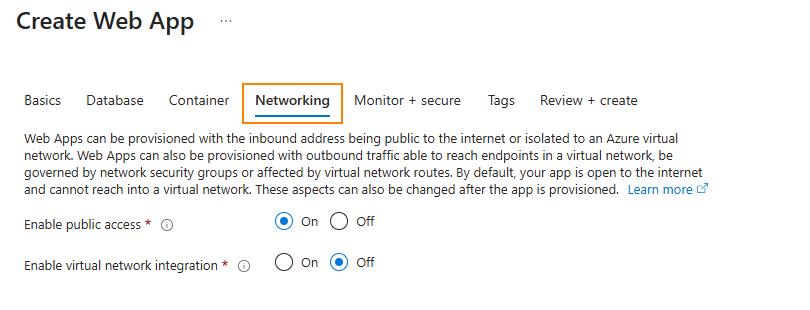
Next, open the Networking tab and set the access type to define whether the instance should be publicly accessible.
-
Configure the settings in the Monitor + secure and Tags tabs according to your needs.
-
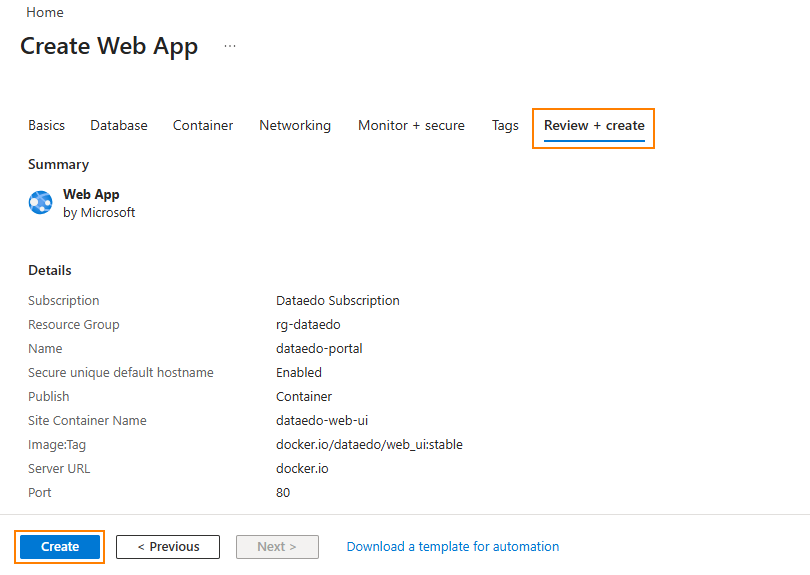
Finally, review your configuration in the Review + create tab and select Create to start deployment.
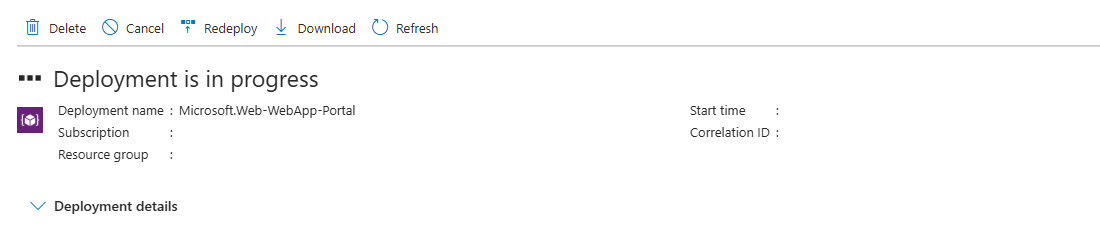
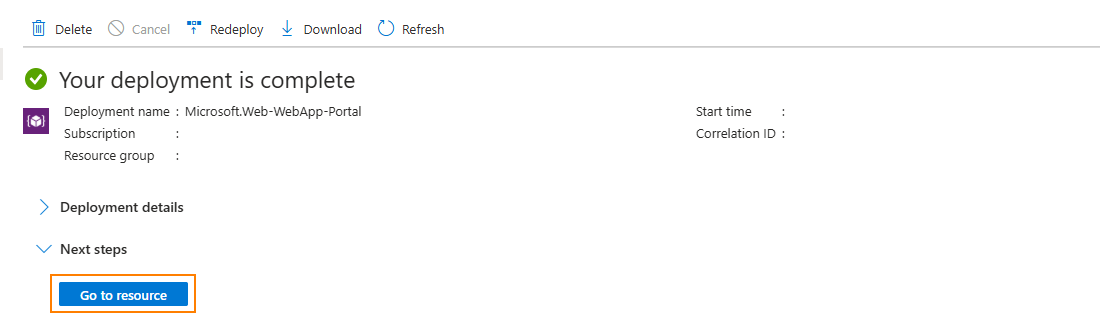
- Wait for the deployment to complete.
- In the Overview section, click Go to resource.
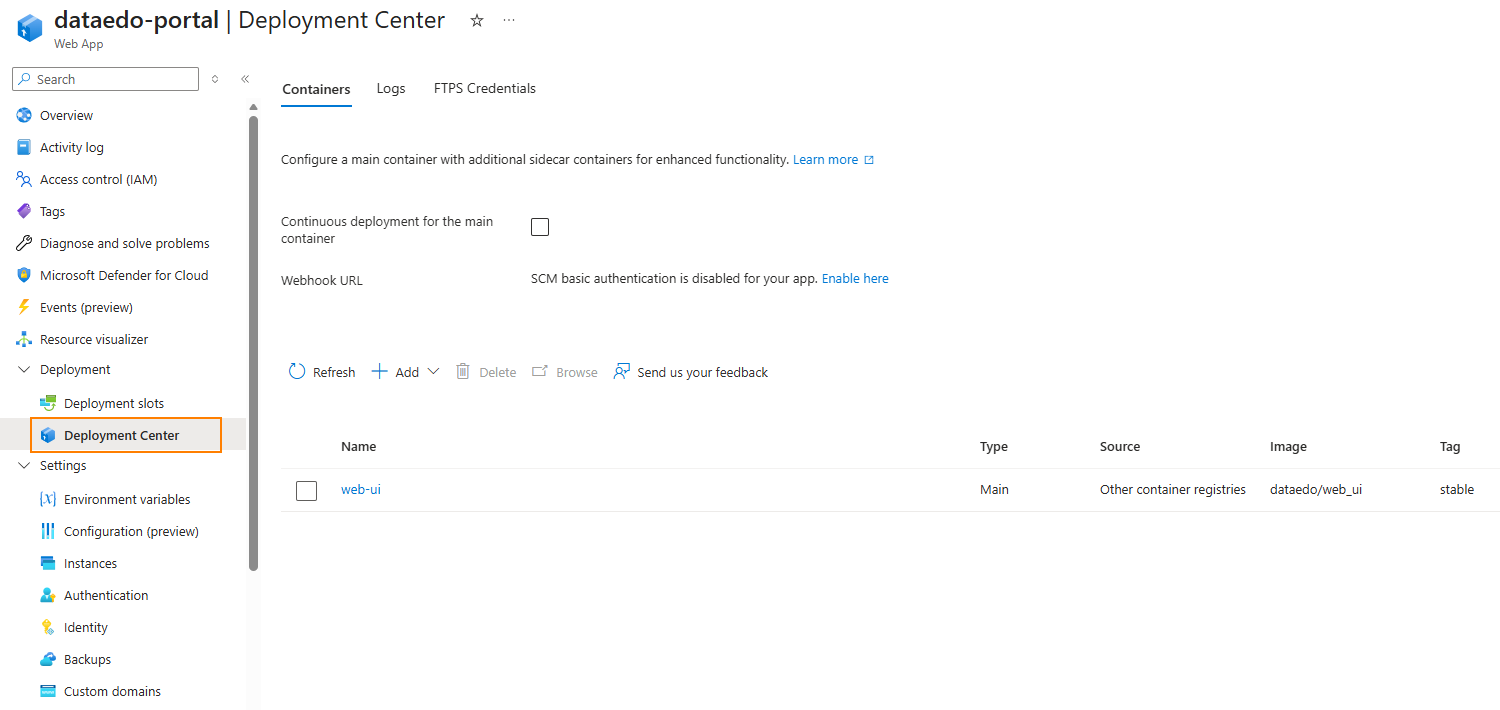
Step 2: Set up sidecar containers
- Navigate to the Deployment Center in the App Service page.
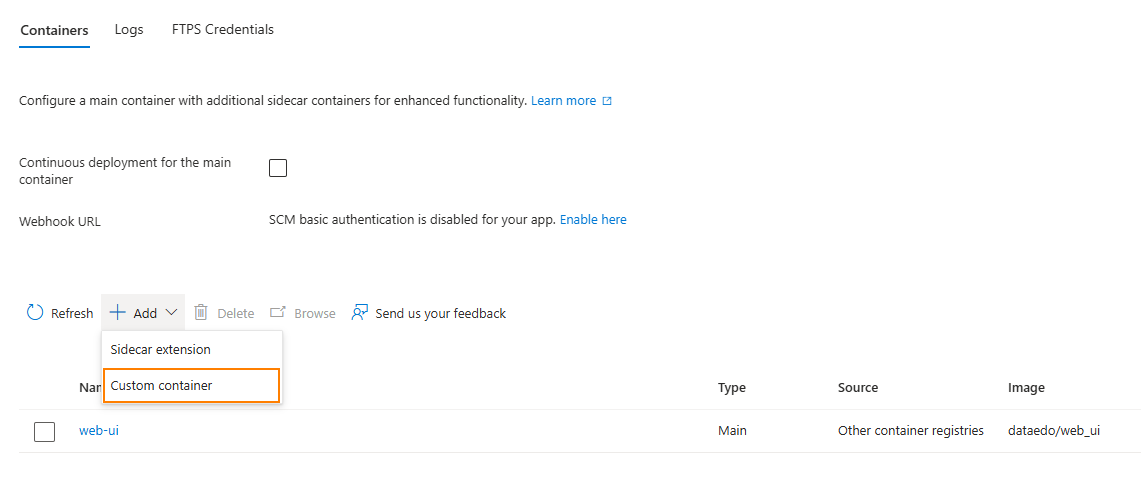
- Click the Add button, then choose Custom Container:
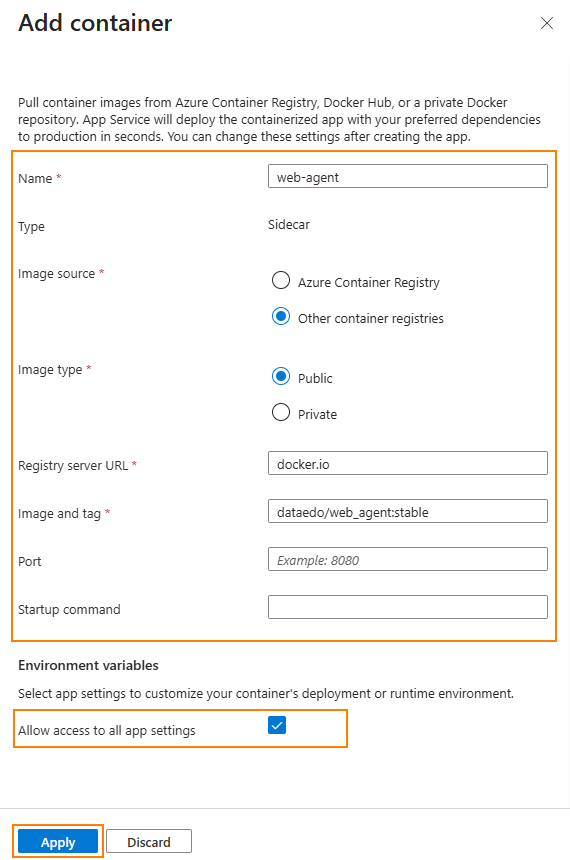
- Configure the API container with the following settings, and select Accept.
- Name: Enter a unique name for your API container.
- Type: Sidecar
- Image source: Other container registries
- Image type: Public
- Registry server URL:
docker.io - Image and tag:
dataedo/web_api:stable - Port and Startup command: Leave empty.
- Allow access to all app settings: Check this option.

- Add second custom container, this time for the Agent. Use following settings:
- Name: Enter a unique name for your Agent container.
- Type: Sidecar
- Image source: Other container registries
- Image type: Public
- Registry server URL:
docker.io - Image and tag:
dataedo/web_agent:stable - Port and Startup command: Leave empty.
- Allow access to all app settings: Check this option.
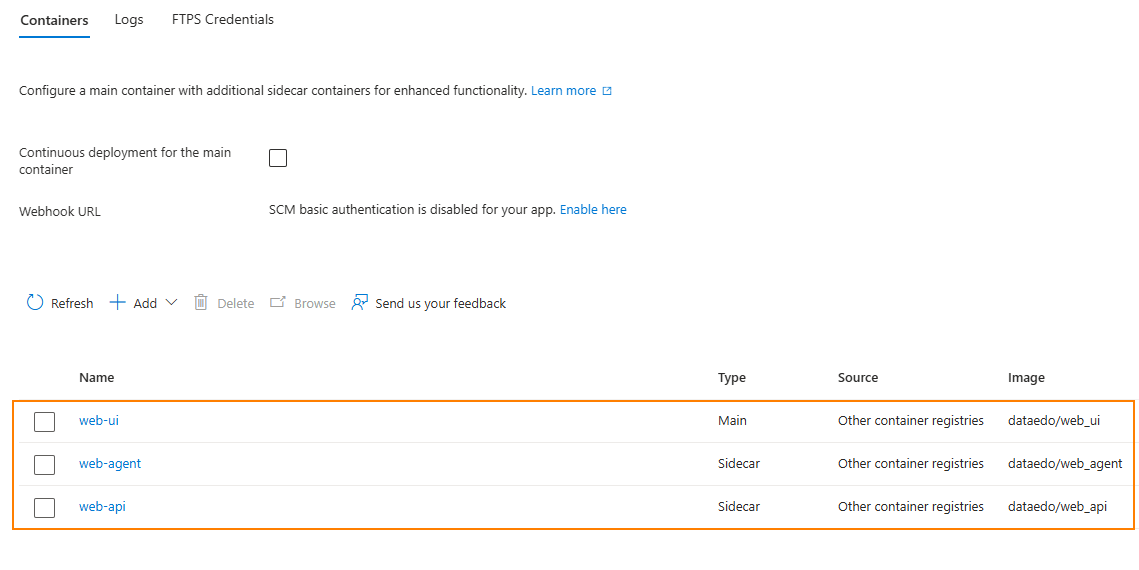
- The complete container configuration should look like the screenshot below.
Step 3: Configure the Environment variables
- Navigate to the Environment variables, and select Add.
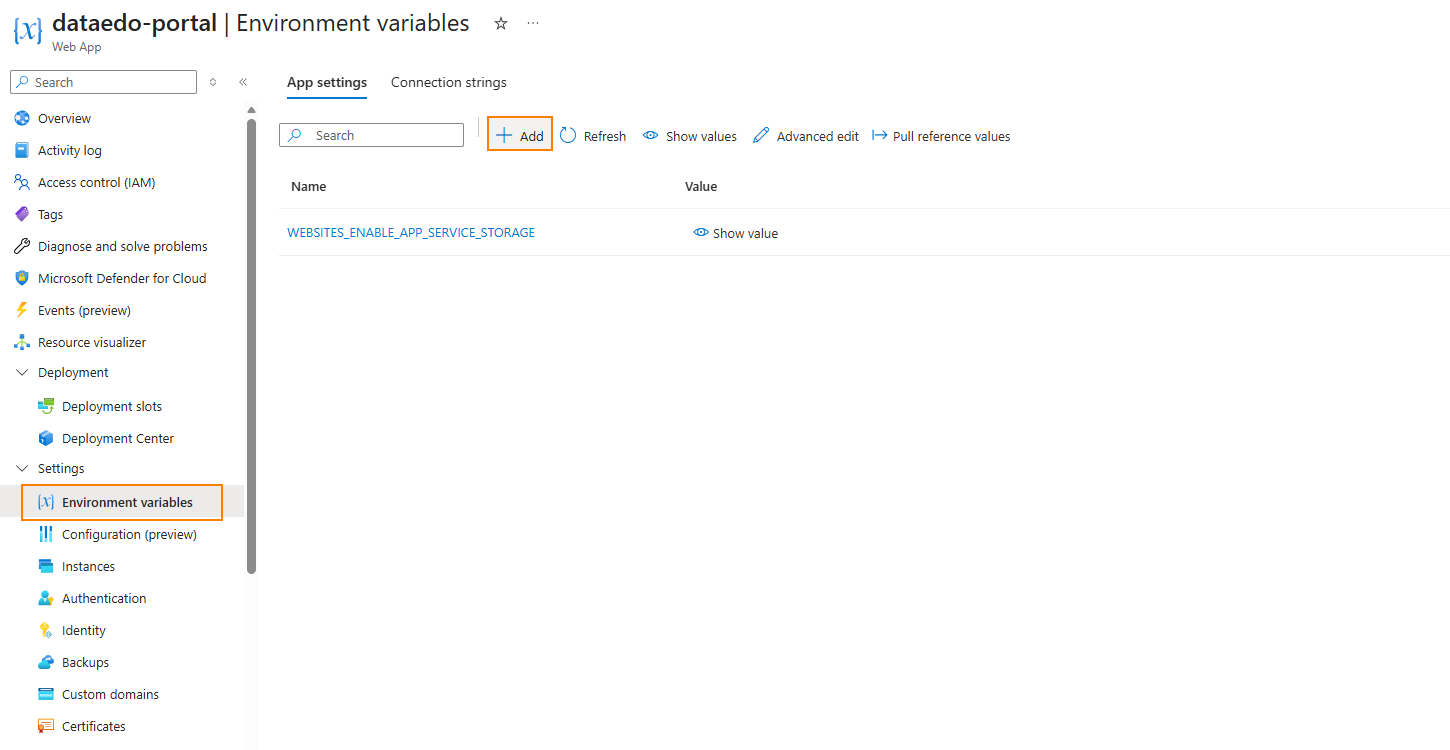
-
Add the first environment variable (
DATAEDO_BACKEND_HOSTNAME) and click Apply:Name Value DATAEDO_BACKEND_HOSTNAMElocalhostMandatory environment variableThe
DATAEDO_BACKEND_HOSTNAMEvariable is required for all Azure Web App setups, including deployments of the Dataedo Portal without the Agent.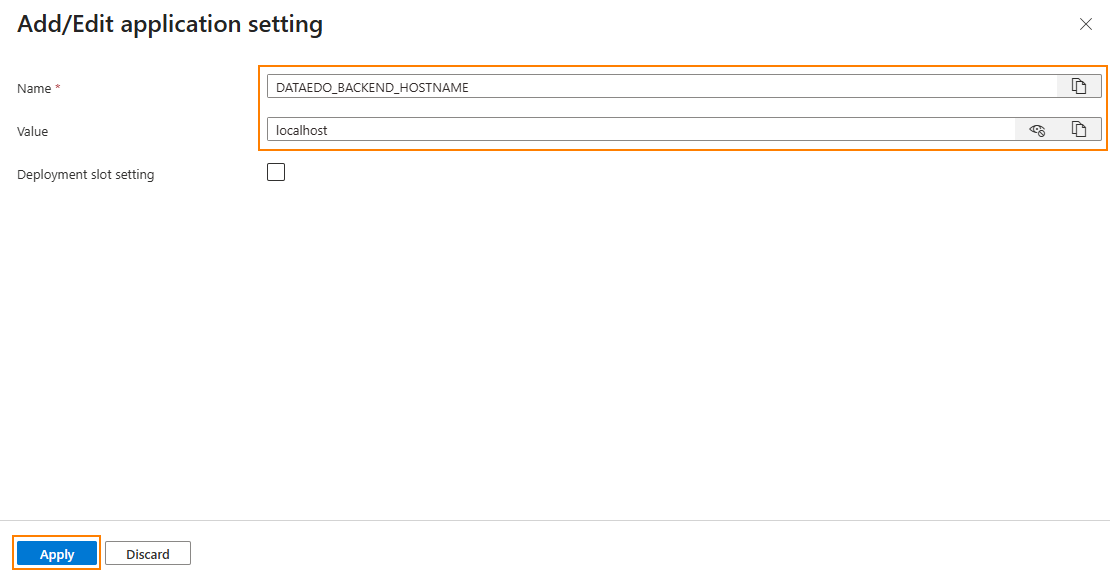
-
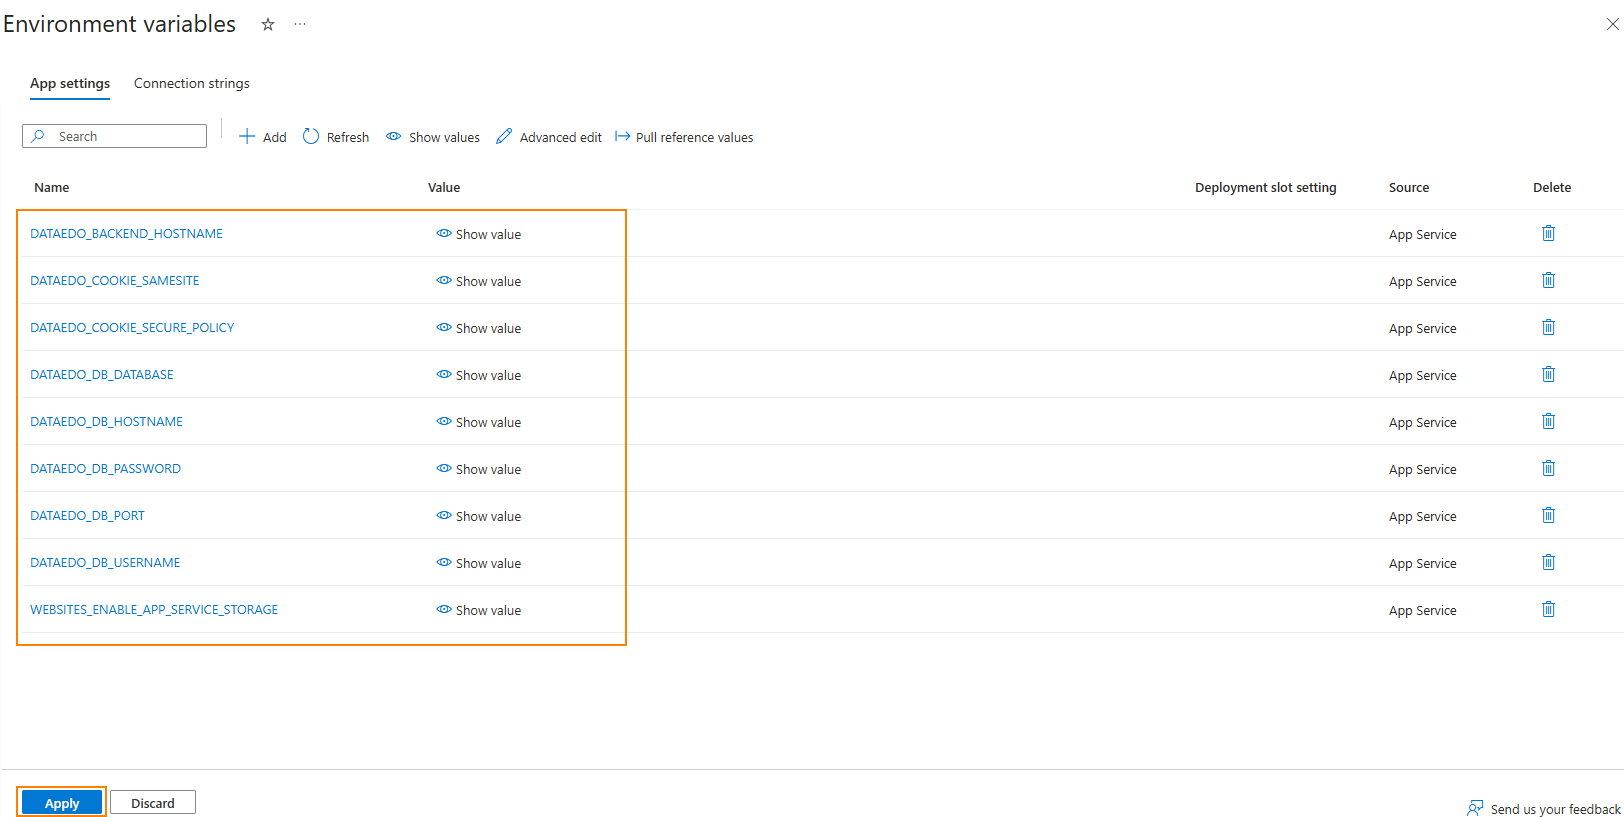
Add the remaining environment variables and click Apply:
Configure cookie policy for HTTP (non-HTTPS) environments:
Name Value DATAEDO_COOKIE_SAMESITELaxDATAEDO_COOKIE_SECURE_POLICYSameAsRequestConfigure the Dataedo repository connection:
Name Value / Description DATAEDO_DB_HOSTNAMEEnter the hostname of the database server hosting the Dataedo repository. DATAEDO_DB_PORTEnter the port number of the repository database server. DATAEDO_DB_DATABASEEnter the name of the Dataedo repository database. DATAEDO_DB_USERNAMEEnter the login for the Dataedo repository database. DATAEDO_DB_PASSWORDEnter the password for the Dataedo repository database. infoThe Dataedo repository is required for the Agent to run. If you don't have one yet, you will be prompted to create a repository the first time you open the app. After creating the repository, add the required environment variables and restart the environment.
The complete environment variables configuration should match the screenshot below.
-
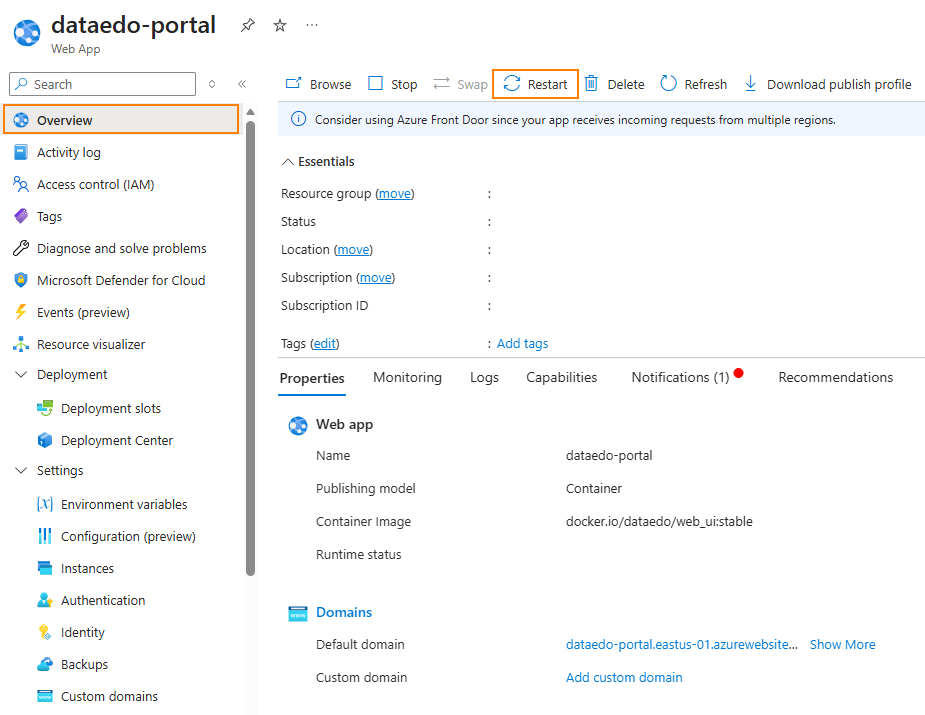
Navigate to the Overview tab and restart the environment by selecting Restart.
Step 4: Connect to Dataedo Portal
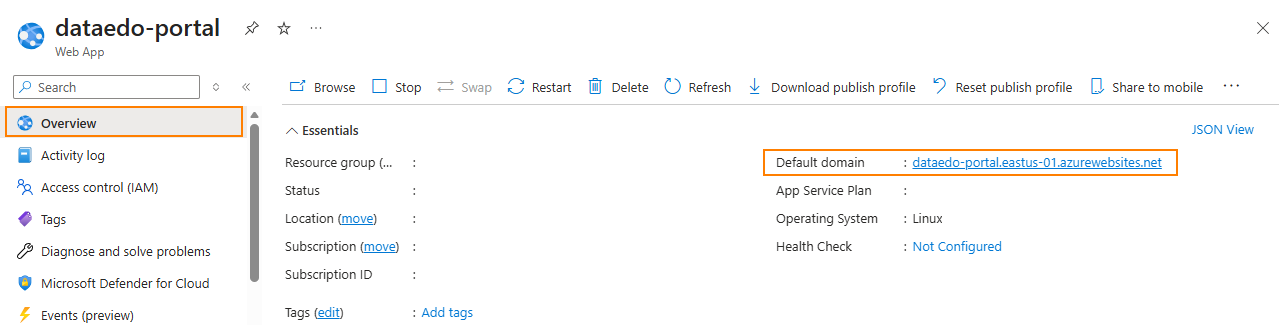
- In the Overview tab, look for Default Domain. Click the URL next to Default Domain to access the Dataedo Portal.
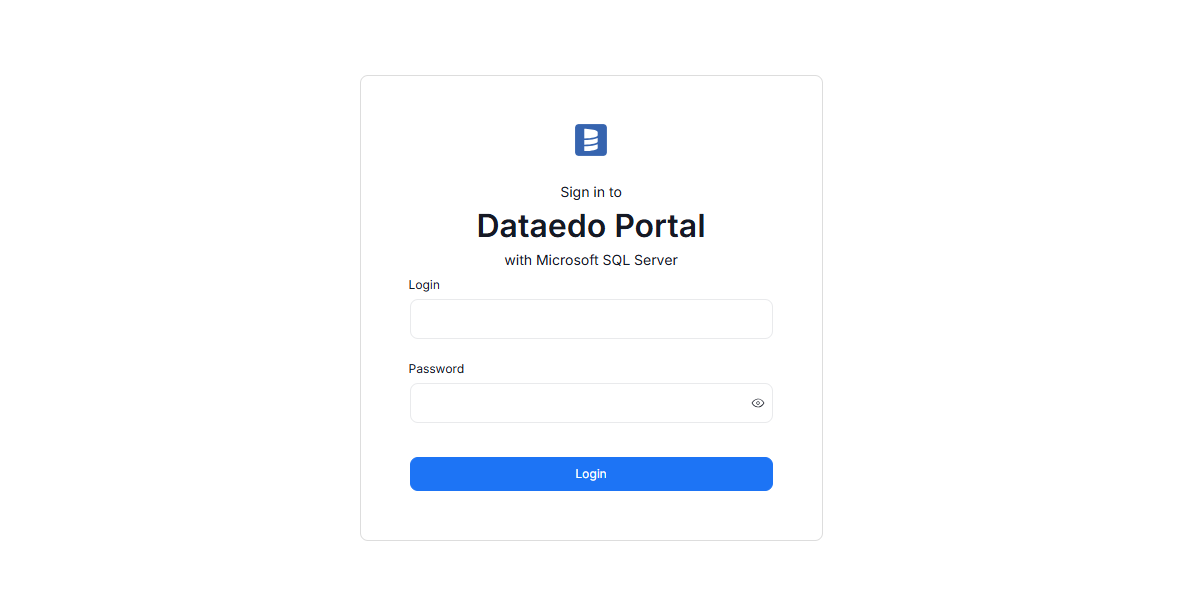
- The Dataedo Portal home page will appear.
Need help?
If you run into any problems or have questions, reach out to Dataedo support.

