Install and configure the Dataedo portal on AWS
This guide walks you through installing and configuring the Dataedo Portal on AWS. For an introduction to the Dataedo portal, see this overview.
If you're upgrading an existing AWS Dataedo Portal instance, check this article.
Step 1: Launch the EC2 Instance
Access the AWS Marketplace
Visit the Dataedo Portal application page on AWS Marketplace. Click Continue to subscribe and log in to your AWS account:

Accept terms and pricing
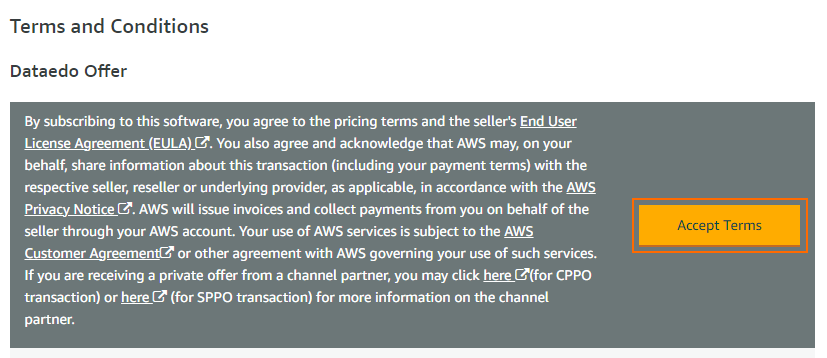
On the subscription page, review the pricing details and terms:

Note that charges apply only to the virtual machine since Dataedo Portal operates on a BYOL (Bring Your Own License) model.
If you agree, click Accept Terms to proceed.
Configure the software
After accepting the terms:
-
Click Continue to configuration.

-
On the Configure this software page, select your preferred AWS Region and click Continue to launch.

Choose launch options
On the launch page:
- Under Choose Action, select Launch from the Website for a simple setup. Alternatively, you can choose the EC2 menu if you're familiar with it.

- Select the EC2 instance type:

We recommend at least 2 vCPUs and 4 GB of RAM. For higher performance, opt for 4 vCPUs and 8 GB of RAM.
Network and security settings
Proper network and security configuration ensures secure and efficient access to your Dataedo Portal instance. Follow these guidelines to set up the Virtual Private Cloud (VPC), Subnet, public IP, and Security Group settings.
-
Use the default
VPCandSubnetsettings unless your organization has specific requirements.

-
Assign a public IP automatically to allow external access, or configure it manually if required.
-
Set up Security Group Settings to allow the following ports:
80: HTTP access to the Dataedo Portal.443: HTTPS access to the Dataedo Portal.22: SSH access to the EC2 instance.
If the portal needs global accessibility, use the "0.0.0.0/0" range. Otherwise, consult your network administrator for the appropriate IP range.

Key pair settings
- Create or use an existing key pair to retrieve the instance's login credentials. This key will be essential for upgrades or maintenance.
- Once you finished configuration, click Launch.
- Wait until the instance deployment is successfully finished. You can now click on the EC2 Console link to access the EC2 dashboard.

Step 2: Connect via SSH
Establish an SSH connection
-
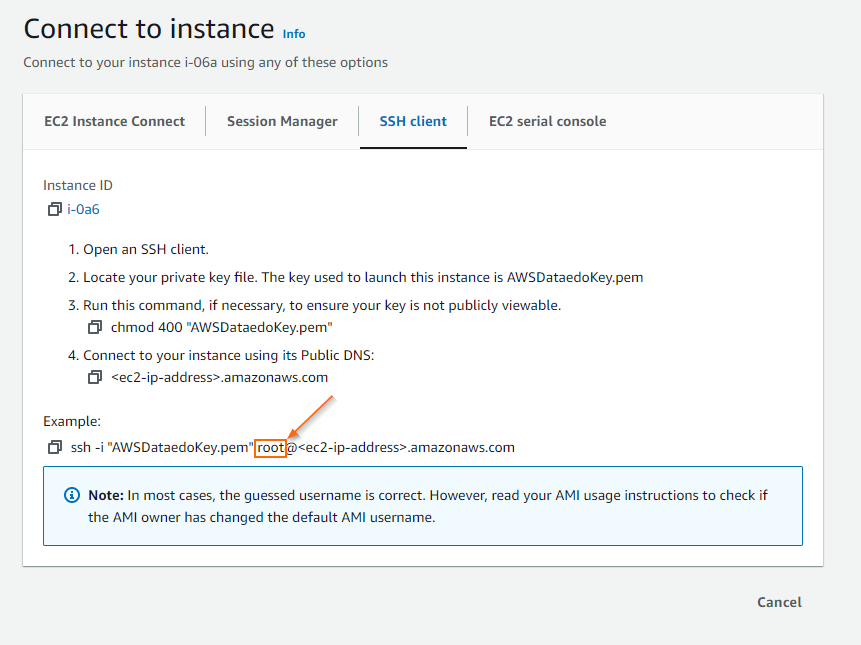
On the EC2 dashboard, locate and select your Instance ID from the list of running instances. Then, click Connect to access the Connect to instance page:

-
On the SSH client tab, follow the instructions to connect to your instance using a terminal application.
 caution
Use
"ubuntu"as the username instead of"root". Otherwise, the connection will fail. -
Update the command with your private key file and EC2 IP address:
ssh -i "<private_key_file>.pem" ubuntu@<ec2-ip-address>
Step 3: Configure environment variables
The Docker configuration files are located in the /opt/dataedo/ directory.
To edit environment variables:
-
Open the
.envfile using a text editor, such asnano:sudo nano /opt/dataedo/.env -
Save changes and restart the containers for the updates to take effect:
cd /opt/dataedo/
sudo docker compose down
sudo docker compose up -d
For detailed information about .env configuration, refer to this guide.
Step 4: Access the Dataedo portal
Retrieve the instance IP
-
Return to the EC2 dashboard, select your
Instance ID:
-
Copy its public IP address:

Open the Portal in your browser
-
Paste the IP address into your web browser using
http://(nothttps://).ssl certificateThe Dataedo Portal doesn't include a pre-installed SSL certificate during setup.
We strongly recommend installing an SSL certificate immediately after completing the initial configuration.
-
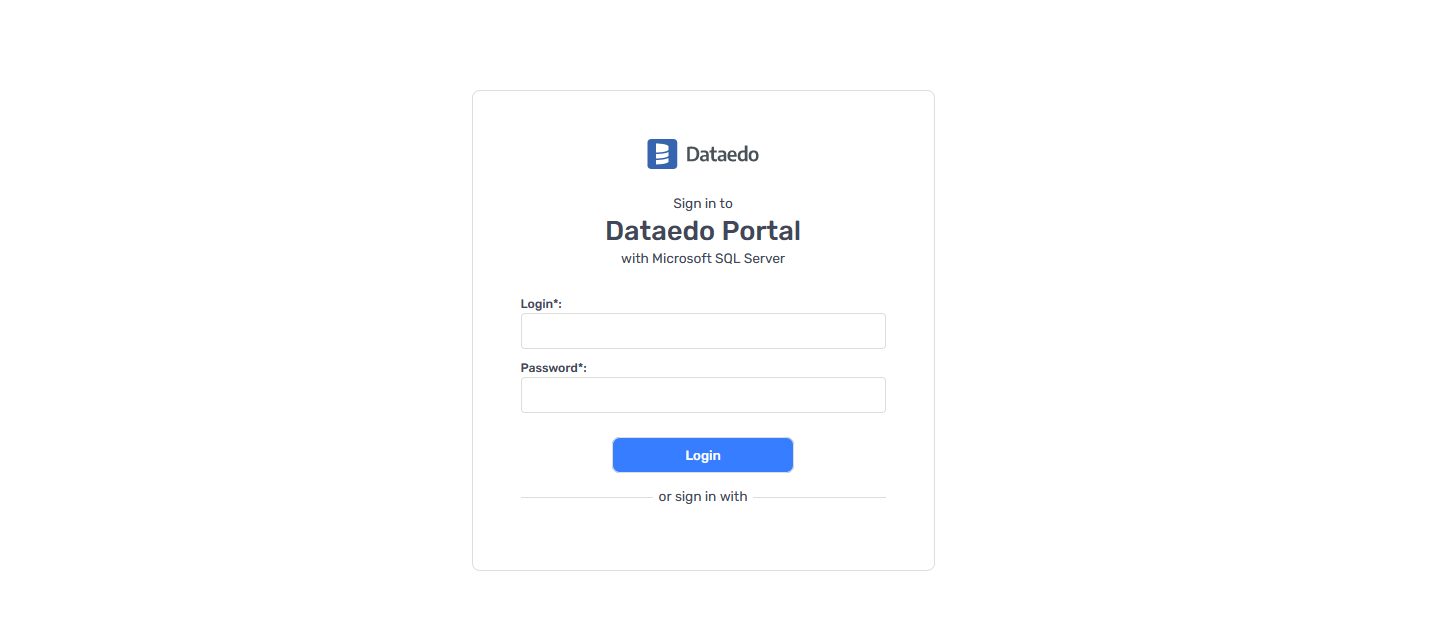
The browser will display the Dataedo portal page:

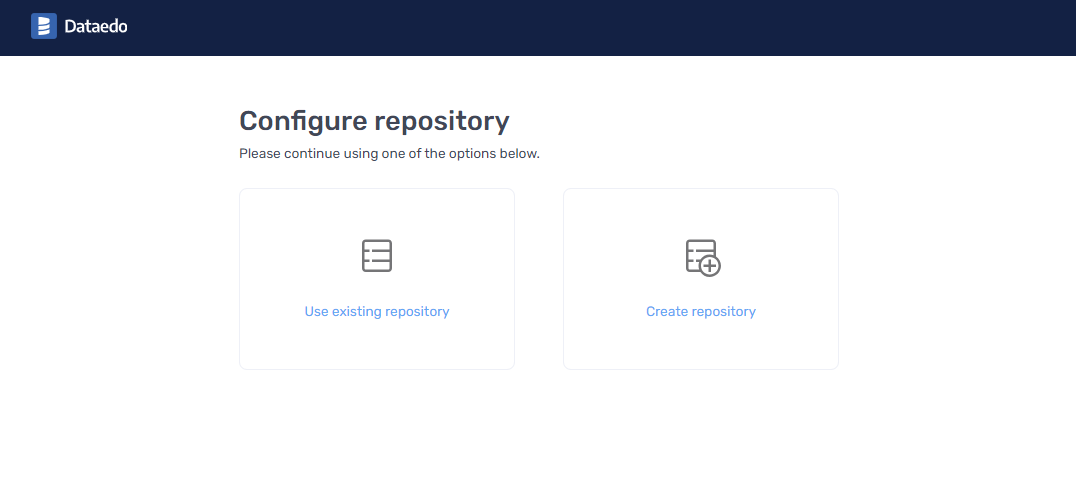
- If you see the Configure repository page instead, it means the connection to the repository failed using the settings from the env file. In this case, go back to the Configuring environment variables section above.

Need help?
If you run into any problems or have questions, reach out to Dataedo support.

