Connecting to Tableau
Introduction
We recommend using Metadata Import in the Portal as the primary method of connecting your data sources.
The Portal offers significant advantages compared to the Desktop application:
- Schedule recurring tasks (Metadata Import).
- Manage connections centrally.
Import through Desktop is still available and allows importing one source at a time.
You can find the instructions at the bottom of this page.
Prerequisites
-
If Tableau Cloud or Tableau Server is not licensed with Data Management, then by default, only admins can see database and table metadata through the Tableau Metadata API. This default can be changed to use "derived permissions," as described here.
-
If you try to connect to the Tableau Server instance you need to manually enable the Tableau Metadata API. You can find details on how to do that here. Tableau Online has the Metadata API turned on by default.
Host details
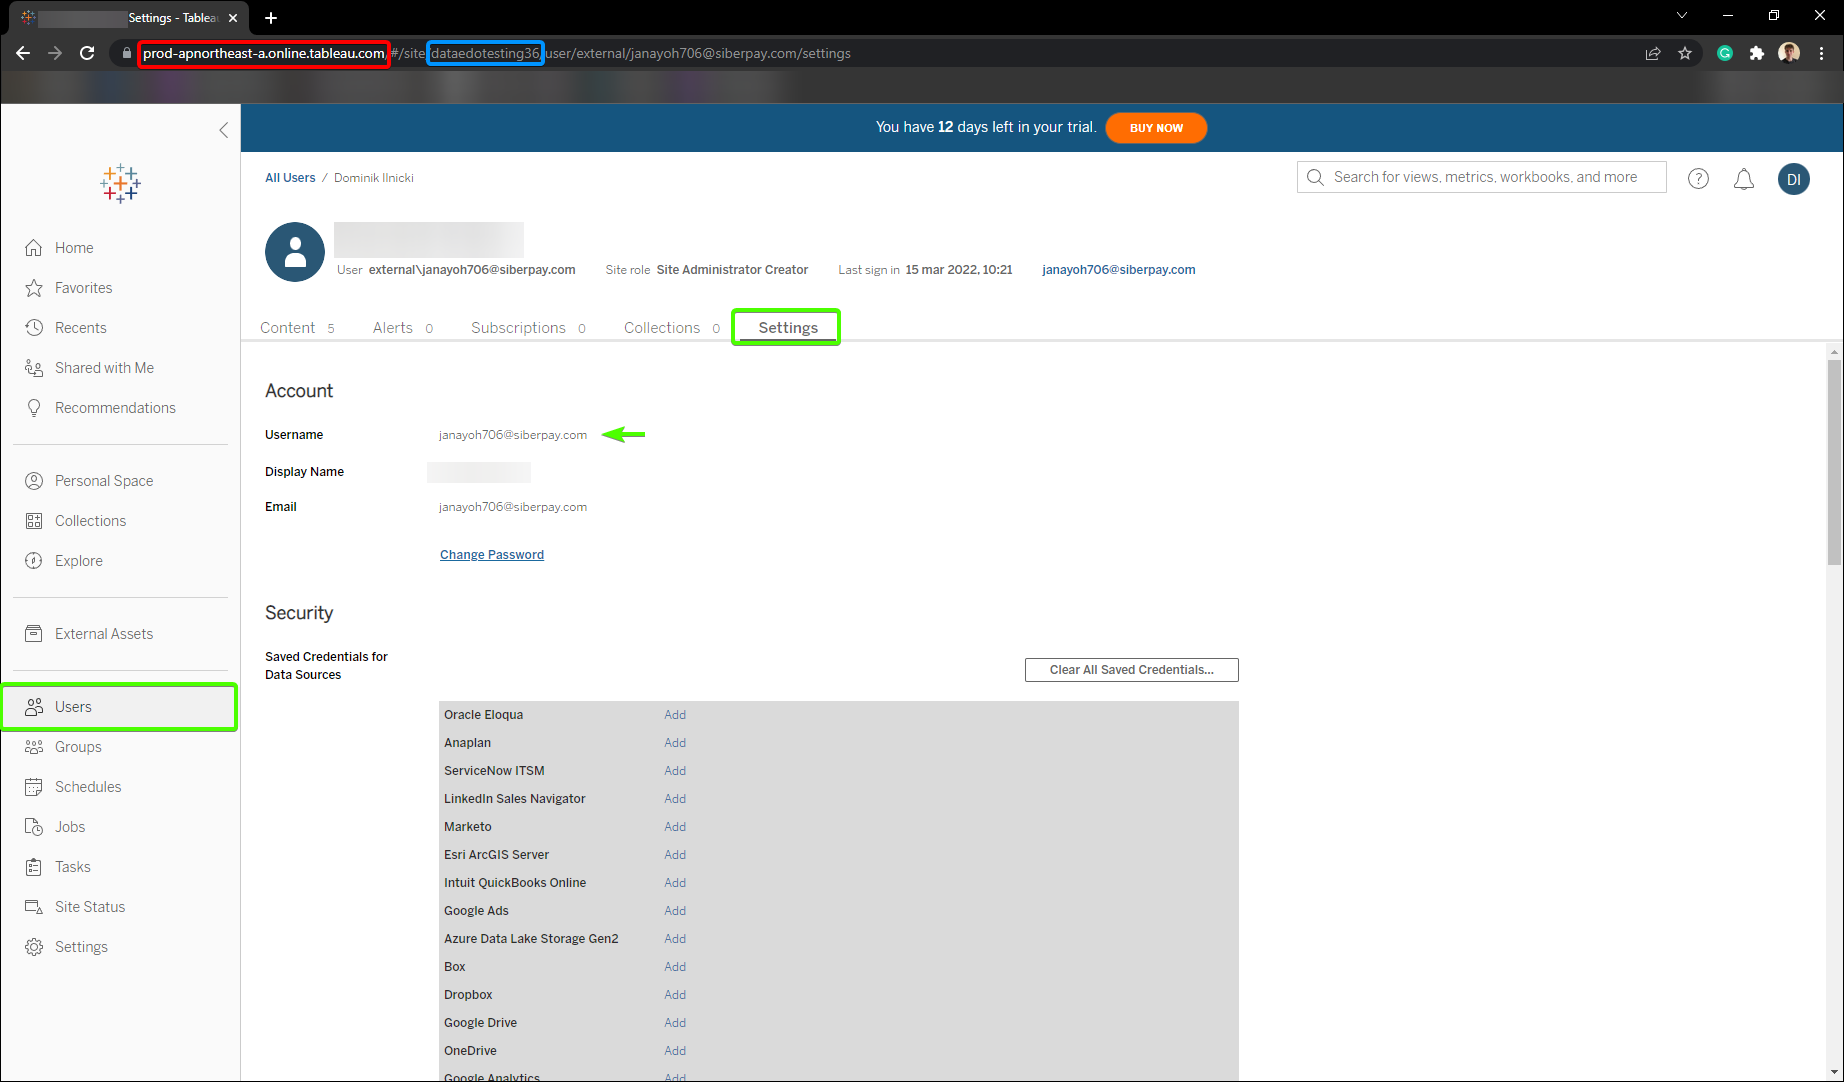
Host connection details are necessary to connect to Tableau. A full breakdown of how to obtain necessary details can be found below.
Connection details breakdown
Necessary connection details:
- Product - Tableau product version you're trying to connect to, Online or Server.
- Host - Provide a host name pointing your Tableau organization. eg. https://dub01.online.tableau.com/
- Authentication - The way you want to authorize.
- Username/password
- Username - Username to your Tableau organization. eg. [email protected]
- Password - Password to your Tableau organization.
- Personal Access Token - You can find the instructions on how to obtain Personal Access Token down below.
- Token name
- Token secret
- Username/password
- Site - Name of the Tableau site. For Tableau Server you can use a [...] button to fetch sites list automatically.
- Import reports usage - specify whether you want to import reports usage data.
How to get connection details in Tableau
Personal Access Token
To obtain Personal Access Token follow these steps:
- Go to your Tableau dashboard and then open My Account Settings.
- Scroll to the Personal Access Tokens section.
- Provide Token Name and click Create new token.
- Select Copy to clipboard.
Find out more on Personal Access Token in the Tableau docs
Server vs Cloud
Whether you choose Server or Cloud as your Product depends on how your organization's Tableau is set up. The only difference in details between Tableau Server and Cloud is the host URL. Tableau Cloud uses the tableau domain (*.tableau.com) and the Server can be in any domain your company set up.
Importing metadata in Dataedo Portal
Entry point
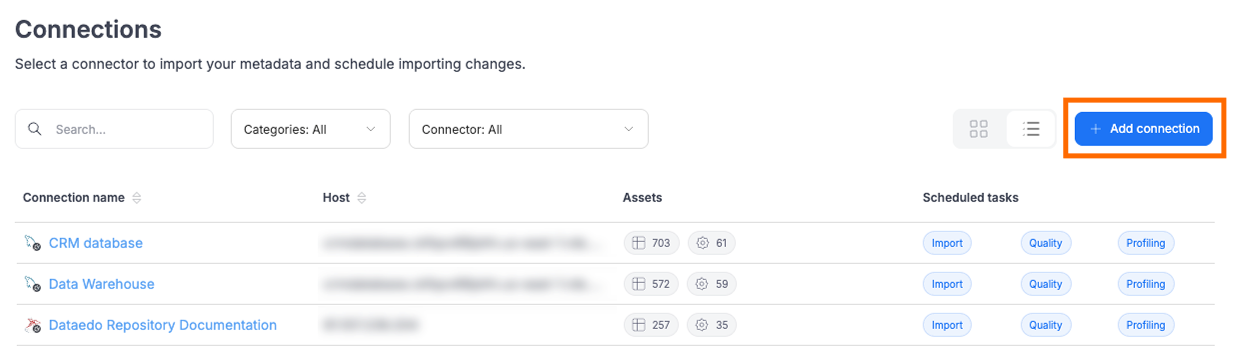
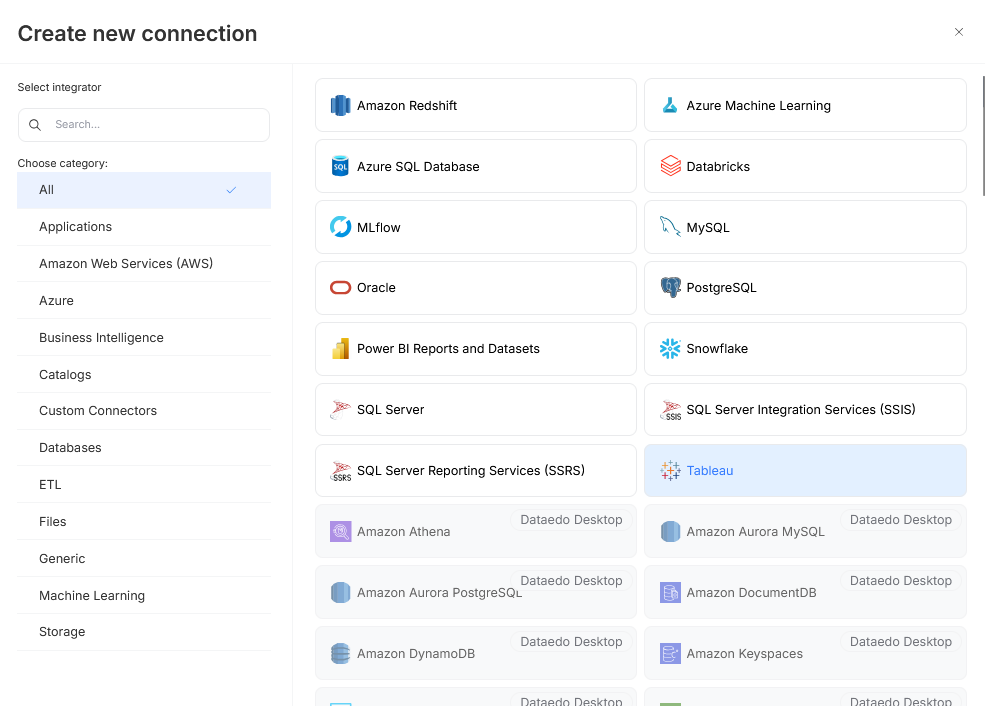
Make sure that you have the Connection Manager role. Then open Connectors>Connections and press the Add Connection button. Select Tableau.
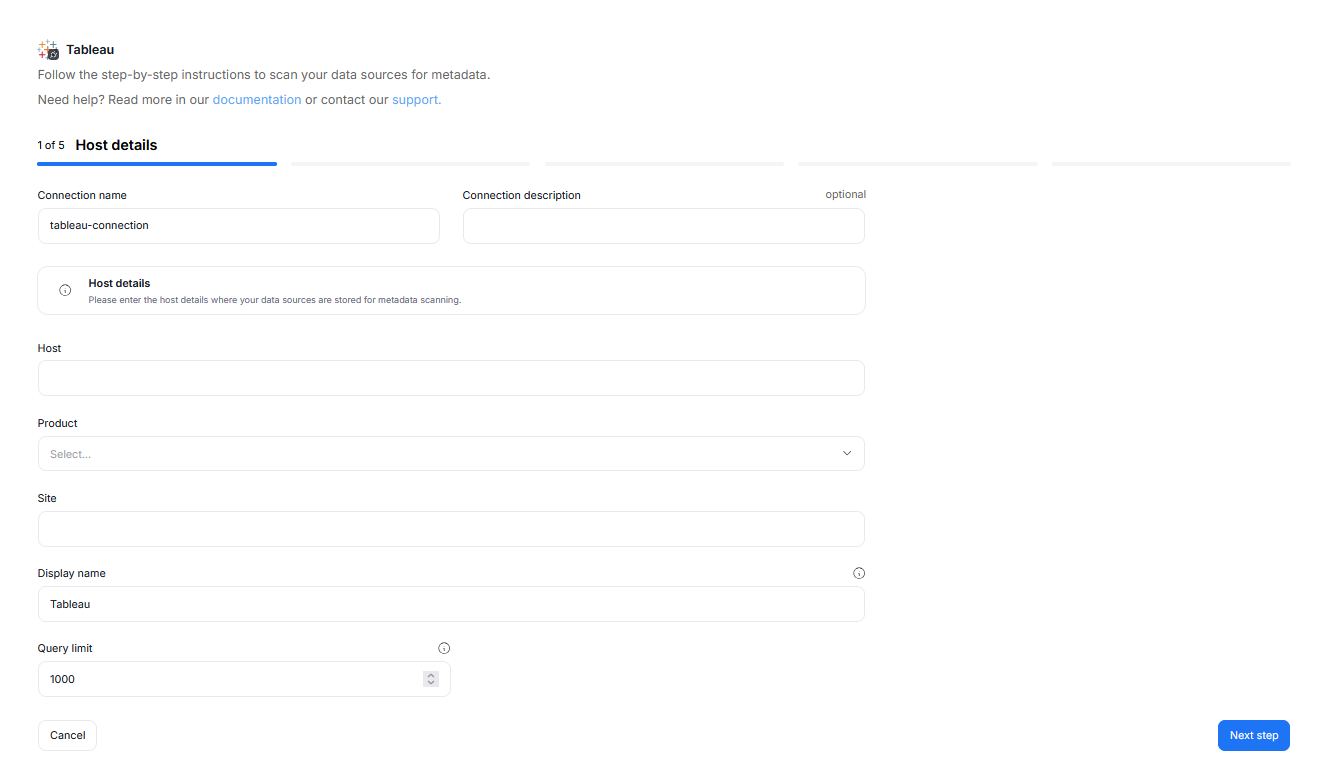
Step 1. Host Details
Provide the connection name, and (optionally) the connection description. These impact how the connection will be visible in your repository.
You also have to provide the Site and Host details pointing to your Tableau organization.
Finally, you can modify the Display Name and Query Limit. Make sure that the Display Name is easily identifiable — this connector does not let you connect multiple sources at once, so one connection will point to only one database.
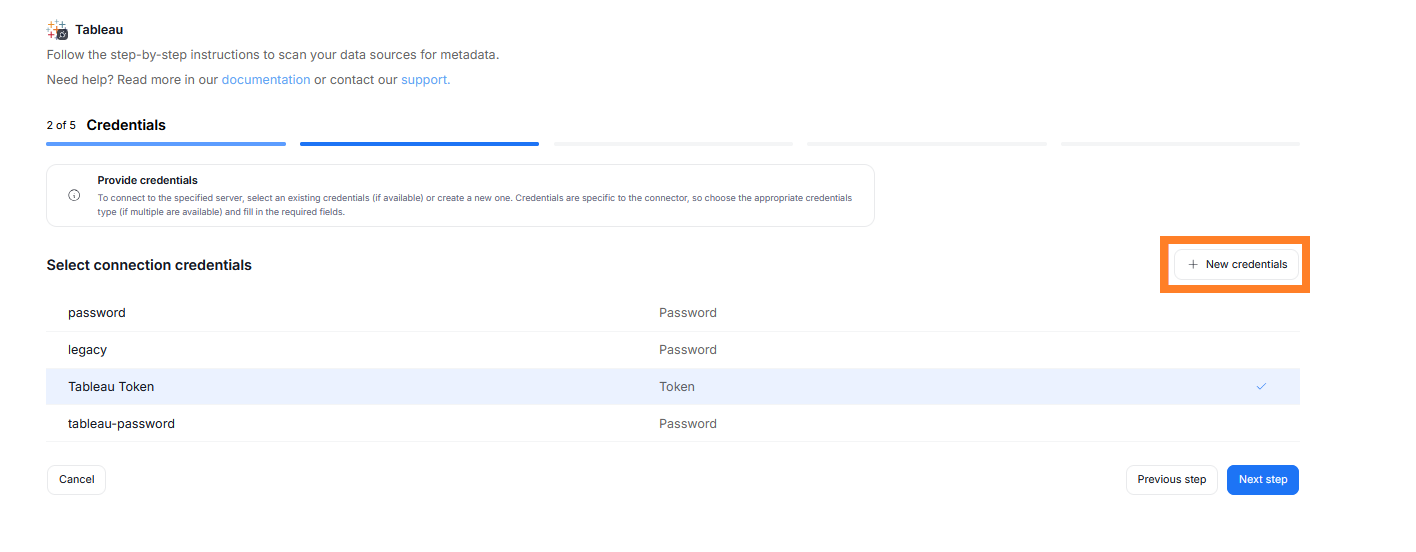
Step 2. Credentials
Choose your credentials from the list of the ones already saved for your chosen connector, or add new ones using the New credentials button.
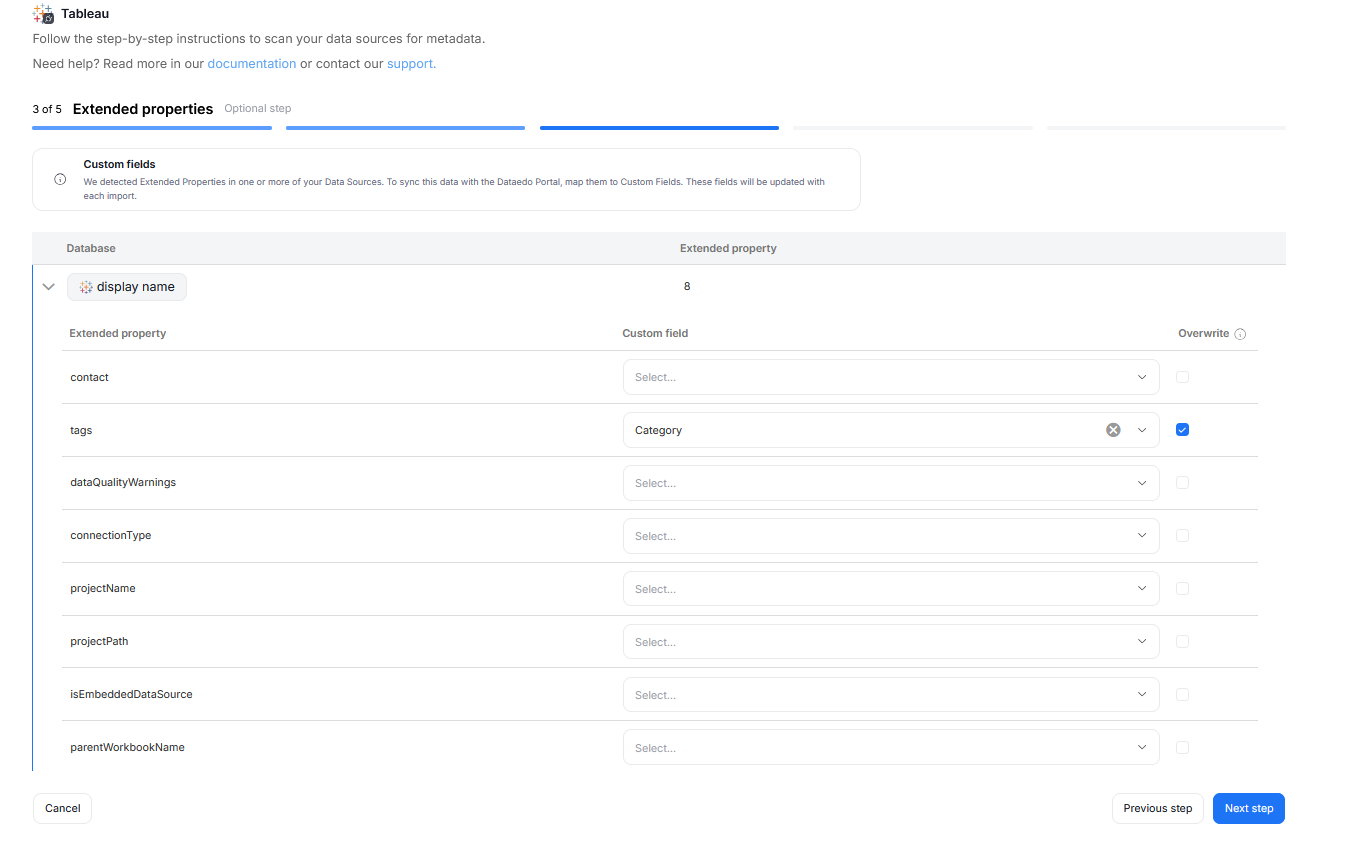
Step 3. Extended properties (optional)
This step appears only if the source exposes Extended Properties. You can map them to Custom Fields in Dataedo, or skip this step entirely.
If skipped, no extended properties will be imported.
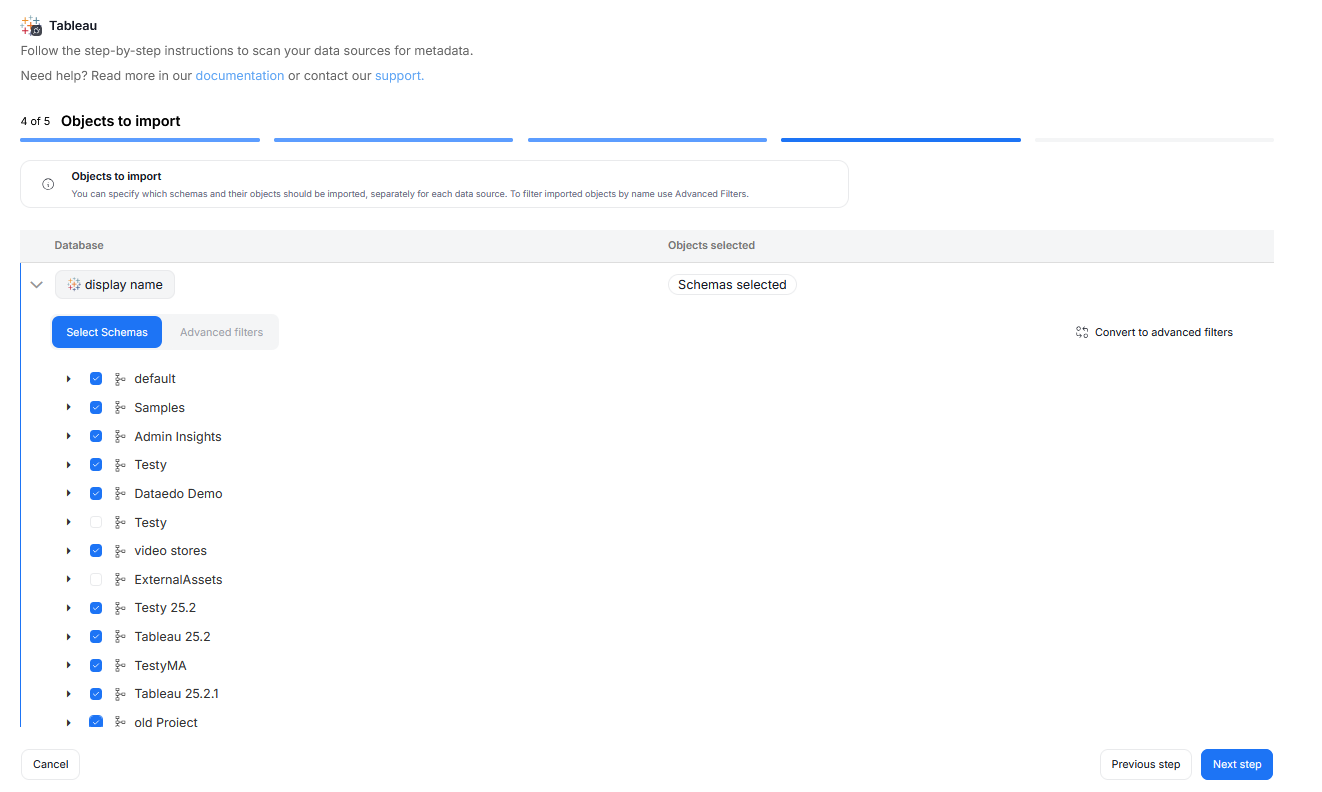
Step 4. Objects to Import
You can select which objects to import from your Tableau organization. You have two ways to do that.
Select Schemas lets you choose schemas and object types (tables, views, procedures etc.) you want to import.
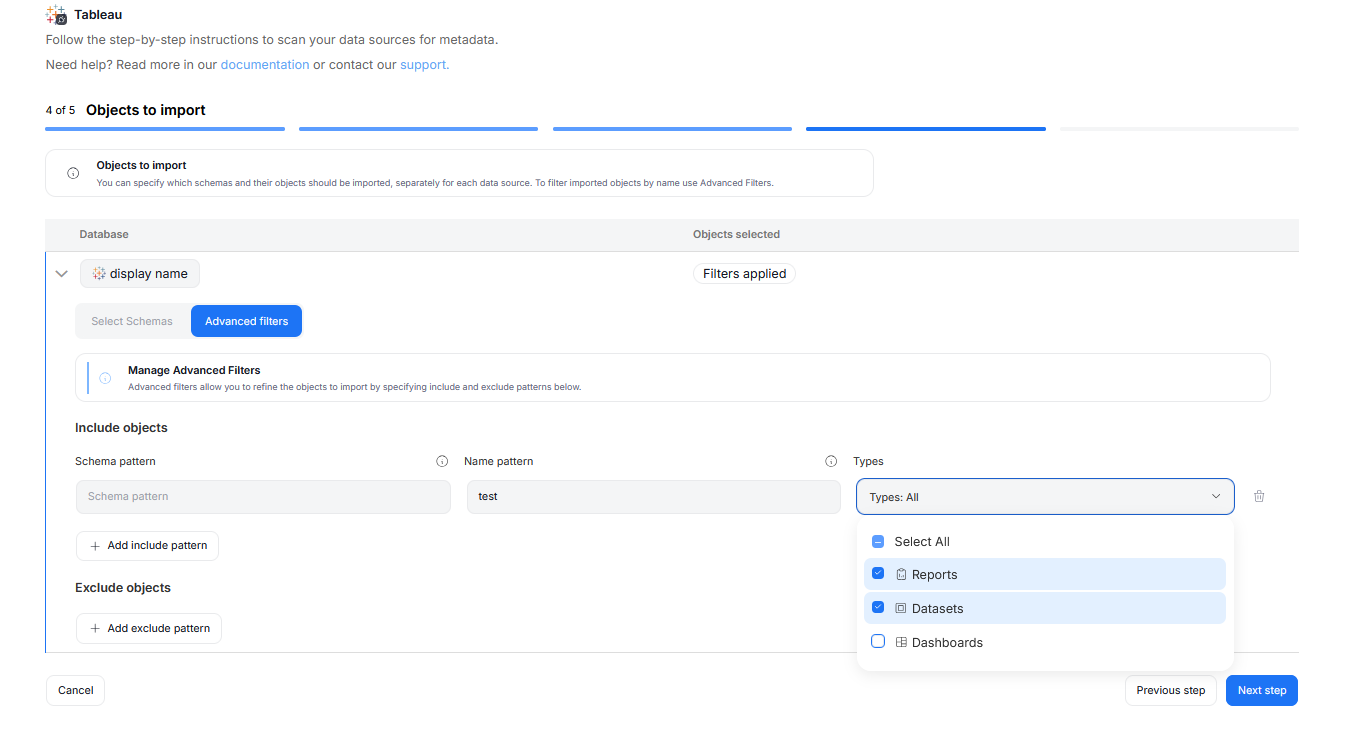
The Advanced Filters let you include or exclude objects based on schema and name patterns using regular expressions. You can configure multiple patterns, and each one can apply only to certain object types.
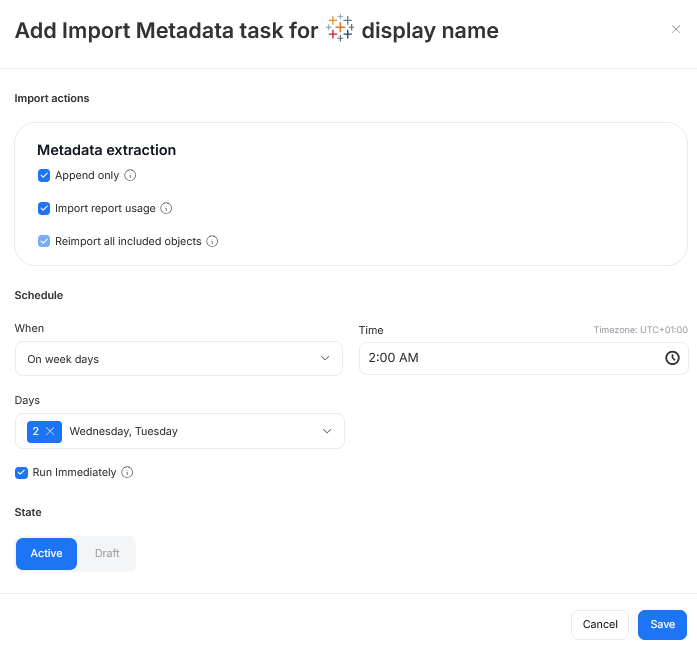
Step 5. Schedule Metadata Import
You must configure an Metadata Import task in the schedule section.
If you skip this, an empty database will be created and no metadata will be imported.
Configure scheduling options for each source individually. You can schedule Metadata Imports, data quality runs, and refresh data profiling.

When you schedule a Metadata Import, you can:
- Affect the import behavior
- Choose its frequency (daily, on selected weekdays, on selected days of the month)
- Choose a time of its execution
- Set its state (
Activetasks will run as scheduled,Draftones will be saved for future but will not run until changed toActive) - Schedule a task to run immediately — this will run the task immediately after you finish configuring imports and according to schedule after that.
Importing metadata in Dataedo Desktop
Add new connection
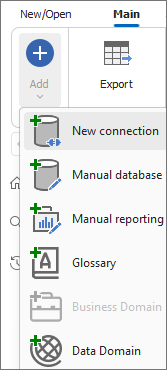
To connect to Tableau instance create new documentation by clicking Add and choosing Database connection.
On the connection screen choose Tableau.
Importing schema
When the connection was successful Dataedo will read objects and show a list of objects found. You can choose which objects to import. You can also use an advanced filter to narrow down the list of objects.
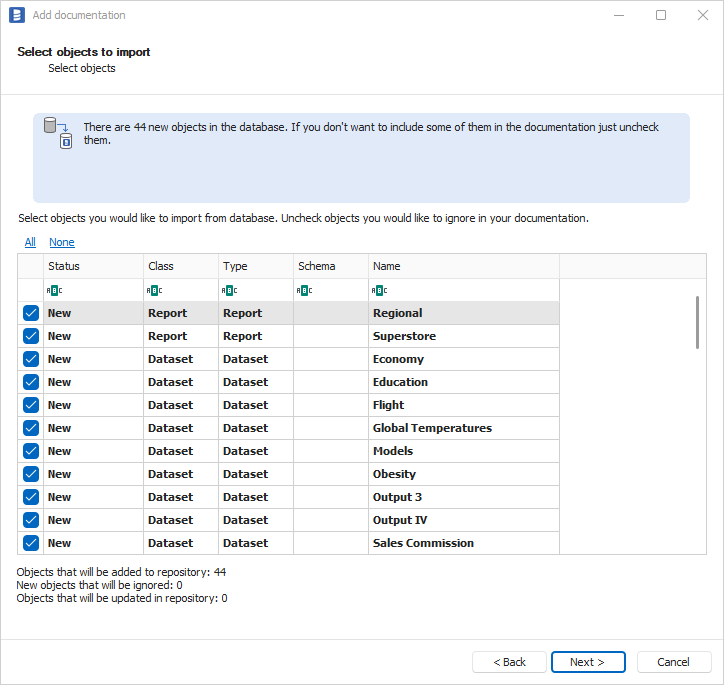
Confirm list of objects to import by clicking Next.
The next screen allows you to change the default name of the documentation under your schema will be visible in the Dataedo repository.
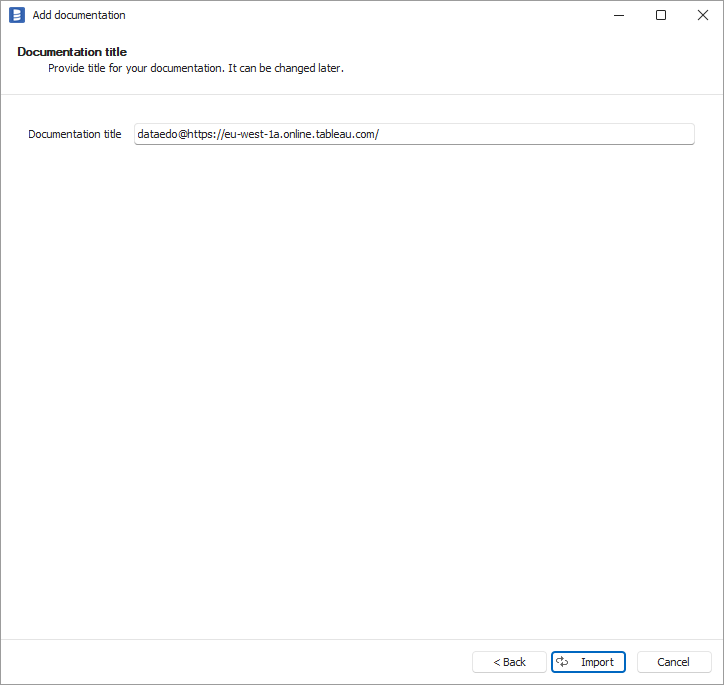
Click Import to start the import.
When done close import window with Finish button.
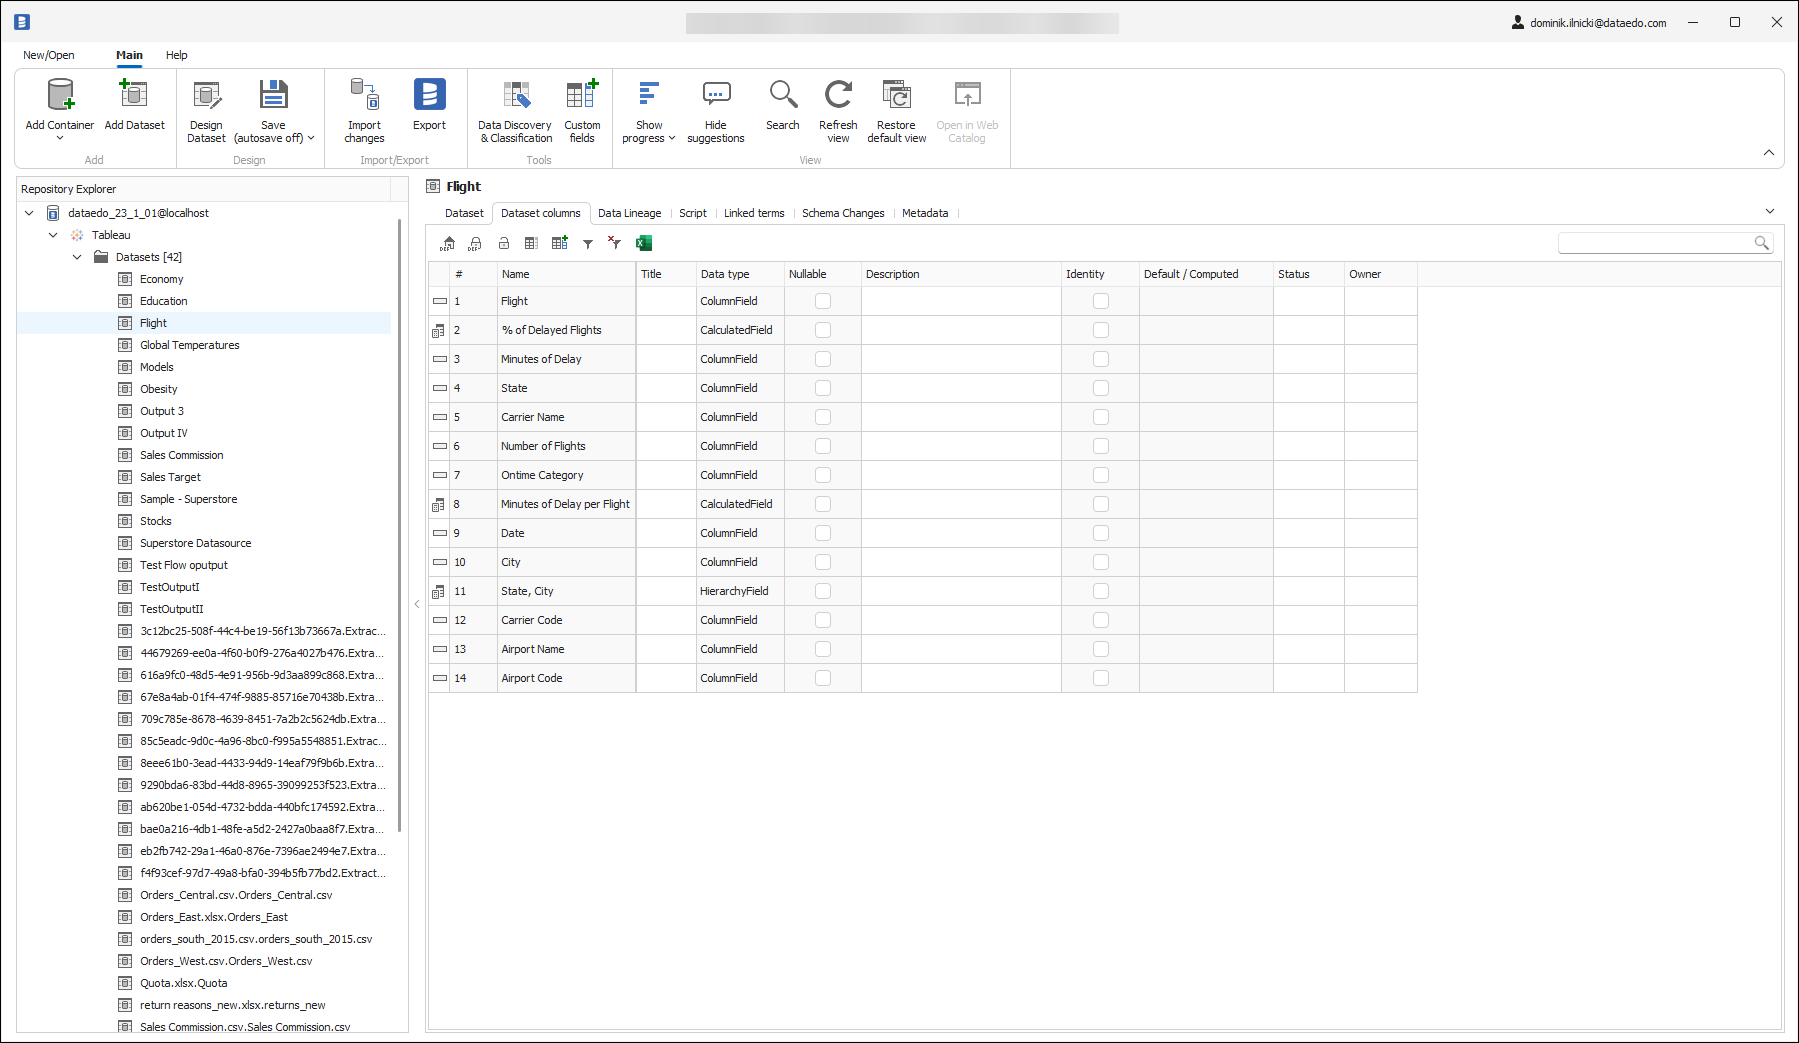
Outcome
Your database schema has been imported to new documentation in the repository.
Importing changes
To sync any changes in the schema in Tableau and reimport any technical metadata simply choose Import changes option. You will be asked to connect to Tableau again and changes will be synced from the source.

