Connecting to SQL Server Integration Services (SSIS)
Introduction
We recommend using Metadata Import in the Portal as the primary method of connecting your data sources.
The Portal offers significant advantages compared to the Desktop application:
- Import multiple sources in a single flow.
- Schedule Metadata Imports.
- Manage connections centrally.
Import through Desktop is still available and allows importing one source at a time.
You can find the instructions at the bottom of this page.
Prerequisites
In order to import data from SSIS you need to provide host details or files containing your data. A full breakdown of how to obtain necessary details can be found below.
Connection details breakdown
SSIS Server connection details
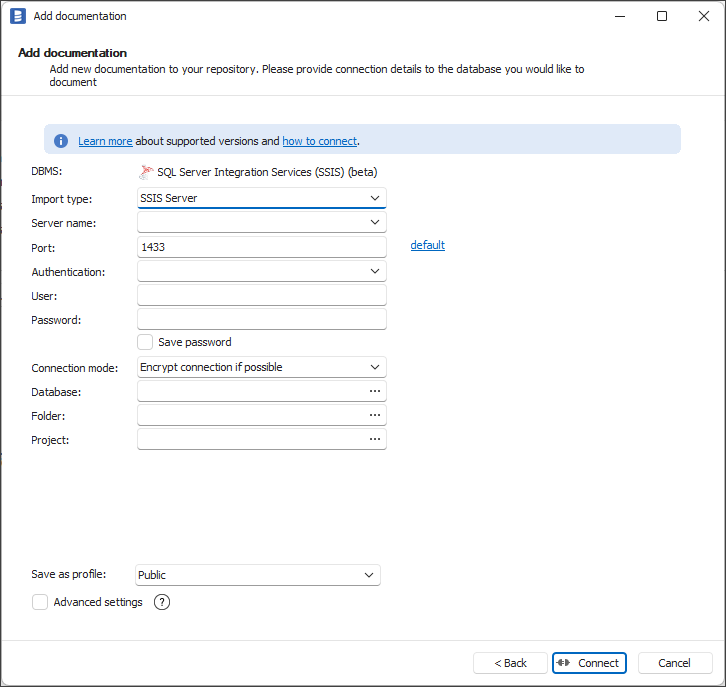
- Server name/Host - SQL Server instance where SSIS is stored, e.g. localhost.
- Port - port under which SQL Server is available. In most cases you can leave the default value of 1433.
- Authentication - it is currently handled through Windows Authentication hence Dataedo will use your Windows account, hence no further details are needed.
caution
While other authentication options might still be visible in the desktop, please do not use those. They are no longer supported
- Database - select SSISDB (Catalog Database) from the list or type its name.
- Folder - select Folder in which the project is stored (in Portal, needed only if DTSX file import is selected).
- Project - select Project which is to be documented ((in Portal, needed only if ISPAC file import is selected)).
How to export an ISPAC project file
Connect to a SQL Server instance containing the SSIS project you want to document with SQL Server Management Studio. Then expand Integration Services Catalog, look for the project you want to document (on the screenshot it's Daily ETL). Then right-click on the project and choose Export.
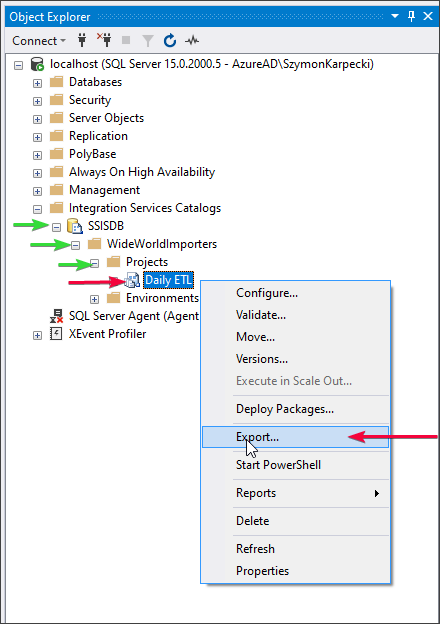
The windows explorer window will appear. Choose a location for the file and save.
Authentication and permissions for SSIS imports
This section applies only to SSIS imports performed directly from SQL Server (using the SSIS Server connection type and the SSISDB catalog).
Windows Authentication behavior
When importing SSIS metadata using Dataedo Portal, the connection is always executed by Dataedo Agent and always uses Windows Authentication.
SQL Server Authentication is not supported for SSIS imports.
How Windows Authentication credentials work in Dataedo
Credentials of type Windows Authentication in Dataedo:
- do not store any user name or password,
- do not represent a specific Windows user,
- are only a configuration flag telling the Agent to
“use Windows Authentication when connecting to the source”.
As a result:
- it does not matter which Windows Authentication credential is selected,
- all credentials of this type behave exactly the same,
- the credential does not determine the identity used to connect.
Which Windows account is actually used
During SSIS import:
Dataedo Agent connects to SSISDB using Windows Integrated Authentication in the Agent process security context.
- If the Agent runs under a domain account or gMSA, SQL Server sees and authenticates that account.
- If the Agent runs under a built-in service account (such as LocalSystem or NetworkService) and connects to a remote SQL Server, SQL Server typically sees the computer account (for example:
DOMAIN\<HOSTNAME>$).
It is not:
- the account of the user logged into Dataedo Portal,
- the account selected in the credential (credentials contain no identity).
Requirements for the Dataedo Agent Windows account
The Windows account running Dataedo Agent must meet all of the following requirements:
1. Access to SQL Server
- Network and login access to the SQL Server instance hosting SSISDB.
2. SQL Server login and database user
- A SQL Server login mapped to the Windows account.
- A database user created in SSISDB.
3. SSIS permissions
The account must have READ permission on the required SSIS folders and projects (grant READ permission on specific folders using SSIS catalog permissions)
Common issue
“The import works in SSMS but not in Dataedo Portal.”
Cause:
- manual tests are executed under a personal Windows account,
- Dataedo Agent runs under a different Windows account,
- the Agent account does not have required permissions in SSISDB.
How to verify the Agent account
On the server where Dataedo Agent is installed:
- Open Services
- Locate Dataedo Agent
- Check the Log On As field
This account must have the permissions described above.
Verifying SSIS access for Dataedo Agent
To verify access, run a test import or check SSIS folder visibility for the Agent account in SQL Server Management Studio. Run a test import or execute the following query in the Agent context:
SELECT *
FROM SSISDB.catalog.folders;
Interpretation:
-
No folders are visible
The account does not have READ permission to any SSIS folder. -
Folders are visible
The account has access to at least one SSIS folder.
Summary
- Windows Authentication credentials do not store user identity
- They only instruct the Dataedo to use Windows Authentication
- The Windows account running Dataedo Agent determines access
- Missing permissions for the Agent account result in empty SSIS imports
Importing metadata in Dataedo Portal
Entry point
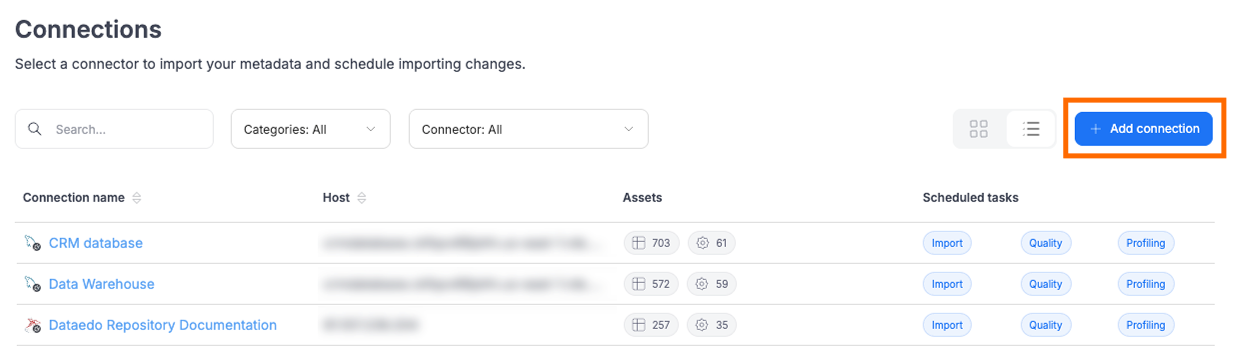
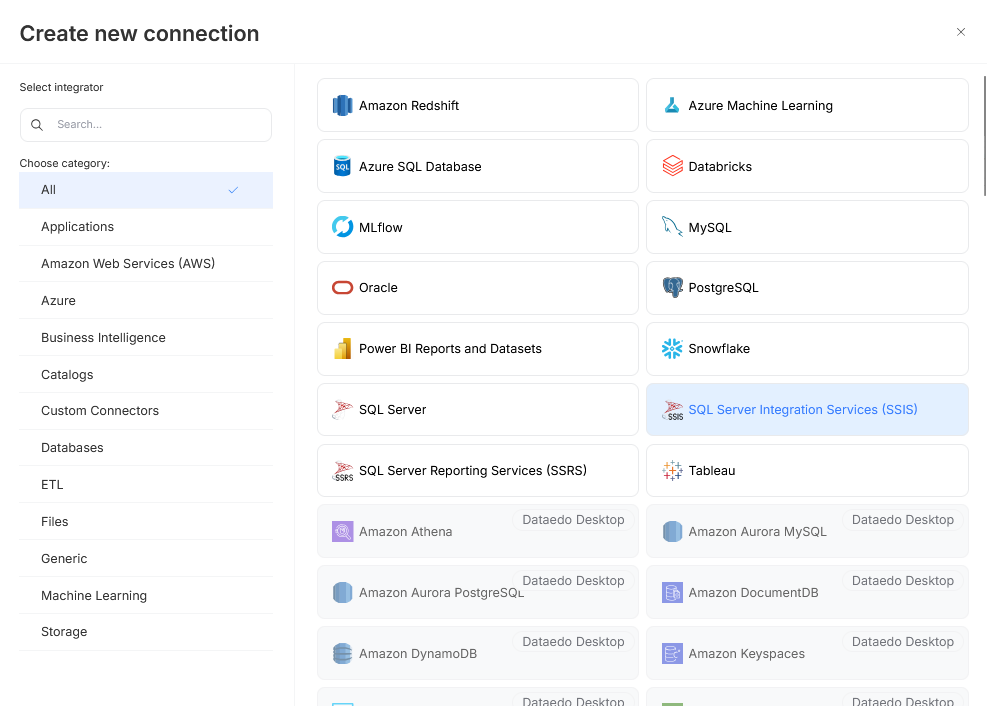
Make sure that you have the Connection Manager role. Then open Connectors>Connections and press the Add Connection button. Select SSIS.
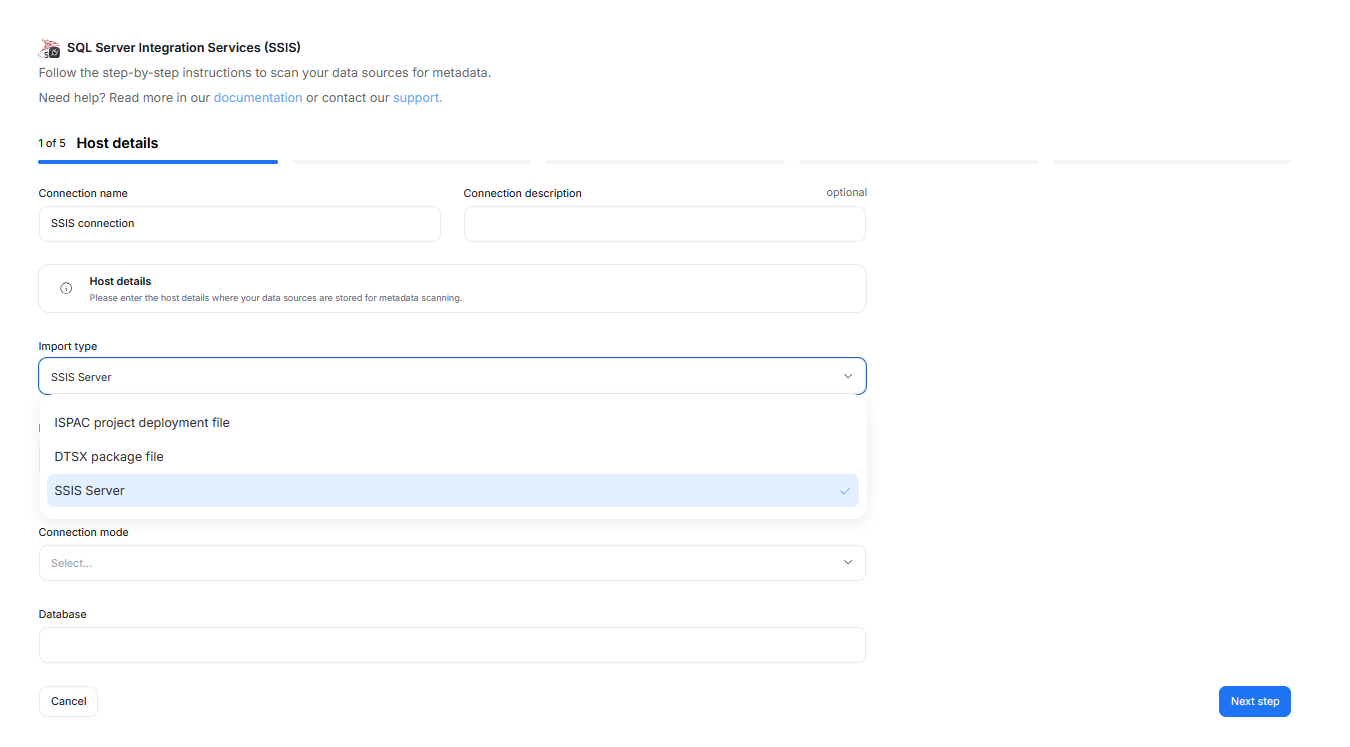
Step 1. Host Details
Provide the connection name, and (optionally) the connection description. These impact how the connection will be visible in your repository.
For SSIS, there exist three primary ways to import your data. You should choose the import type based on your needs:
- ISPAC project deployment file - if you want to document all packages in a project file exported from SSIS SQL Server instance.
- DTSX package file - if you want to document just one package, either extracted from ISPAC file, or created in Visual Studio.
- SSIS Server - this option allows you to connect to a SQL Server instance holding an SSIS project.
If you are using a DTSX or ISPAC file you will have to provide only the path to the file. If you are using SSIS server, you will be asked to provide full connection details, as well as specify a connection mode.
Dataedo Portal uses an Agent to run the connection task. If the Agent is not installed on your computer, do not use local file paths from your machine. Instead, ensure the paths point to a location the Agent can access.
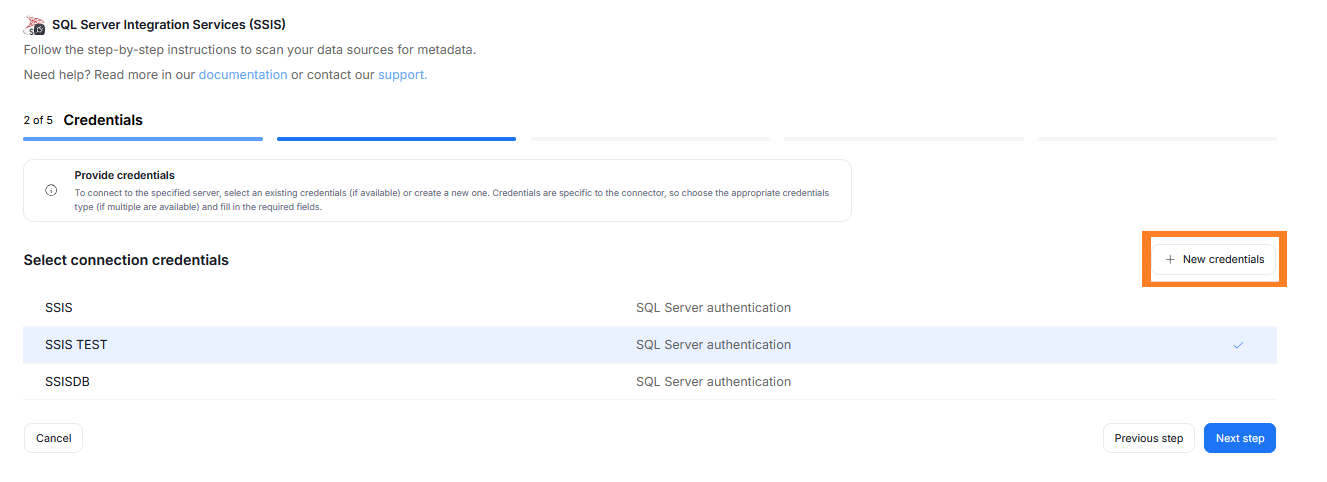
Step 2. Credentials
Choose your credentials from the list of the already saved ones, or add new ones using the New credentials button. Make sure they match your Windows Authentication details.
Step 3. Data Sources (conditional)
During one import you can read the metadata of up to 20 data sources. You can reuse the same connection to import more sources later.
This step appears only when importing using SSIS Server connection. You will see a list of all databases available using the provided credentials. You can select multiple databases at once, it is also possible to narrow down your search using the search box above the tree. You will be asked to give a Title to each selected database — this is the database's name that will be shown in Dataedo.

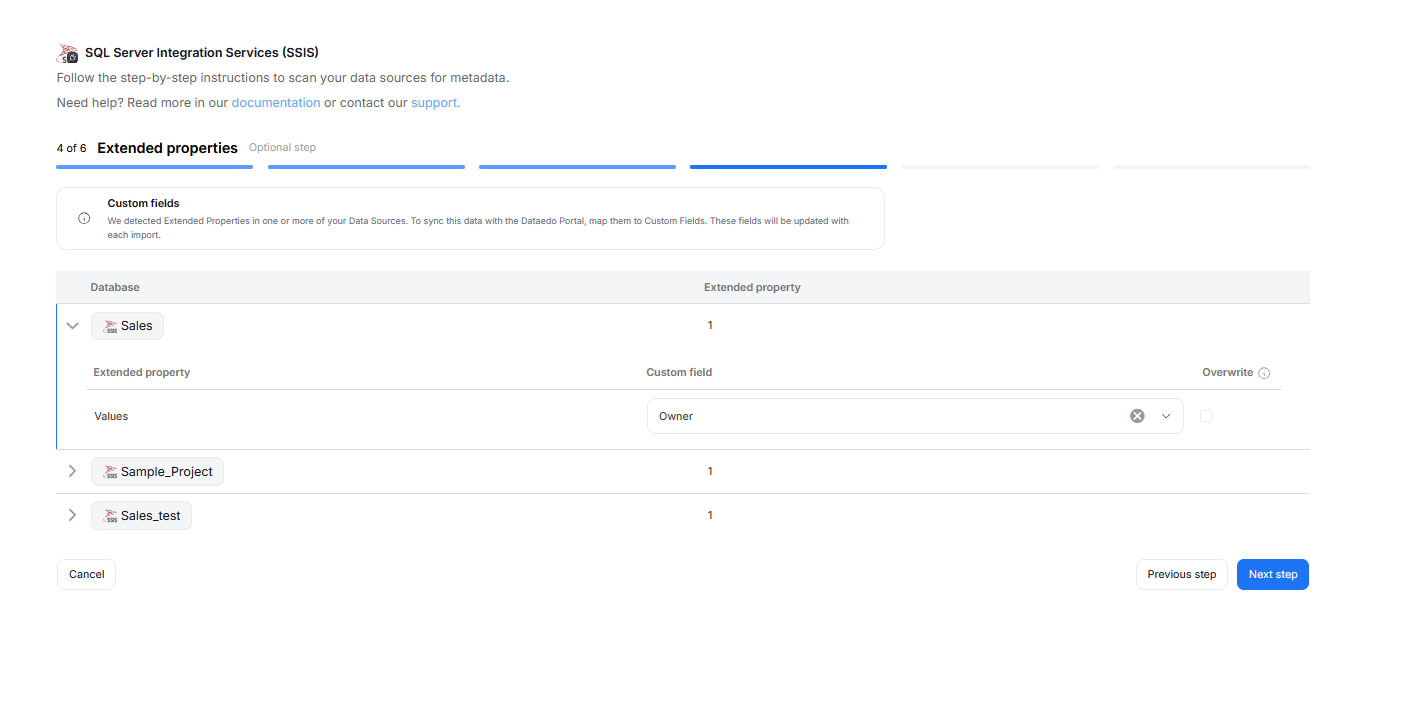
Step 4. Extended properties (optional)
This step appears only if the source exposes Extended Properties. You can map them to Custom Fields in Dataedo, or skip this step entirely.
If skipped, no extended properties will be imported.
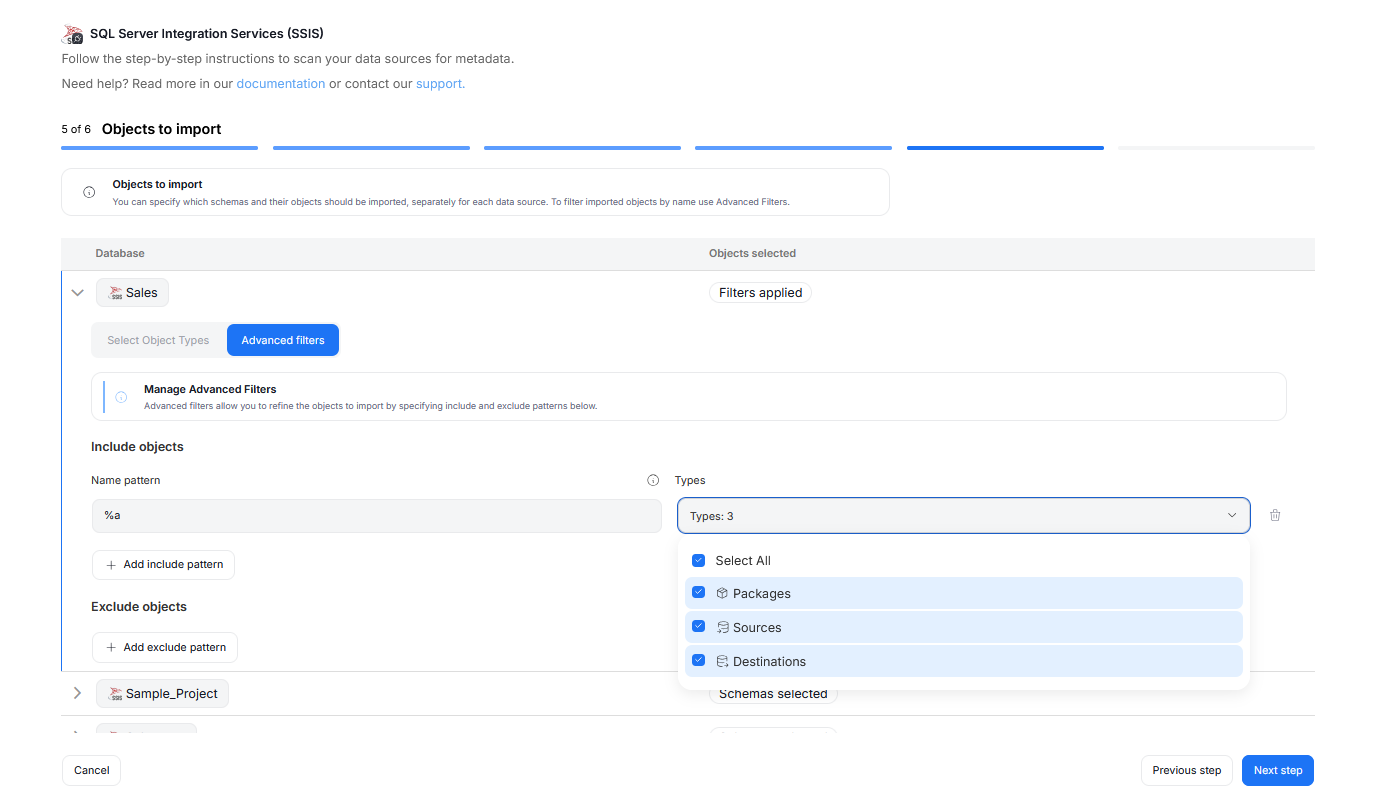
Step 5. Objects to import
You can select which objects to import from your Tableau organization. You have two ways to do that.
Select Schemas lets you choose schemas and object types (tables, views, procedures etc.) you want to import.
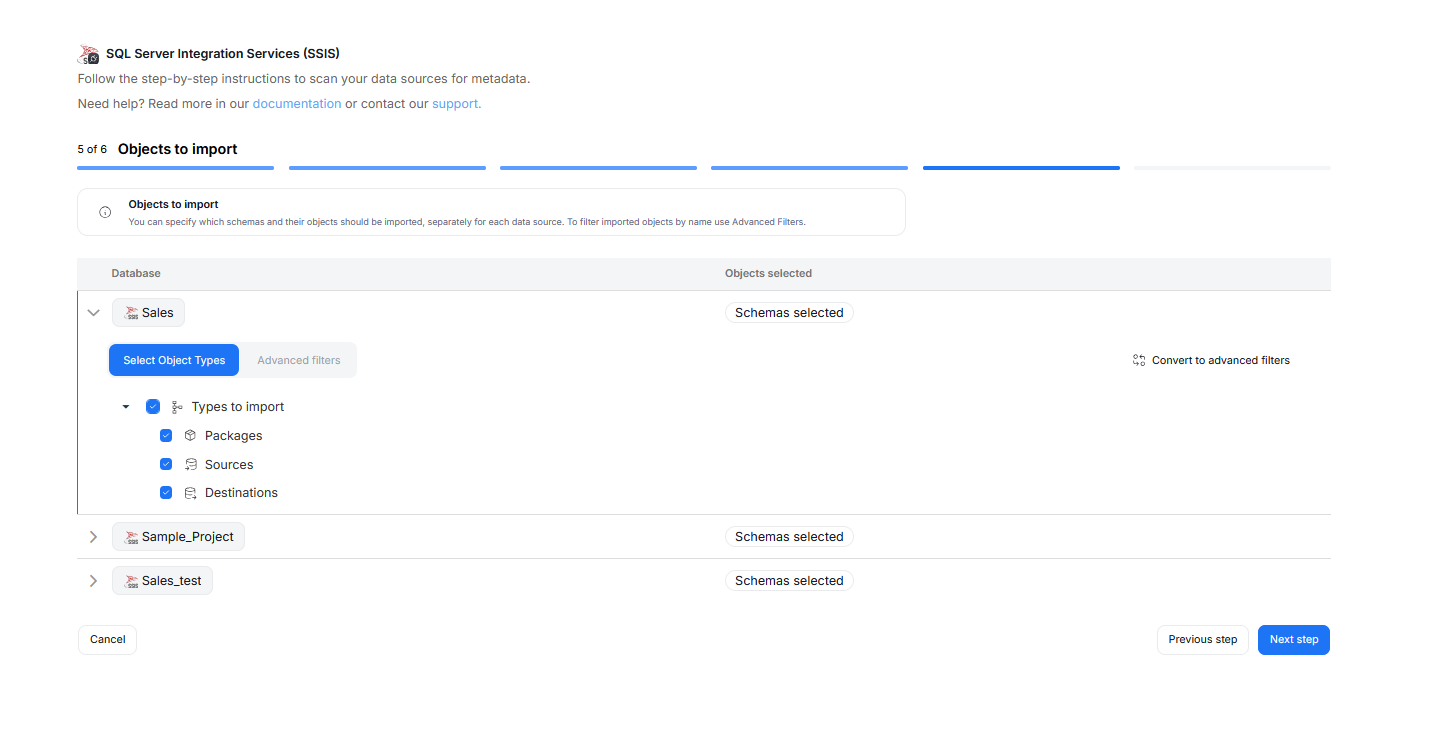
The Advanced Filters let you include or exclude objects based on schema and name patterns using SQL-style regular expressions. You can configure multiple patterns, and each one can apply only to certain object types.
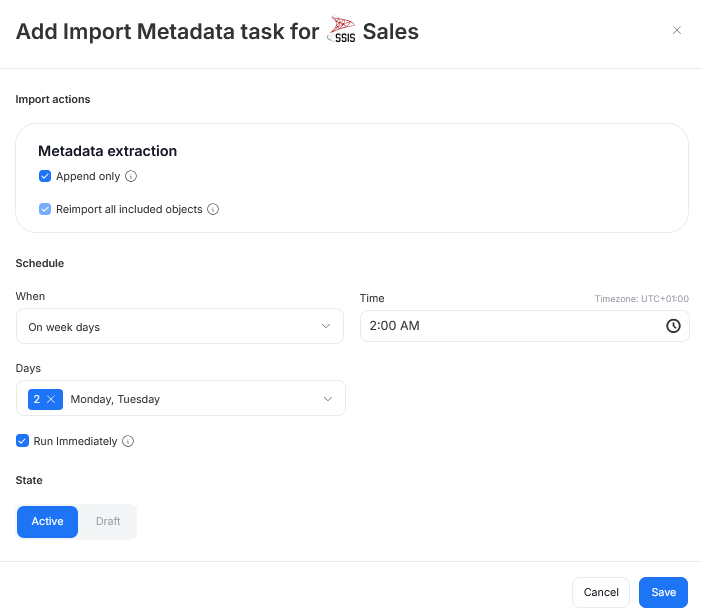
Step 6. Schedule Metadata Import
You must configure at least one Metadata Import task in the schedule section.
If you skip this, an empty database will be created and no metadata will be imported.
Configure scheduling options for each source individually. You can schedule Metadata Imports, data quality runs, and refresh data profiling.
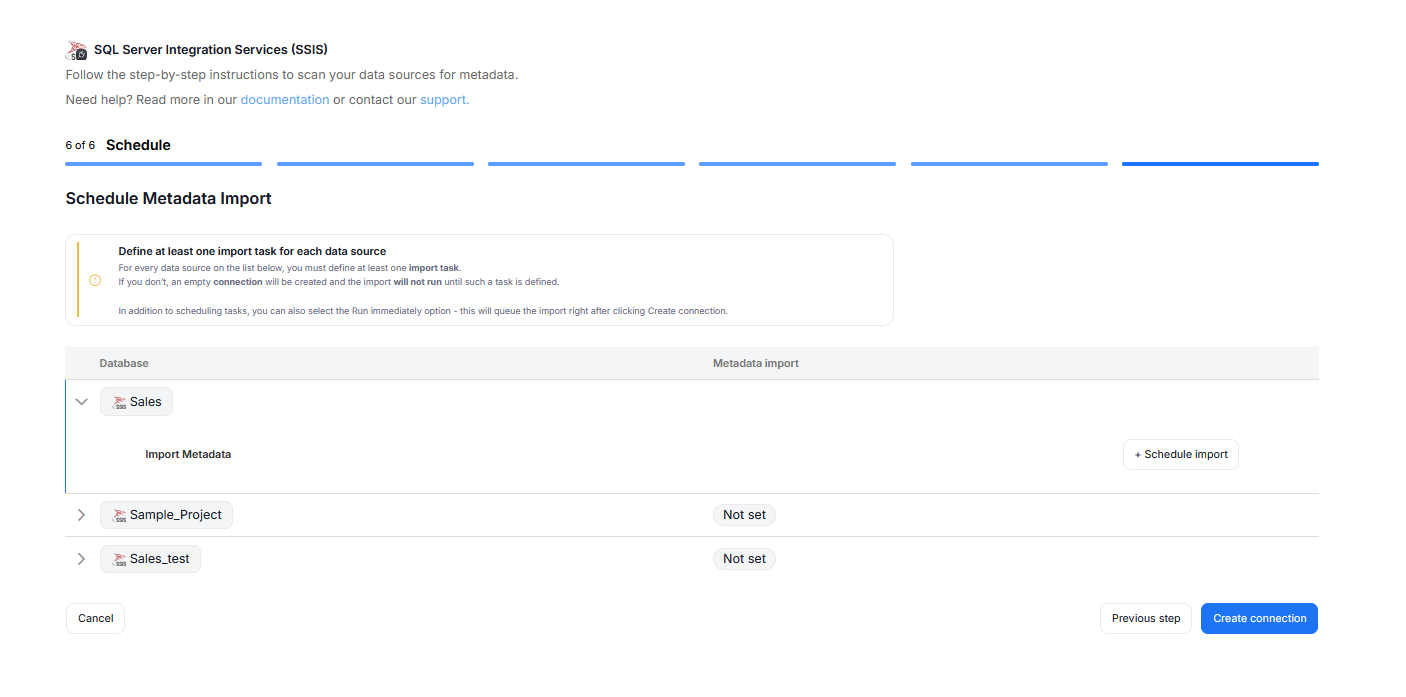
When you schedule an import, you can:
- Modify the Metadata Import behavior
- Choose its frequency (daily, on selected weekdays, on selected days of the month)
- Choose a time of its execution
- Set its state (
Activetasks will run as scheduled,Draftones will be saved for future but will not run until changed toActive) - Schedule a task to run immediately — this will run the task immediately after you finish configuring imports and according to schedule after that.
Import metadata in Dataedo Desktop
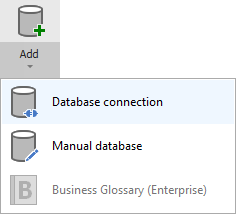
Make Connection
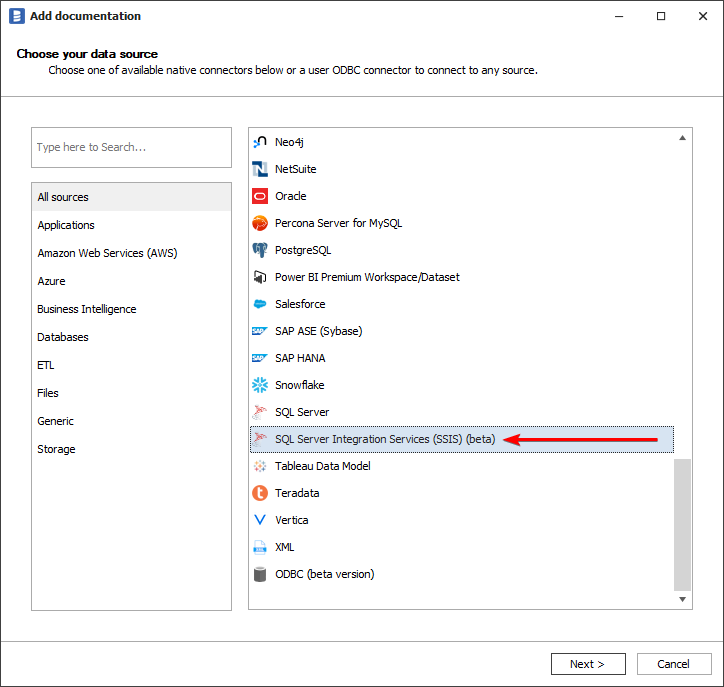
To connect to SSIS create new documentation by clicking Add documentation and choosing Database connection.
On the Add documentation window choose SQL Server Integration Services (SSIS):
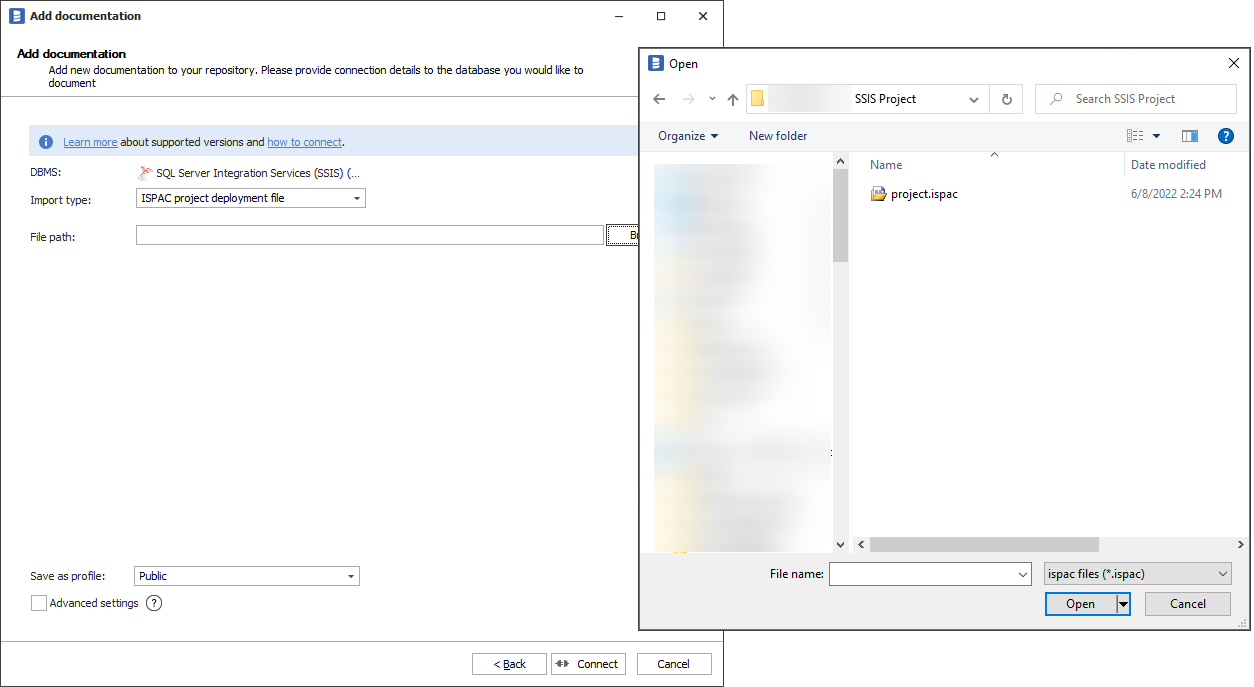
On the next screen select Import Type:
- ISPAC project deployment file - if you want to document all packages in a project file exported from SSIS SQL Server instance.
- DTSX package file - if you want to document just one package, either extracted from ISPAC file, or created in Visual Studio.
- SSIS Server - this option allows you to connect to a SQL Server instance holding an SSIS project.
For the first two options select the path of the appropriate file by clicking the Browse button.
Click Connect. Dataedo will now read all the packages and will list them as Package type. Select packages to import and click Next. Set the Documentation Title and click Import.
For the SSIS Server option you will need to fill in connection details:
Outcome


