Connecting to Snowflake database
Importing Metadata in Dataedo Portal
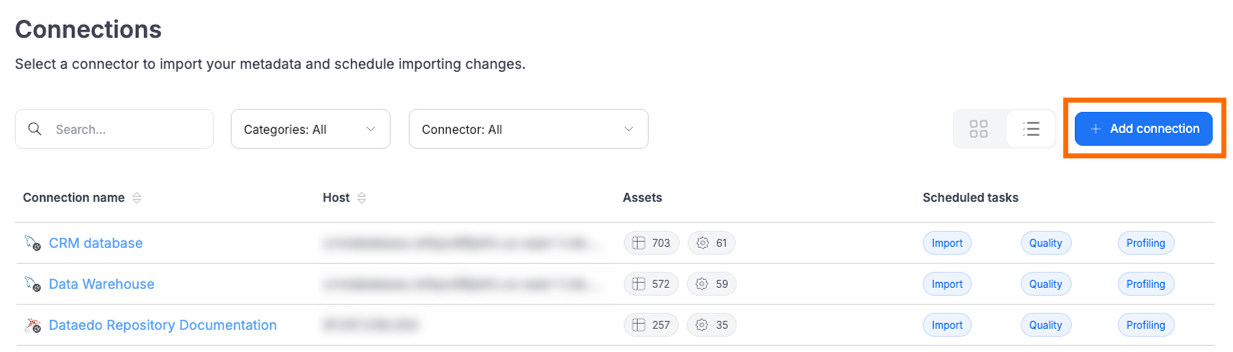
Entry point
To start the Metadata Import flow, make sure you have the Connection Manager role.
Then navigate to:
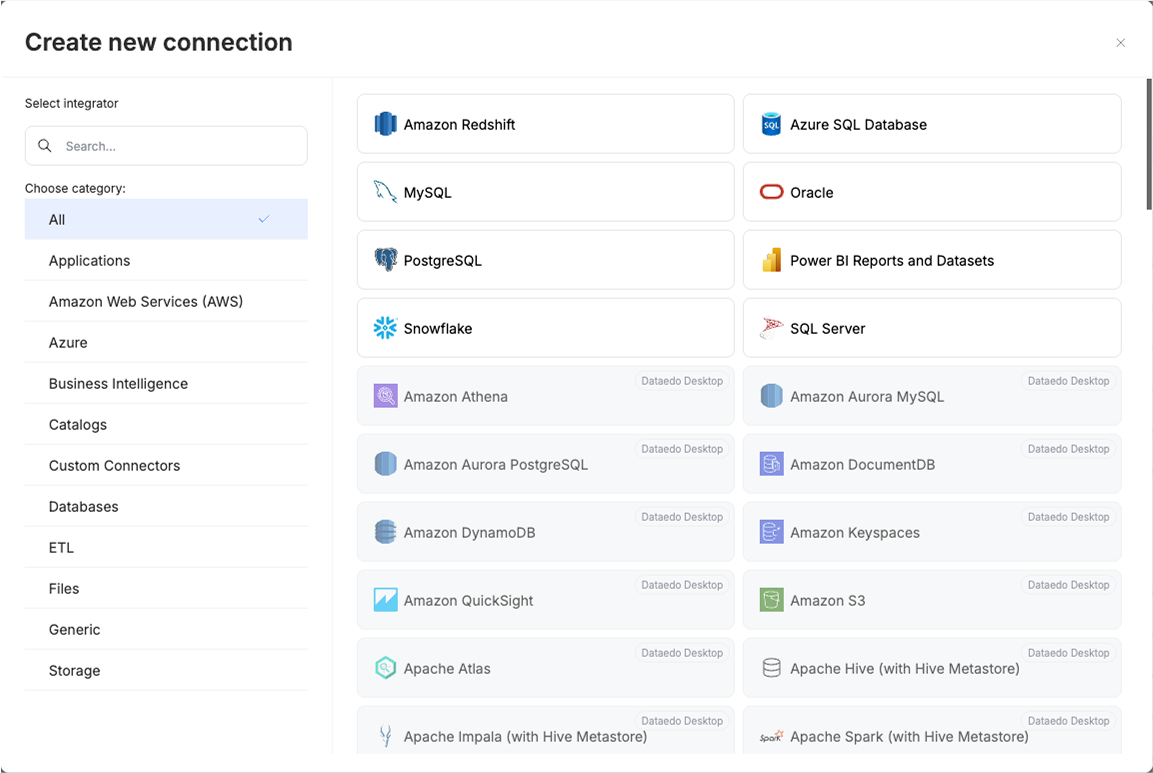
Connections → Add new connection → Snowflake
This will open the import wizard described in the following steps.
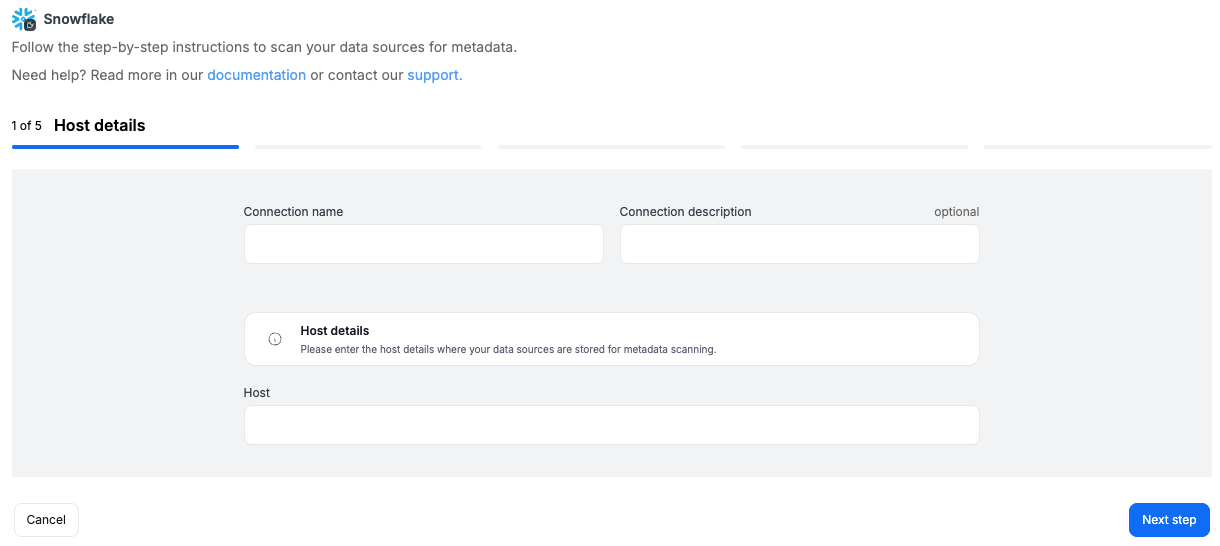
Step 1. Host details
Provide the host.
You will also be asked to name the Connection.
A Connection in Dataedo represents a saved configuration for accessing a data source.
It can be reused for future imports and scheduling.
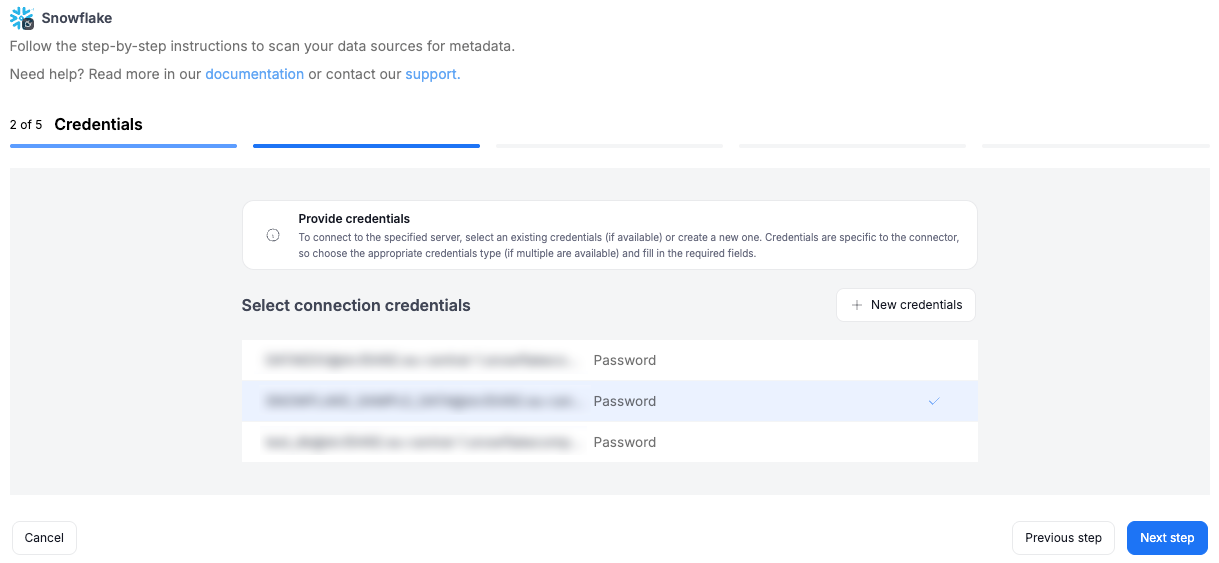
Step 2. Credentials
Choose credentials from the list of existing ones available for the selected connector, or add new credentials.
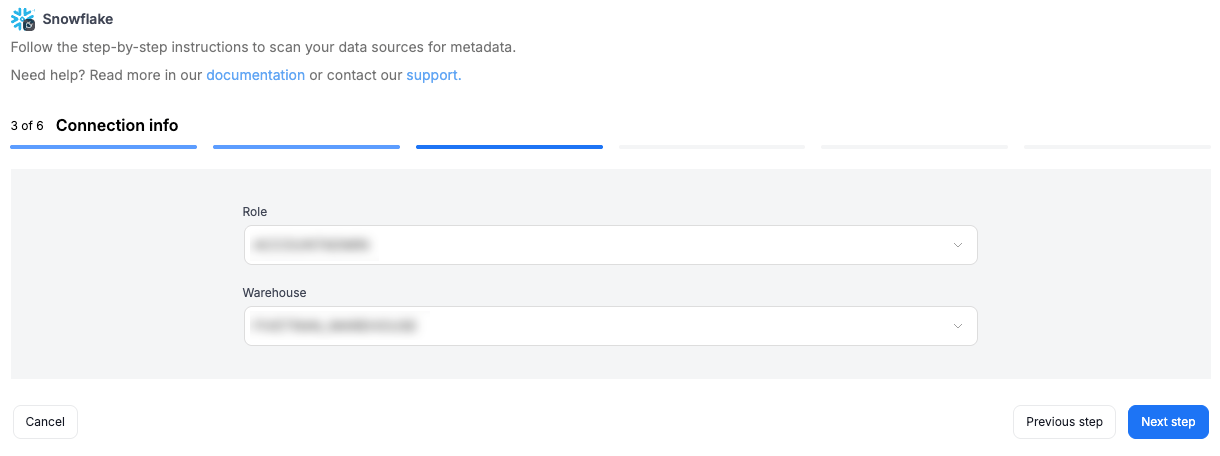
Step 3. Connection info
You will be asked to select two parameters:
- Role – defines which permissions will be applied during the import.
- Warehouse – specifies the compute resources used for executing queries.
Make sure to choose the appropriate role and warehouse to ensure all required databases are accessible.
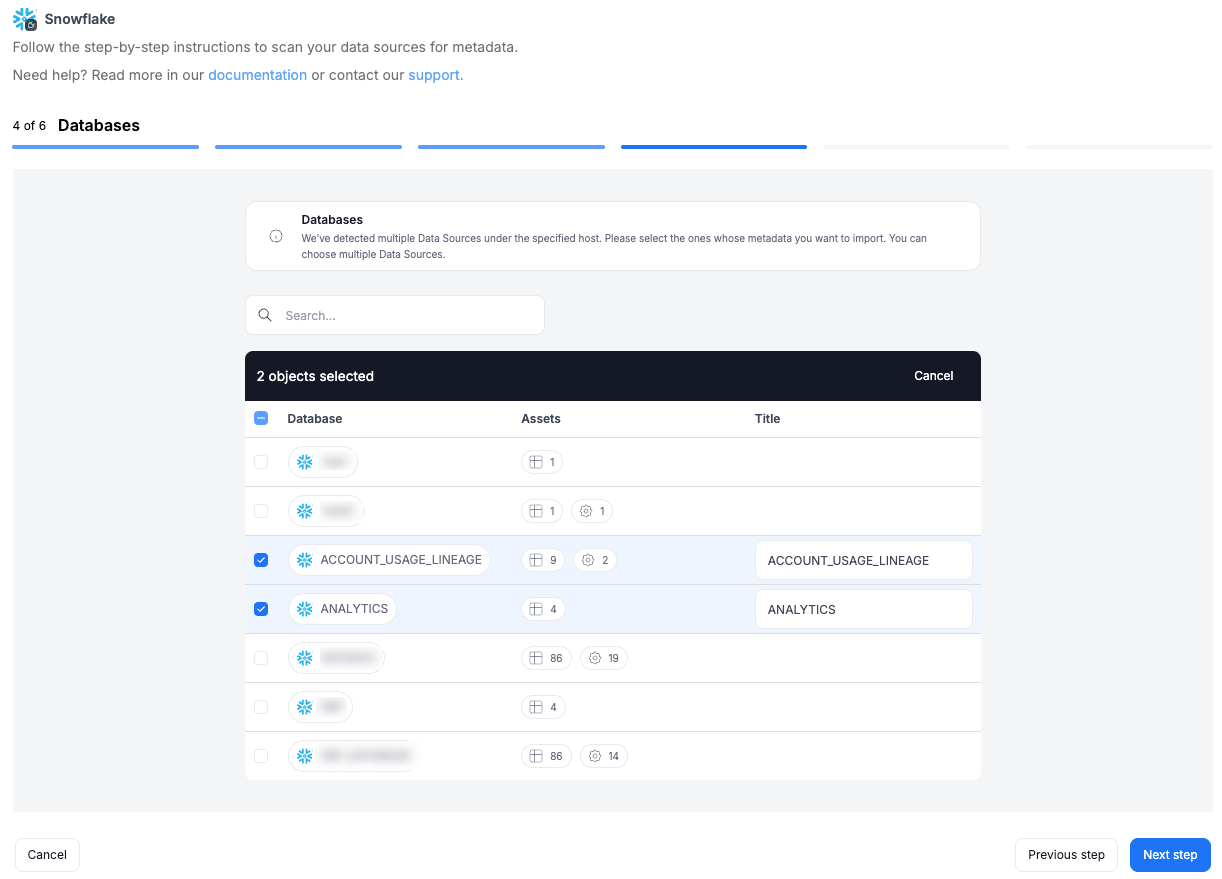
Step 4. Databases
During one import you can read the metadata of up to 20 data sources. You can reuse the same connection to import more sources later.
- The Portal will display all databases accessible with the provided credentials.
- You can select multiple databases at once and use the search box to narrow down results.
- Each selected database should be given a Title, which will be visible in Dataedo.
- At this step, the Portal also retrieves the number of assets in each source.
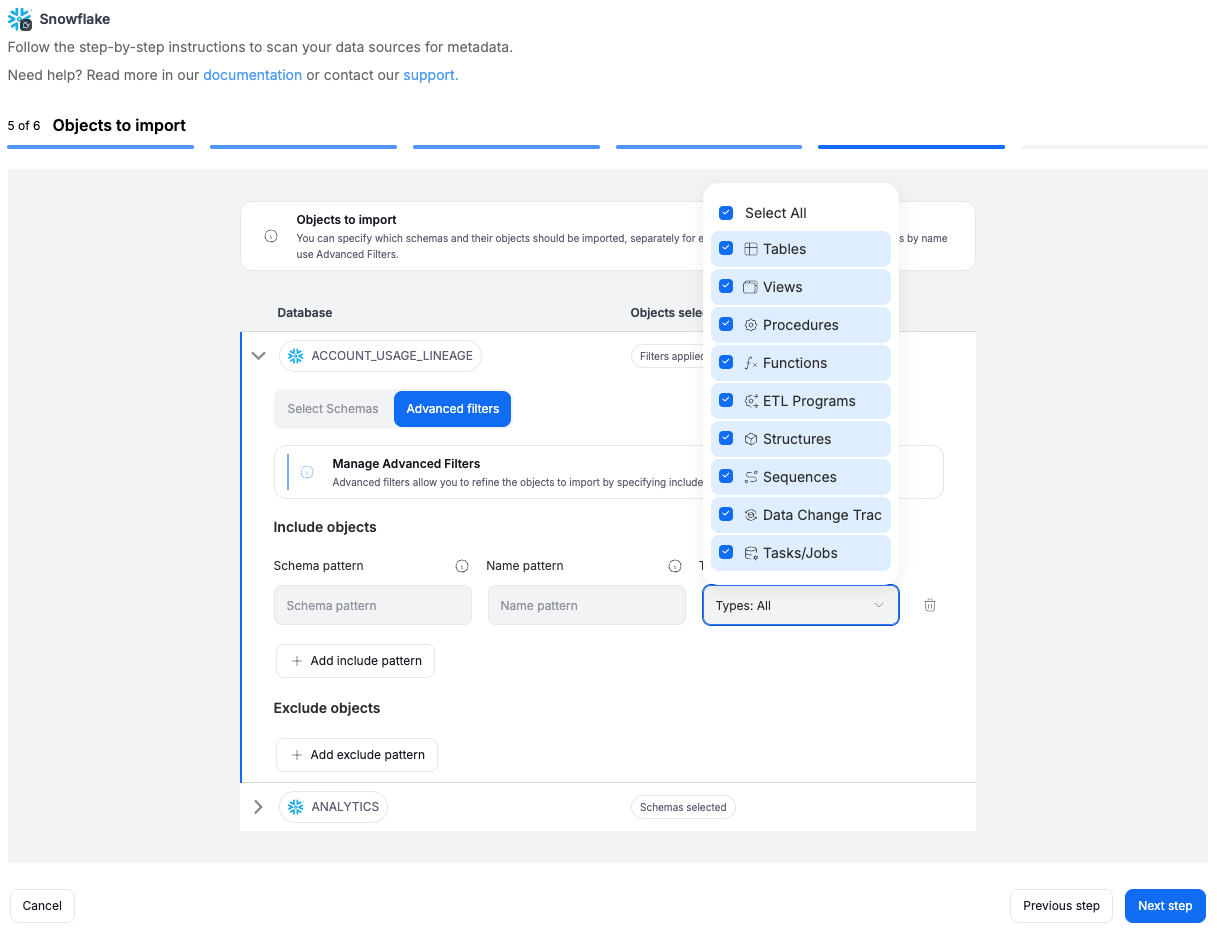
Step 5. Objects to import
For each selected database, you can refine which objects to import:
- Select schemas and object types (tables, views, procedures, etc.).
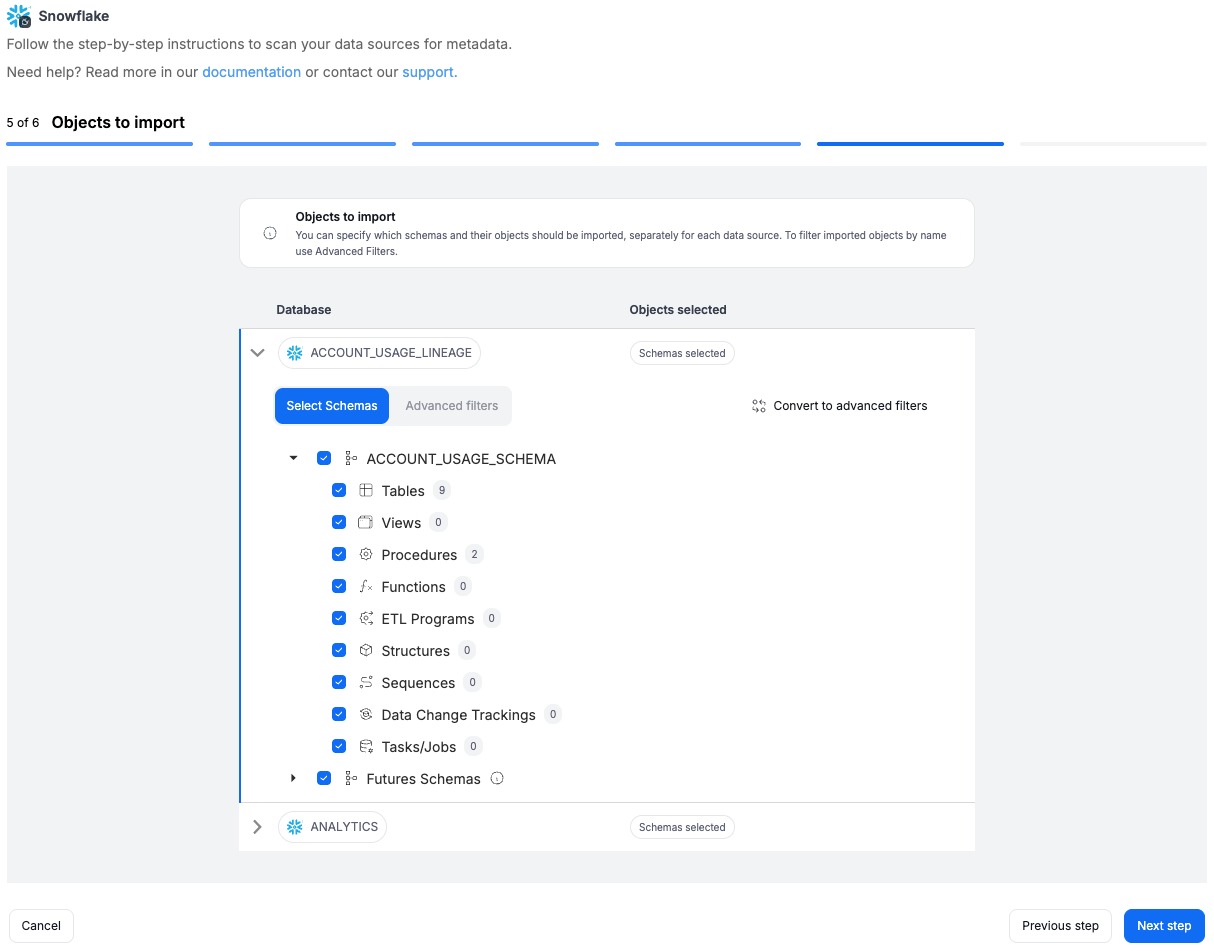
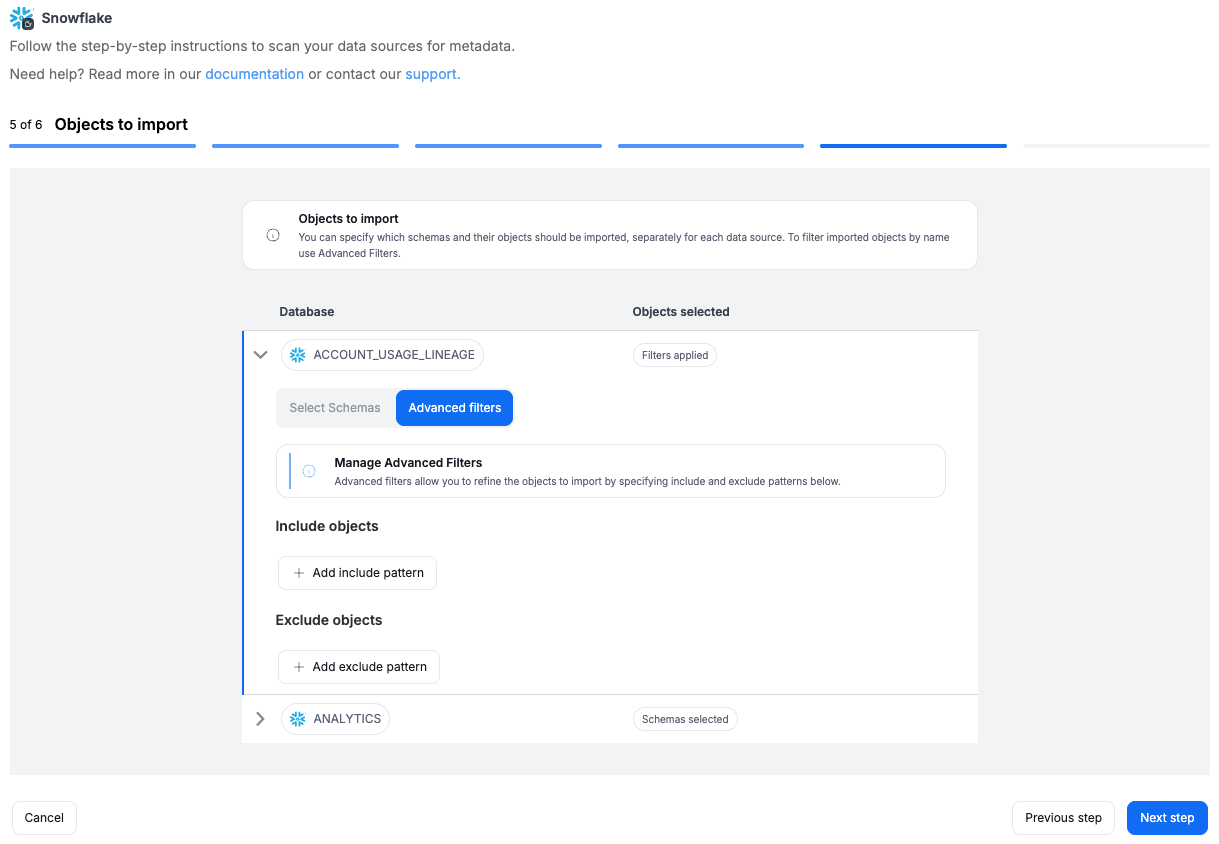
- Use Advanced filters to include or exclude objects with:
- schema patterns
- name patterns
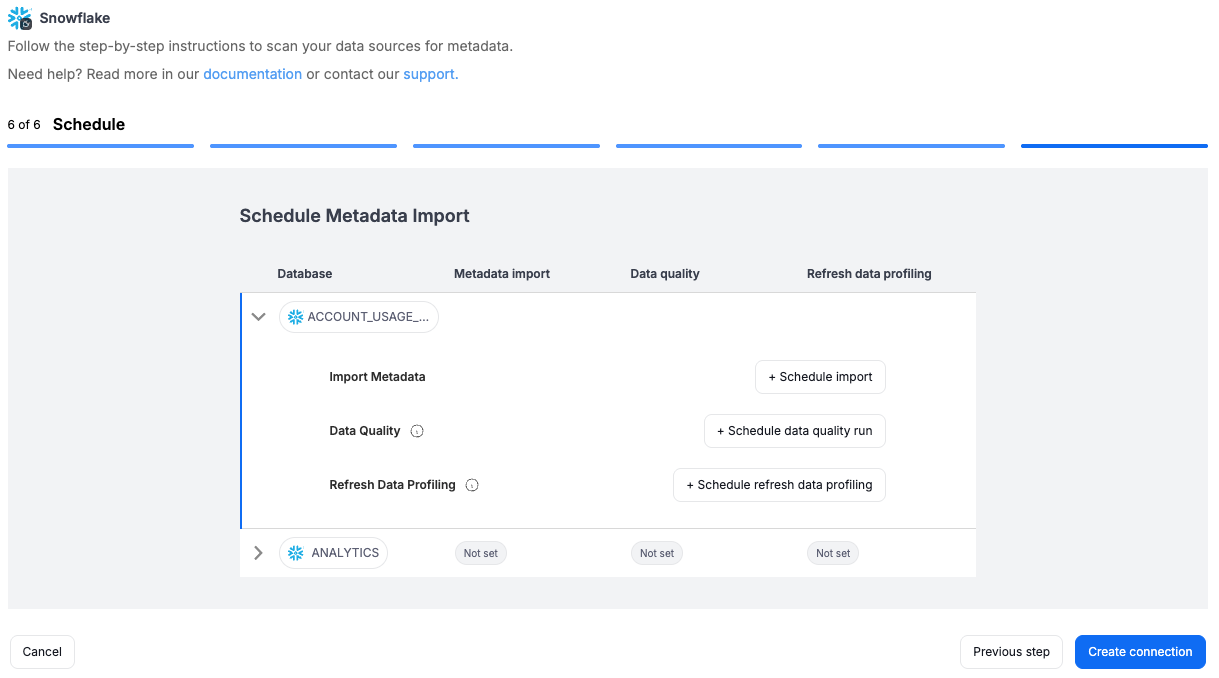
Step 6. Schedule
Configure scheduling options for each source individually:
- Define tasks you want to schedule (Metadata Import, Data Quality run, Refresh Profiling).
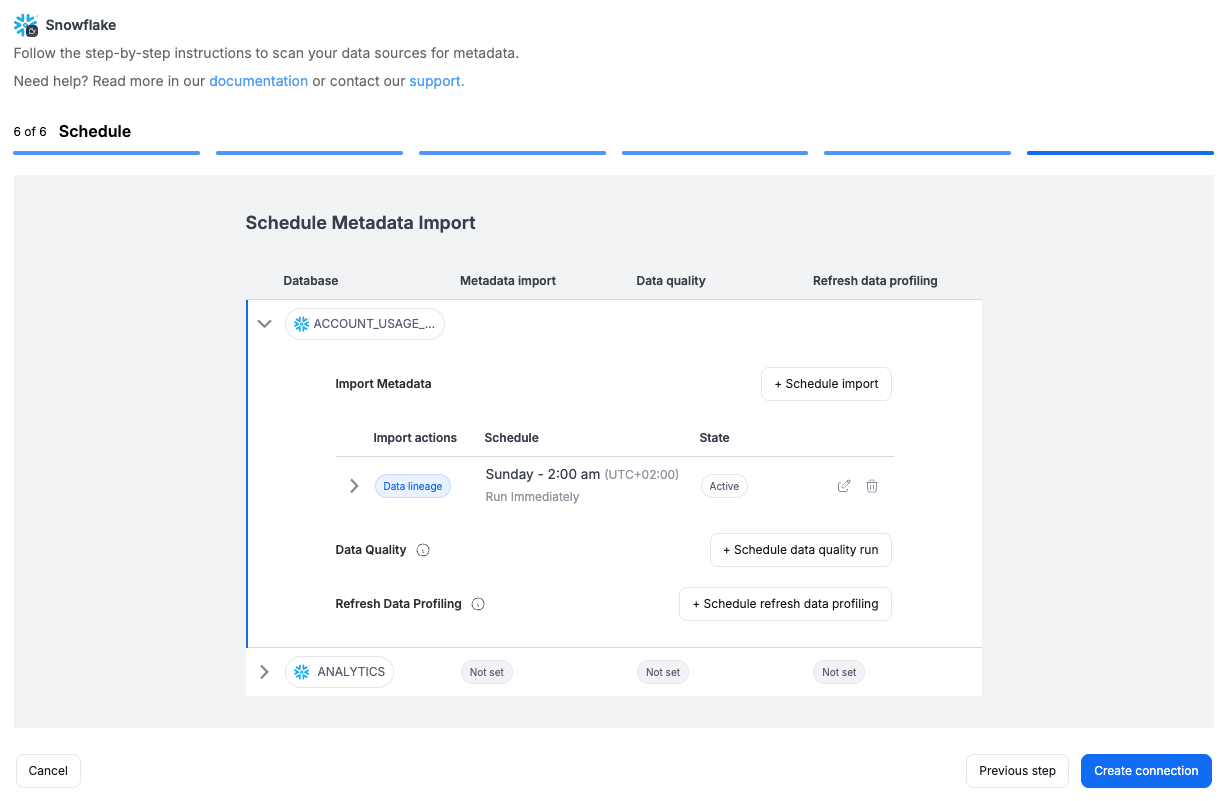
- Run daily, on selected weekdays, or on specific days of the month.
- Choose an exact time of execution.
- Task state:
Active– the task will run as scheduled.Draft– the task is saved but not executed until switched to Active.
- Run immediately – when checked, the task will also be executed right after clicking
Create connection.
Only one source in a metadata import can have Run immediately selected.
You must configure at least one import task in the schedule section.
If you skip this, an empty database will be created and no metadata will be imported.
Importing Metadata in Dataedo Desktop
Metadata import is also possible using Dataedo Desktop.
In this mode, you can only import one source at a time.
Connecting to Snowflake
To connect to Snowflake, create new documentation by clicking Add documentation and choosing Database connection.
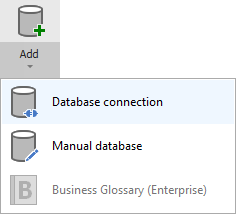
On the connection screen, choose Snowflake as DBMS.
Provide database connection details:
- Host - provide a host name or address where the database is located. E.g., server17, server17.ourdomain.com, or 192.168.0.37.
- Port - change the default port of the Snowflake instance if required.
- User and Password - provide your username and password.
- Database - type in the database name.
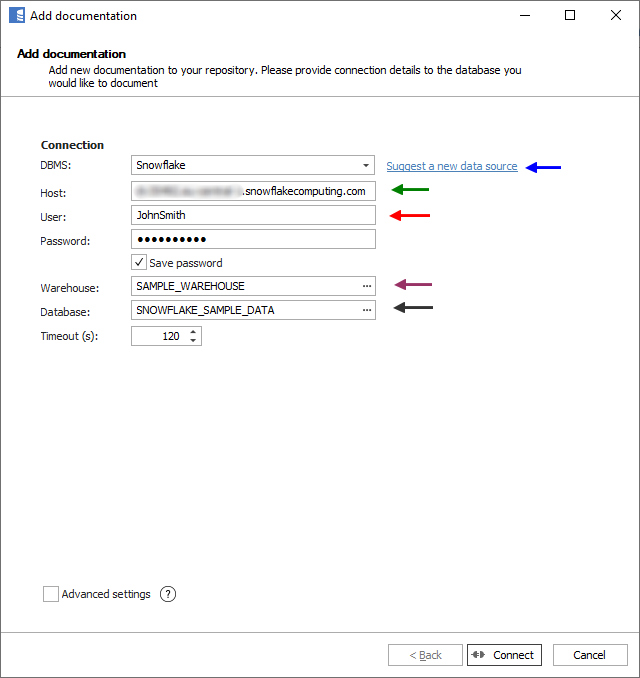
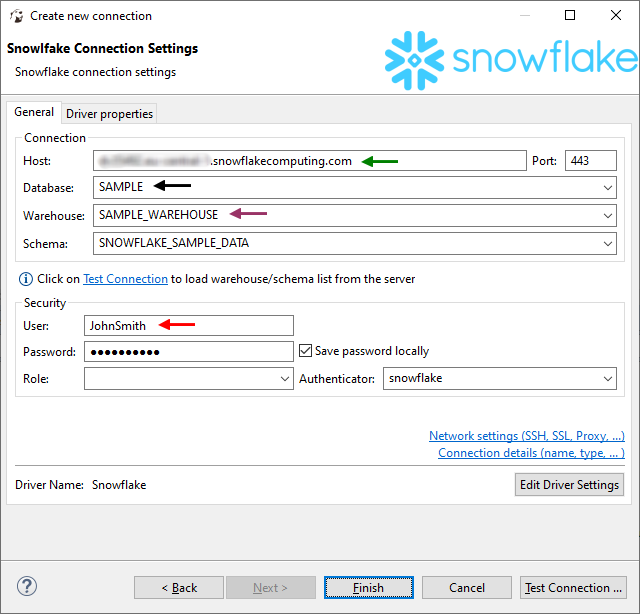
Here is a comparison with connection details in DBeaver.
Connecting using SSO
Read Setup SSO to learn how to configure Okta for use with Snowflake.
Read Configuring Snowflake to learn how to configure Snowflake to use federated authentication.
Connecting using JWT (Private Key) - Key Pair Authentication
Read Key Pair Authentication article. In Dataedo, provide the generated private key file.
Saving password
You can save the password for later connections by checking the Save password option. Passwords are saved in the repository database.
Importing schema
When the connection is successful, Dataedo will read objects and show a list of objects found. You can choose which objects to import. You can also use the advanced filter to narrow down the list of objects.
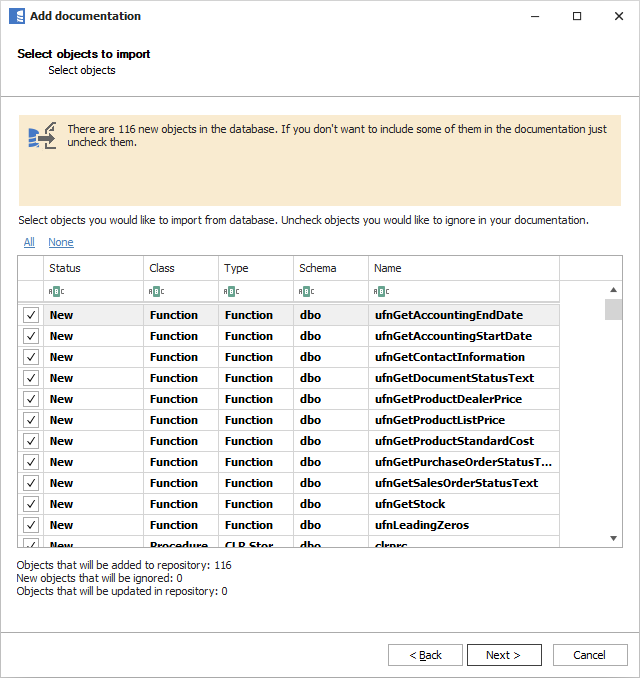
Confirm the list of objects to import by clicking Next.
The next screen will allow you to change the default name of the documentation under which your schema will be visible in the Dataedo repository.
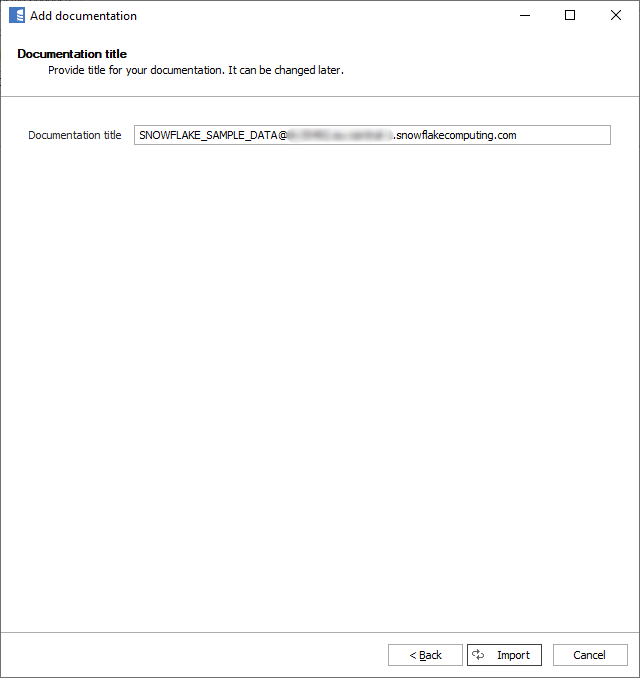
Click Import to start the import.
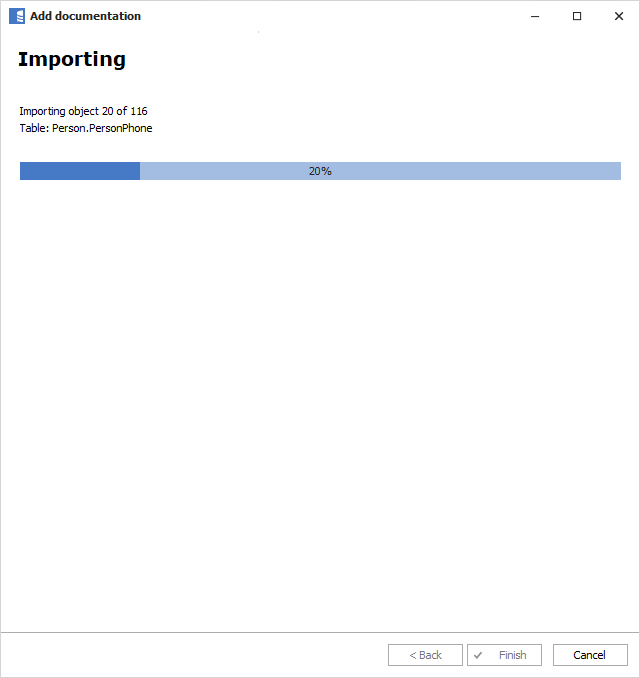
When done, close the import window with the Finish button.
Your database schema has been imported into new documentation in the repository.

Required Permissions
Dataedo requires a Snowflake role with sufficient privileges to read metadata from your databases. Different Dataedo features — like basic metadata import, data lineage, and data profiling — require different access levels.
Minimum privileges for metadata import
For a basic metadata import (object structure, definitions, dependencies, lineage) the role needs read-only metadata access; Dataedo does not SELECT from your tables or views. Metadata is read through INFORMATION_SCHEMA views, SHOW commands, system functions, and (for some features) SNOWFLAKE.ACCOUNT_USAGE views.
Different object types require different minimum privileges. Note that in Snowflake each object type needs its own grant — ALL TABLES does not cover external, dynamic, or Iceberg tables, and ALL VIEWS does not cover materialized views:
| Object type | Minimum privilege | Grant statement |
|---|---|---|
| Database access | USAGE | GRANT USAGE ON DATABASE <db> TO ROLE <role>; |
| Schema access | USAGE | GRANT USAGE ON ALL SCHEMAS IN DATABASE <db> TO ROLE <role>; |
| Warehouse | USAGE | GRANT USAGE ON WAREHOUSE <wh> TO ROLE <role>; |
| Tables (incl. transient) | REFERENCES (metadata only, no data access) | GRANT REFERENCES ON ALL TABLES IN DATABASE <db> TO ROLE <role>; |
| Views | REFERENCES | GRANT REFERENCES ON ALL VIEWS IN DATABASE <db> TO ROLE <role>; |
| Materialized views | REFERENCES | GRANT REFERENCES ON ALL MATERIALIZED VIEWS IN DATABASE <db> TO ROLE <role>; |
| External tables | REFERENCES | GRANT REFERENCES ON ALL EXTERNAL TABLES IN DATABASE <db> TO ROLE <role>; |
| Iceberg tables | REFERENCES | GRANT REFERENCES ON ALL ICEBERG TABLES IN DATABASE <db> TO ROLE <role>; |
| Procedures | USAGE (also allows calling the procedure — see details below) | GRANT USAGE ON ALL PROCEDURES IN DATABASE <db> TO ROLE <role>; |
| Functions | USAGE | GRANT USAGE ON ALL FUNCTIONS IN DATABASE <db> TO ROLE <role>; |
| Stages | USAGE (external stages; internal stages need READ — see note below) | GRANT USAGE ON ALL STAGES IN DATABASE <db> TO ROLE <role>; |
| Sequences | USAGE | GRANT USAGE ON ALL SEQUENCES IN DATABASE <db> TO ROLE <role>; |
| Pipes (Snowpipes) | MONITOR — must be granted per pipe, see details below | GRANT MONITOR ON PIPE <db>.<schema>.<pipe> TO ROLE <role>; |
| Dynamic tables | MONITOR (object visibility + definition via DYNAMIC_TABLE_GRAPH_HISTORY) | GRANT MONITOR ON ALL DYNAMIC TABLES IN DATABASE <db> TO ROLE <role>; |
| Tasks | MONITOR | GRANT MONITOR ON ALL TASKS IN DATABASE <db> TO ROLE <role>; |
The USAGE privilege applies only to external stages. Internal named stages are visible to Dataedo when the role has any privilege on them — grant READ on internal stages you want cataloged.
Bulk grants on pipes
Bulk grants on pipes are not allowed in Snowflake and will be rejected with Bulk grant on objects of type PIPE to ROLE is restricted — MONITOR has to be granted on each pipe individually.
Use the following script to generate the grant statements for all existing pipes:
SHOW PIPES IN DATABASE <db>;
SELECT 'GRANT MONITOR ON PIPE ' || "database_name" || '.' || "schema_name" || '.' || "name" ||
       ' TO ROLE DATAEDO_ROLE;' AS grant_statement
FROM TABLE(RESULT_SCAN(LAST_QUERY_ID()));
The restriction applies to bulk (ON ALL) grants only. Future grants are a separate mechanism and pipes are not listed among the object types unsupported for future grants, so GRANT MONITOR ON FUTURE PIPES IN DATABASE ... can cover pipes created later. Because Snowflake does not document this case, test the grant before relying on it.
Procedure scripts and owner's rights vs. caller's rights
Snowflake does not offer a metadata-only privilege for procedures — USAGE is the only option besides OWNERSHIP, and USAGE technically allows calling the procedure. Whether USAGE is enough to also import the procedure script depends on how the procedure was created (owner's rights vs. caller's rights):
- Caller's rights (
EXECUTE AS CALLER) — a role with USAGE can read the procedure body. Dataedo imports the procedure including its script. OWNERSHIP is not required. - Owner's rights (
EXECUTE AS OWNER, the default) — Snowflake hides the procedure body from every role other than the owner. Dataedo imports such procedures without their script unless the Dataedo role owns them (or is granted the owning role). - Secure procedures, functions, and views — the definition is visible only to the owning role, regardless of rights model.
If executing procedures with the Dataedo role is a concern, you can skip granting USAGE on procedures — Dataedo will simply not import them.
Data Profiling, Data Quality, and Data Classification
If you plan to use Data Profiling, Data Quality rules, or automatic Data Classification, Dataedo needs to read actual data from your tables. These features execute read-only SELECT queries against user tables — row-limited sampling queries (SELECT TOP n ...) for value sampling, and aggregate queries (COUNT(*), COUNT(DISTINCT ...), GROUP BY) for statistics.
Use the following script to grant the role read access to the data:
GRANT SELECT ON ALL TABLES IN DATABASE <database_name> TO ROLE DATAEDO_ROLE;
GRANT SELECT ON ALL VIEWS IN DATABASE <database_name> TO ROLE DATAEDO_ROLE;
-- Repeat for other data-holding object types you want profiled:
GRANT SELECT ON ALL MATERIALIZED VIEWS IN DATABASE <database_name> TO ROLE DATAEDO_ROLE;
GRANT SELECT ON ALL DYNAMIC TABLES IN DATABASE <database_name> TO ROLE DATAEDO_ROLE;
GRANT SELECT ON ALL EXTERNAL TABLES IN DATABASE <database_name> TO ROLE DATAEDO_ROLE;
GRANT SELECT ON ALL ICEBERG TABLES IN DATABASE <database_name> TO ROLE DATAEDO_ROLE;

-- Future grants
GRANT SELECT ON FUTURE TABLES IN DATABASE <database_name> TO ROLE DATAEDO_ROLE;
GRANT SELECT ON FUTURE VIEWS IN DATABASE <database_name> TO ROLE DATAEDO_ROLE;
GRANT SELECT ON FUTURE MATERIALIZED VIEWS IN DATABASE <database_name> TO ROLE DATAEDO_ROLE;
GRANT SELECT ON FUTURE DYNAMIC TABLES IN DATABASE <database_name> TO ROLE DATAEDO_ROLE;
GRANT SELECT ON FUTURE EXTERNAL TABLES IN DATABASE <database_name> TO ROLE DATAEDO_ROLE;
GRANT SELECT ON FUTURE ICEBERG TABLES IN DATABASE <database_name> TO ROLE DATAEDO_ROLE;
Metadata Sync write-back
All features above are read-only. The only exception is Metadata Sync with write-back enabled, which pushes metadata edited in Dataedo back to Snowflake using DDL statements. Currently this covers Data Classification — classifications are written as Snowflake tags, which requires the global APPLY TAG privilege, or OWNERSHIP of the object together with APPLY on the tag.
If you don't use write-back, the read-only role described on this page is sufficient.
Dependencies, lineage, and ACCOUNT_USAGE
Several features rely on Snowflake's ACCOUNT_USAGE views — account-scoped metadata that requires explicit grants on the SNOWFLAKE system database.
| Feature | ACCOUNT_USAGE view | Database role needed |
|---|---|---|
| Object dependencies | OBJECT_DEPENDENCIES | SNOWFLAKE.OBJECT_VIEWER |
| Stream column metadata | COLUMNS | SNOWFLAKE.OBJECT_VIEWER |
| Direct loading lineage (COPY INTO) | COPY_HISTORY | SNOWFLAKE.USAGE_VIEWER |
| Last load time (basic statistics) | COPY_HISTORY | SNOWFLAKE.USAGE_VIEWER |
There are two ways to grant access:
Option A — Granular database roles (recommended):
GRANT DATABASE ROLE SNOWFLAKE.OBJECT_VIEWER TO ROLE DATAEDO_ROLE;
GRANT DATABASE ROLE SNOWFLAKE.USAGE_VIEWER TO ROLE DATAEDO_ROLE;
Option B — Legacy blanket access:
GRANT IMPORTED PRIVILEGES ON DATABASE SNOWFLAKE TO ROLE DATAEDO_ROLE;
Option B grants access to all ACCOUNT_USAGE and ORGANIZATION_USAGE views. Snowflake recommends Option A for least-privilege access.
ACCOUNT_USAGE views are not real-time — documented latency is up to 3 hours for OBJECT_DEPENDENCIES, up to 90 minutes for COLUMNS, and up to 2 hours for COPY_HISTORY. Newly created objects may not appear immediately in dependency or lineage results.
GET_LINEAGE function (Enterprise Edition+)
On Snowflake Enterprise Edition or higher, Dataedo uses the GET_LINEAGE function to automatically extract table-level and column-level upstream data lineage.
This requires:
- Enterprise Edition (or higher) — the function is not available on Standard Edition.
- VIEW LINEAGE privilege — granted to the PUBLIC role by default. If it was revoked, re-grant it:
GRANT VIEW LINEAGE ON ACCOUNT TO ROLE DATAEDO_ROLE;
- Edition detection — Dataedo checks the account edition via
SNOWFLAKE.ORGANIZATION_USAGE.ACCOUNTS. If the view is inaccessible or returns no row for the account,GET_LINEAGEis silently skipped. To enable:
GRANT DATABASE ROLE SNOWFLAKE.ORGANIZATION_ACCOUNTS_VIEWER TO ROLE DATAEDO_ROLE;
ORGANIZATION_USAGE.ACCOUNTS is populated only in accounts that are part of a Snowflake organization (the organization account, or a regular account with the ORGADMIN role enabled), and its latency can be up to 24 hours. To verify, run SELECT EDITION FROM SNOWFLAKE.ORGANIZATION_USAGE.ACCOUNTS WHERE account_name = CURRENT_ACCOUNT(); as the Dataedo role. If it returns no row, GET_LINEAGE is skipped even on Enterprise Edition.
Enterprise Lineage connector (Enterprise Edition+)
The Snowflake Enterprise Lineage is a separate connector that extracts data lineage from query execution history — including column-level flows and the SQL scripts that created them. It requires:
GRANT DATABASE ROLE SNOWFLAKE.GOVERNANCE_VIEWER TO ROLE DATAEDO_ROLE;
This grants access to:
SNOWFLAKE.ACCOUNT_USAGE.ACCESS_HISTORY— objects modified by queries (Enterprise Edition+ only)SNOWFLAKE.ACCOUNT_USAGE.QUERY_HISTORY— executed SQL statements
Both tables must contain data for the connection test to pass.
Recommended setup script
The script below covers all features (metadata import, lineage, dependencies, profiling, data quality, classification). Remove sections you don't need.
-- 1. Create a dedicated role
CREATE ROLE IF NOT EXISTS DATAEDO_ROLE
  COMMENT = 'Metadata access for Dataedo';

-- 2. Grant warehouse access
GRANT USAGE ON WAREHOUSE <warehouse_name> TO ROLE DATAEDO_ROLE;

-- 3. Grant access to each database you want to catalog
GRANT USAGE ON DATABASE <database_name> TO ROLE DATAEDO_ROLE;
GRANT USAGE ON ALL SCHEMAS IN DATABASE <database_name> TO ROLE DATAEDO_ROLE;

-- 4. Object metadata (required for import)
--    Each object type needs its own grant - ALL TABLES does not cover
--    external/dynamic/Iceberg tables, ALL VIEWS does not cover materialized views
GRANT REFERENCES ON ALL TABLES IN DATABASE <database_name> TO ROLE DATAEDO_ROLE;
GRANT REFERENCES ON ALL VIEWS IN DATABASE <database_name> TO ROLE DATAEDO_ROLE;
GRANT REFERENCES ON ALL MATERIALIZED VIEWS IN DATABASE <database_name> TO ROLE DATAEDO_ROLE;
GRANT REFERENCES ON ALL EXTERNAL TABLES IN DATABASE <database_name> TO ROLE DATAEDO_ROLE;
GRANT REFERENCES ON ALL ICEBERG TABLES IN DATABASE <database_name> TO ROLE DATAEDO_ROLE;
GRANT USAGE ON ALL FUNCTIONS IN DATABASE <database_name> TO ROLE DATAEDO_ROLE;
GRANT USAGE ON ALL PROCEDURES IN DATABASE <database_name> TO ROLE DATAEDO_ROLE;
GRANT USAGE ON ALL STAGES IN DATABASE <database_name> TO ROLE DATAEDO_ROLE;
GRANT USAGE ON ALL SEQUENCES IN DATABASE <database_name> TO ROLE DATAEDO_ROLE;
GRANT MONITOR ON ALL DYNAMIC TABLES IN DATABASE <database_name> TO ROLE DATAEDO_ROLE;
GRANT MONITOR ON ALL TASKS IN DATABASE <database_name> TO ROLE DATAEDO_ROLE;

-- 5. Pipes (Snowpipes) - bulk grants on pipes are NOT allowed in Snowflake
--    ("Bulk grant on objects of type PIPE to ROLE is restricted").
--    Run SHOW PIPES, then generate one grant per pipe:
SHOW PIPES IN DATABASE <database_name>;
SELECT 'GRANT MONITOR ON PIPE ' || "database_name" || '.' || "schema_name" || '.' || "name" ||
       ' TO ROLE DATAEDO_ROLE;' AS grant_statement
FROM TABLE(RESULT_SCAN(LAST_QUERY_ID()));
-- ...and execute the generated GRANT statements.

-- 6. SELECT for Data Profiling / Data Quality / Classification (optional)
--    Remove if you only need metadata import without data analysis
GRANT SELECT ON ALL TABLES IN DATABASE <database_name> TO ROLE DATAEDO_ROLE;
GRANT SELECT ON ALL VIEWS IN DATABASE <database_name> TO ROLE DATAEDO_ROLE;
GRANT SELECT ON ALL MATERIALIZED VIEWS IN DATABASE <database_name> TO ROLE DATAEDO_ROLE;
GRANT SELECT ON ALL DYNAMIC TABLES IN DATABASE <database_name> TO ROLE DATAEDO_ROLE;
GRANT SELECT ON ALL EXTERNAL TABLES IN DATABASE <database_name> TO ROLE DATAEDO_ROLE;
GRANT SELECT ON ALL ICEBERG TABLES IN DATABASE <database_name> TO ROLE DATAEDO_ROLE;

-- 7. Future grants (so new objects are automatically visible)
GRANT USAGE ON FUTURE SCHEMAS IN DATABASE <database_name> TO ROLE DATAEDO_ROLE;
GRANT REFERENCES ON FUTURE TABLES IN DATABASE <database_name> TO ROLE DATAEDO_ROLE;
GRANT REFERENCES ON FUTURE VIEWS IN DATABASE <database_name> TO ROLE DATAEDO_ROLE;
GRANT REFERENCES ON FUTURE MATERIALIZED VIEWS IN DATABASE <database_name> TO ROLE DATAEDO_ROLE;
GRANT REFERENCES ON FUTURE EXTERNAL TABLES IN DATABASE <database_name> TO ROLE DATAEDO_ROLE;
GRANT REFERENCES ON FUTURE ICEBERG TABLES IN DATABASE <database_name> TO ROLE DATAEDO_ROLE;
GRANT USAGE ON FUTURE FUNCTIONS IN DATABASE <database_name> TO ROLE DATAEDO_ROLE;
GRANT USAGE ON FUTURE PROCEDURES IN DATABASE <database_name> TO ROLE DATAEDO_ROLE;
GRANT USAGE ON FUTURE STAGES IN DATABASE <database_name> TO ROLE DATAEDO_ROLE;
GRANT USAGE ON FUTURE SEQUENCES IN DATABASE <database_name> TO ROLE DATAEDO_ROLE;
GRANT MONITOR ON FUTURE DYNAMIC TABLES IN DATABASE <database_name> TO ROLE DATAEDO_ROLE;
GRANT MONITOR ON FUTURE TASKS IN DATABASE <database_name> TO ROLE DATAEDO_ROLE;
-- The pipe restriction applies to bulk (ON ALL) grants only. Snowflake does not
-- document future grants on pipes explicitly - test this grant before relying on it:
GRANT MONITOR ON FUTURE PIPES IN DATABASE <database_name> TO ROLE DATAEDO_ROLE;
-- SELECT future grants - only needed with Data Profiling / Data Quality / Classification
GRANT SELECT ON FUTURE TABLES IN DATABASE <database_name> TO ROLE DATAEDO_ROLE;
GRANT SELECT ON FUTURE VIEWS IN DATABASE <database_name> TO ROLE DATAEDO_ROLE;
GRANT SELECT ON FUTURE MATERIALIZED VIEWS IN DATABASE <database_name> TO ROLE DATAEDO_ROLE;
GRANT SELECT ON FUTURE DYNAMIC TABLES IN DATABASE <database_name> TO ROLE DATAEDO_ROLE;
GRANT SELECT ON FUTURE EXTERNAL TABLES IN DATABASE <database_name> TO ROLE DATAEDO_ROLE;
GRANT SELECT ON FUTURE ICEBERG TABLES IN DATABASE <database_name> TO ROLE DATAEDO_ROLE;

-- 8. Dependencies and stream columns (ACCOUNT_USAGE)
GRANT DATABASE ROLE SNOWFLAKE.OBJECT_VIEWER TO ROLE DATAEDO_ROLE;

-- 9. Direct loading lineage - COPY INTO (ACCOUNT_USAGE)
GRANT DATABASE ROLE SNOWFLAKE.USAGE_VIEWER TO ROLE DATAEDO_ROLE;

-- 10. GET_LINEAGE - Enterprise Edition+ only (optional)
GRANT DATABASE ROLE SNOWFLAKE.ORGANIZATION_ACCOUNTS_VIEWER TO ROLE DATAEDO_ROLE;
-- VIEW LINEAGE is granted to PUBLIC by default; if revoked:
-- GRANT VIEW LINEAGE ON ACCOUNT TO ROLE DATAEDO_ROLE;

-- 11. Enterprise Lineage connector - Enterprise Edition+ only (optional)
GRANT DATABASE ROLE SNOWFLAKE.GOVERNANCE_VIEWER TO ROLE DATAEDO_ROLE;

-- 12. Assign to the Dataedo user
GRANT ROLE DATAEDO_ROLE TO USER <dataedo_user>;
Repeat steps 3-7 for each database you want to import.
If any schema in the database already has its own schema-level future grants for a given object type, Snowflake ignores the database-level future grants for that object type in that schema. New objects created there will not be visible to DATAEDO_ROLE — add the corresponding GRANT ... ON FUTURE ... IN SCHEMA statements for those schemas as well.
Graceful degradation
Most metadata extraction steps are fault-tolerant. If the role lacks a specific privilege, the import continues and skips the affected feature:
| Feature | What happens without the required privilege |
|---|---|
Object DDL (GET_DDL) | Objects are imported without their SQL definition |
| Procedure scripts (owner's rights / secure procedures) | Procedures are imported without their script — Snowflake hides the body from non-owner roles (see procedure permissions) |
Dependencies (OBJECT_DEPENDENCIES) | Imported without dependency information |
Direct loading lineage (COPY_HISTORY) | COPY INTO lineage is skipped |
GET_LINEAGE | Table/column lineage via GET_LINEAGE is skipped |
Stream columns (ACCOUNT_USAGE.COLUMNS) | Streams are imported with metadata columns only (METADATA$ACTION, etc.) |
Iceberg table location (SYSTEM$GET_ICEBERG_TABLE_INFORMATION requires OWNERSHIP) | Iceberg tables are imported without location; Iceberg lineage is skipped |
| Pipes | Pipes without MONITOR are not visible in INFORMATION_SCHEMA.PIPES and are skipped |
| Tasks | Tasks not visible via SHOW TASKS are skipped |
| Dynamic tables without MONITOR | DYNAMIC_TABLE_GRAPH_HISTORY() returns only object names — dynamic tables are imported without their definition, and dynamic table lineage falls back to SQL parsing only |
| Organization/account name | Snowsight links in object URLs are not generated |
| Data Profiling / Data Quality / Classification | These features cannot run without SELECT on the target objects |
The only issues that prevent the import from starting are:
- Cannot connect to the host (network or credential issue)
- No USAGE on the warehouse (cannot execute any query)
- No USAGE on the database (cannot access INFORMATION_SCHEMA)
Full reference: all Snowflake objects and commands accessed by Dataedo
INFORMATION_SCHEMA views (database-scoped)
| View | What Dataedo reads | Minimum privilege |
|---|---|---|
SCHEMATA | Schema list | USAGE on schema |
TABLES | Tables, views, dynamic tables, external tables — name, type, comment, dates, row count | REFERENCES (tables/views) |
VIEWS | View definitions | REFERENCES; secure view definitions are visible only to the owning role |
EXTERNAL_TABLES | External table locations | REFERENCES |
COLUMNS | Column name, type, nullable, default, identity, comment | REFERENCES on parent table/view |
PROCEDURES | Procedure name, schema, comment, signature, dates, definition | USAGE; owner's-rights procedure bodies are visible only to the owning role |
FUNCTIONS | Function name, schema, definition, comment, dates | USAGE; secure function definitions are visible only to the owning role |
STAGES | Stage name, URL, comment | USAGE (external stages) / READ (internal stages) |
SEQUENCES | Sequence name, start/increment/order | USAGE |
PIPES | Pipe name, definition, comment | MONITOR or OWNERSHIP (OPERATE is not enough for this view) |
LOAD_HISTORY | Last load timestamps (basic statistics) | Standard INFORMATION_SCHEMA visibility — any privilege on the table |
DYNAMIC_TABLE_GRAPH_HISTORY() | Dynamic table definitions and dependency inputs | MONITOR on the dynamic table (without it, only object names are returned) |
TAG_REFERENCES_ALL_COLUMNS() | Existing classification tags on columns (Data Classification sync) | Standard INFORMATION_SCHEMA visibility on the table and the tag |
SHOW commands
| Command | Purpose | Visibility |
|---|---|---|
SHOW WAREHOUSES | Connection test + warehouse listing | Any privilege on the warehouse |
SHOW ROLES | Available roles listing | Any privilege on the role |
SHOW DATABASES | Accessible databases listing | Any privilege on the database |
SHOW IMPORTED KEYS | Foreign key extraction | Any privilege on the parent tables* |
SHOW PRIMARY KEYS | Primary key extraction | Any privilege on the parent tables |
SHOW UNIQUE KEYS | Unique key extraction | Any privilege on the parent tables* |
SHOW STREAMS | Stream enumeration | Any privilege on the source object of the stream |
SHOW TASKS | Task (job) enumeration | MONITOR, OPERATE, or OWNERSHIP |
* SHOW IMPORTED KEYS and SHOW UNIQUE KEYS are not documented by Snowflake; their visibility rules follow the same pattern as the documented SHOW PRIMARY KEYS.
System functions
| Function | Purpose | Privilege |
|---|---|---|
GET_DDL(type, name) | Object DDL for procedures, functions, views, tasks, streams, pipes, external tables, Iceberg tables | Same minimum privilege as DESCRIBE/SHOW for the object type. Exceptions: secure objects and owner's-rights procedure bodies are visible only to the owning role |
CURRENT_VERSION() | Snowflake version detection | None |
CURRENT_ORGANIZATION_NAME() | Organization name for Snowsight URLs | None |
CURRENT_ACCOUNT() | Account identifier | None |
SYSTEM$GET_ICEBERG_TABLE_INFORMATION() | Iceberg table location | OWNERSHIP on the Iceberg table |
ACCOUNT_USAGE views (account-scoped)
| View | Database role | What Dataedo uses it for |
|---|---|---|
OBJECT_DEPENDENCIES | OBJECT_VIEWER | Object dependency graph |
COLUMNS | OBJECT_VIEWER | Stream column metadata |
COPY_HISTORY | USAGE_VIEWER | Direct loading (COPY INTO) lineage; last load time (basic statistics) |
ACCESS_HISTORY | GOVERNANCE_VIEWER | Enterprise Lineage connector (Enterprise+) |
QUERY_HISTORY | GOVERNANCE_VIEWER | Enterprise Lineage connector |
Other
| Object | Required role / privilege | Purpose |
|---|---|---|
ORGANIZATION_USAGE.ACCOUNTS | ORGANIZATION_ACCOUNTS_VIEWER | Edition detection for GET_LINEAGE |
CORE.GET_LINEAGE() | VIEW LINEAGE (account-level) | Table/column upstream lineage (Enterprise+) |

