Connecting to Salesforce database
Before you begin
Dataedo connects to Salesforce using REST API and OAuth, instead of directly accessing a database. This means it works with any Salesforce instance regardless of where it is hosted — cloud (AWS, Azure, etc.), on-premises via Hyperforce, or any other environment. As long as the Salesforce API endpoint is reachable from the machine running Dataedo, the connection will work.
Requirements:
- Salesforce edition with API access (Enterprise, Unlimited, Developer, or Performance)
- A Salesforce user with the API Enabled permission on their profile
- For the Sign in with values method: a Connected App configured in Salesforce (requires a Salesforce Administrator)
- Port 5005 available on the machine running Dataedo (used for OAuth callback during Interactive sign-in)
- Network access to
login.salesforce.com(or your custom Salesforce domain, ortest.salesforce.comfor sandbox)
Add new connection
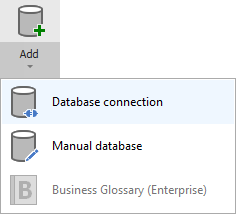
To connect to Salesforce create new documentation by clicking Add documentation and choosing Database connection.
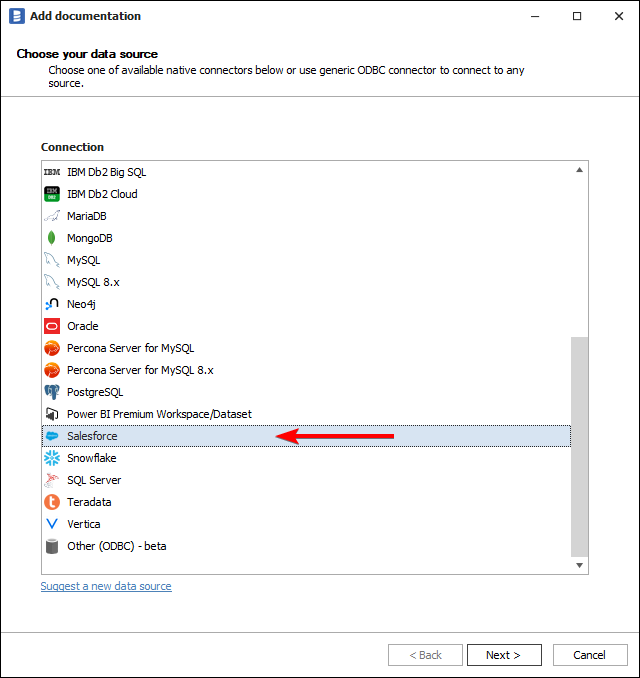
On the Add documentation screen choose Salesforce:
Connection details
Dataedo supports two authentication methods for connecting to Salesforce. Choose the one that best fits your organization's security requirements.
Dataedo supports both Production and Sandbox Salesforce instances. You can choose the instance type when providing connection details. We recommend testing with a Sandbox first before connecting to production.
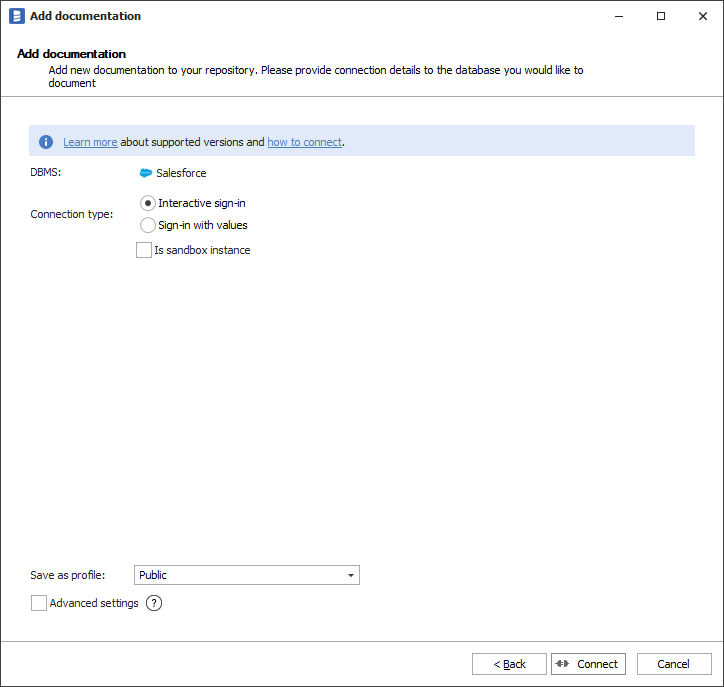
Interactive sign-in
When you select Connect, a Salesforce login page opens in your browser. Provide your Username and Password there. Dataedo will handle the OAuth flow with no additional Salesforce setup required.
When to use: Quick setup, individual use, or when you want to avoid configuring a Connected App in Salesforce.
If Interactive sign-in fails with OAUTH_APPROVAL_ERROR_GENERIC, see the Troubleshooting section. You can also configure Dataedo to use your own Connected App or a custom domain — see Advanced configuration.
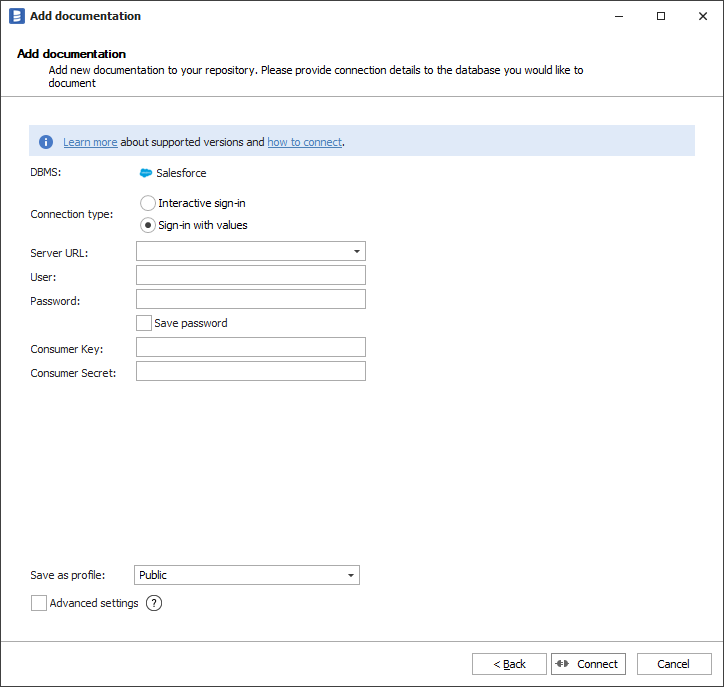
Sign in with values
This option uses stored credentials (Consumer Key, Consumer Secret, Username, and Password) to connect. For this option to work, you have to configure a Connected App in Salesforce first.
When to use: Automated or repeated connections, environments where browser-based login is not practical, or when your organization prefers explicit control over the Connected App configuration.
Connection form
-
Server URL - URL of your Salesforce organization's domain (e.g.
https://yourcompanyname.my.salesforce.com) or the general Salesforce login URL (https://login.salesforce.com) -
User
-
Password
-
Consumer Key - obtained from the Connected App setup below
-
Consumer Secret - obtained from the Connected App setup below
Get Consumer Key and Secret Key from Salesforce
To fill in the connection form above, you first need a Consumer Key and Consumer Secret from a Connected App. If you haven't set one up yet, follow the Set up a Connected App instructions first, then return here.
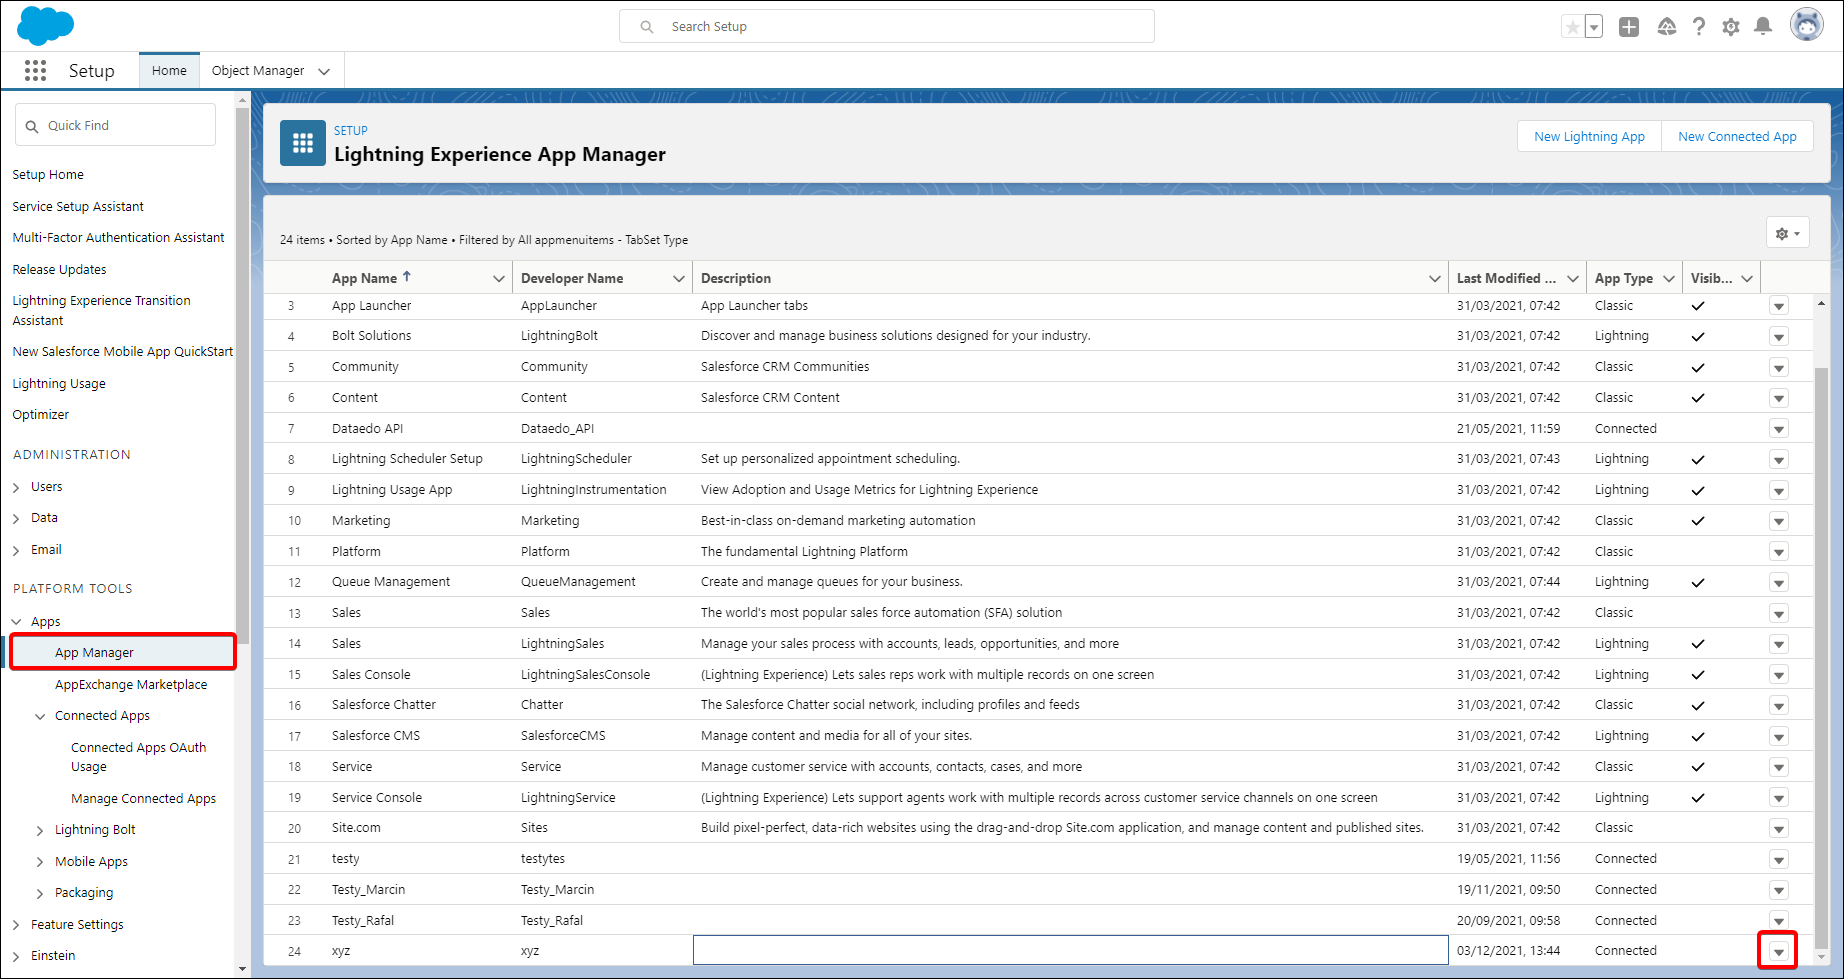
Step 1.
Go to Apps > App Manager, click the down arrow icon next to your Connected App and select View.
Step 2.
You can find the Consumer Key on the left side. To get Consumer Secret click "Click to reveal" on the right and copy the key.
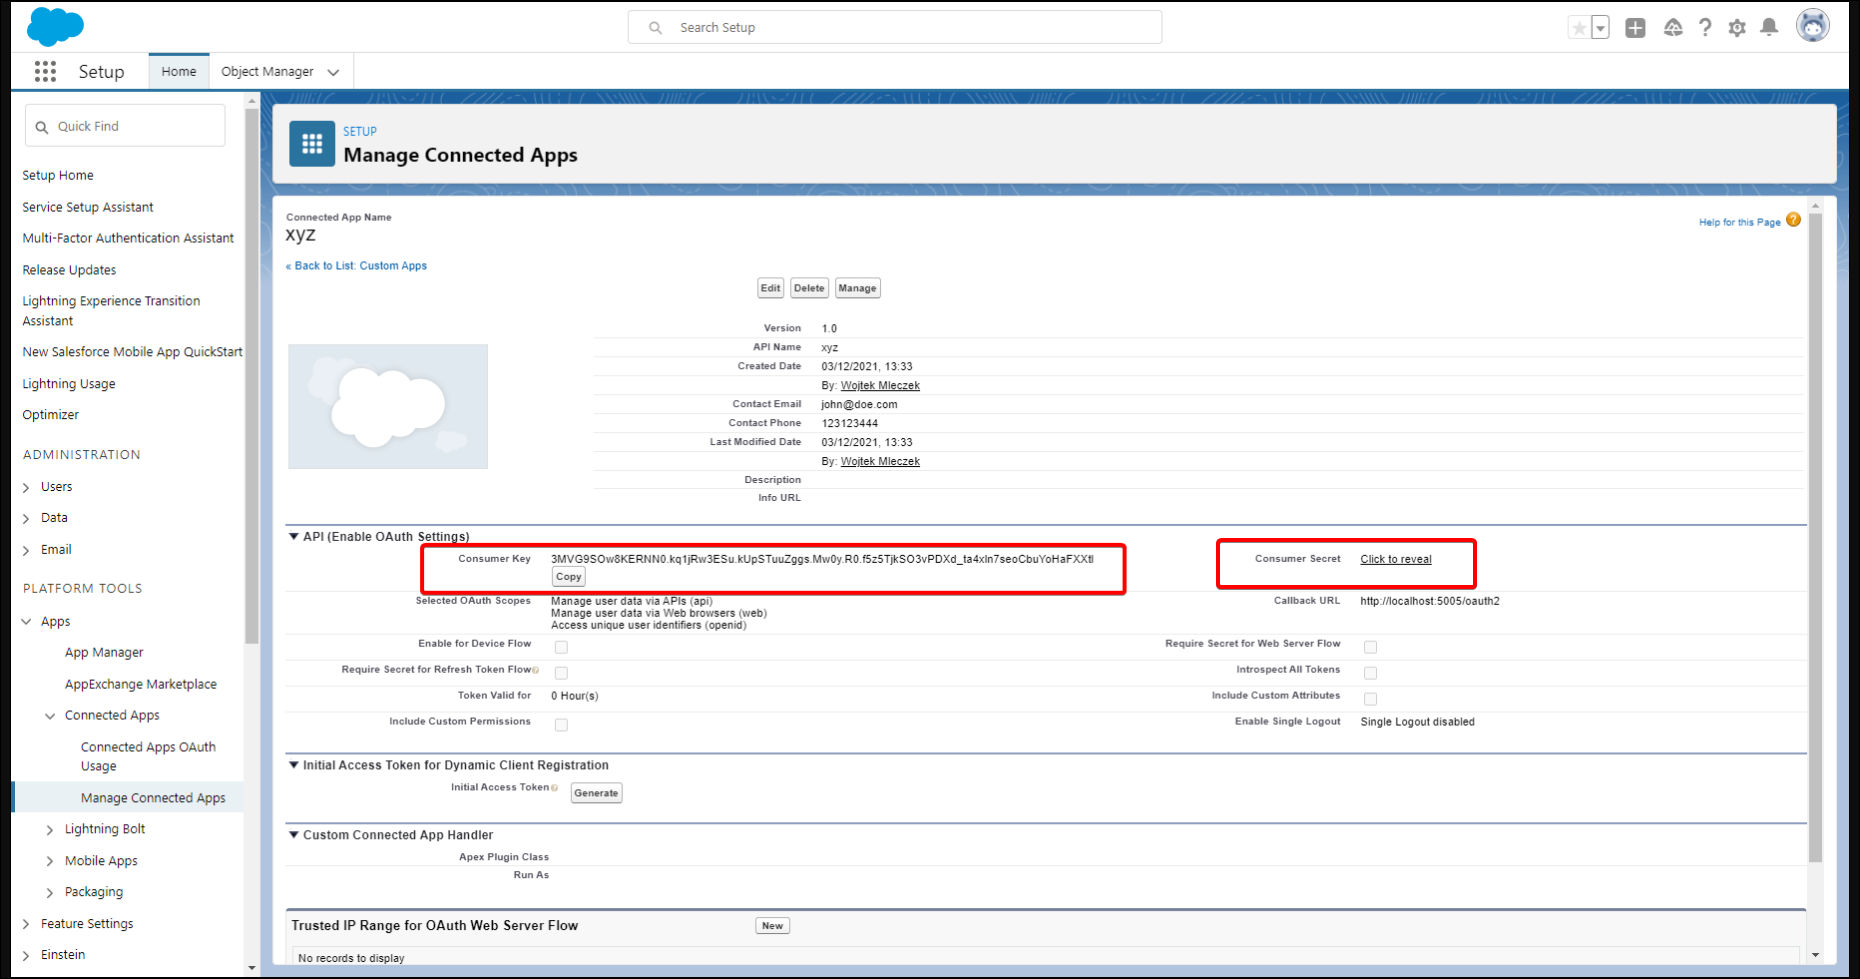
Now return to the Connection form above and enter the Consumer Key and Consumer Secret along with your Username and Password.
Saving password
You can save password for later connections by checking Save password option. Passwords are saved in the repository database.
Importing metadata
If the connection attempt was successful, Dataedo will read objects and show a list of objects found. You can choose which objects to import. You can also use advanced filter to narrow down the list of objects.
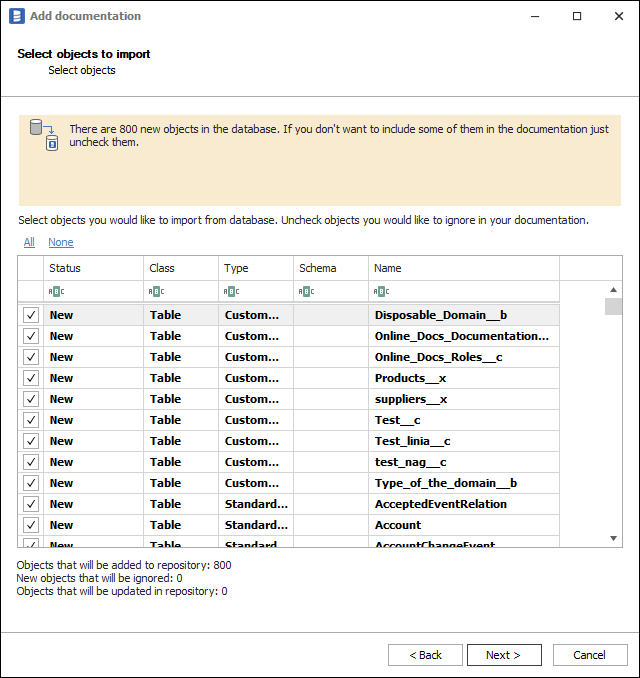
Confirm the list of objects to import by clicking Next.
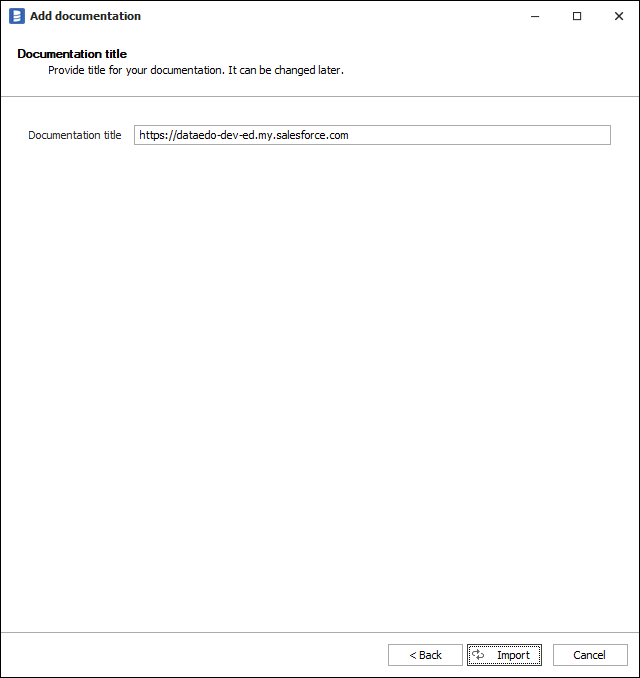
Next screen allows you to change the documentation title that will be visible in your Dataedo repository.
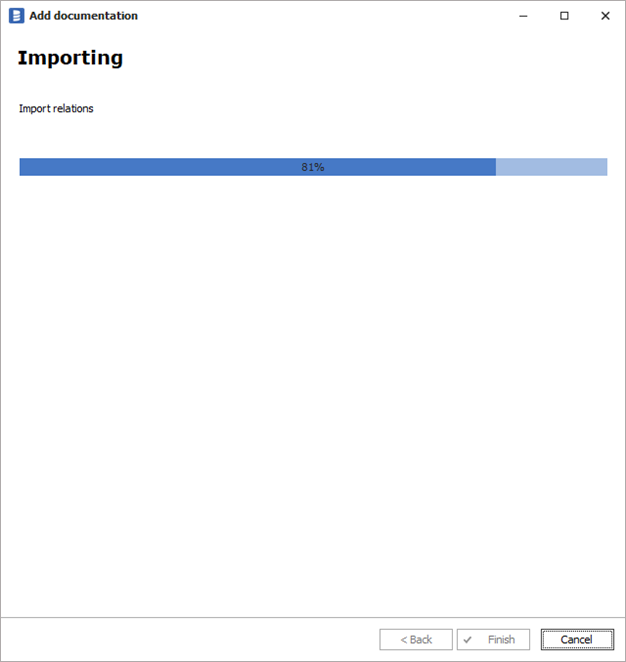
Click Import to start the import.
After the metadata import is finished, close the import window with the Finish button.
Outcome
Your Salesforce objects have been imported to new documentation in the repository.
Troubleshooting
OAUTH_APPROVAL_ERROR_GENERIC
Error message: OAUTH_APPROVAL_ERROR_GENERIC: An unexpected error has occurred during authentication
Since September 2025, Salesforce enforces new security restrictions on how third-party applications connect. This may cause connection issues.
The solution: Dataedo application needs to be explicitly installed and approved within your Salesforce Connected Apps settings.
By default, Dataedo uses a predefined Connected App for authentication. However, we recommend creating your own Connected App for better control and security.
Option 1: Use your own Connected App (Recommended)
See Use your own Connected App for Interactive sign-in for instructions.
Option 2: Salesforce Admin Install
A Salesforce Administrator needs to install the Dataedo app in your organization:
- Log in to Salesforce as a Salesforce Administrator
- Navigate to Setup
- In the Quick Find box, search for Connected Apps OAuth Usage
- Find the Dataedo app in the list and click Install or Approve
Dataedo Connected App will only be visible once a user has attempted to connect. If it's not listed, have a user attempt the connection first, then return to approve it.
Option 3: User-Specific Permission
If other options fail to resolve the issue, a Salesforce Administrator can grant permission to the user's profile:
- Navigate to Setup
- In the Quick Find box, search for Profiles and select the user's profile
- Under System Permissions, enable Approve Uninstalled Connected Apps
OAUTH_APP_BLOCKED
The Connected App used for authentication has been blocked in your Salesforce organization.
The solution (requires Salesforce Administrator):
- In Salesforce, navigate to Setup → Connected Apps OAuth Usage
- Find the application in the list (Dataedo or your custom Connected App)
- If blocked, click Install to unblock the app

API access errors
If users cannot connect their Salesforce account, verify that the user's profile has the API Enabled permission:
- Navigate to Setup → Profiles
- Select the user's profile
- Under System Permissions, ensure API Enabled is checked
The connecting user also needs view access to EntityDefinition and FieldDefinition objects and access to the Tooling API for importing descriptions.
Port 5005 already in use
If the Interactive sign-in fails immediately, another application may be using port 5005. Ensure that the port is available on the machine running Dataedo, or configure a different redirect URL via ImportSettings.json (see Advanced configuration).
Changes not taking effect after Connected App setup
After creating or modifying a Connected App in Salesforce, you may need to wait up to 10 minutes for changes to propagate through Salesforce systems. If the connection fails immediately after setup, wait and try again.
Advanced configuration
The sections above cover the standard setup for both authentication methods. For organizations with specific security requirements — such as using your own Connected App, authenticating via a custom domain, or troubleshooting Interactive sign-in — Dataedo supports additional configuration options through ImportSettings.json.
File location: [Dataedo Installation Path]\Application\ImportSettings.json
Available settings
| Setting | Description | Example |
|---|---|---|
SalesforceClientIdOverride | Use your own Connected App Client ID | "3MVG9..." |
SalesforceCustomDomain | Authenticate via custom My Domain instead of login.salesforce.com | "yourcompany" |
UseSystemBrowserToAuthenticateSalesforce | Use system browser instead of embedded during interactive login | true |
Set up a Connected App
To use the Sign in with values authentication method, a Salesforce Administrator needs to create a Connected App. You only need to create one Connected App for Dataedo.
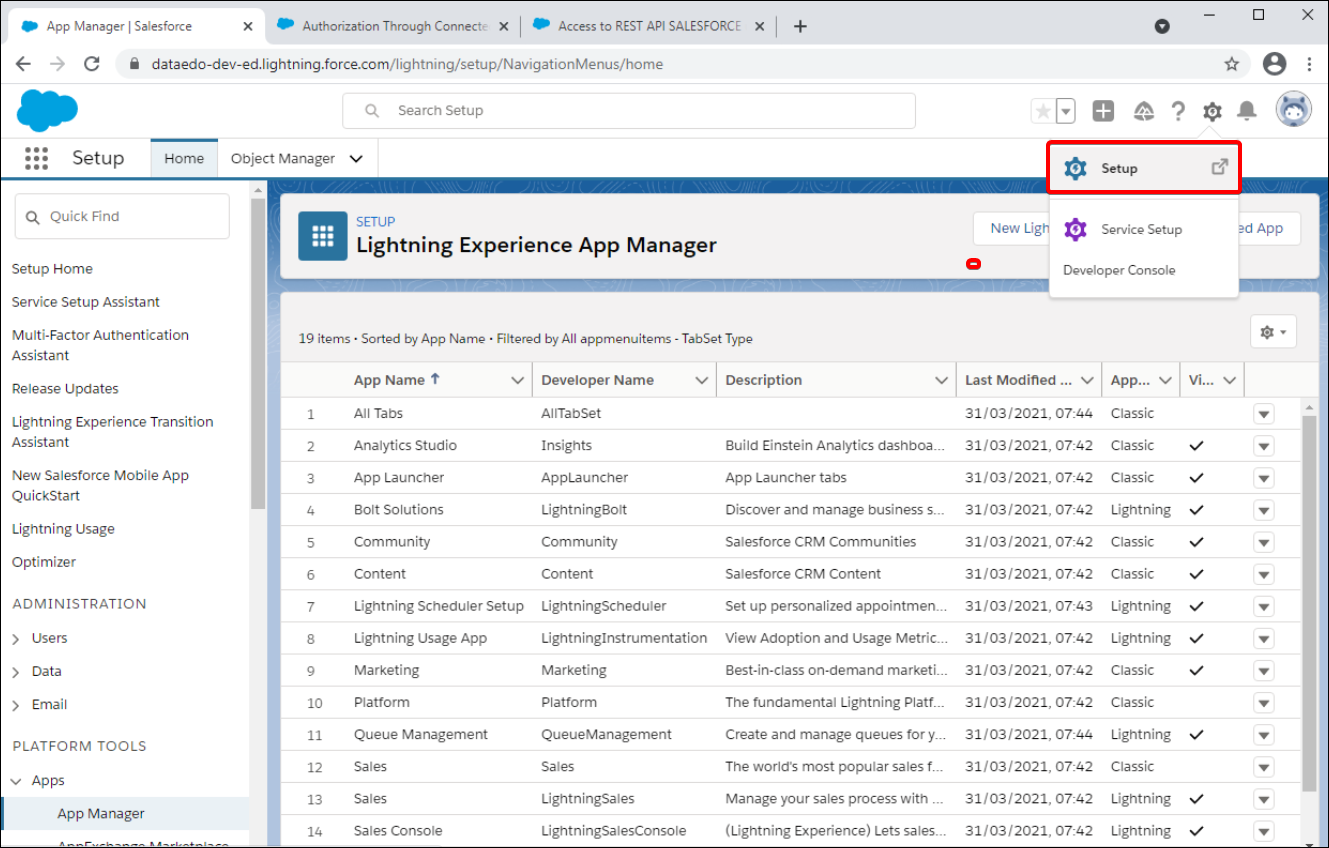
Step 1.
Click setup icon in a top right corner and then Setup
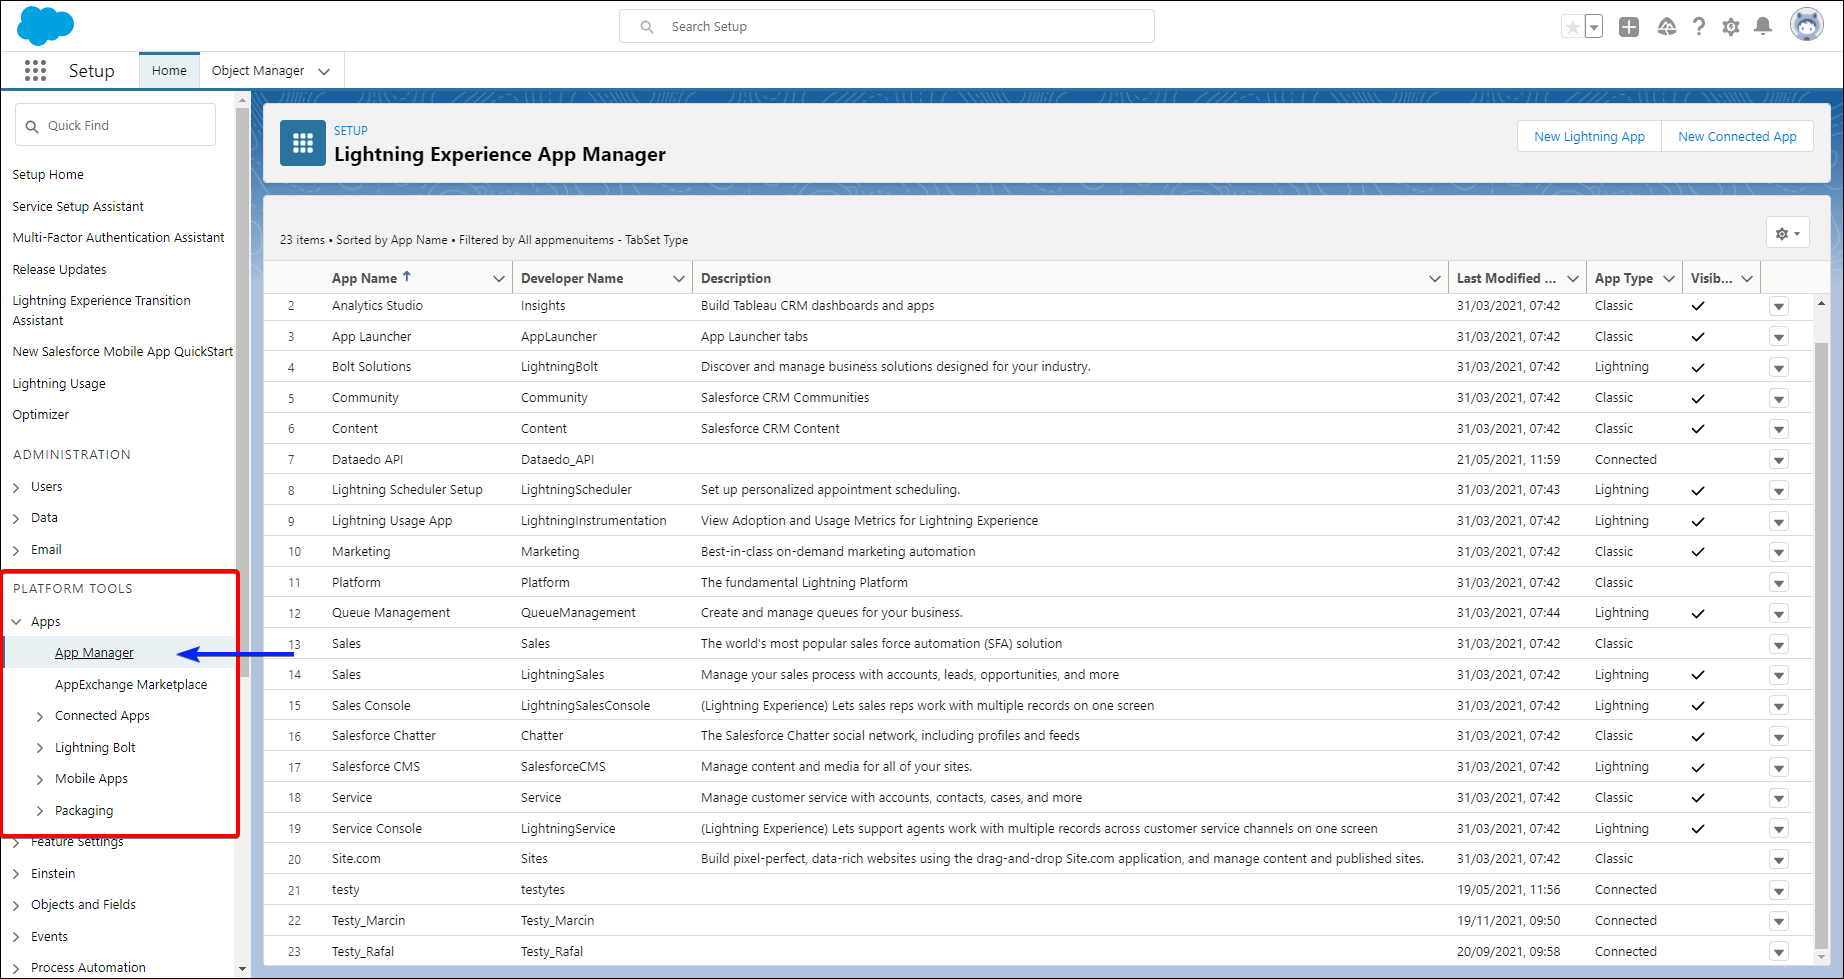
Step 2.
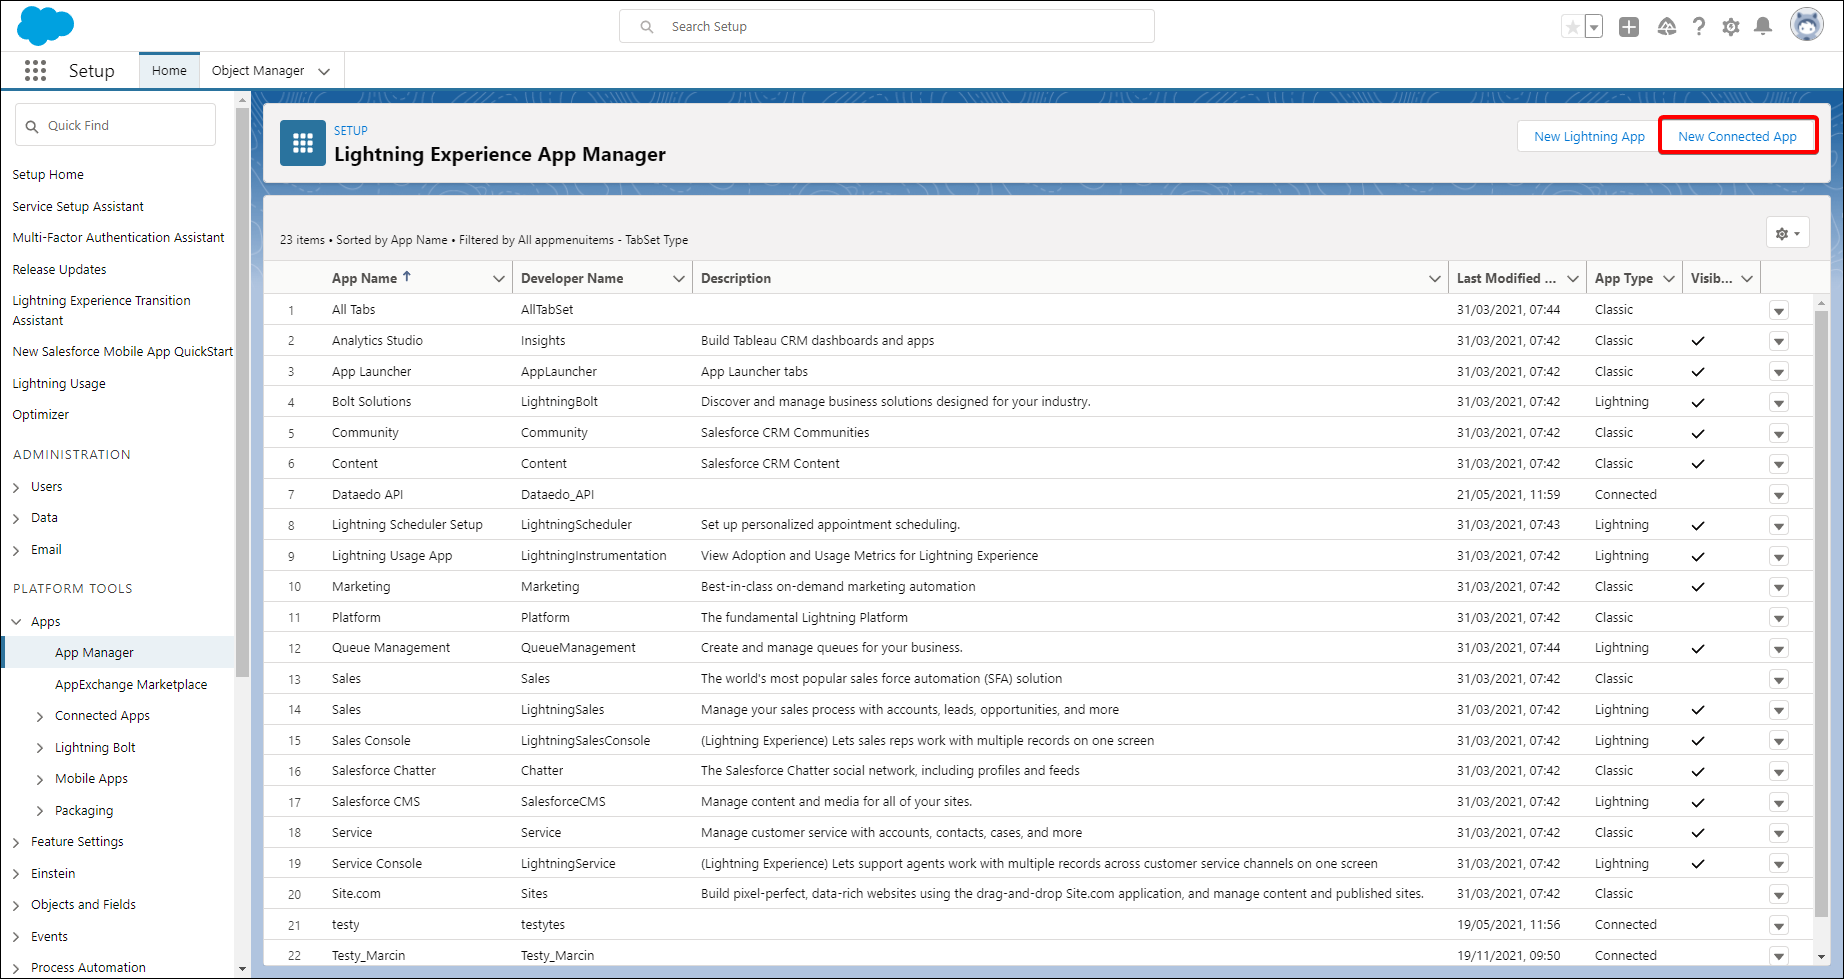
In the left sidebar within a PLATFORM TOOLS group you can find Apps and then App Manager. Click it to list all the Connected Apps in your organization.
Step 3.
Select New Connected App on the right.
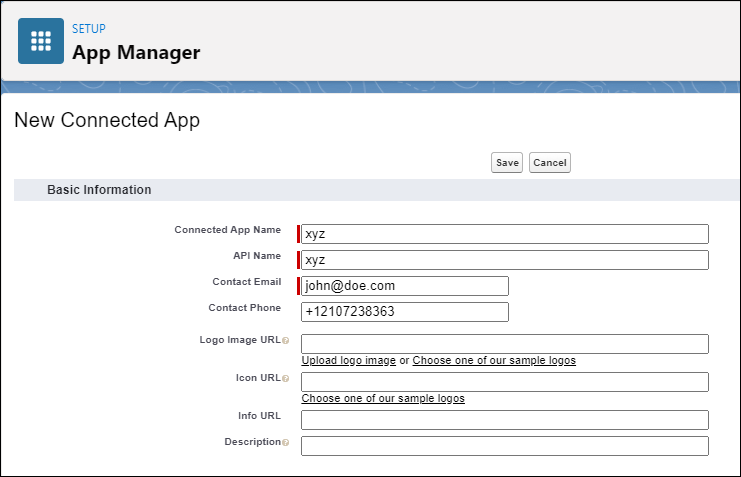
Step 4.
Fill in all the required information inside the Basic Information section.
Here's an example configuration:
Step 5.
-
Select Enable OAuth Settings
-
Set Callback URL to http://localhost:5005/oauth2
-
Make sure that Require Secret for Web Server Flow and Require Secret for Refresh Token Flow are unselected
-
In Selected OAuth Scopes add:
- Access unique user identifiers (openid) — required for user authentication and identification during the login flow
- Manage user data via APIs (api) — allows Dataedo to query the Salesforce REST API and Tooling API to read metadata (objects, fields, triggers, relationships)
- Manage user data via Web browsers (web) — required for the browser-based OAuth authentication flow
For more details on OAuth scopes, see Salesforce OAuth Tokens and Scopes.
-
Submit with Save on top of the page.

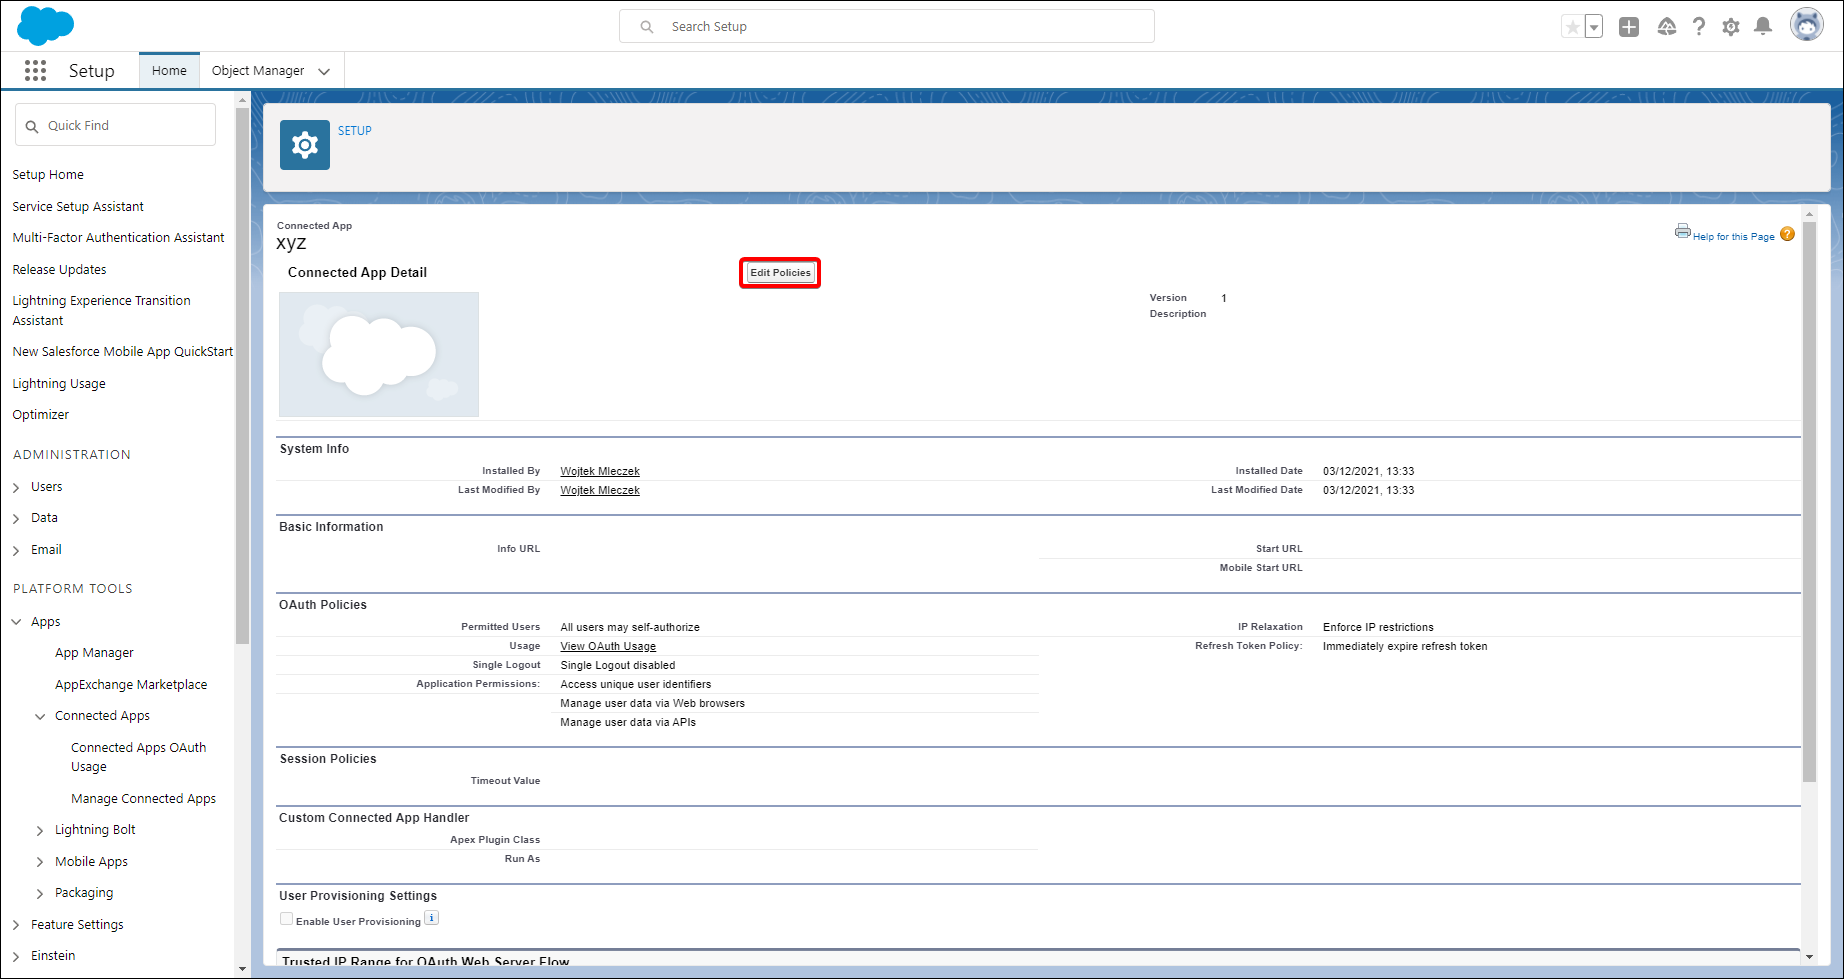
Step 6.
After creating Connected App you can see a summary. To unlock signing in with password:
- Click Manage

- Then press Edit Policies
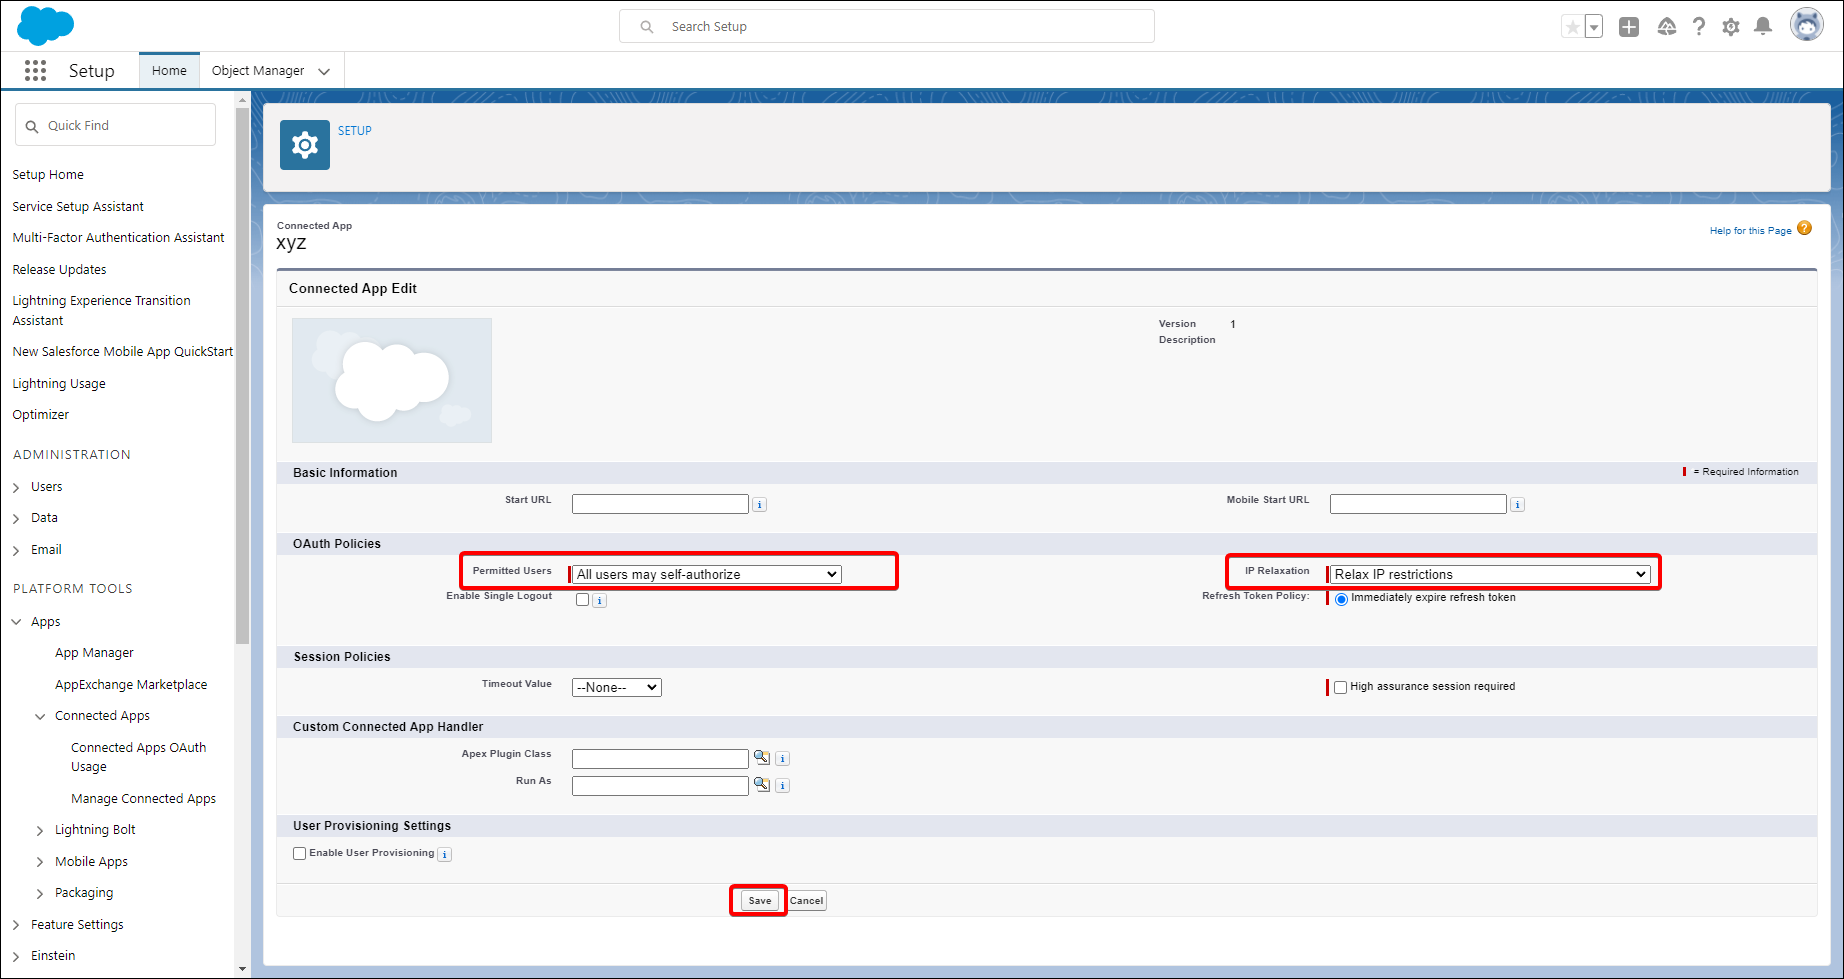
-
Inside OAuth Policies change Permitted Users and IP Relaxation:
- Permitted Users → All users may self-authorize — allows any user in your Salesforce organization to connect via Dataedo without requiring explicit admin pre-approval for each user. Alternatively, choose "Admin approved users are pre-authorized" if you want to restrict access to specific user profiles or permission sets.
- IP Relaxation → Relax IP restrictions — disables IP range checks for OAuth connections. This is needed because Dataedo connects from the user's machine, which may not be in Salesforce's trusted IP ranges. You can also configure stricter IP ranges if your organization's security policies require it.
-
Submit changes by clicking "Save" at the bottom.
The settings above are the simplest configuration to get started. Your Salesforce Administrator should review and adjust these settings to match your organization's security policies and requirements.
Step 7.
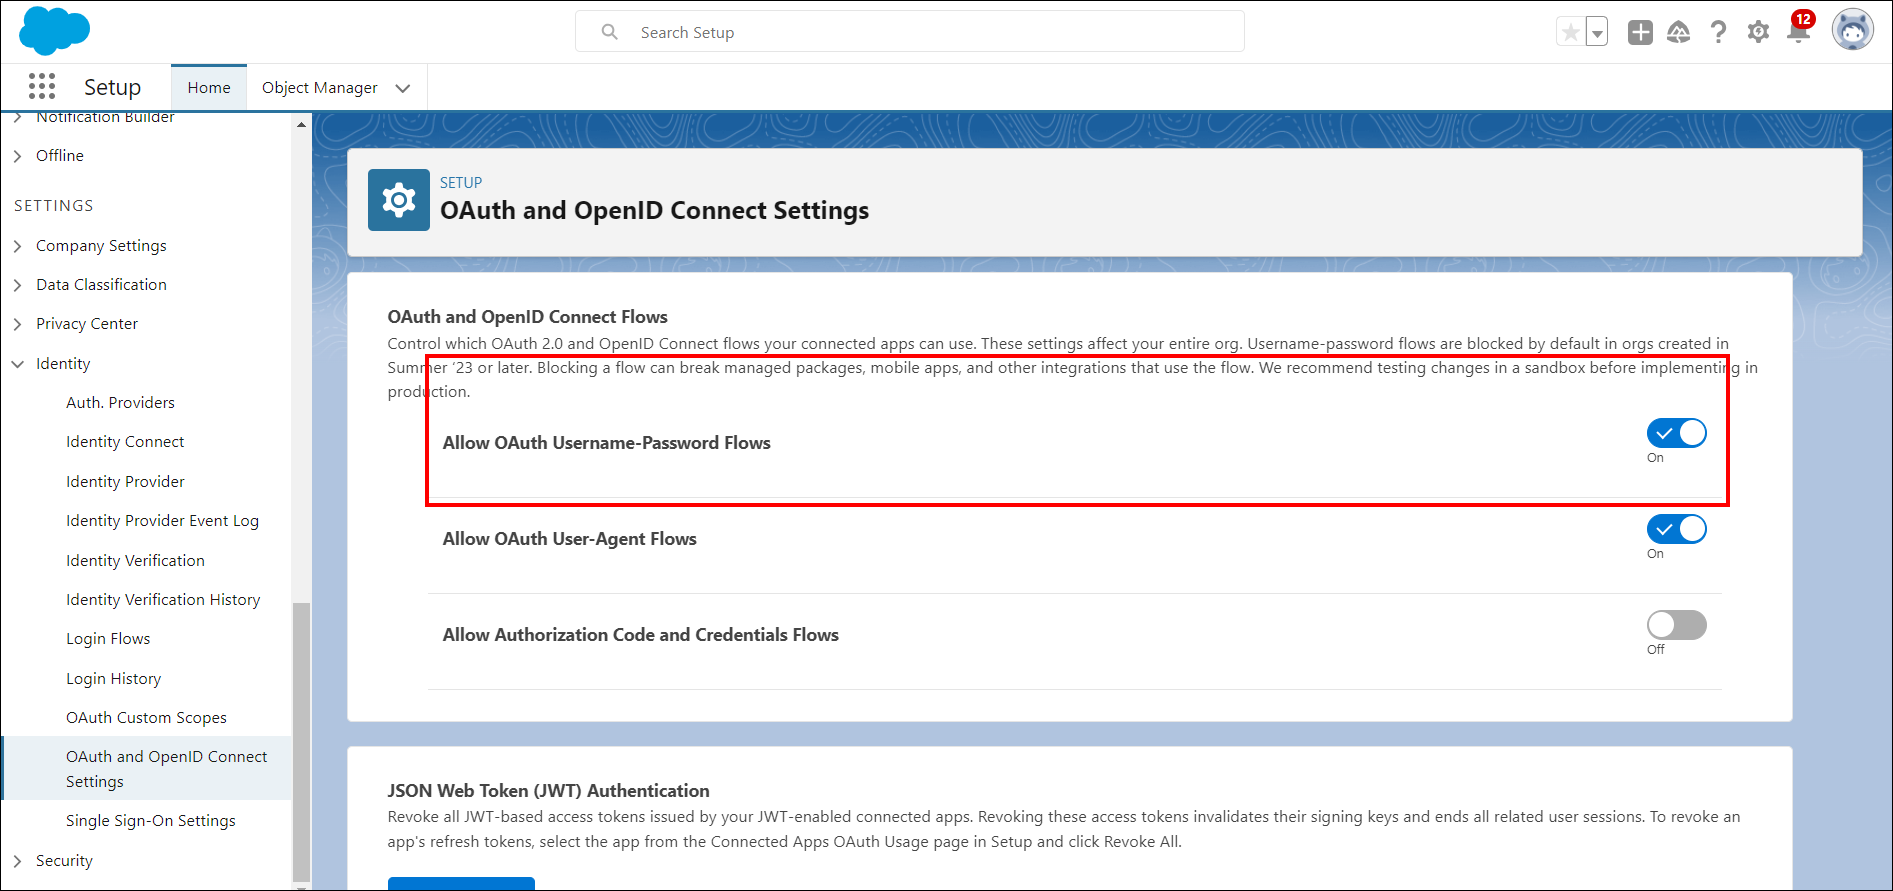
This step is required for the Sign in with values authentication method. In Setup sidebar under Settings section expand Identity menu. Go to OAuth and OpenID Connect Settings and enable 'Allow OAuth Username-Password Flows'.
You might need to wait around 10 minutes to let changes propagate through Salesforce systems.
Once the Connected App is ready, go to Get Consumer Key and Secret Key to retrieve the credentials for the connection form.
Use your own Connected App for Interactive sign-in
By default, Dataedo uses a predefined Connected App for Interactive sign-in. If you prefer to use your own, create a dedicated app and override the Client ID:
Salesforce now recommends External Client Apps instead of Connected Apps for new integrations. The steps below use External Client Apps.
Step 1. In Salesforce Setup, search for App Manager and click New External Client App
Step 2. Fill in Basic Information:
- External Client App Name:
Dataedo(or your preferred name) - Contact Email: your email
- Distribution State: select
Local
Step 3. Under Enable OAuth configure:
- Check Enable OAuth
- Callback URL:
http://localhost:5005/oauth2 - OAuth Scopes: Add
Manage user data via APIs (api)
Step 4. Click Create
Step 5. Copy the Client ID (Consumer Key)
Step 6. Add to ImportSettings.json:
{
  "SalesforceClientIdOverride": "<your-client-id>"
}
For more details, see Salesforce External Client App documentation.
Use custom My Domain
If your organization blocks login.salesforce.com and requires authentication through your custom domain (e.g., yourcompany.my.salesforce.com):
{
  "SalesforceCustomDomain": "yourcompany"
}

