Connecting to PostgreSQL database
PostgreSQL is one of the most advanced open-source relational databases. Dataedo provides a native connector to PostgreSQL with SSL support.
PostgreSQL SSL configuration
Generating certificates
Server configuration and generating SSL certificates for a server is described in official PostgreSQL documentation - Secure TCP/IP Connections with SSL section.
Following sections (Converting client certificate to PFX format and Add certificate to a trusted root authorities store) are both optional, and can be ignored if you authenticate with a password and not with the client certificate.
Converting client certificate to PFX format (optional)
Dataedo requires client certificate to have .PFX format (so that both certificate and private key are in the same file). If you have client certificate in formats such as PEM, CRT, CER or others, they won't be accepted by Dataedo. However, you can easily convert existing certificates into PFX certificate using the following OpenSSL command:
openssl pkcs12 -export -out client-cert.pfx -inkey private-key.key -in client-cert.crt
- openssl - command to execute OpenSSL,
- pkcs12 - file utility,
- -export -out client-cert.pfx - export and save the certificate as PFX client-cert.pfx file,
- -inkey private-key.key - the private key to be combined with certificate into PFX file,
- -in client-cert.crt - client certificate to be combined with private key into PFX file.
OpenSSL then asks you to provide a passphrase to protect the file. You can leave it empty, although we recommend setting a safe password, as having a certificate may allow anyone to connect to a database.
Add certificate to a trusted root authorities store (optional)
If your server uses a self-signed certificate or one that was issued by an organization not considered as trusted by Microsoft (you can find the full list in documentation) and you want to use Verify CA or Verify Full SSL mode (see more in Connection Details section), you need to add a CA certificate (this can be provided by a database administrator) to your trusted root certificates store.
To do this, run Microsoft Management Console as an administrator - type mmc in the start menu, right-click the icon, and choose Run as Administrator.
Then expand the Console Root, Certificates (Local Computer), and Trusted Root Authorities Store. Right-click on Certificates. Choose All Tasks > Import and select the CA file.

Importing Metadata in Dataedo Portal
Entry point
To start the Metadata Import flow, make sure you have the Connection Manager role.
Then navigate to:
Connections → Add new connection → PostgreSQL
This will open the import wizard described in the following steps.


Step 1. Host details
Provide the connection details such as host, port, and SSL mode.
You will also be asked to name the Connection.
A Connection in Dataedo represents a saved configuration for accessing a data source.
It can be reused for future imports and scheduling.

Step 2. Credentials
Choose credentials from the list of existing ones available for the selected connector, or add new credentials.

Step 3. Databases
- The Portal will display all databases accessible with the provided credentials.
- You can select multiple databases at once and use the search box to narrow down results.
- Each selected database should be given a Title, which will be visible in Dataedo.
- At this step, the Portal also retrieves the number of assets in each source.

Step 4. Objects to import
For each selected database, you can refine which objects to import:
- Select schemas and object types (tables, views, procedures, etc.).

- Use Advanced filters to include or exclude objects with:
- schema patterns
- name patterns


Step 5. Schedule
Configure scheduling options for each source individually:
- Define tasks you want to schedule (Metadata Import, Data Quality run, Refresh Profiling).
- Run daily, on selected weekdays, or on specific days of the month.
- Choose an exact time of execution.
- Task state:
Active– the task will run as scheduled.Draft– the task is saved but not executed until switched to Active.
- Run immediately – when checked, the task will also be executed right after clicking
Create connection.
Only one source in a metadata import can have Run immediately selected.


You must configure at least one import task in the schedule section.
If you skip this, an empty database will be created and no metadata will be imported.
Importing Metadata in Dataedo Desktop
Metadata import is also possible using Dataedo Desktop.
In this mode, you can only import one source at a time.
Add new connection
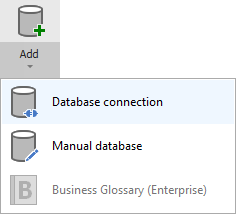
To connect to PostgreSQL database create new documentation by clicking Add documentation and choosing Database connection.
On the connection screen choose PostgreSQL as DBMS.
Connection details
Provide database connection details:
- Host - provide a host name or address where a database is on. E.g. server17, server17.ourdomain.com or 192.168.0.37.
- Port - change the default port of PostgreSQL instance if required.
- User and password - provide your username and password.
- SSL Mode - select the SSL Mode for connection:
- Prefer - Dataedo first will try to connect to a database with SSL support, and in case it didn't work it will try to establish a connection without SSL encryption.
- Disable - connection will be unencrypted.
- Require - only encrypted connection is possible.
- Verify CA - connection will be encrypted and Dataedo will verify if a server certificate was issued by a trusted authority.
- Verify Full - connection will be encrypted, Dataedo will verify if a server certificate was issued by a trusted authority and if all the information provided in the certificate are correct.
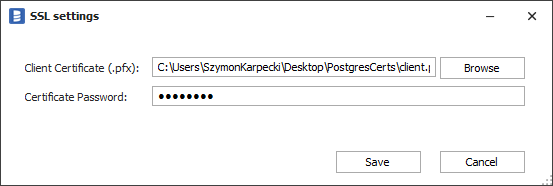
- Configure SSL - optional step if you want to authenticate with a client certificate.
- Database - type in database name or click [...] and choose it from the list.

To add a client certificate for a connection, click the Configure button and choose the certificate file. If your certificate is protected with a passphrase, provide it in the Certificate Password field. Otherwise, leave the field empty.
Saving password
You can save the password for later connections by checking the Save password option. Passwords are saved in the repository database.
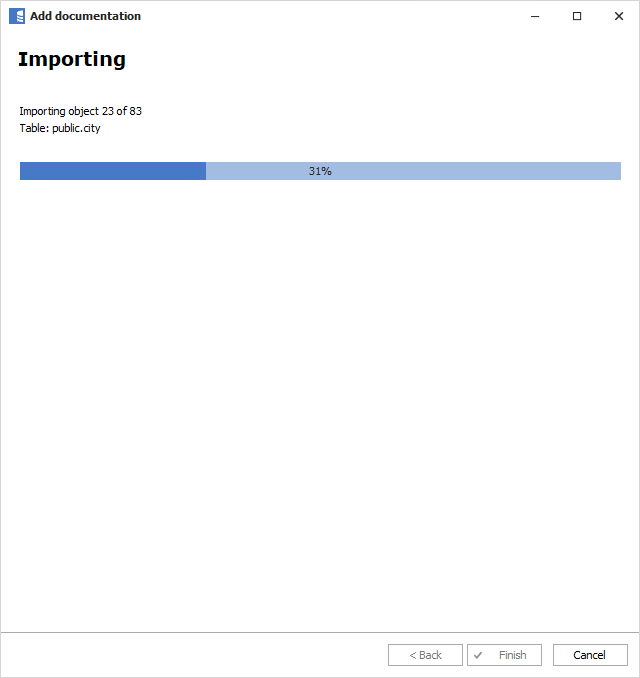
Importing schema
When the connection is successful, Dataedo will read objects and show a list of objects found. You can choose which objects to import. You can also use advanced filter to narrow down the list of objects.
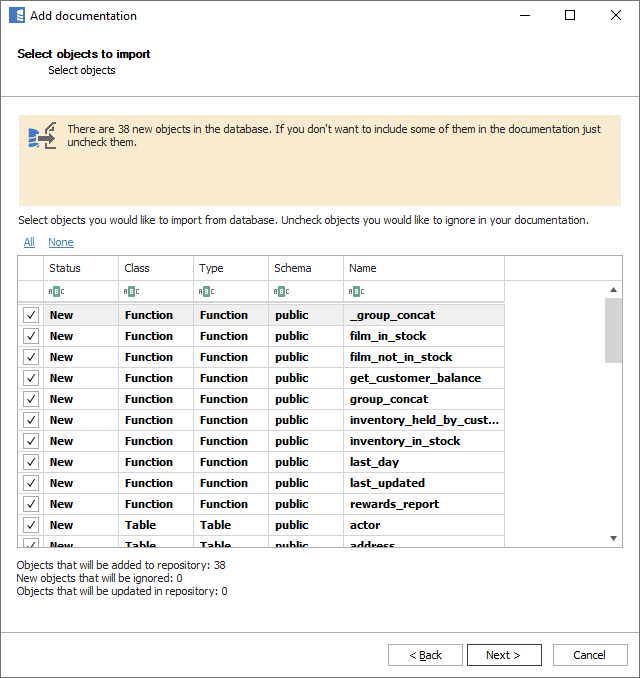
Confirm the list of objects to import by clicking Next.
The next screen will allow you to change the default name of the documentation under which your schema will be visible in the Dataedo repository.
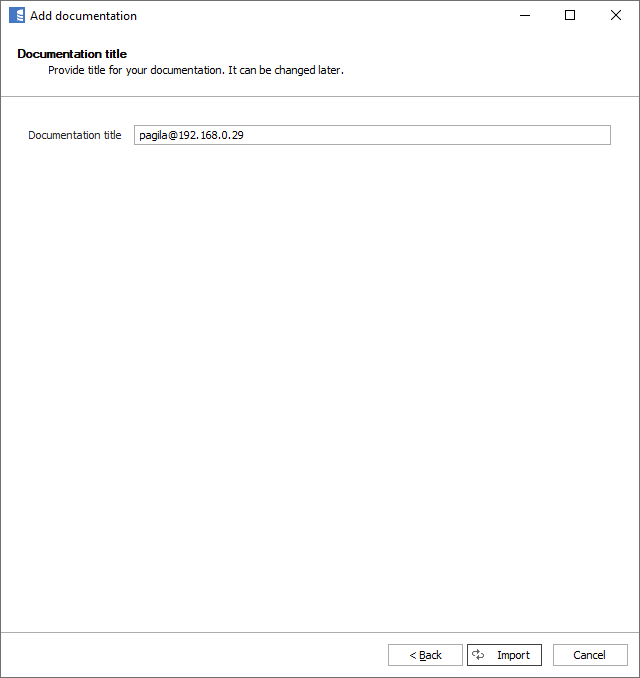
Click Import to start the import.
When done, close the import window with the Finish button.
Outcome
Your database schema has been imported to new documentation in the repository.
Required Permissions
Dataedo connects to PostgreSQL using a standard user account (username + password) and reads metadata from system catalogs. Different features require different levels of access:
- Metadata import (tables, views, procedures, columns, constraints, triggers, dependencies) — requires only access to system catalogs and
USAGEon target schemas - Data Profiling, Data Quality, and Classification — additionally requires
SELECTon user tables
Minimum privileges for metadata import
A standard PostgreSQL user can read the metadata that Dataedo needs without any additional grants on system catalogs — pg_catalog and information_schema are readable by all roles by default.
The minimum requirements for a metadata-only import are:
| Requirement | Grant statement | Purpose |
|---|---|---|
| Connect to the database | GRANT CONNECT ON DATABASE mydb TO dataedo_role; | Allows the role to connect (granted to PUBLIC by default) |
| Access target schemas | GRANT USAGE ON SCHEMA my_schema TO dataedo_role; | Allows Dataedo to see and access objects within the schema |
CONNECT on the database and USAGE on the pg_catalog and information_schema schemas are granted to PUBLIC by default in standard PostgreSQL installations. You only need to explicitly grant USAGE on user-created schemas that you want to document.
View and materialized view definitions
To import view definitions, Dataedo reads from pg_catalog.pg_views and pg_catalog.pg_matviews. These system views may restrict the definition column visibility based on the user's access to the underlying view. If view definitions appear as NULL, grant SELECT on the views in question to the Dataedo role.
Procedure and function definitions
Dataedo calls pg_get_functiondef(oid) to retrieve procedure and function source code. This built-in function is accessible to all roles, but it only returns definitions for functions the role can see. Ensure the Dataedo role has USAGE on the schemas containing the procedures/functions you want to document.
USAGE on a schema that contains functions also implicitly allows executing those functions (since EXECUTE is granted to PUBLIC by default for new functions). If this is a concern, revoke EXECUTE from PUBLIC on sensitive functions and grant it only to roles that need it. Dataedo does not execute user functions — it only reads their definitions.
Data Profiling, Data Quality, and Classification
Data Profiling, Data Quality rules, and automatic Data Classification execute SELECT queries directly against user tables and views to analyze their content (row counts, value distributions, sample data, DQ rule validation, column value sampling for classification).
SELECT on user tables is not required for metadata-only import.
-- Grant SELECT on all existing tables in a schema
GRANT SELECT ON ALL TABLES IN SCHEMA my_schema TO dataedo_role;

-- Grant SELECT on future tables (so new tables are automatically accessible)
ALTER DEFAULT PRIVILEGES IN SCHEMA my_schema
    GRANT SELECT ON TABLES TO dataedo_role;
Alternatively, on PostgreSQL 14+, you can use the predefined pg_read_all_data role:
GRANT pg_read_all_data TO dataedo_role;
This grants SELECT on all tables, views, and sequences across all schemas, plus USAGE on all schemas.
Dependencies
Dataedo imports view-to-object dependencies by querying pg_catalog.pg_depend and pg_catalog.pg_rewrite. These catalogs are readable by all roles by default. No additional grants are needed.
Data lineage
Dataedo derives data lineage by parsing SQL definitions of procedures, functions, and views that were already fetched during metadata import. No additional queries or permissions are required beyond those needed for metadata import.
Recommended setup script
The script below covers all features (metadata import, lineage, dependencies, profiling, data quality, classification). Remove sections you don't need, and repeat steps 3-4 for each schema you want to document.
-- 1. Create a dedicated role for Dataedo
CREATE ROLE dataedo_role WITH LOGIN PASSWORD 'your_secure_password';

-- 2. Grant connect to the target database
-- (Usually already available via PUBLIC, but explicit grant is safer)
GRANT CONNECT ON DATABASE mydb TO dataedo_role;

-- 3. Grant USAGE on schemas you want to document
GRANT USAGE ON SCHEMA public TO dataedo_role;
GRANT USAGE ON SCHEMA my_schema TO dataedo_role;
-- Repeat for each schema...

-- 4. (Optional) For Data Profiling, Data Quality, and Classification:
--    Grant SELECT on tables in each schema
GRANT SELECT ON ALL TABLES IN SCHEMA public TO dataedo_role;
GRANT SELECT ON ALL TABLES IN SCHEMA my_schema TO dataedo_role;
-- Repeat for each schema...

-- Grant SELECT on future tables automatically
ALTER DEFAULT PRIVILEGES IN SCHEMA public
    GRANT SELECT ON TABLES TO dataedo_role;
ALTER DEFAULT PRIVILEGES IN SCHEMA my_schema
    GRANT SELECT ON TABLES TO dataedo_role;
-- Repeat for each schema...

-- Alternative for PostgreSQL 14+: use pg_read_all_data instead of per-schema grants
-- GRANT pg_read_all_data TO dataedo_role;
Graceful degradation
Most metadata extraction steps are fault-tolerant. If the role lacks a specific privilege, the import continues and skips the affected feature:
| Feature | What happens without the required privilege |
|---|---|
CONNECT on database | Connection fails — import cannot start |
USAGE on a schema | Objects in that schema are not imported (other schemas still work) |
SELECT on user tables | Metadata import works normally; Data Profiling, Data Quality, and Classification features fail for the affected tables |
| View definitions not visible | Views are imported but their definition field is empty |
pg_get_functiondef returns NULL | Functions/procedures are imported but without source code |
Dependencies (pg_depend, pg_rewrite) not accessible | Dependencies are not imported; metadata import still completes |
Full reference: all PostgreSQL objects and functions accessed by Dataedo
System catalog tables queried
| Catalog object | Feature | Purpose |
|---|---|---|
pg_catalog.pg_database | Database listing | List available databases in connection wizard |
pg_catalog.pg_namespace | All metadata | Schema names and OIDs |
pg_catalog.pg_class | Tables, views, mat views, columns, constraints, triggers, dependencies, row count estimates | Object metadata, column-to-table mapping, index info |
pg_catalog.pg_proc | Procedures, functions, SQL queries, parameters | Function/procedure metadata |
pg_catalog.pg_language | Procedures, functions | Language of procedure (internal vs SQL/plpgsql) |
pg_catalog.pg_description | All objects | Object and column comments |
pg_catalog.pg_attribute | Columns, PK/FK tests | Column names, types, nullable, positions |
pg_catalog.pg_attrdef | Columns | Column default values and computed formulas |
pg_catalog.pg_index | Columns | Primary key indicator on columns |
pg_catalog.pg_type | Functions, SQL queries, parameters | Type resolution for parameters and return types |
pg_catalog.pg_constraint | Relations (FK), unique constraints (PK/UQ) | Foreign keys, primary keys, unique constraints |
pg_catalog.pg_trigger | Triggers | Trigger metadata (type, enabled, definition) |
pg_catalog.pg_views | Views | View definitions |
pg_catalog.pg_matviews | Materialized views | Materialized view definitions |
pg_catalog.pg_depend | Dependencies | Object dependency graph |
pg_catalog.pg_rewrite | Dependencies | Rewrite rules linking views to source objects |
information_schema views queried (PostgreSQL < 10 or < 11 only)
| Catalog object | Feature | Condition |
|---|---|---|
information_schema.table_constraints | Unique constraints (PK/UQ) | PostgreSQL < 10 |
information_schema.key_column_usage | Unique constraint columns | PostgreSQL < 10 |
information_schema.parameters | Procedure/function parameters; function RETURNS TABLE columns | PostgreSQL < 10 (parameters), < 11 (RETURNS TABLE) |
information_schema.routines | Procedure/function return types; function RETURNS TABLE columns | PostgreSQL < 10 (return types), < 11 (RETURNS TABLE) |
Built-in functions called
| Function | Feature | Purpose |
|---|---|---|
pg_get_functiondef(oid) | Procedures, functions, SQL queries | Retrieve function/procedure DDL source code |
pg_get_triggerdef(oid) | Triggers | Retrieve trigger definition DDL |
pg_get_expr(adbin, adrelid) | Columns (v12+) | Retrieve default value / computed column expressions |
format_type(typid, typmod) | Columns, parameters | Format data type name from internal OIDs |
version() | Connection | Get PostgreSQL server version string |
current_timestamp | Connection, sync | Get server date/time |
current_catalog / current_database() | All metadata | Get current database name |
SHOW commands
| Command | Feature | Purpose |
|---|---|---|
SHOW search_path | Default schema detection | Determine the default schema for the database |
PostgreSQL support
Learn more about PostgreSQL support in Dataedo.

