Connecting to Microsoft Fabric - Data Warehouse
Introduction
We recommend using metadata import in the Portal as the primary method of connecting your data sources.
The Portal offers significant advantages compared to the Desktop application:
- Import multiple sources in a single flow.
- Schedule recurring tasks (metadata import, profiling, and data quality checks).
- Manage connections centrally.
Import through Desktop is still available and allows importing one source at a time.
You can find the instructions at the bottom of this page.
Importing Metadata in Dataedo Portal
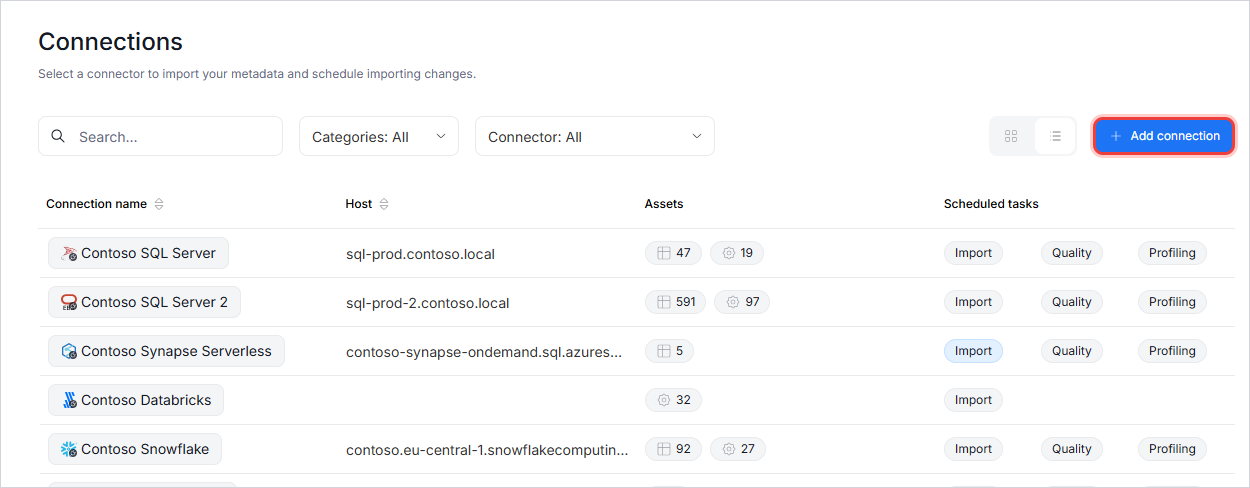
Entry point
To start the Metadata Import flow, make sure you have the Connection Manager role.
Then navigate to:
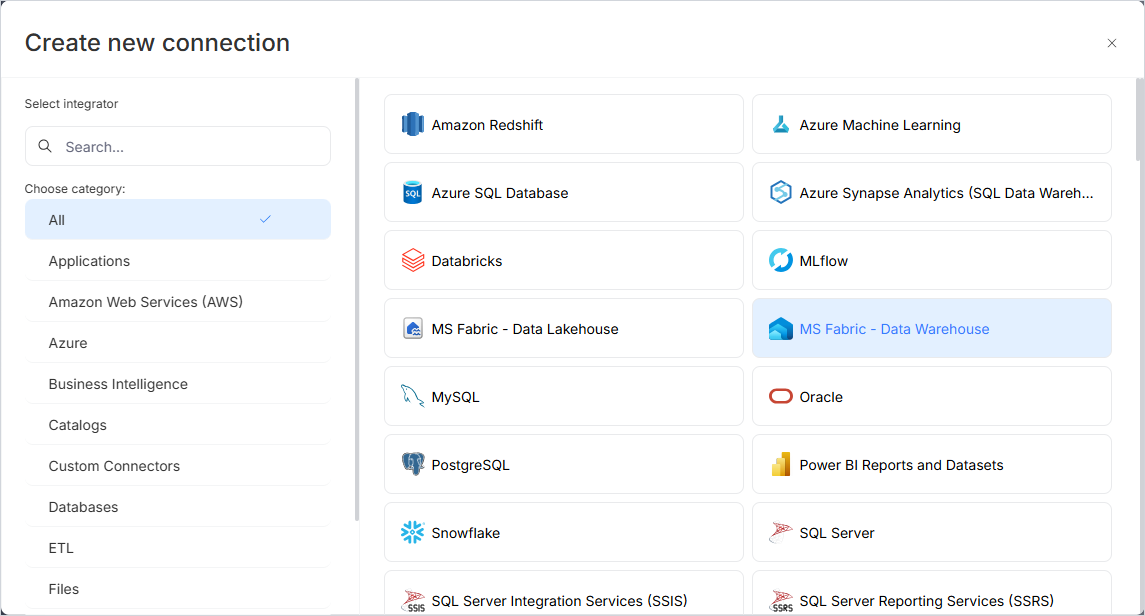
Connections -> Add new connection -> MS Fabric - Data Warehouse
This opens the import wizard described in the following steps.
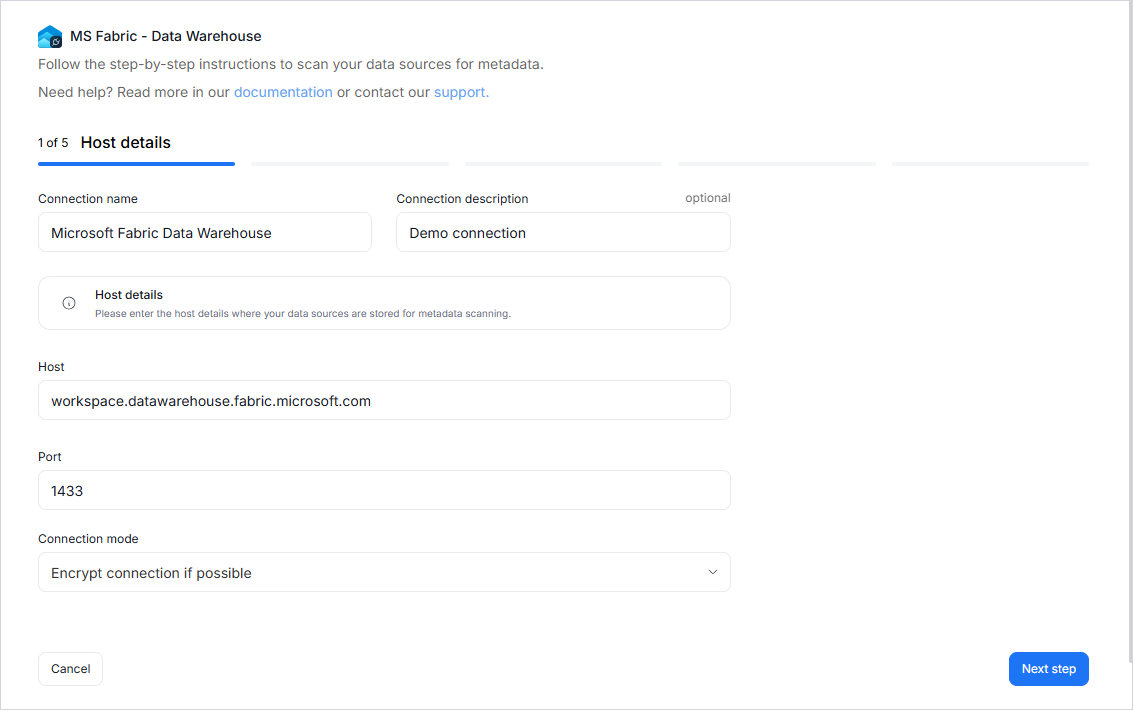
Step 1. Host details
Provide connection details such as host, port, and connection mode.
You will also be asked to name the Connection.
A Connection in Dataedo represents a saved configuration for accessing a data source.
It can be reused for future imports and scheduling.
If you need help finding the host value, see Finding server name.
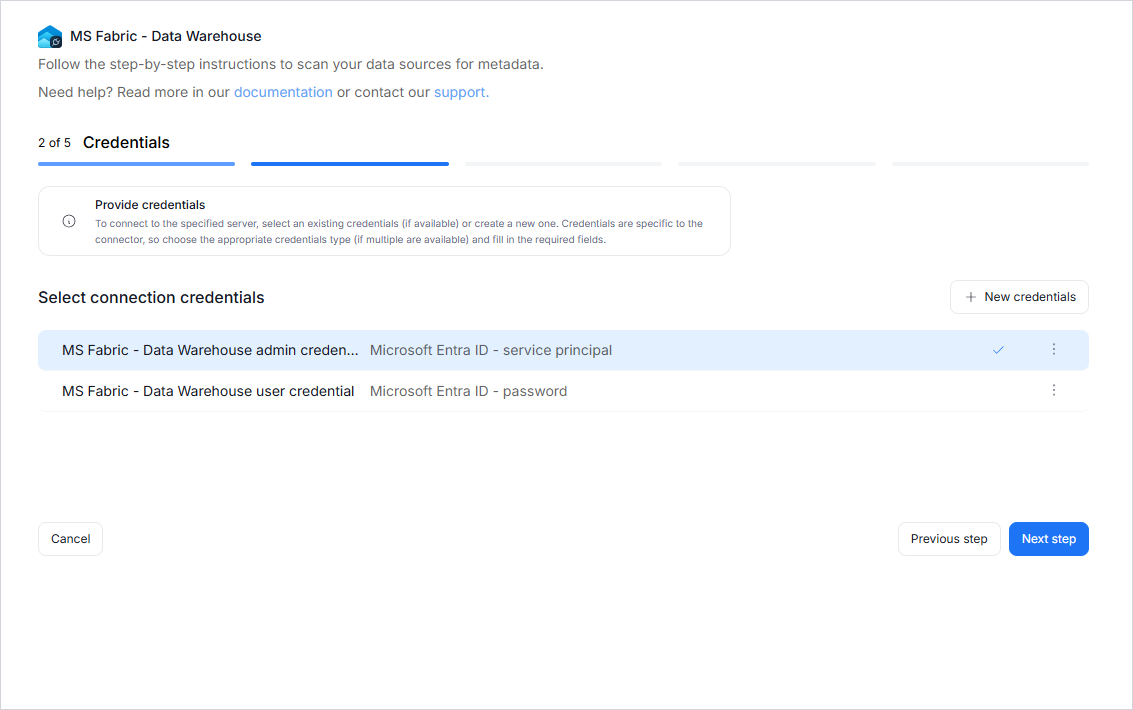
Step 2. Credentials
Choose credentials from the list of existing ones available for the selected connector, or add new credentials.
If you use Microsoft Entra ID - Service Principal credentials, see Connecting with Service Principal (Microsoft Entra ID) for configuration details.
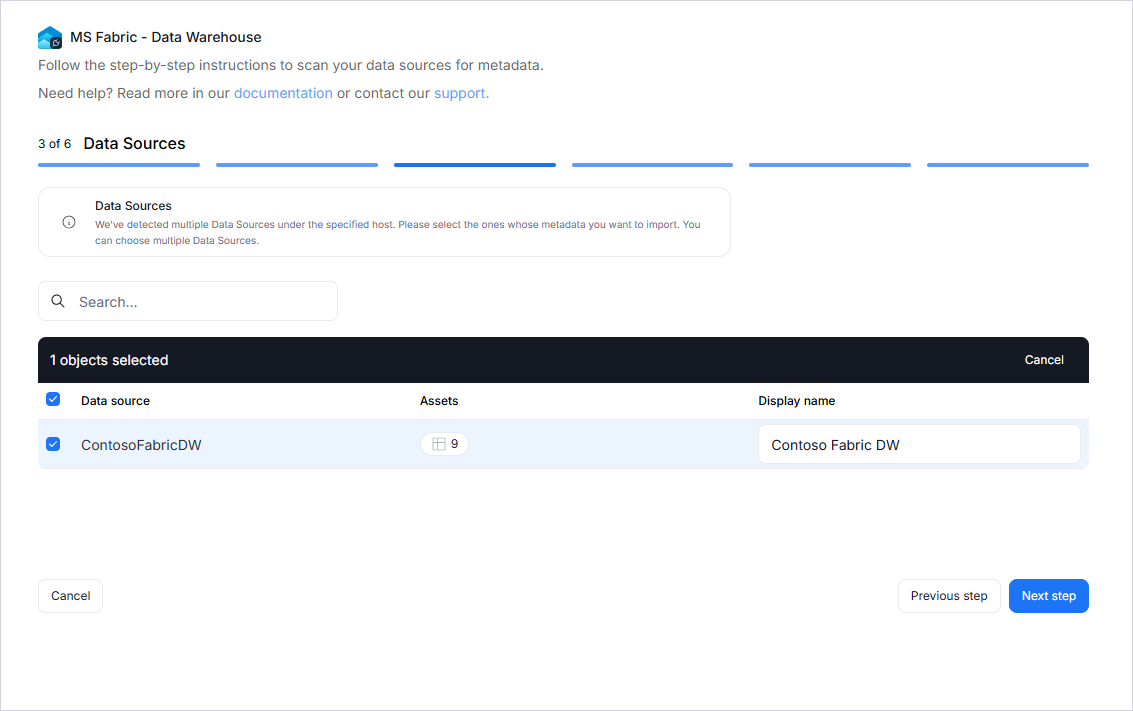
Step 3. Data Sources
- The Portal will display all data sources accessible with the provided credentials.
- For Fabric Warehouse, this means warehouses available under the provided host.
- You can select the source(s) to import and use the search box to narrow down results.
- Each selected source should be given a Title, which will be visible in Dataedo.
- At this step, the Portal also retrieves the number of assets in each source.
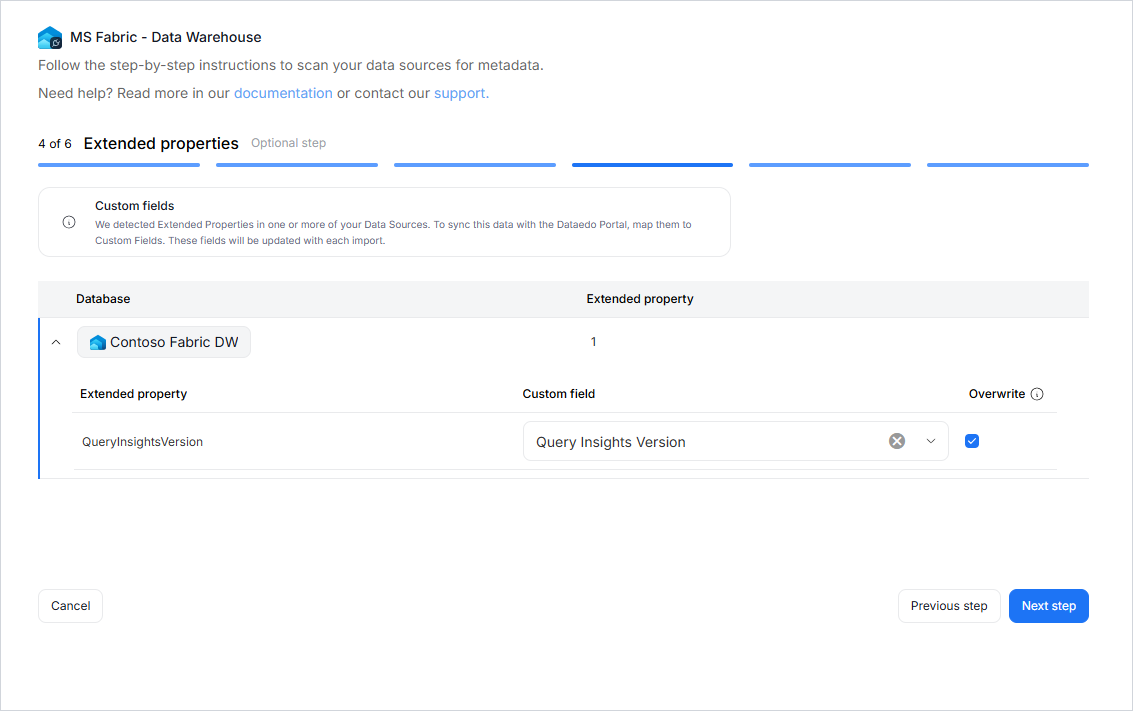
Step 4. Extended properties (optional)
This step appears only if the source exposes Extended Properties.
You can map them to Custom Fields in Dataedo, or skip this step entirely.
If skipped, no extended properties will be imported.
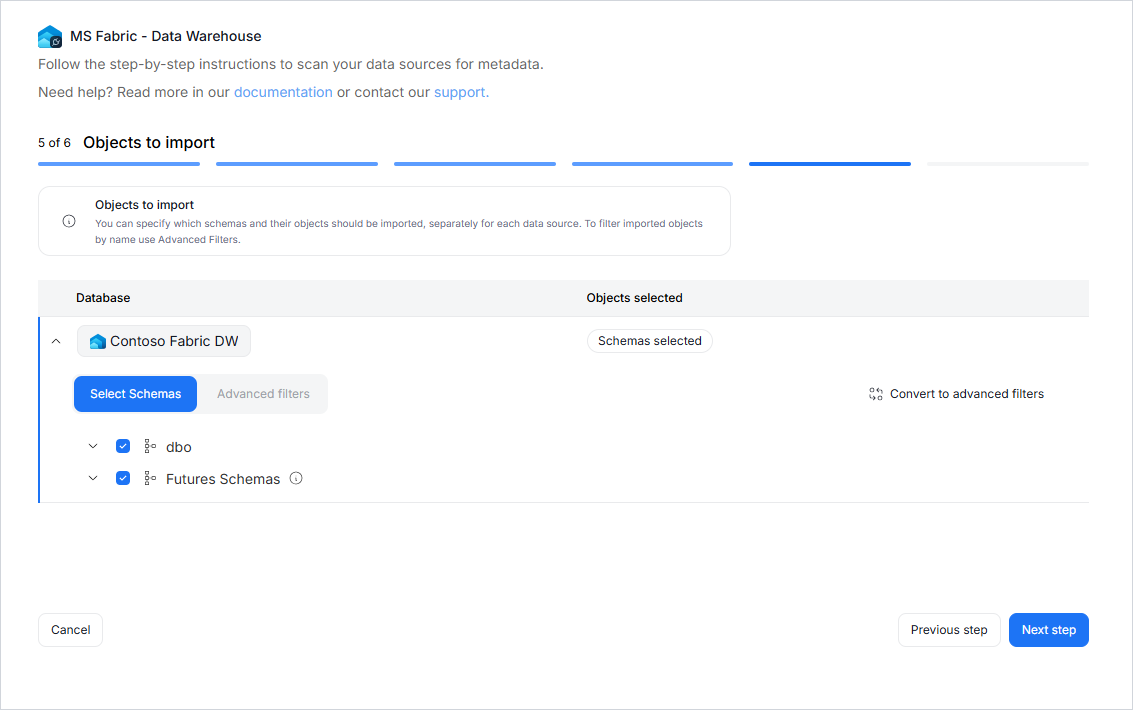
Step 5. Objects to import
For each selected source, you can refine which objects to import:
- Select schemas and object types (tables, views, procedures, functions, etc.).
- Use Advanced filters to include or exclude objects with:
- schema patterns
- name patterns
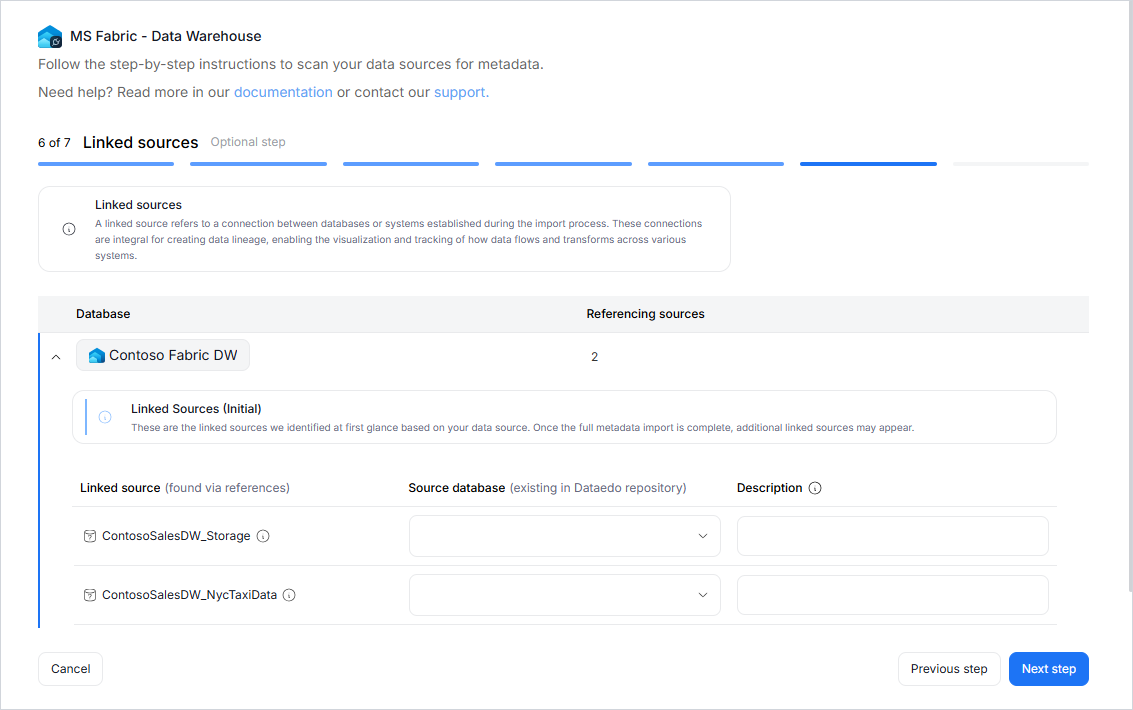
Step 6. Linked sources (optional)
A linked source refers to a connection between databases or systems established during the import process.
They are essential for data lineage, enabling visualization and tracking of how data flows and transforms across systems.
In this step, you can map linked sources to existing Dataedo sources. This mapping can also be updated later in the Connection details.
Step 7. Schedule
If no linked-source references are detected, this may still appear as Step 6 in the wizard.
Configure scheduling options for each source individually:
- Define tasks you want to schedule (Metadata Import, Data Quality run, Refresh Profiling).
- Run daily, on selected weekdays, or on specific days of the month.
- Choose an exact time of execution.
- Task state:
Active- the task will run as scheduled.Draft- the task is saved but not executed until switched to Active.
- Run immediately - when checked, the task will also be executed right after clicking
Create connection.
Only one source in a metadata import can have Run immediately selected.
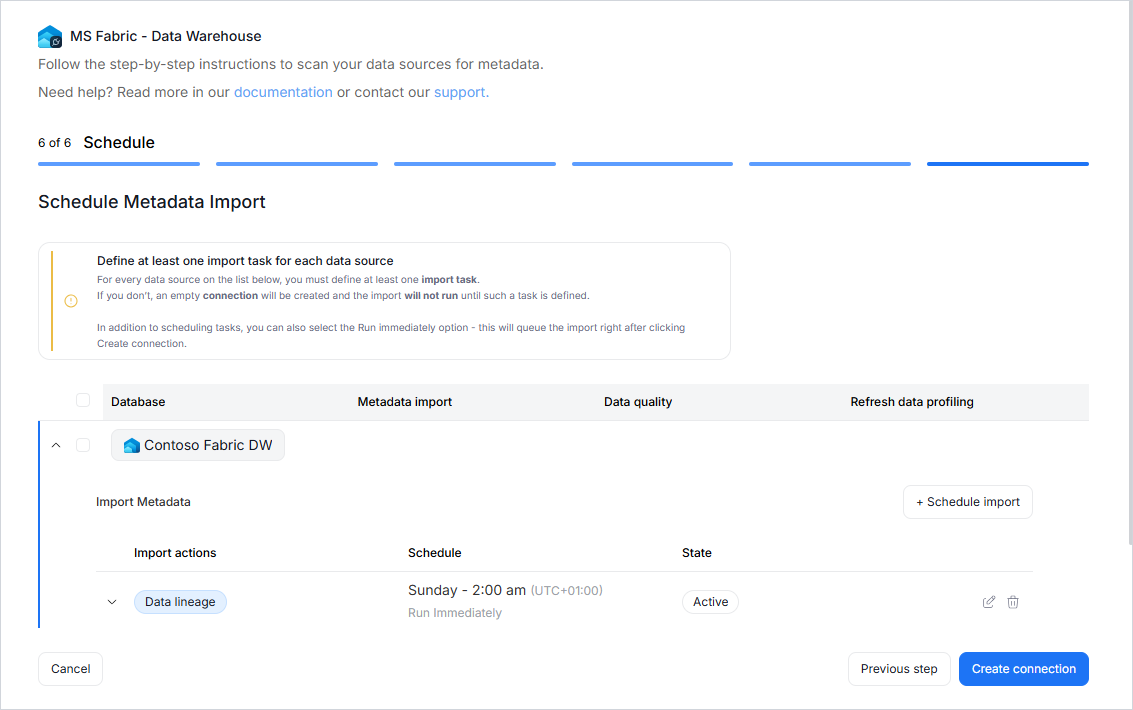
You must configure at least one import task in the schedule section.
If you skip this, an empty database will be created and no metadata will be imported.
Connecting with Service Principal (Microsoft Entra ID)
The Microsoft Entra ID - Service Principal authentication option for Microsoft Fabric Data Warehouse uses the standard Microsoft Entra ID service principal setup flow.
1. Create (or reuse) an App Registration in Azure
If you already have an Azure Application Registration prepared for Microsoft Fabric API access, you can reuse it. Otherwise, create one as described below.
Creating Azure Application Registration
To create an Azure Application Registration:
- Log in to the Azure Portal.
- In the search bar, search for App registrations and select it from the list.
- From the toolbar, on the App registrations page, click + New registration.
- On the Register page for Name, enter a name of your client application, select supported account types, and Redirect URI as Public client/native, with
http://localhostredirect URI.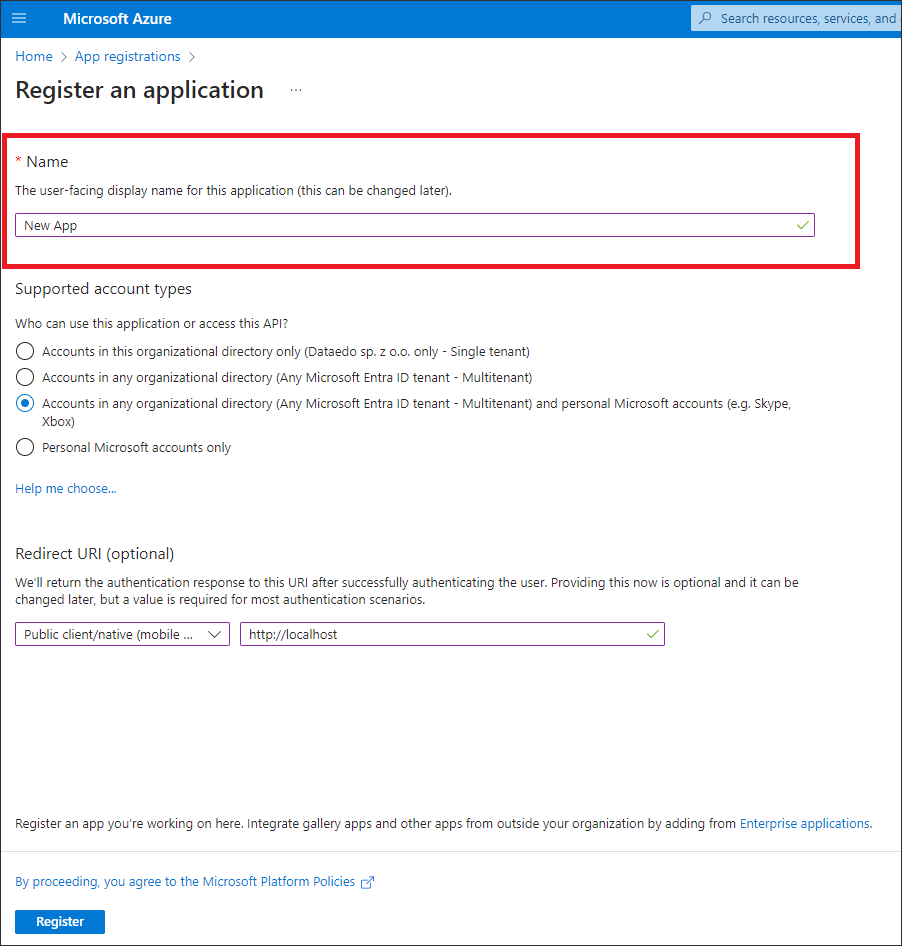
- Click Register.
- On the homepage of your created application, from the Overview screen, copy the values for the Application (client) ID field and Directory (tenant) ID.

- From the left menu of your created application registration page, click Certificates & secrets.
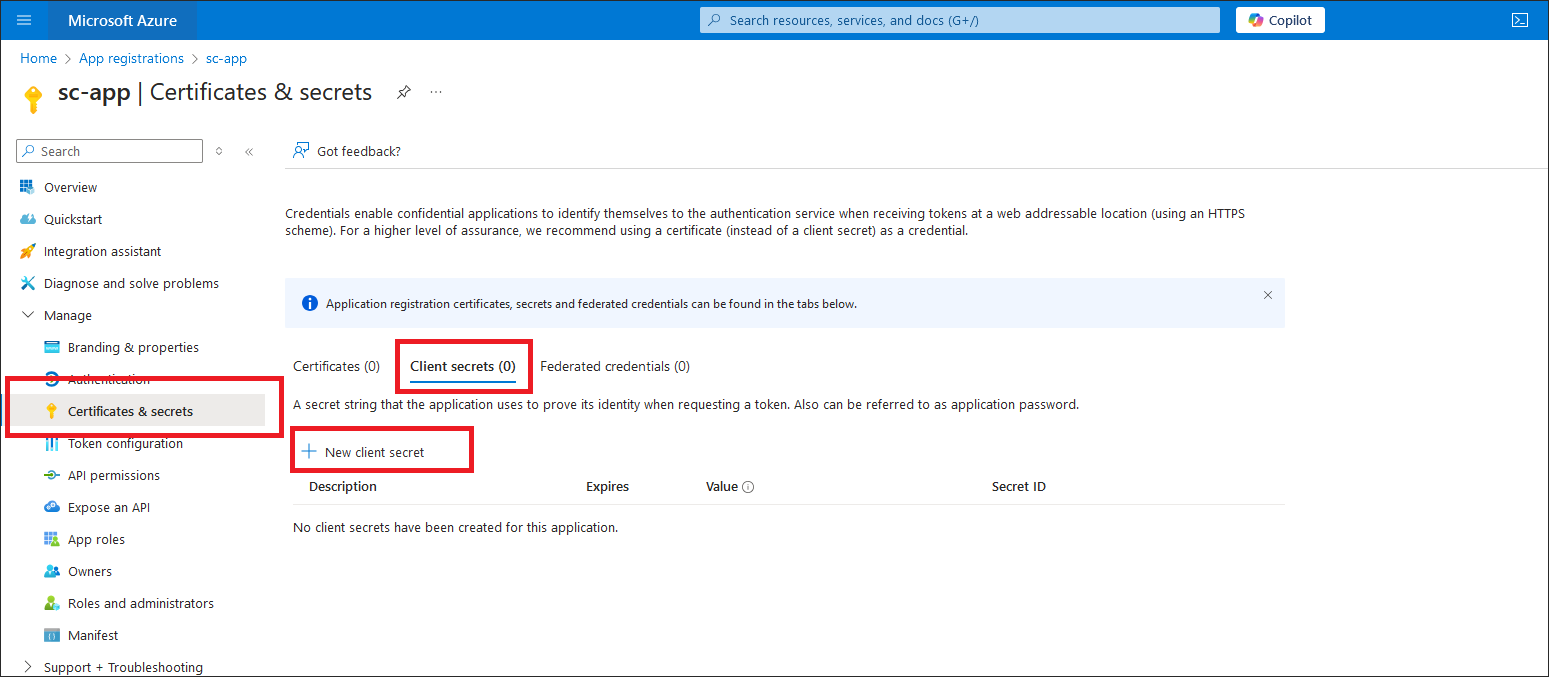
- On the Certificates & secrets page, under Client secrets, click + New client secret.

- In the Add client secret screen, enter the description, expiry and click Add.
- On the Certificates & secrets page, under Client secrets copy the secret value and store it securely for use in Dataedo.
You will use these values in Dataedo:
- User = Application (client) ID
- Password = Client secret value
2. Configure Fabric permissions for the Service Principal
Configure workspace access for the Service Principal:
- Create a Security Group in Microsoft Entra ID and add the Service Principal (created from the App Registration) to that group.
- Add that Security Group (or the Service Principal directly, if applicable in your tenant) to the target Microsoft Fabric workspace.
- Assign the Viewer workspace role.
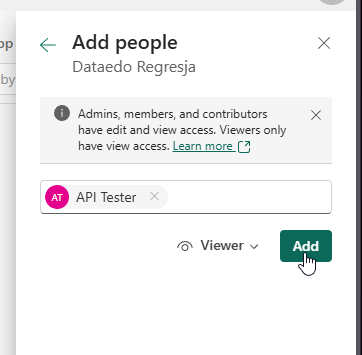
Open the target workspace and use Manage access:
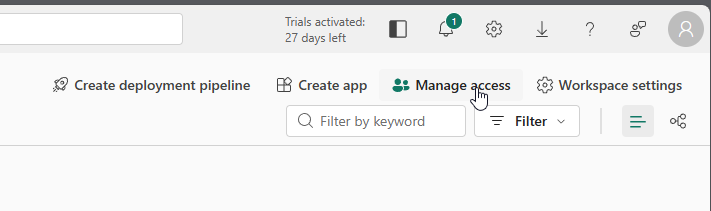
Then add the Security Group / Service Principal and assign the Viewer role:
3. Use the Service Principal in Dataedo
In Dataedo Desktop (and in Portal credentials), configure authentication as follows:
- Authentication:
Microsoft Entra ID - Service Principal - User: Application (client) ID
- Password: Client secret value
If the connection fails, verify the App Registration and confirm the Service Principal (or its Security Group) has Viewer access to the target workspace.
Importing Metadata in Dataedo Desktop
Metadata import is also possible using Dataedo Desktop.
In this mode, you can only import one source at a time.
Add new connection
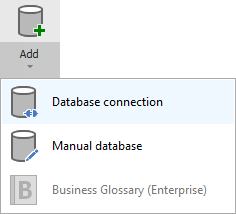
To connect to a Microsoft Fabric Data Warehouse instance, create new documentation by clicking Add and choosing Database connection.
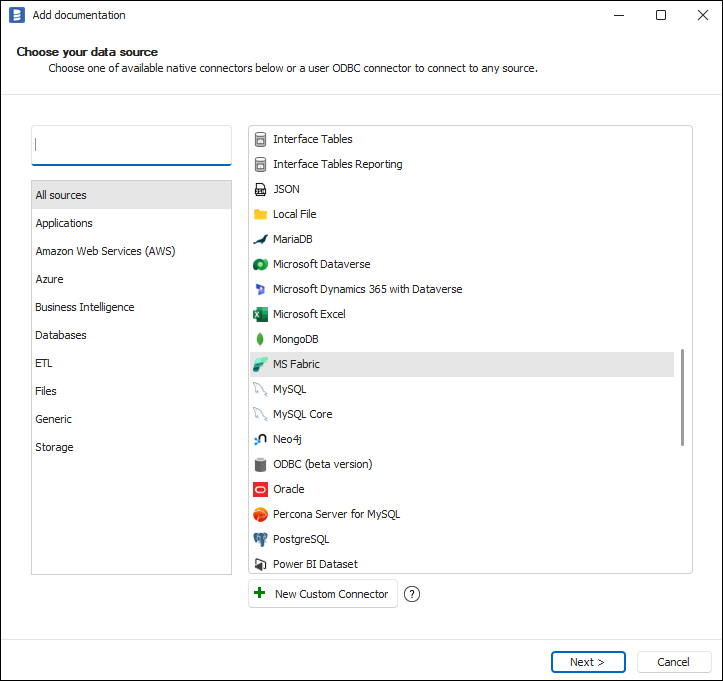
On the connection screen, choose MS Fabric.
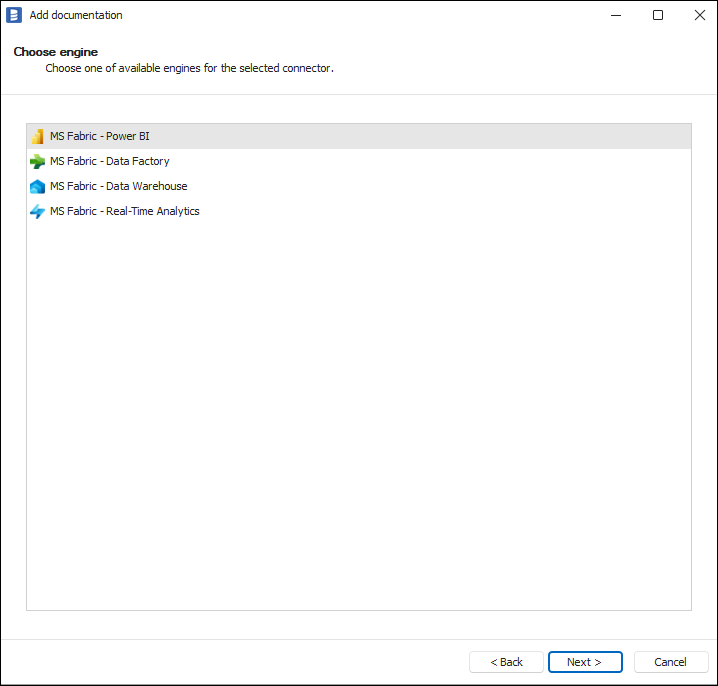
Then pick MS Fabric - Data Warehouse.
Connection details
Provide connection details:
- Server name - Name of the server you would like to connect to (if you do not know where to find it, see Finding server name)
- Port - Port of the service
- Authentication - Way of authentication to be used when connecting:
- Windows Authentication - Uses the currently logged-in Windows user
- SQL Server Authentication - Requires SQL login:
- User
- Password
- Microsoft Entra ID - Password - Requires:
- User (Microsoft Entra username)
- Password
- Microsoft Entra ID - Integrated - Uses the Microsoft Entra account currently logged in to Windows
- Microsoft Entra ID - Service Principal - Authentication using Service Principal (configuration details: Connecting with Service Principal (Microsoft Entra ID))
- Microsoft Entra ID - Universal with MFA - Authentication through an external Microsoft Entra service; you can optionally provide a username
- Connection mode - Select the way you want to encrypt data
- Database - Name of the Microsoft Fabric Data Warehouse database
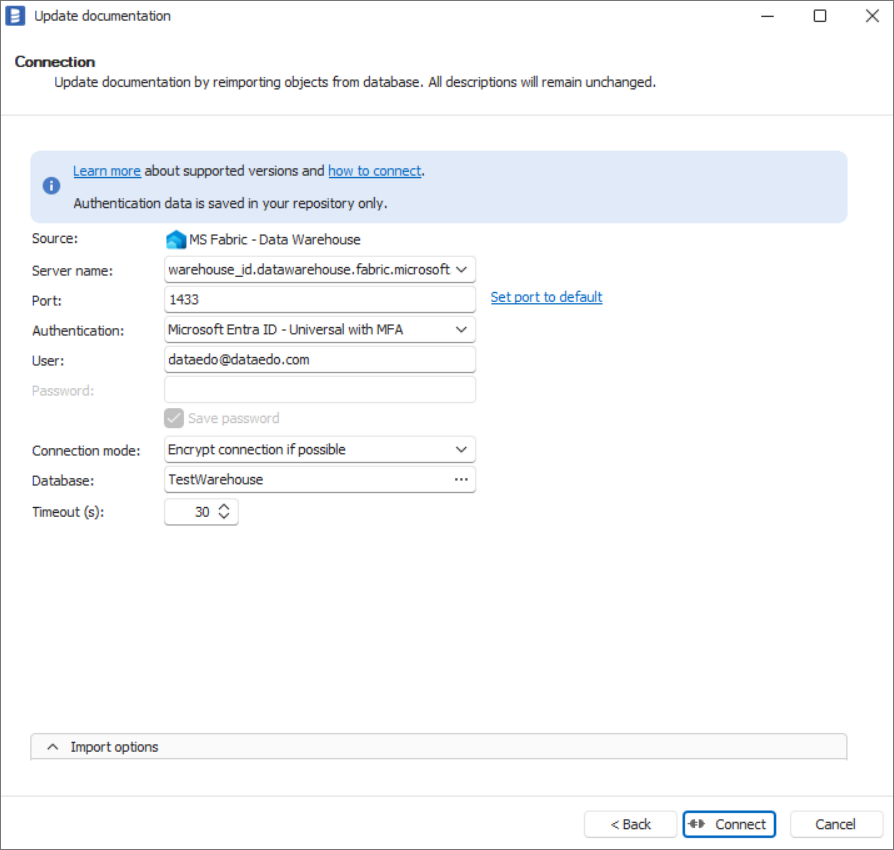
Saving password
You can save the password for later connections by checking the Save password option. Passwords are securely stored in the repository database.
Importing schema
After providing required connection parameters, click Connect to load workspaces by letting Dataedo connect to your Microsoft Fabric instance.
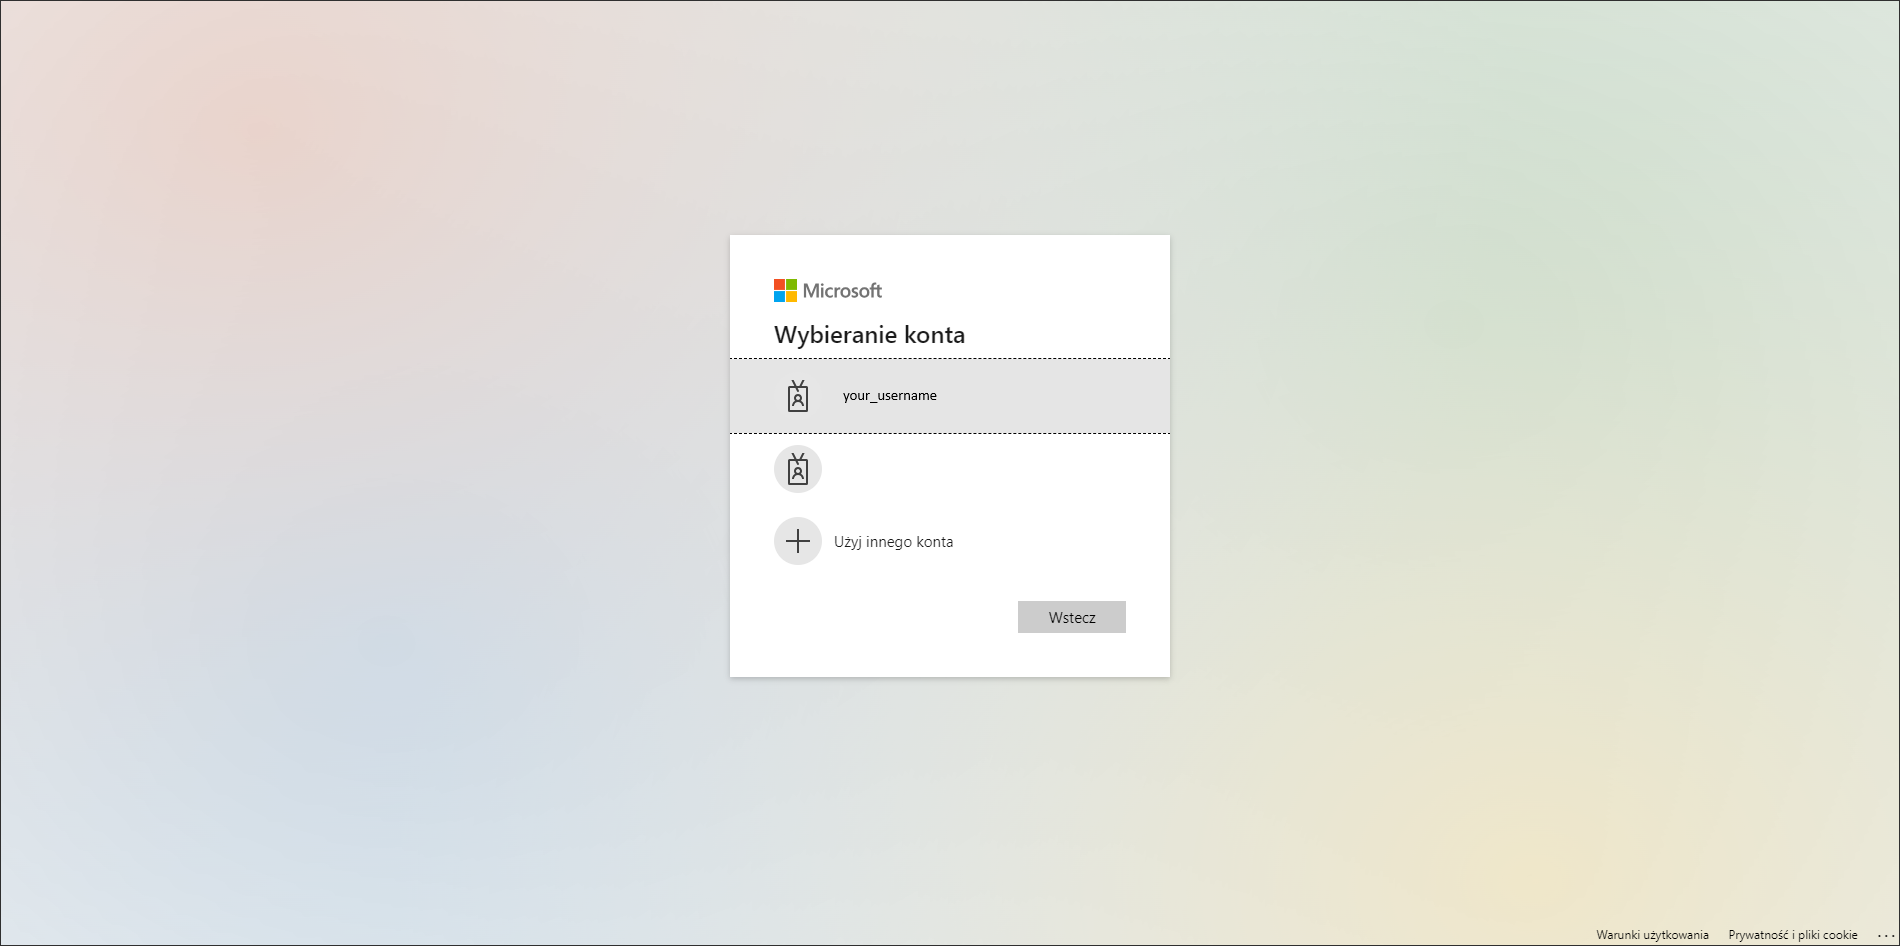
If you choose Microsoft Entra ID - Universal with MFA, select the account on the Microsoft authentication screen that appears:
If this is your first use of Dataedo, you also need to accept the license agreement and grant required permissions.
When the connection is successful, Dataedo will read objects and show a list of schemas found. You can choose which schemas and object types to import and also use an advanced filters.
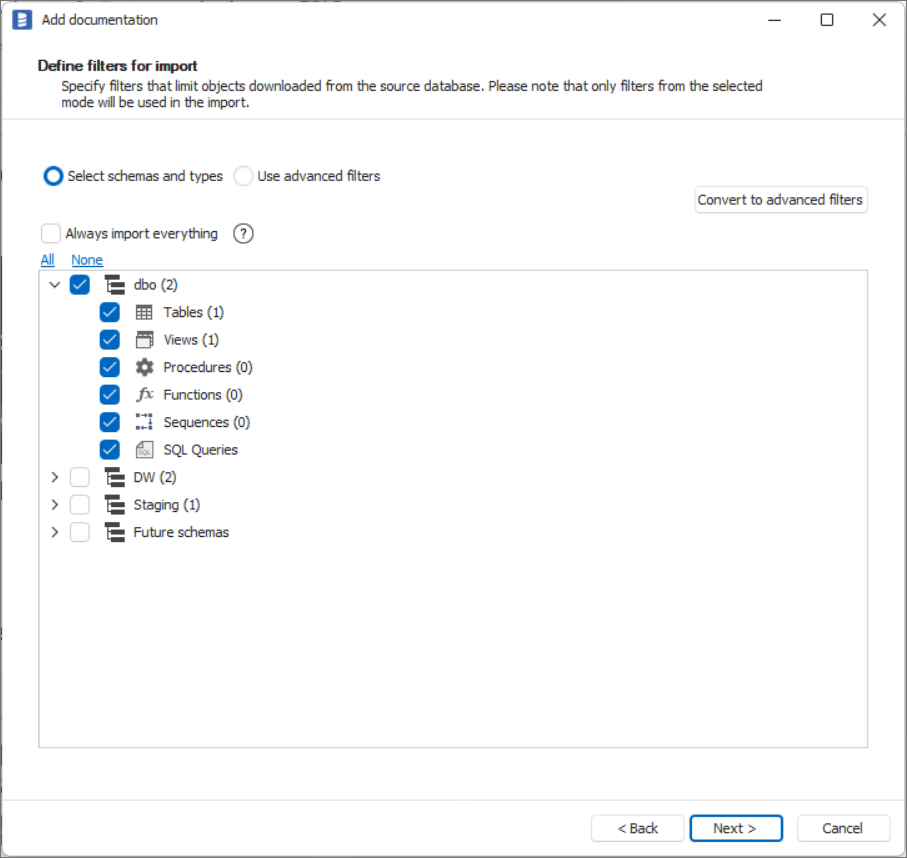
Confirm the list of objects to import by clicking Next.
The next screen allows you to change the default name of the documentation under which your schema will be visible in the Dataedo repository.
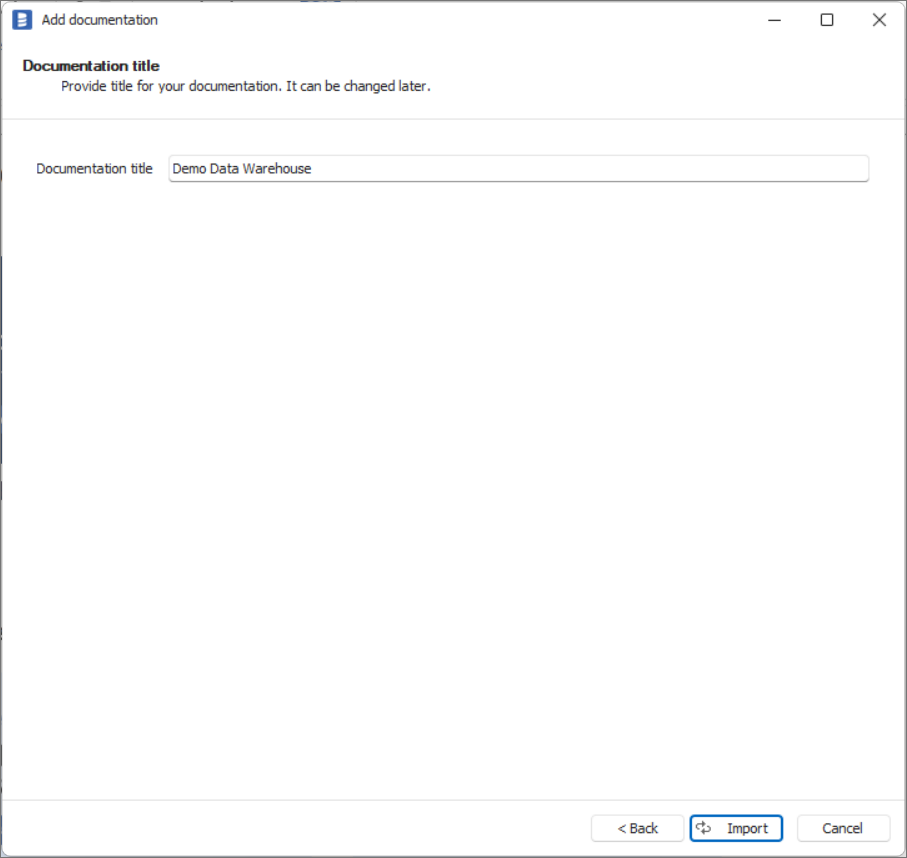
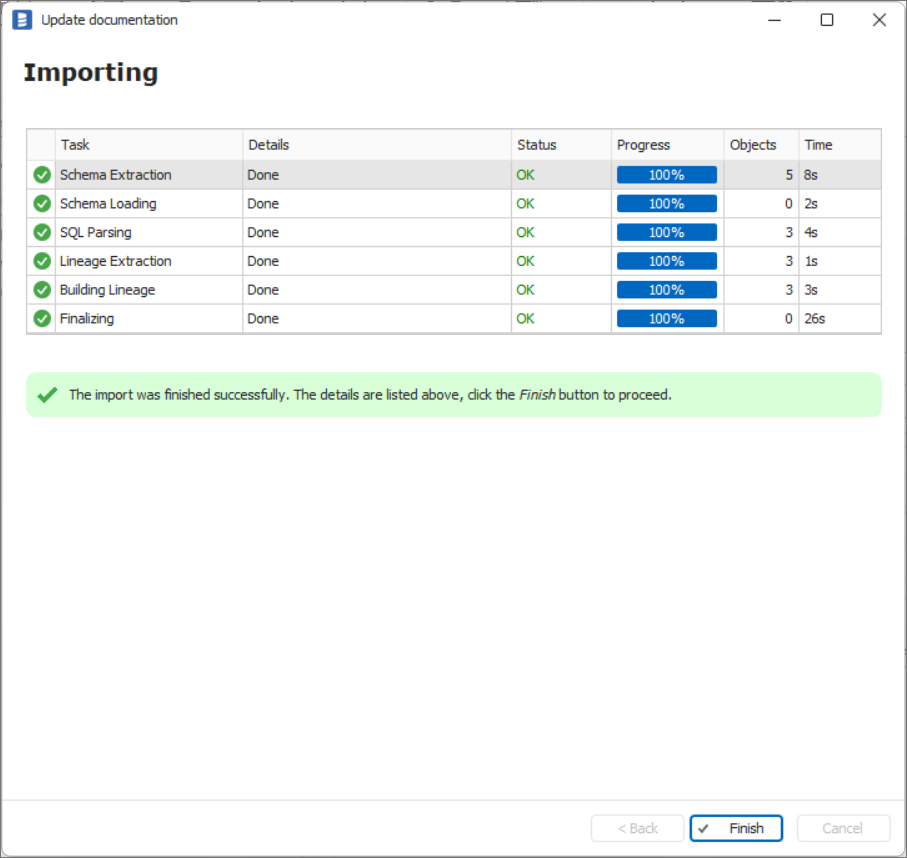
Click Import to start the import.
When done, close the import window with the Finish button.
Importing changes
To sync changes in the schema and reimport technical metadata, choose Import changes. You will be asked to connect to Microsoft Fabric - Data Warehouse again, and changes will be synced from the source.
Scheduling imports
You can also schedule metadata updates using command-line files. After creating documentation, use Save update command. The downloaded file can be run in the command line to reimport changes.
Microsoft Fabric support
Learn more about Microsoft Fabric support:

