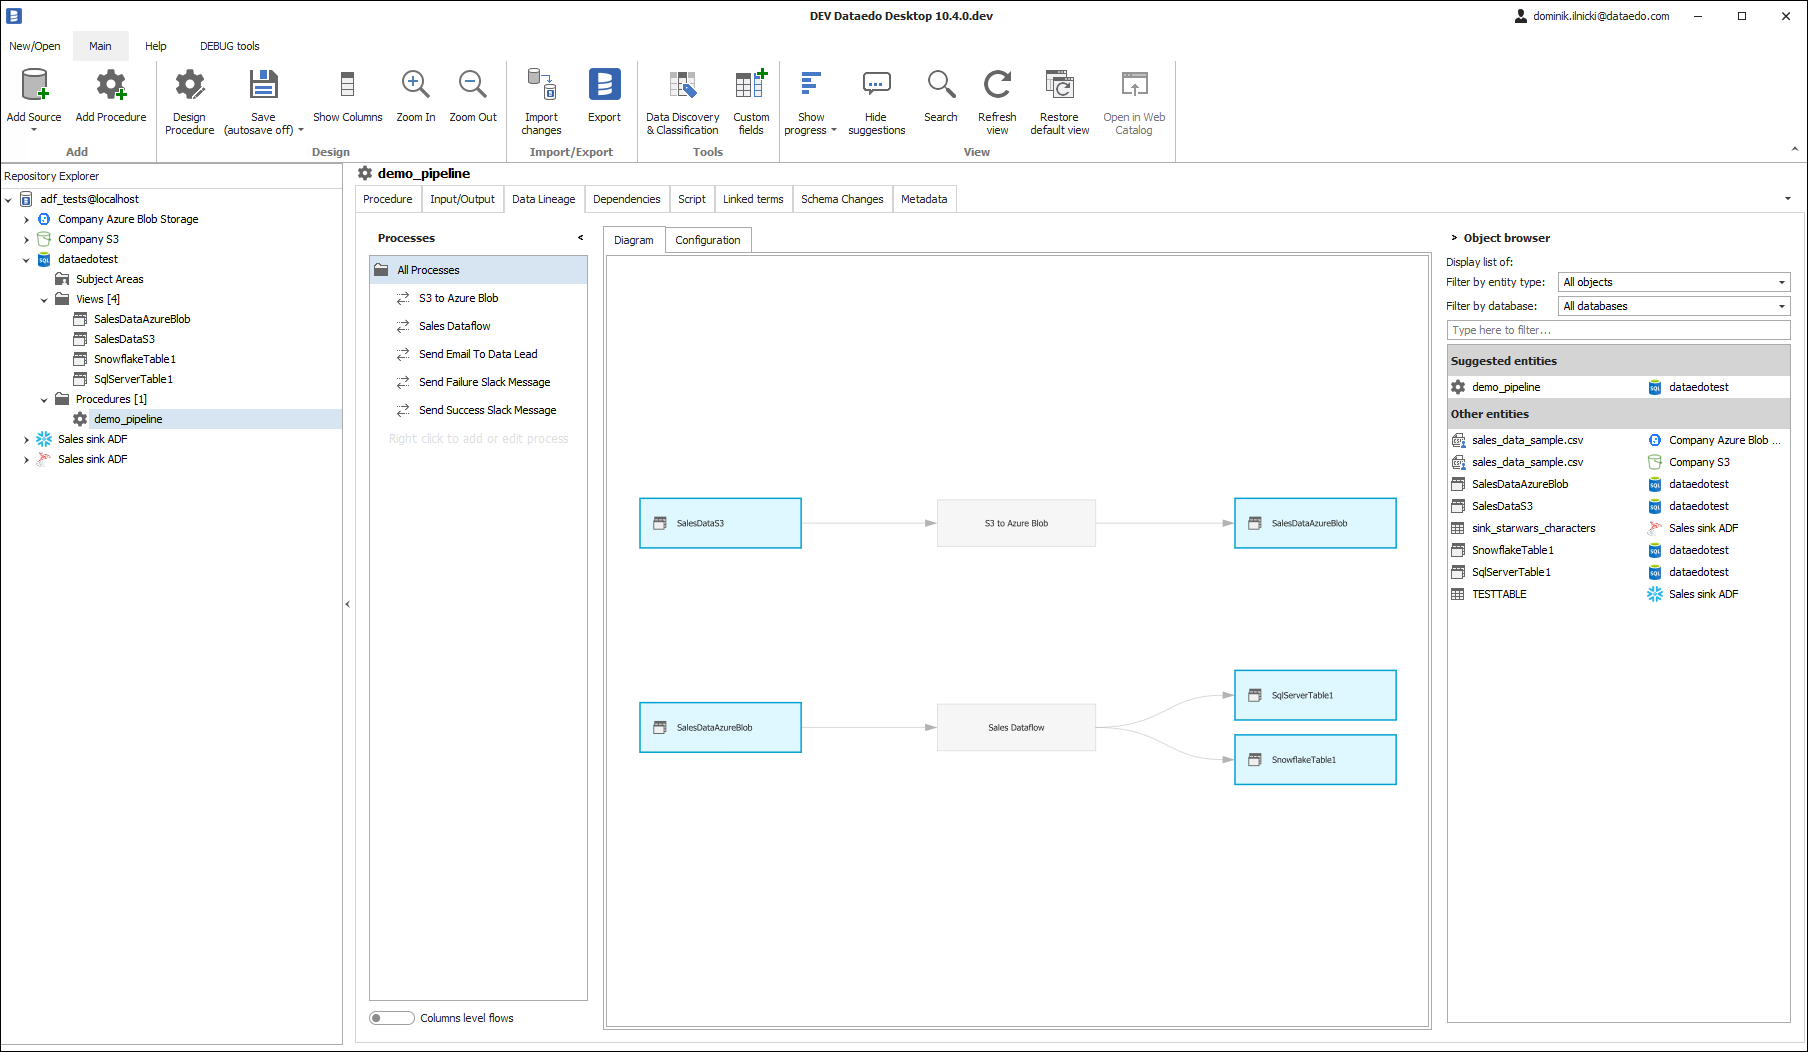
Connecting to Azure Data Factory and setting up authentication
There are two methods to authenticate. The first method is Service Principal, which uses a client secret from Azure Application Registration and does not require user interaction during import. The second method is Interactive mode, which requires user interaction each time a data source is imported. Because of this, import tasks using Interactive mode cannot be scheduled in Dataedo Scheduler.
When using the Interactive authentication type without Advanced authentication settings, the only prerequisite is that the user you are connecting with has the appropriate permissions. However, when using the Service Principal authentication type or the Interactive authentication type with Advanced authentication settings, you must first have an Azure Application Registration created.
Permissions - all authentication types
The user must have at least Reader access to the factory they want to document (Microsoft.DataFactory/factories/read).
Additionally, to list resource groups and factories in the connection window, the user must belong to the Data Factory Contributor role at the Resource Group level or above. If the user does not have this role, they must provide the resource group and factory name manually instead of picking from the list.
Interactive authentication type
In this authentication workflow, we are using user impersonation against Azure Application Registration. In default mode, we are using Dataedo’s Application Registration, but when clicking Advanced authentication settings, it is possible to provide connection details for your own Azure Application Registration.
Required permissions
The user must have Data Factory Contributor role.
Interactive authentication using default settings
To use interactive authentication, Authentication Type dropdown should be selected to Interactive and Advanced authentication settings checkbox should be unchecked.
- Power BI
- SharePoint Lists
- Azure Data Factory
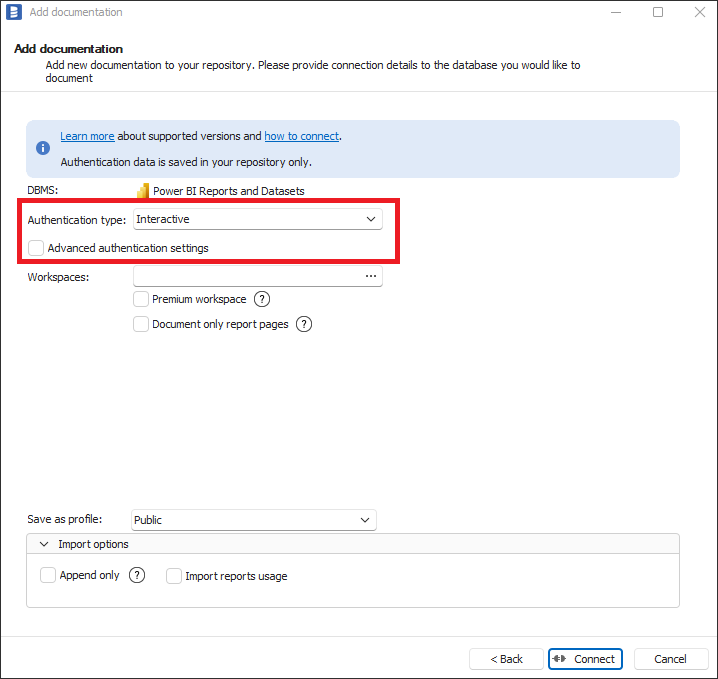
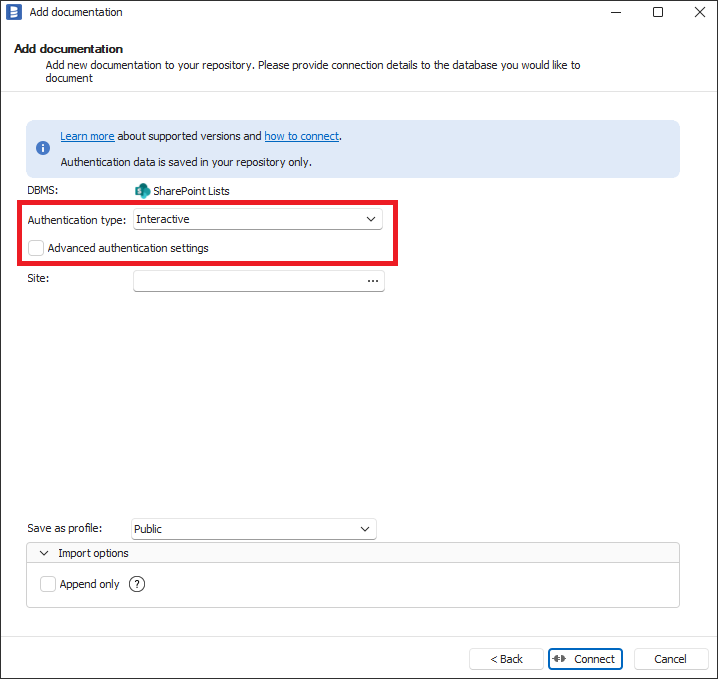
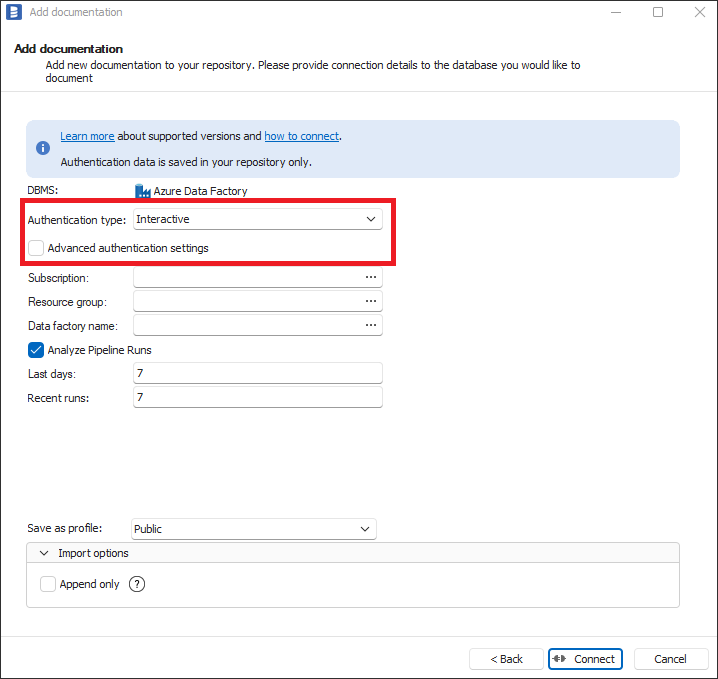
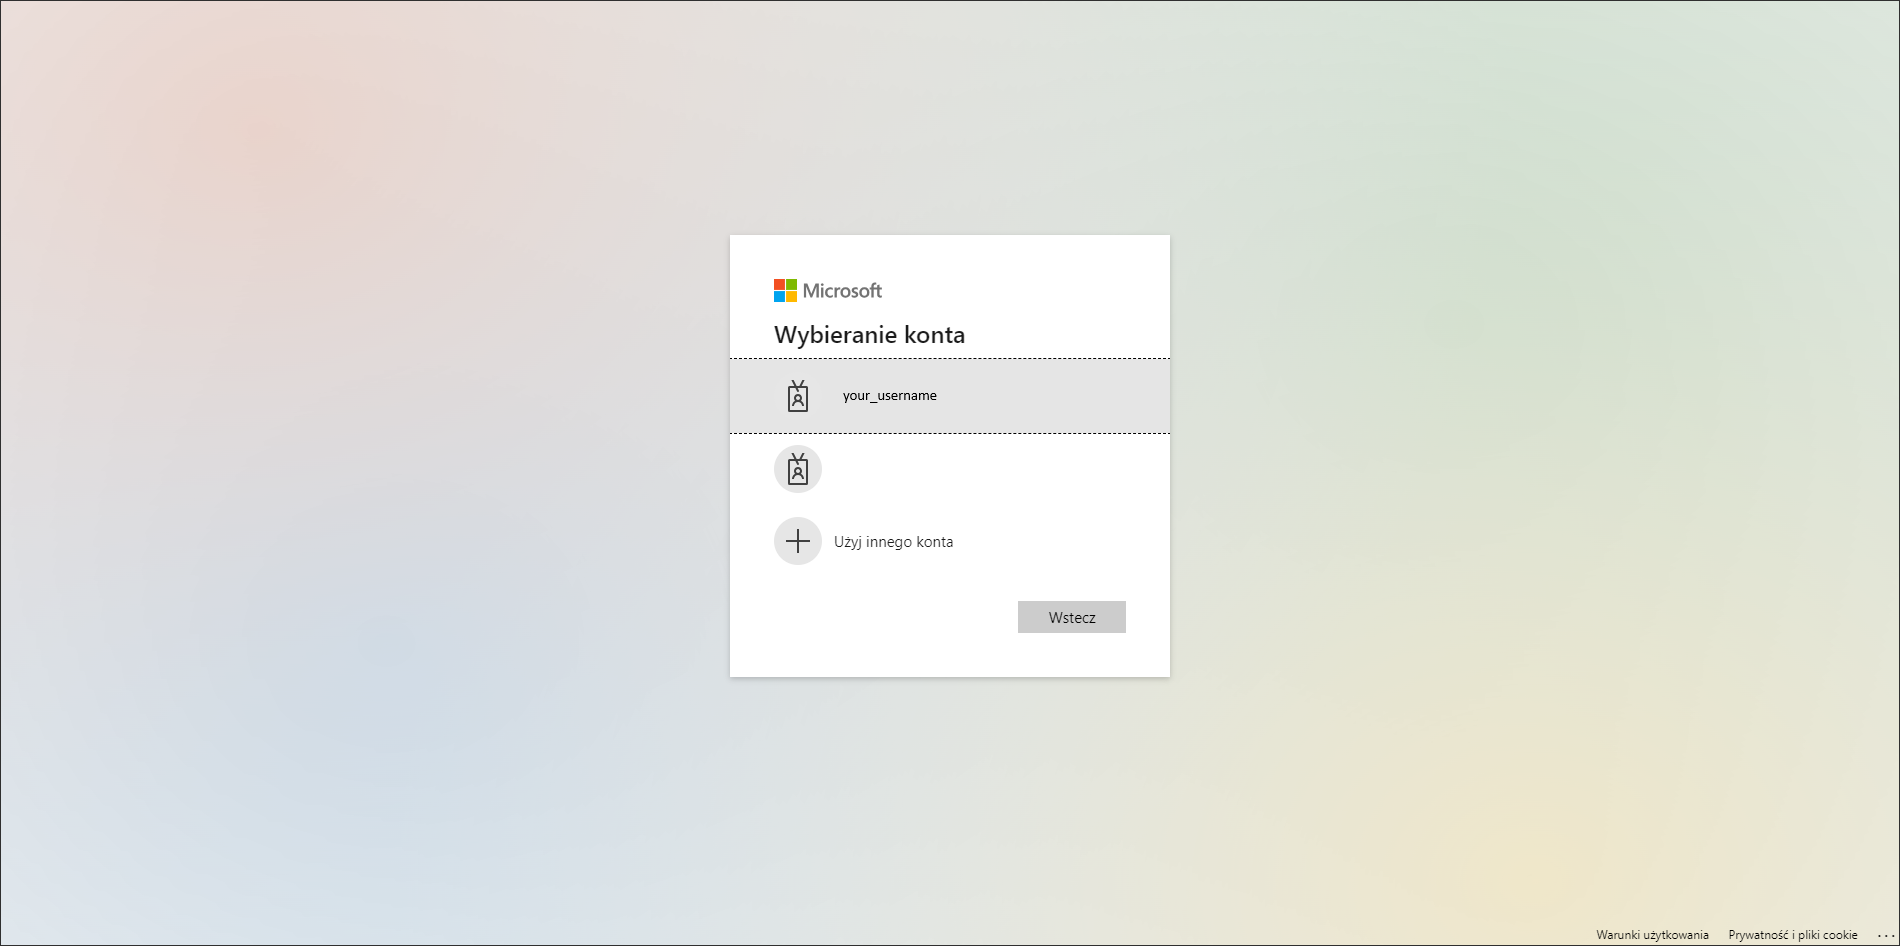
When you click Connect or select some details (Subscription/Resource Group/Factory), your default browser will be opened with Microsoft login screen. After successful login, you can close the browser and start import. In some cases, for the first time use there will be Azure Administrator consent required and there will be Administrator action needed as explained in Adding Azure Administrator consent to Azure Application Registration section below.
Interactive authentication using advanced authentication settings
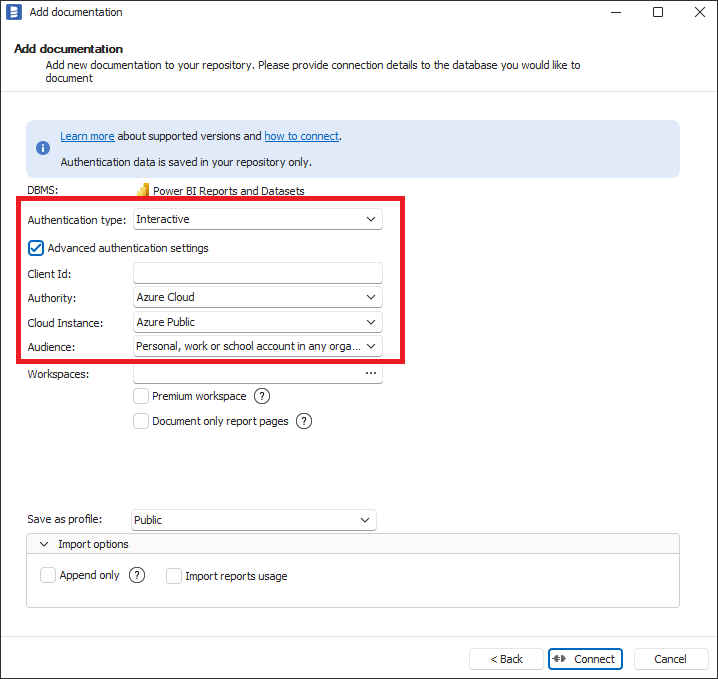
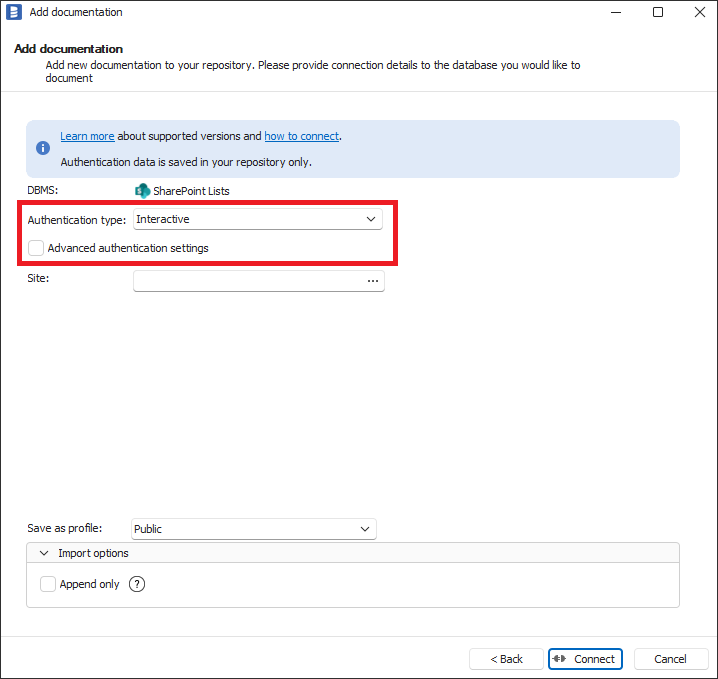
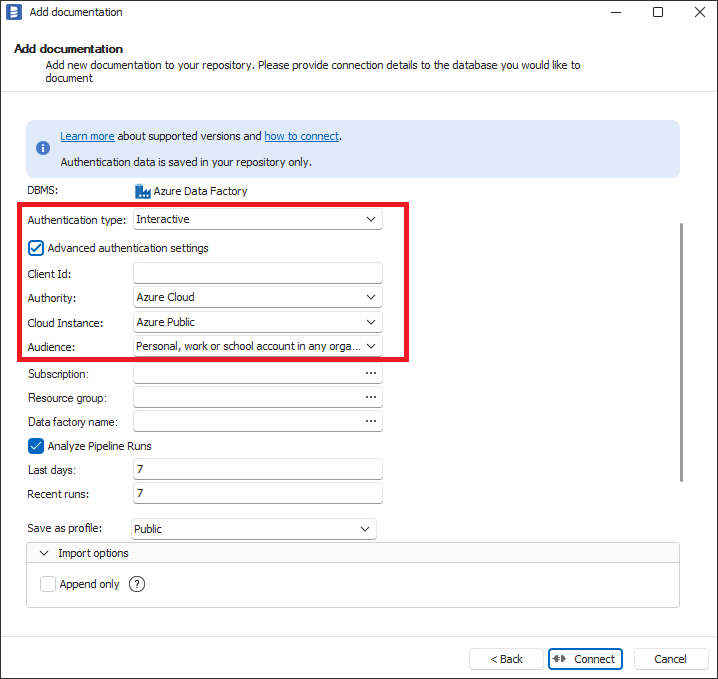
To use interactive authentication using advanced authentication settings. Authentication Type dropdown should be selected to Interactive and Advanced authentication settings checkbox should be checked. Then please enter your Application Registration Client Id to Client Id textbox. How to create Azure Application Registration and where is Application Registration Client Id is explained in Creating Azure Application Registration section below. When you are using not default settings in Application Registration or Azure Cloud Instance other than Azure Public please select proper values in Authority, Cloud Instance and Audience fields.
- Power BI
- SharePoint Lists
- Azure Data Factory
Creating Azure Application Registration
To create an Azure Application Registration:
- Log in to the Azure Portal.
- In the search bar, search for App registrations and select it from the list.
- From the toolbar, on the App registrations page, click + New registration.
- On the Register page for Name, enter a name of your client application, select supported account types, and Redirect URI as Public client/native, with http://localhost redirect URI.
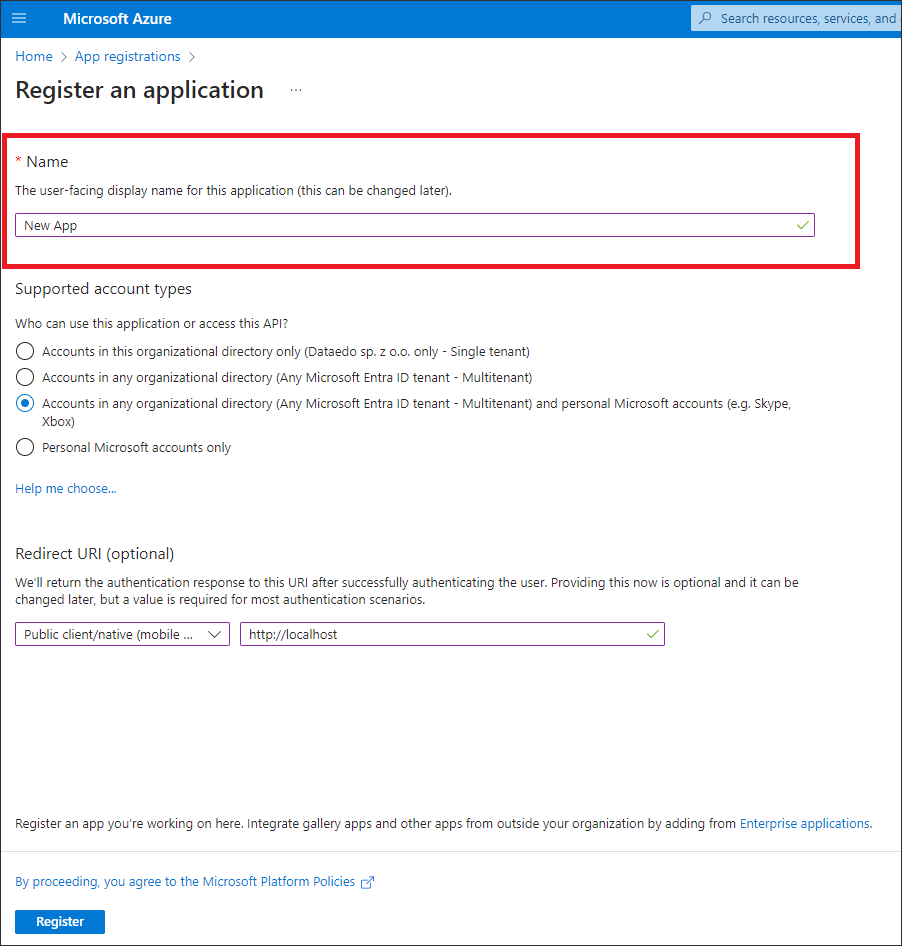
- Click Register.
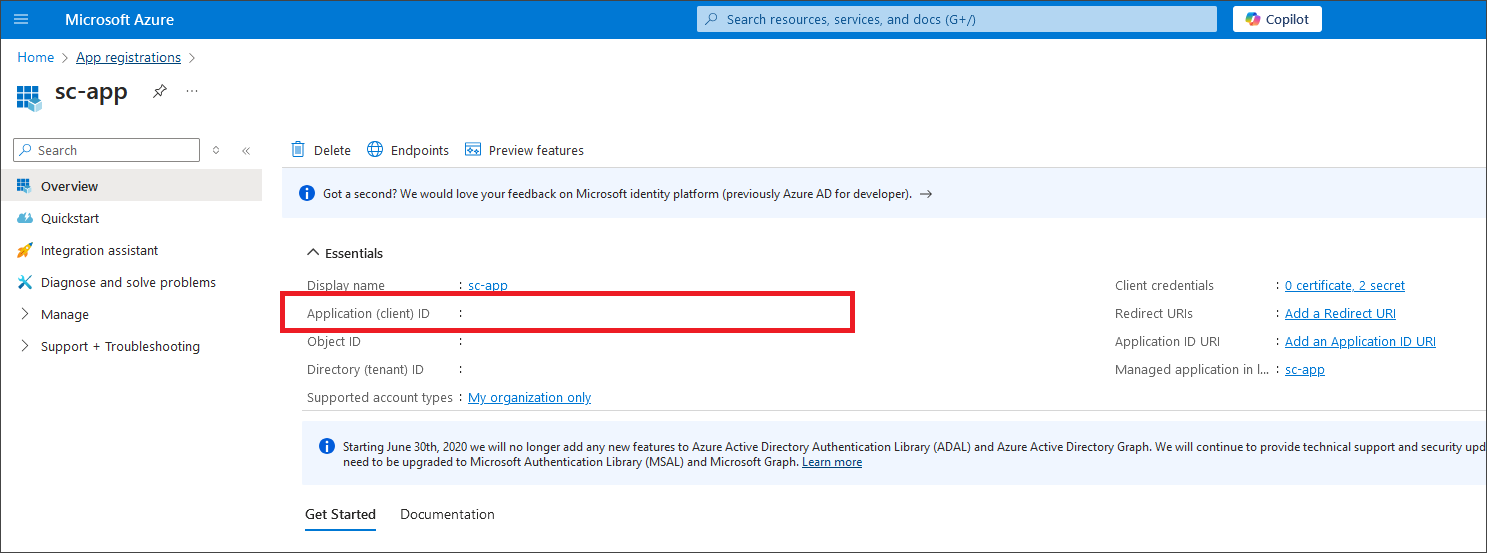
- On the homepage of your created application, from the Overview screen, copy the values for the Application (client) ID field - this value needs to be pasted into Client Id field in Dataedo.
- On the left sidebar of your created application page click on Manage and then click API permissions to assign proper permissions to the application.
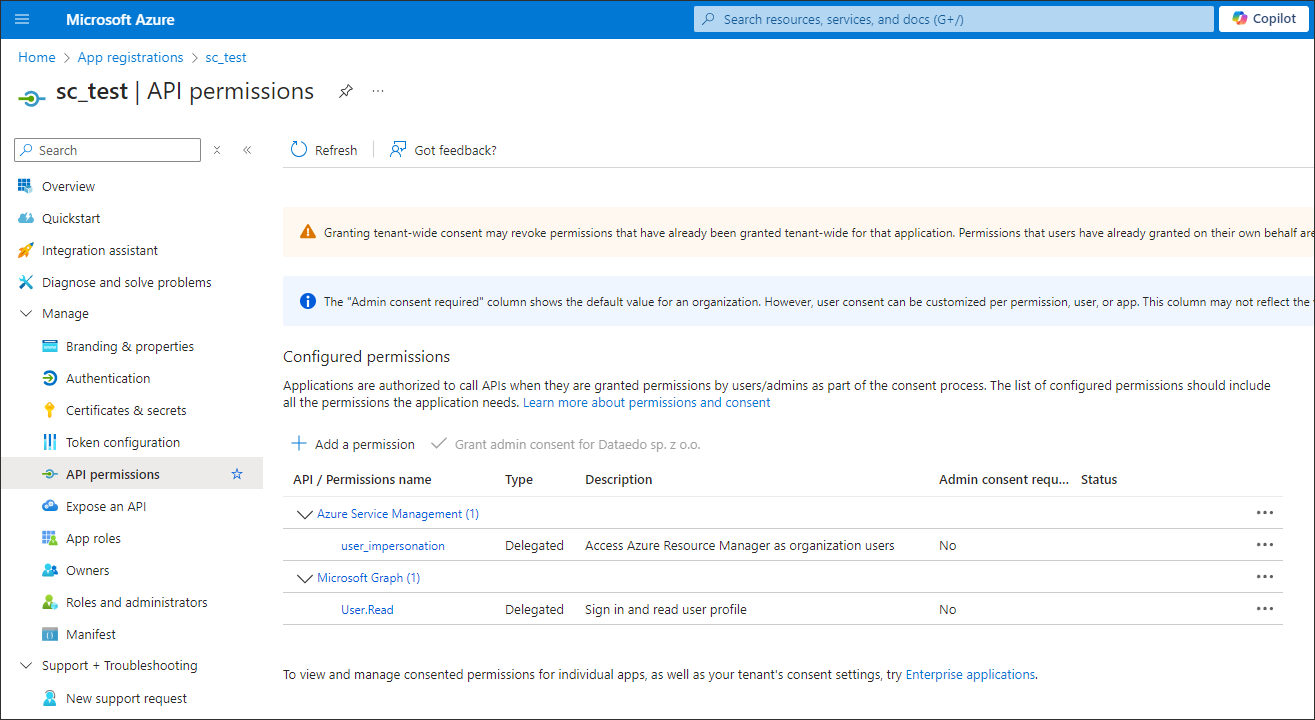
- In API permissions page click Add a permission.
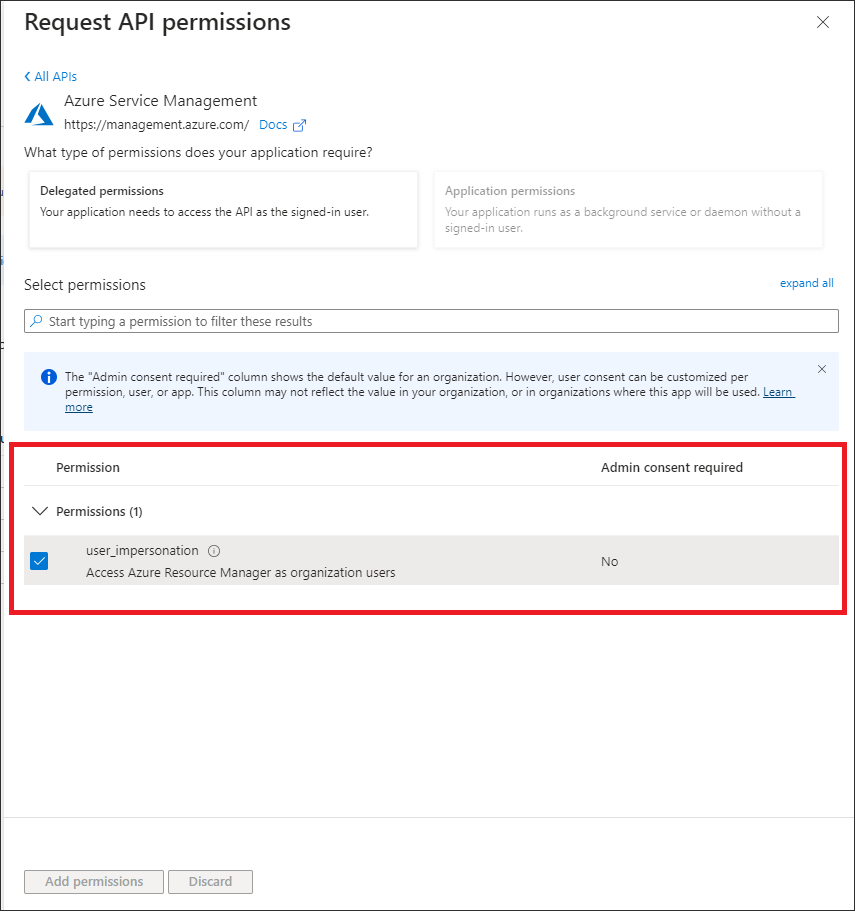
- On the right sidebar Request API permissions click on Azure Services Management.
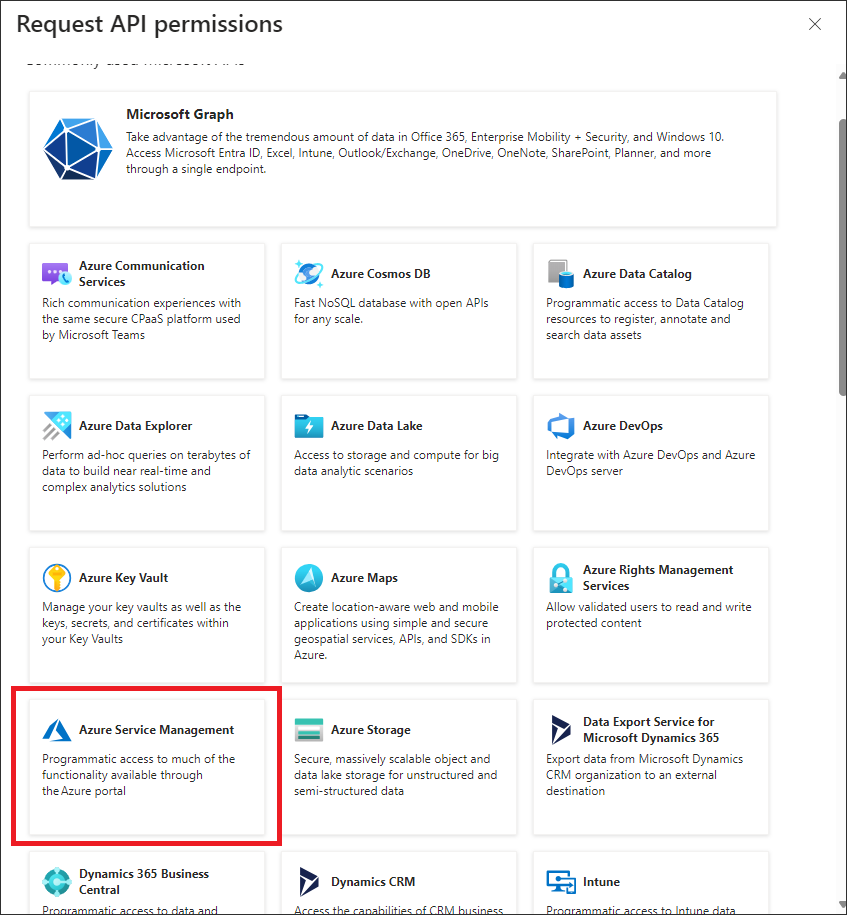
- On the permissions list which will appear after clicking on Azure Service Management check the checkbox user_impersonation and click Add Permissions
Adding Azure Administrator consent to Azure Application Registration
In some Azure subscription configurations, Admin consent may be required for using Application Registration.
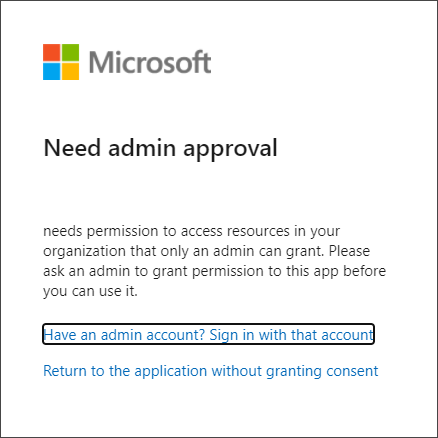
If the user encounters a screen like this, it means that requesting Admin consent is disabled for your Azure subscription:
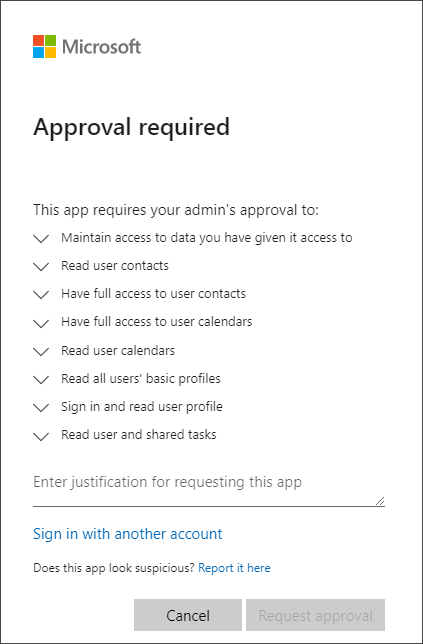
To resolve this, the user needs to see a screen like this, where they can send a request for approval to the Azure Admin:
To enable sending Admin consent requests, the Azure Administrator needs to take the following steps in Azure Portal:
- Open Enterprise applications in the Azure portal.
- In the left sidebar, go to Security and click on the Consent and permissions menu.
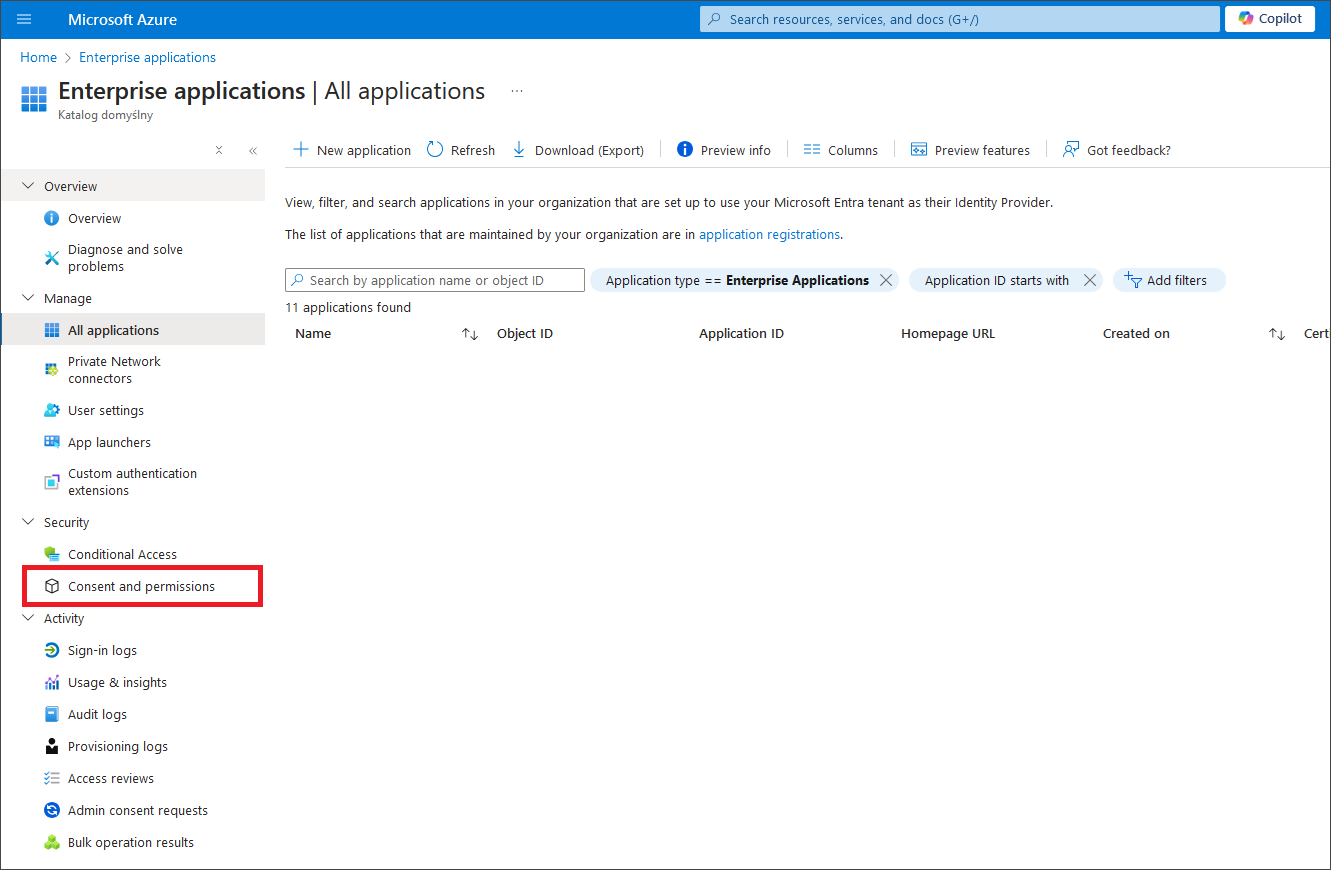
- In Consent and permissions, click Admin consent settings in the left sidebar and select YES for "Admin consent requests – Users can request admin consent to apps they are unable to consent to." Select one or more users, groups, or roles that can consent to applications.
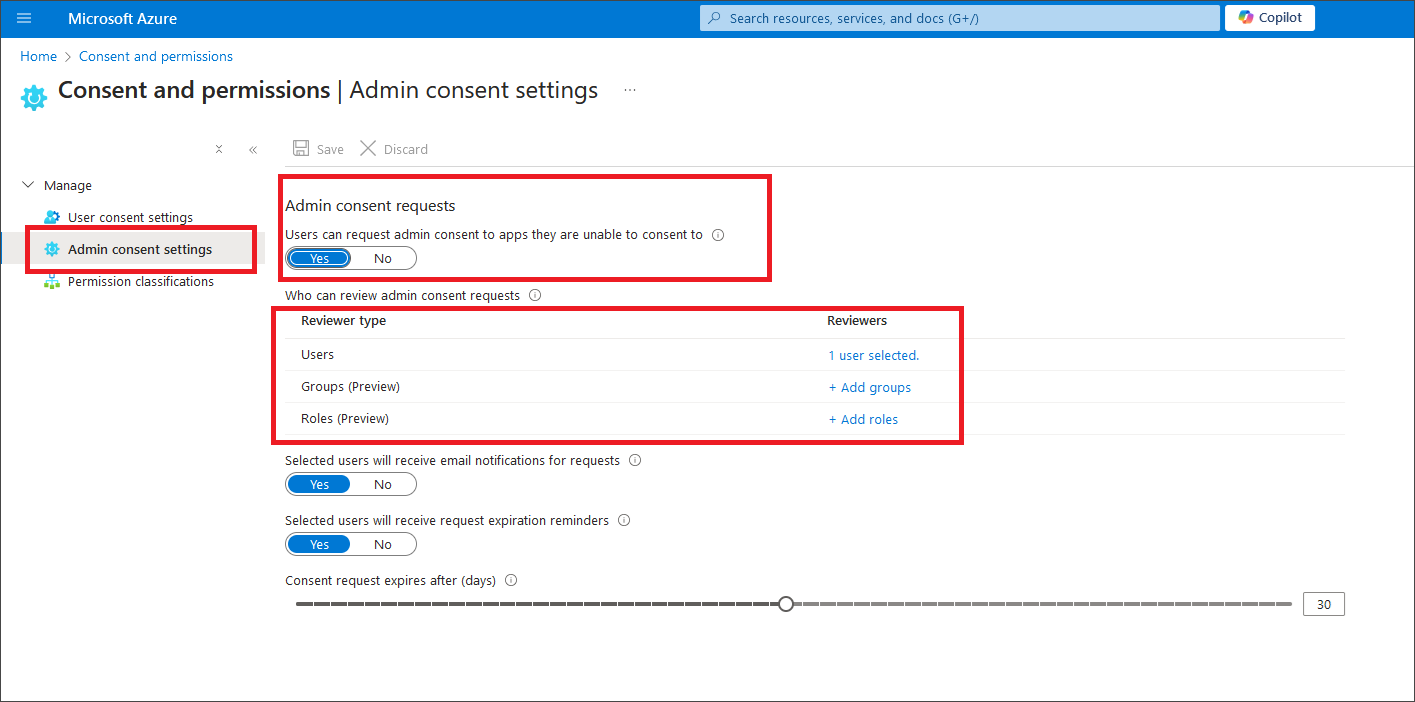
Once consent requests are enabled, the user can send a request for approval:
After the request is sent, the Azure Administrator will see the request for review under Enterprise applications in the Azure Portal, within the Activity → Admin consent requests menu. After reviewing and approving the requested permissions, the user will be able to log in and import the Power BI workspace with the Dataedo application.
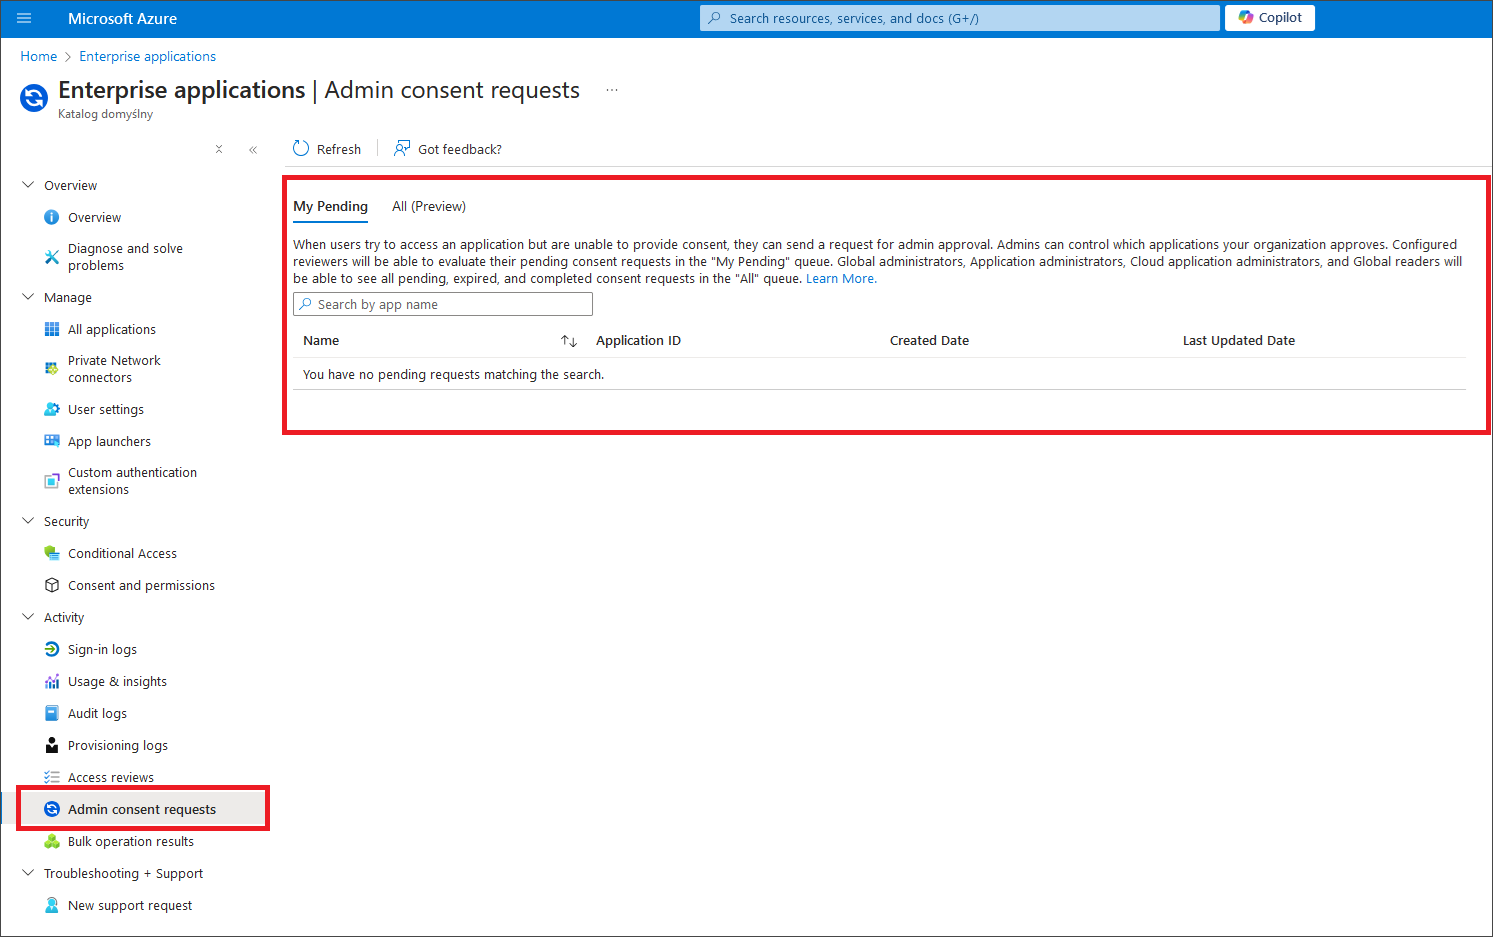
Service Principal authentication type
Configure Service Principal credentials in Dataedo
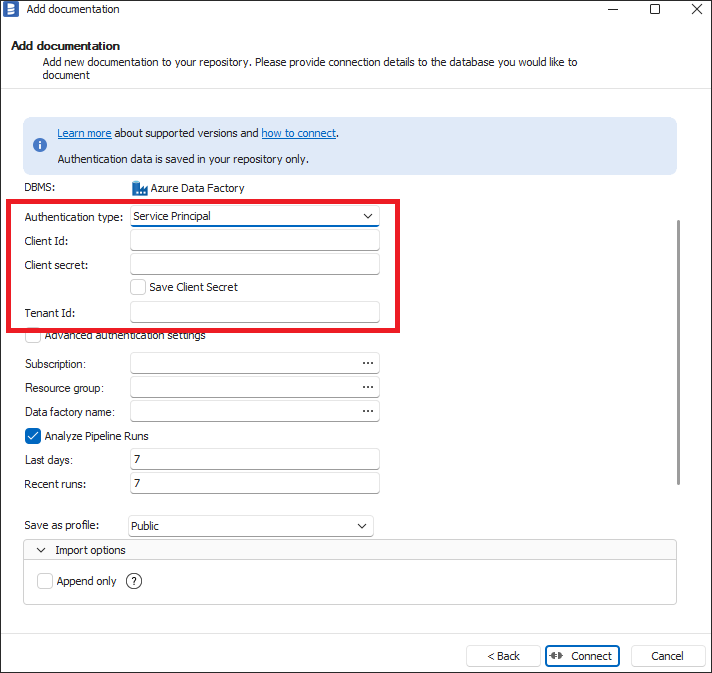
To use the service principal authentication type, please select Service Principal in Authentication Type dropdown and fill Client Id, Client Secret and Tenant Id with proper values from your Azure Application Registration. How to create Azure Application Registration and where those values available are explained in Creating Azure Application Registration section below.
- Power BI
- SharePoint Lists
- Azure Data Factory
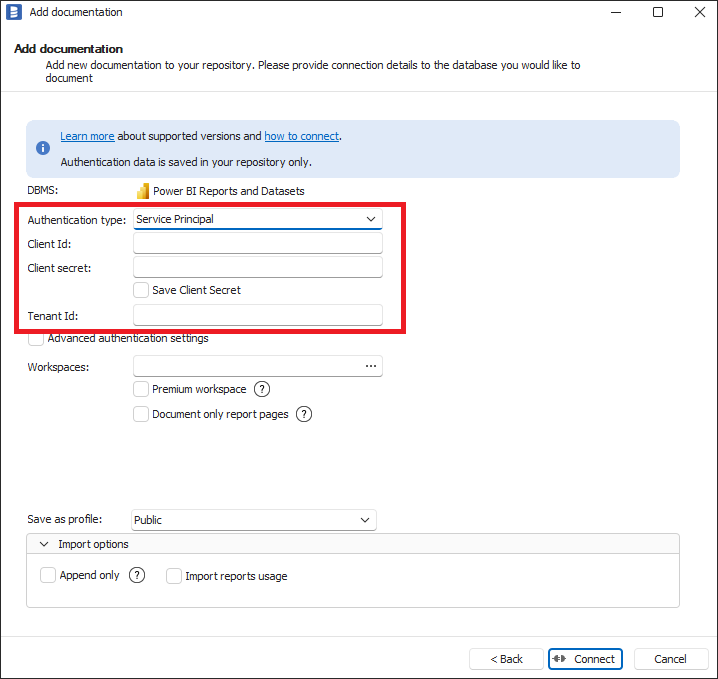
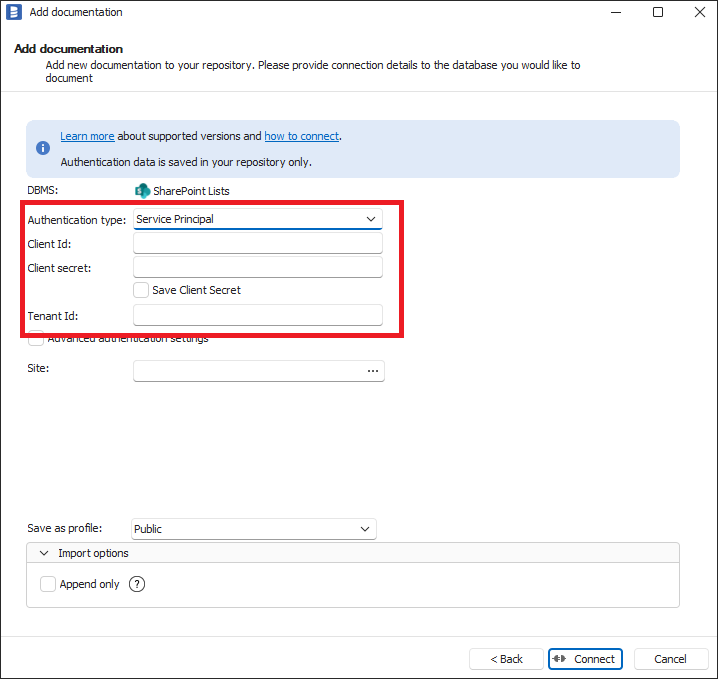
Creating Azure Application Registration
To create an Azure Application Registration:
- Log in to the Azure Portal.
- In the search bar, search for App registrations and select it from the list.
- From the toolbar, on the App registrations page, click + New registration.
- On the Register page for Name, enter a name of your client application, select supported account types, and Redirect URI as Public client/native, with http://localhost redirect URI.
- Click Register.
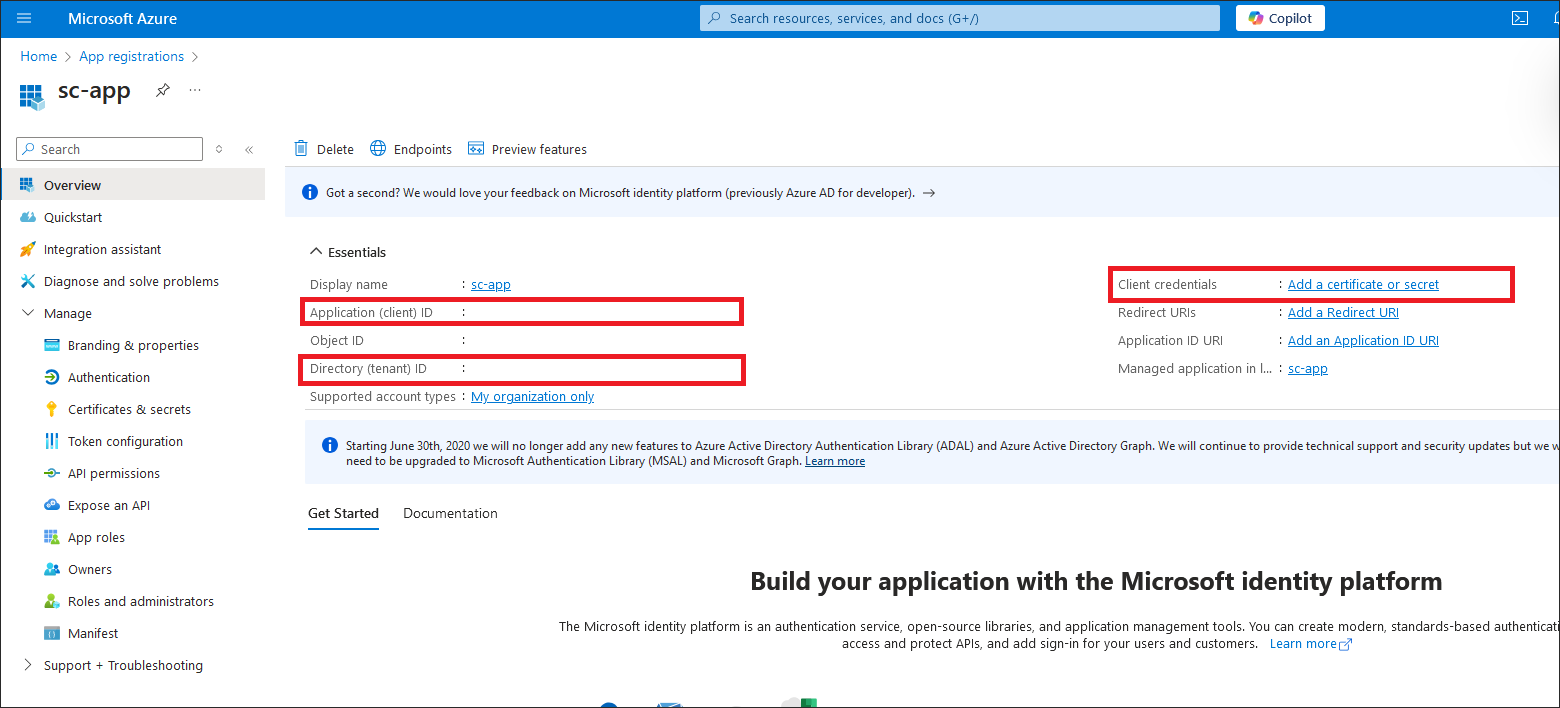
- On the homepage of your created application, from the Overview screen, copy the values for the Application (client) ID field - this value needs to be pasted into Client Id field in Dataedo and Tenant Id into Tenant Id in Dataedo.
- From the left menu of your created application registration page, click Certificates & secrets.
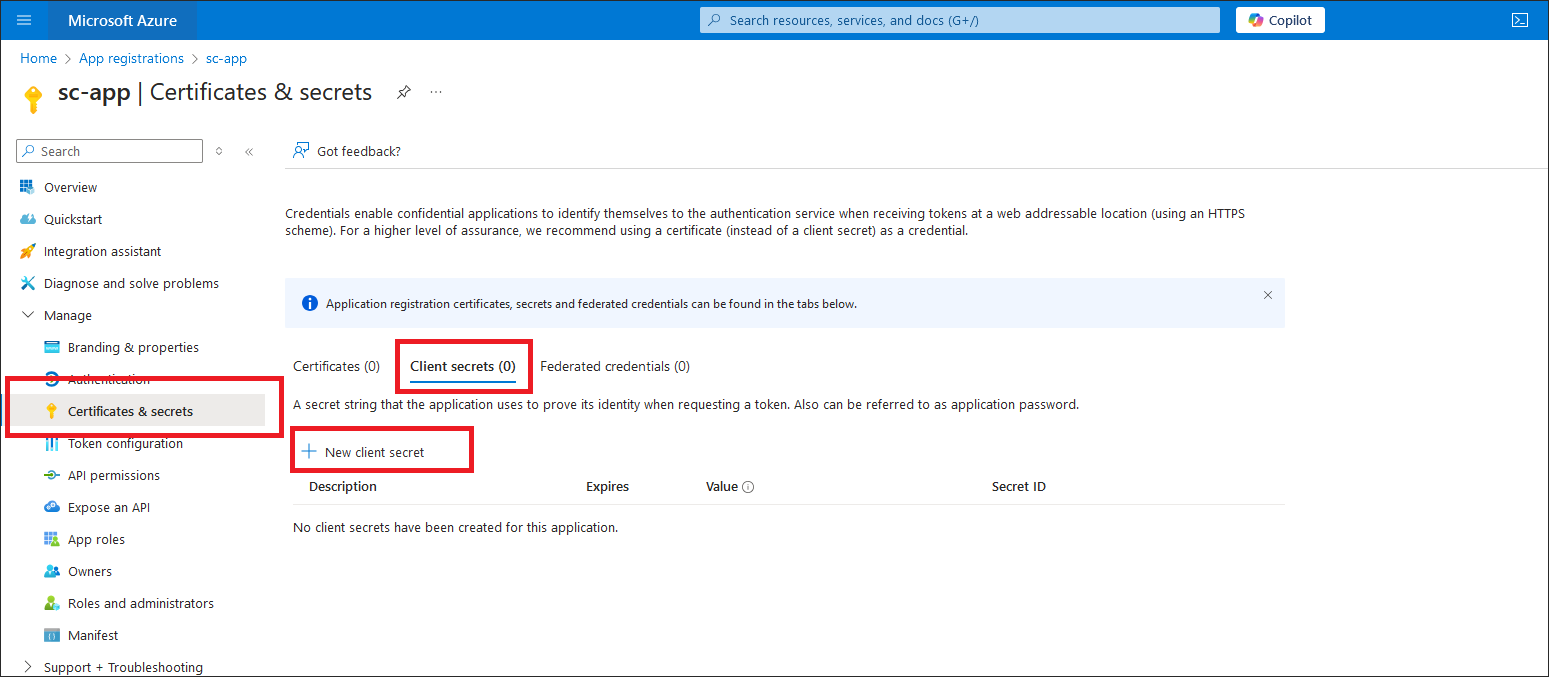
- On the Certificates & secrets page, under Client secrets, click + New client secret.
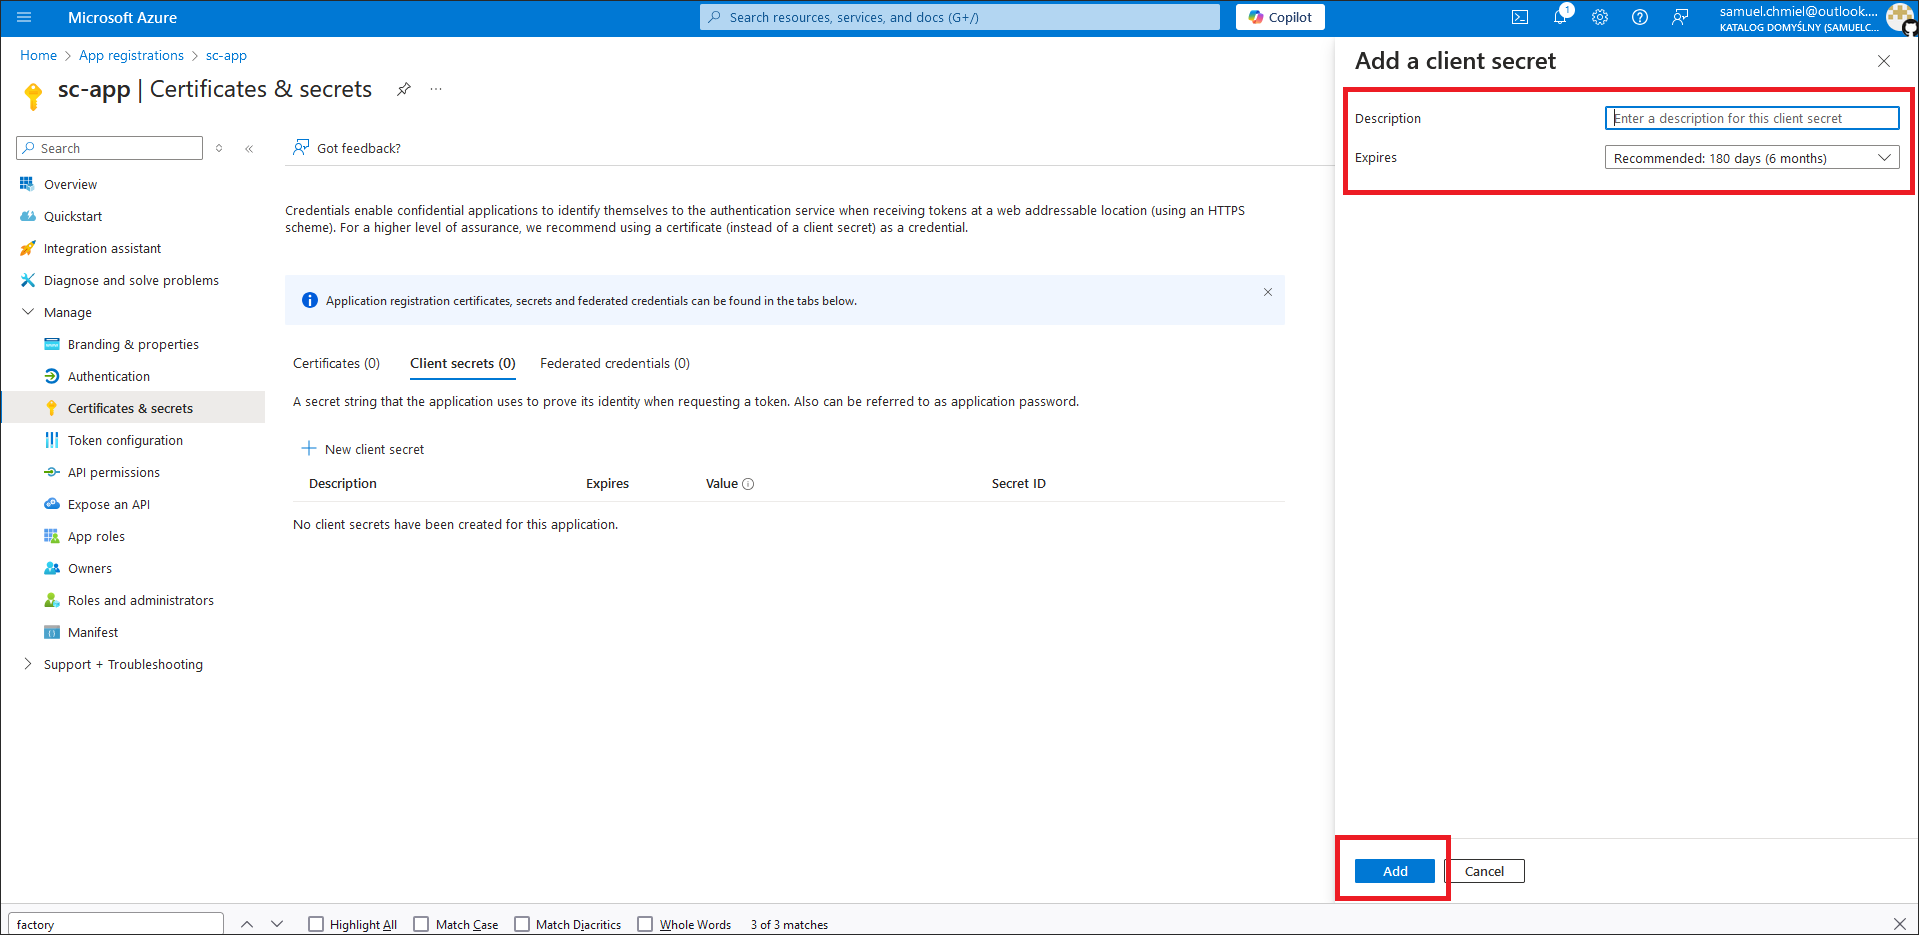
- In the Add client secret screen, enter the description, expiry and click Add
- On the certificates & secrets page, under Client secrets click the clipboard icon to copy it and paste it in Client secret field in Dataedo.
Setting up Service Principal authentication for Azure Data Factory
To set up Azure Data Factory import using service principal authentication in addition to application registration, it is required to assign a Data Factory Contributor role to this application registration for proper resources as explained below. After setting it up, you are ready to import Azure Data Factory using service principal authentication.
Assigning the Data Factory Contributor role to application registration for Azure Data Factory
- Log in to the Azure Portal.
- In the search bar, search for Data factories and select it from the list.
- Choose the Data Factory to which you want to assign a role.
- On the selected Data Factory click on Access control (IAM) in the left menu.
- Under Grant access to this resource click Add role assignment.
- Select Data Factory Contributor from the list.
- Click on Members tab.
- Click Select members.
- Enter your application registration name and click Select.
- Click Review and assign.
Add new connection
To connect to Azure Data Factory and create new documentation, click Add documentation and choose Database connection.
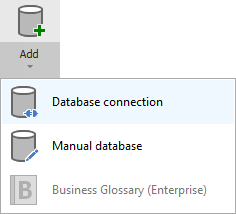
On the connection screen choose Azure Data Factory as DBMS.
Choose one of the available login methods:
- Service Principal
- Interactive (logging in with a Microsoft account)
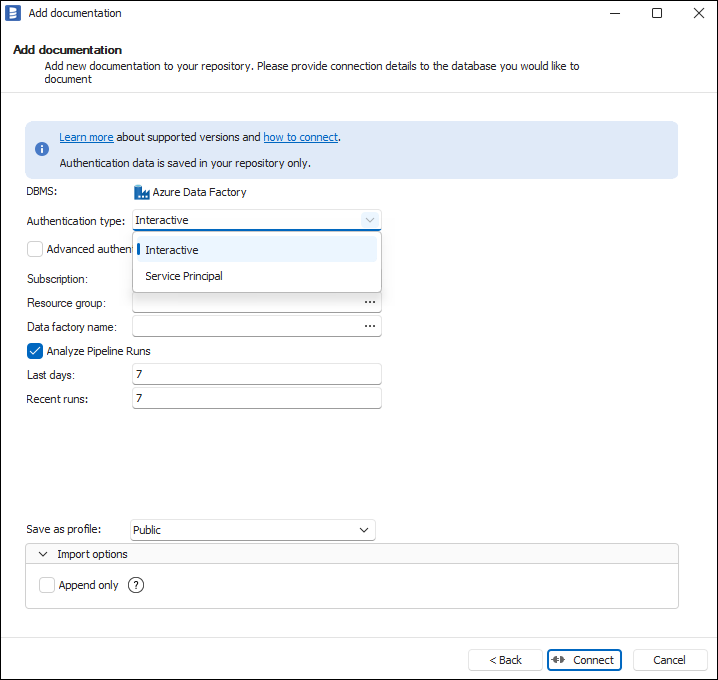
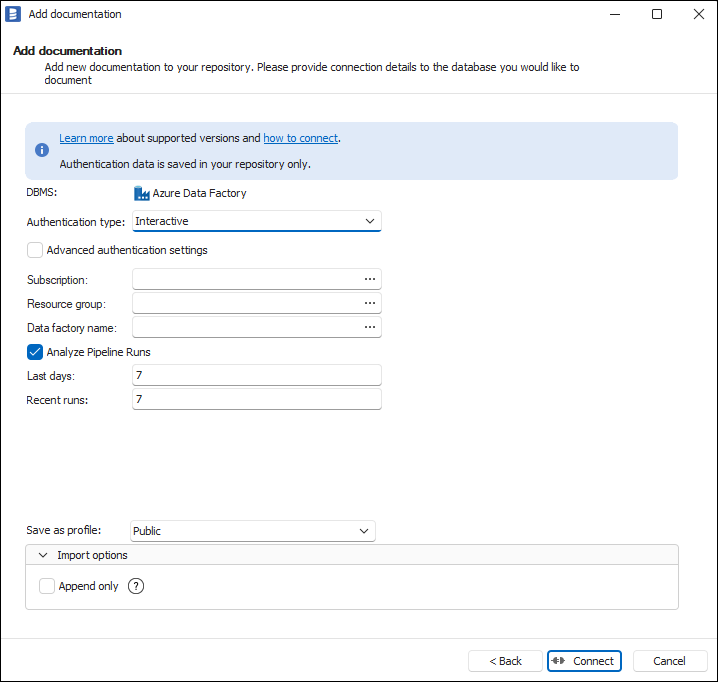
Connection details
-
Advanced settings - When you want to login using custom Azure Application Registration
-
Subscription - Azure subscription assigned to your factory.
-
Resource group - Resource group where your factory sits in.
-
Data factory name - Name of the factory you want to extract metadata from.
-
Analyze Pipeline Runs - Select if you want to get lineage from runtime values of pipeline parameters
-
Last Days - When choosing Analyze Pipeline Runs specifies the number of recent days for analyzing pipeline runs.
-
Recent Runs - When choosing Analyze Pipeline Runs indicates the number of recent runs for each activity from the selected days to be analyzed.
Importing objects
When the connection is successful Dataedo will read objects and show a list of objects found. You can choose which object types to import. You can also use advanced filter to narrow down the list of objects.
Confirm the list of objects to import by clicking Next.
The next screen allows you to change the default name of the documentation under which your schema will be visible in the Dataedo repository.
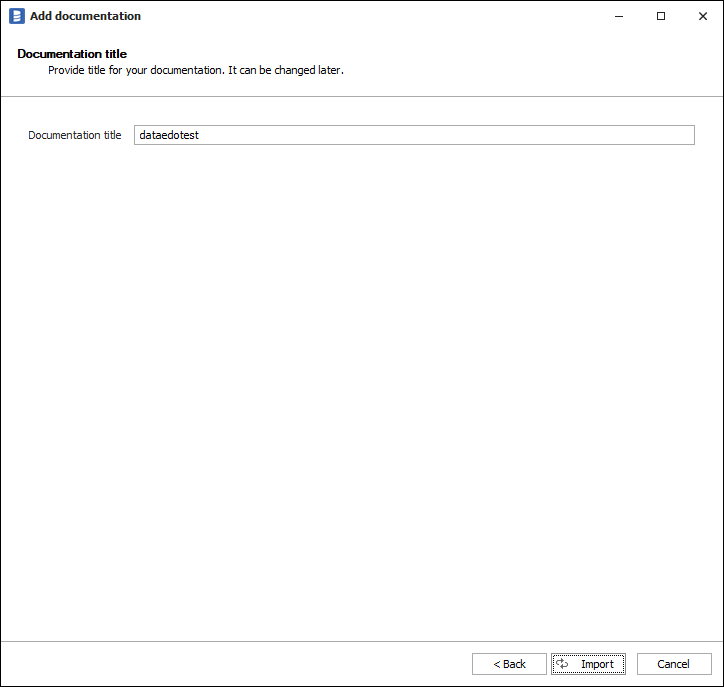
Click Import to start the import.
When done close the import window with the Finish button.
Outcome
Your Azure Data Factory objects have been imported to new documentation in the repository.