Azure Blob Storage
Azure Blob storage is Microsoft's object storage solution for the cloud. Blob storage is optimized for storing massive amounts of unstructured data. Unstructured data is data that doesn't adhere to a particular data model or definition, such as text or binary data.
Dataedo provides a native Azure Blob Storage connector, which allows you to document objects/files stored in this service.
Authentication
In order to document Azure Blob Storage, you will need to authenticate. Dataedo supports the following options of authentication:
- Access Key
- Azure Active Directory - Interactive
- Connection string
- Public container (no authentication)
- Shared Access Signature - Account
- Shared Access Signature - Directory
- Shared Access Signature - URL
Out of all options, we recommend Azure Active Directory - Interactive authentication, as it provides the best access control in the Azure cloud.
How to find storage account name in Azure
Storage account name is a unique identifier of your account within the whole Azure cloud. You can find it in the following way (we'll show only the Azure Portal method, as others are more advanced):
- Sign into Azure Portal.
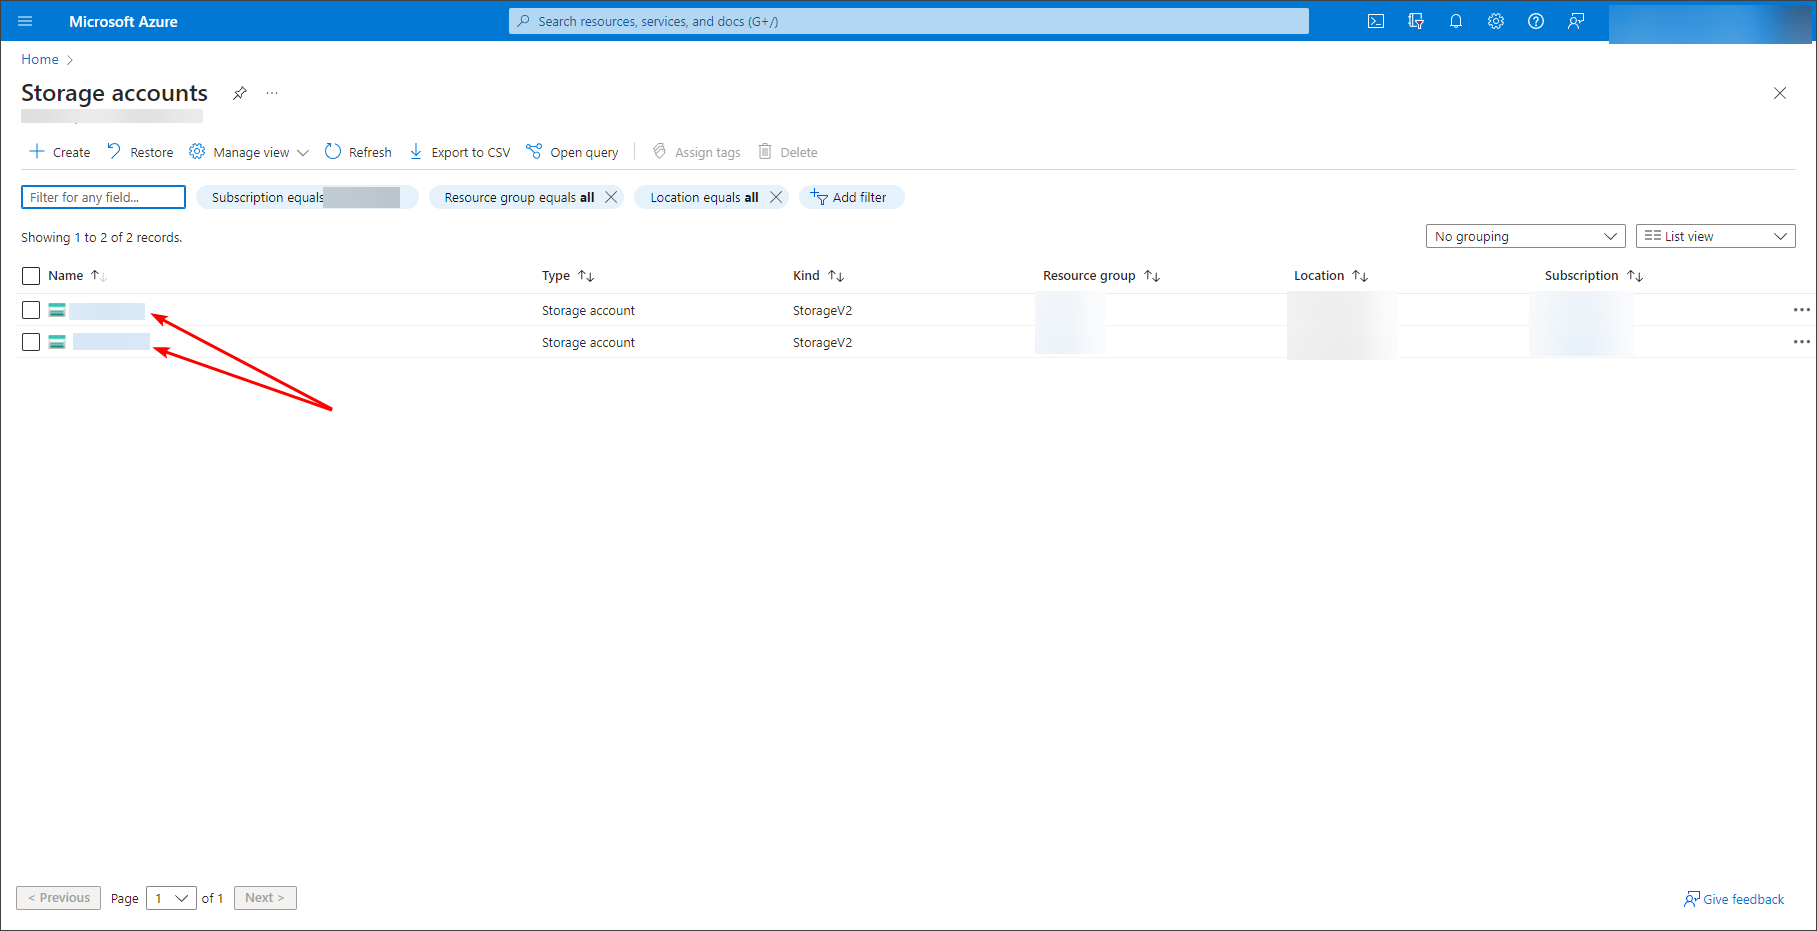
- Search for storage account and select Storage accounts:

- You will see a list of Storage Accounts, where the name is the first column. Copy the name of the account you want to document:
Access key
When you create an Azure Storage Account, it receives automatically generated keys that can be used to authenticate to Blob Storage in Dataedo.
How to find Access Key in Azure Portal
- Search for Storage Accounts, and open the one you would like to document.
- On the side tab, look for Access keys and open the page:
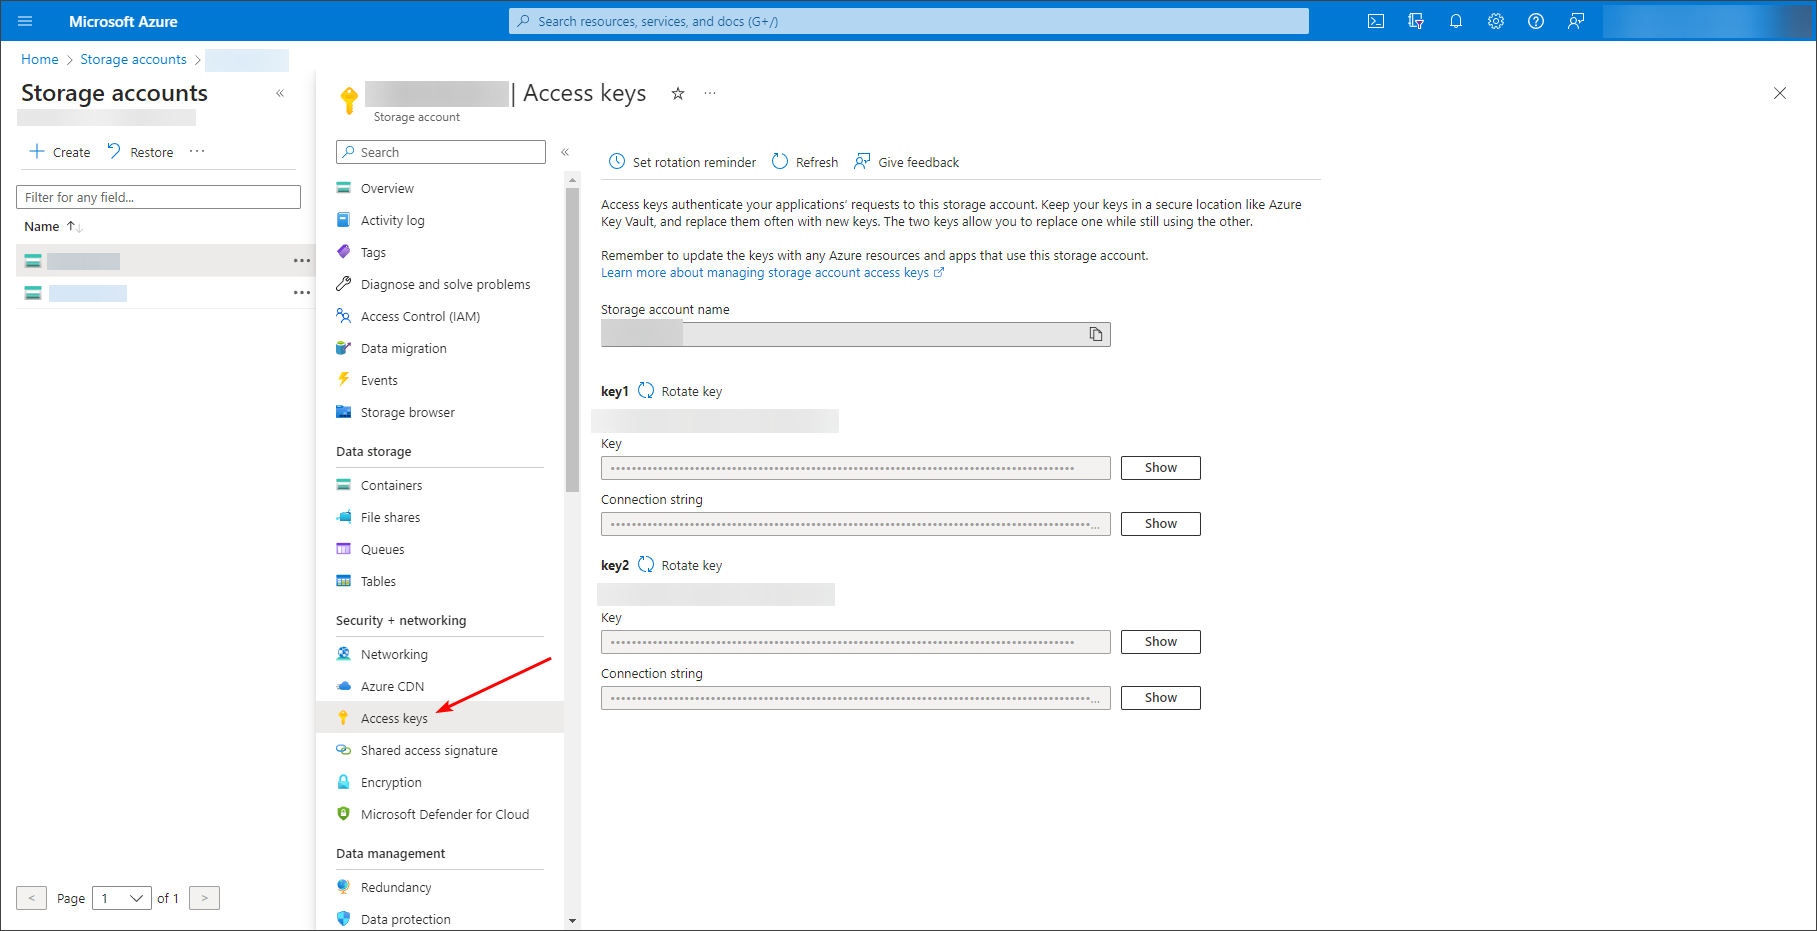
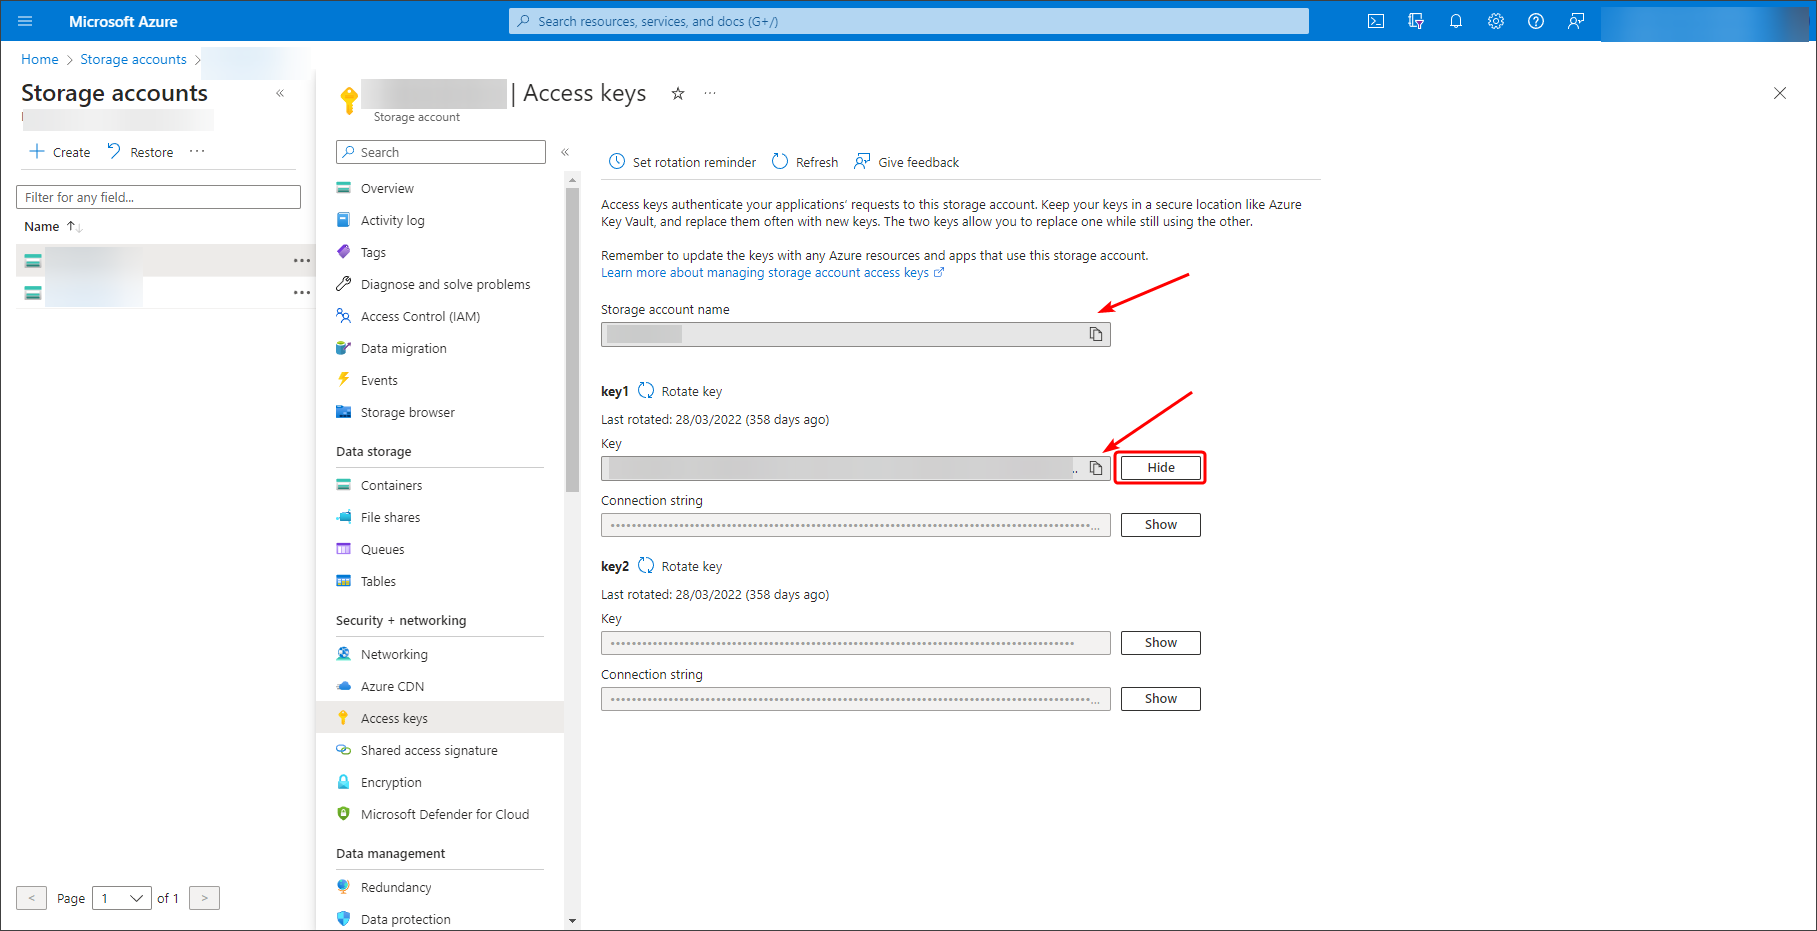
- Click Show button to reveal Key and copy it to Dataedo. You can use either of the keys. Furthermore, you can copy Storage account name on the page:
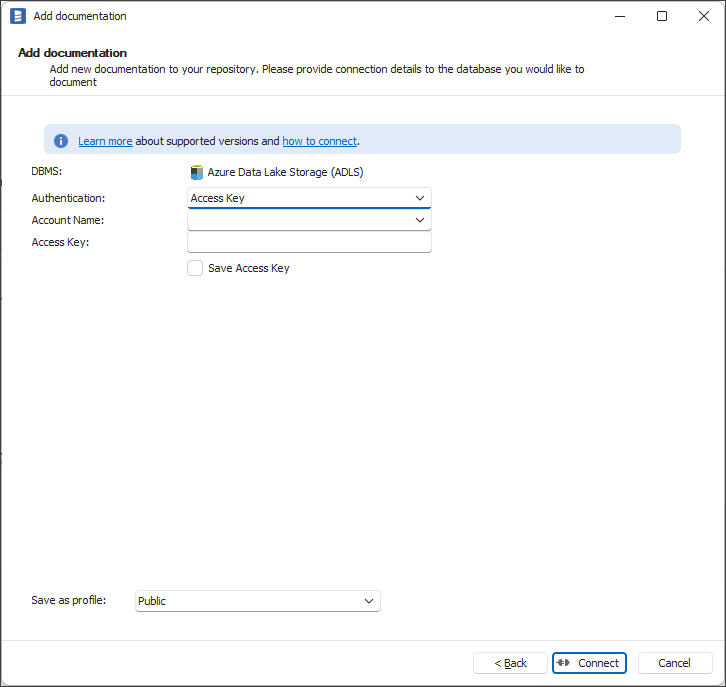
- Paste values in Dataedo connector window:
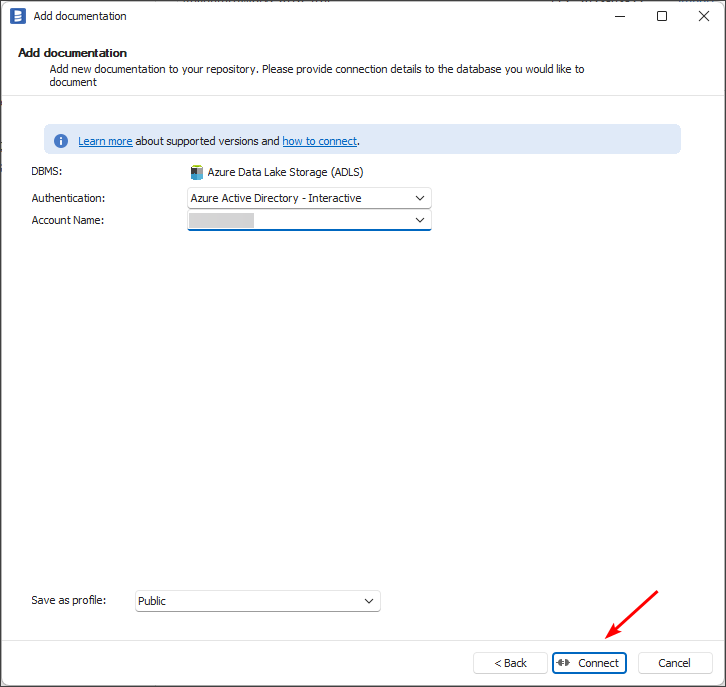
Azure Active Directory - Interactive
You can use your Entra ID (Azure AD) credentials to access Storage Account. All you need to provide is Account Name. Finding one is described in How to find storage account name in Azure section of this article. Once you click Connect in Dataedo window you will have to interactively sign in with your Azure account.
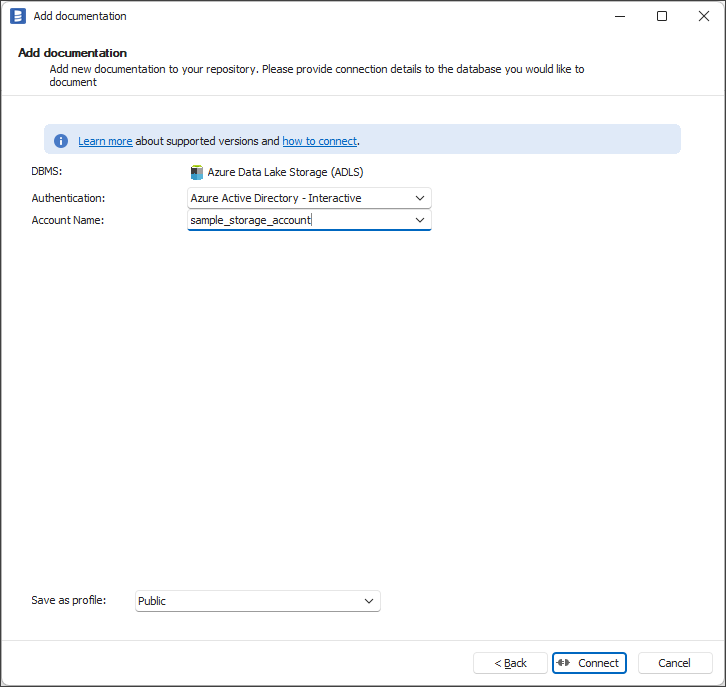
Azure Active Directory - Interactive authentication cannot be used to automate imports with dataedocmd, as it needs you to manually sign in before import can begin
Connection string
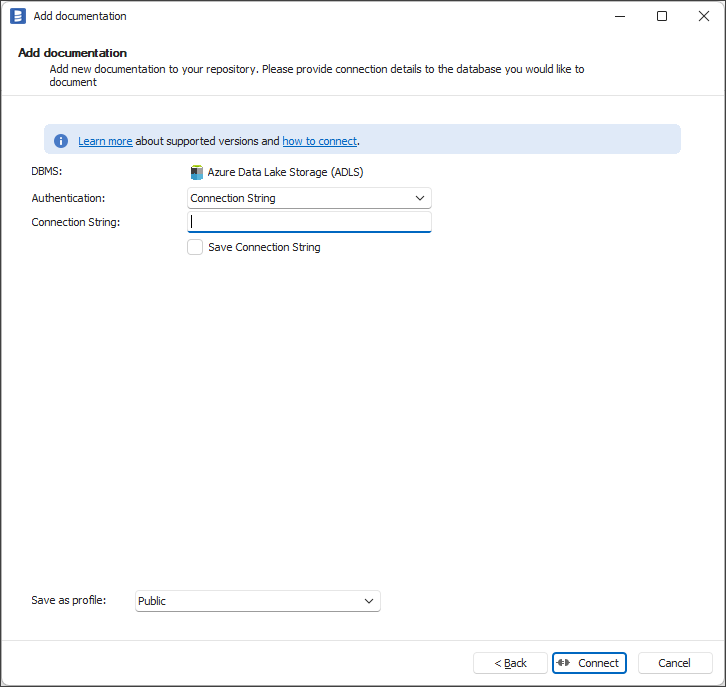
Connection string for Azure Data Storage contains all required information to connect to Storage Account, hence there is only one field in Dataedo connector for this type of authentication.
How to find Connection string in Azure Portal
- Search for Storage Accounts, and open the one you would like to document.
- On the side tab, look for Access keys and open the page:
- Click Show button to reveal Connection string and copy it to Dataedo. You can use either of the connection strings. Furthermore, you can copy Storage account name on the page:
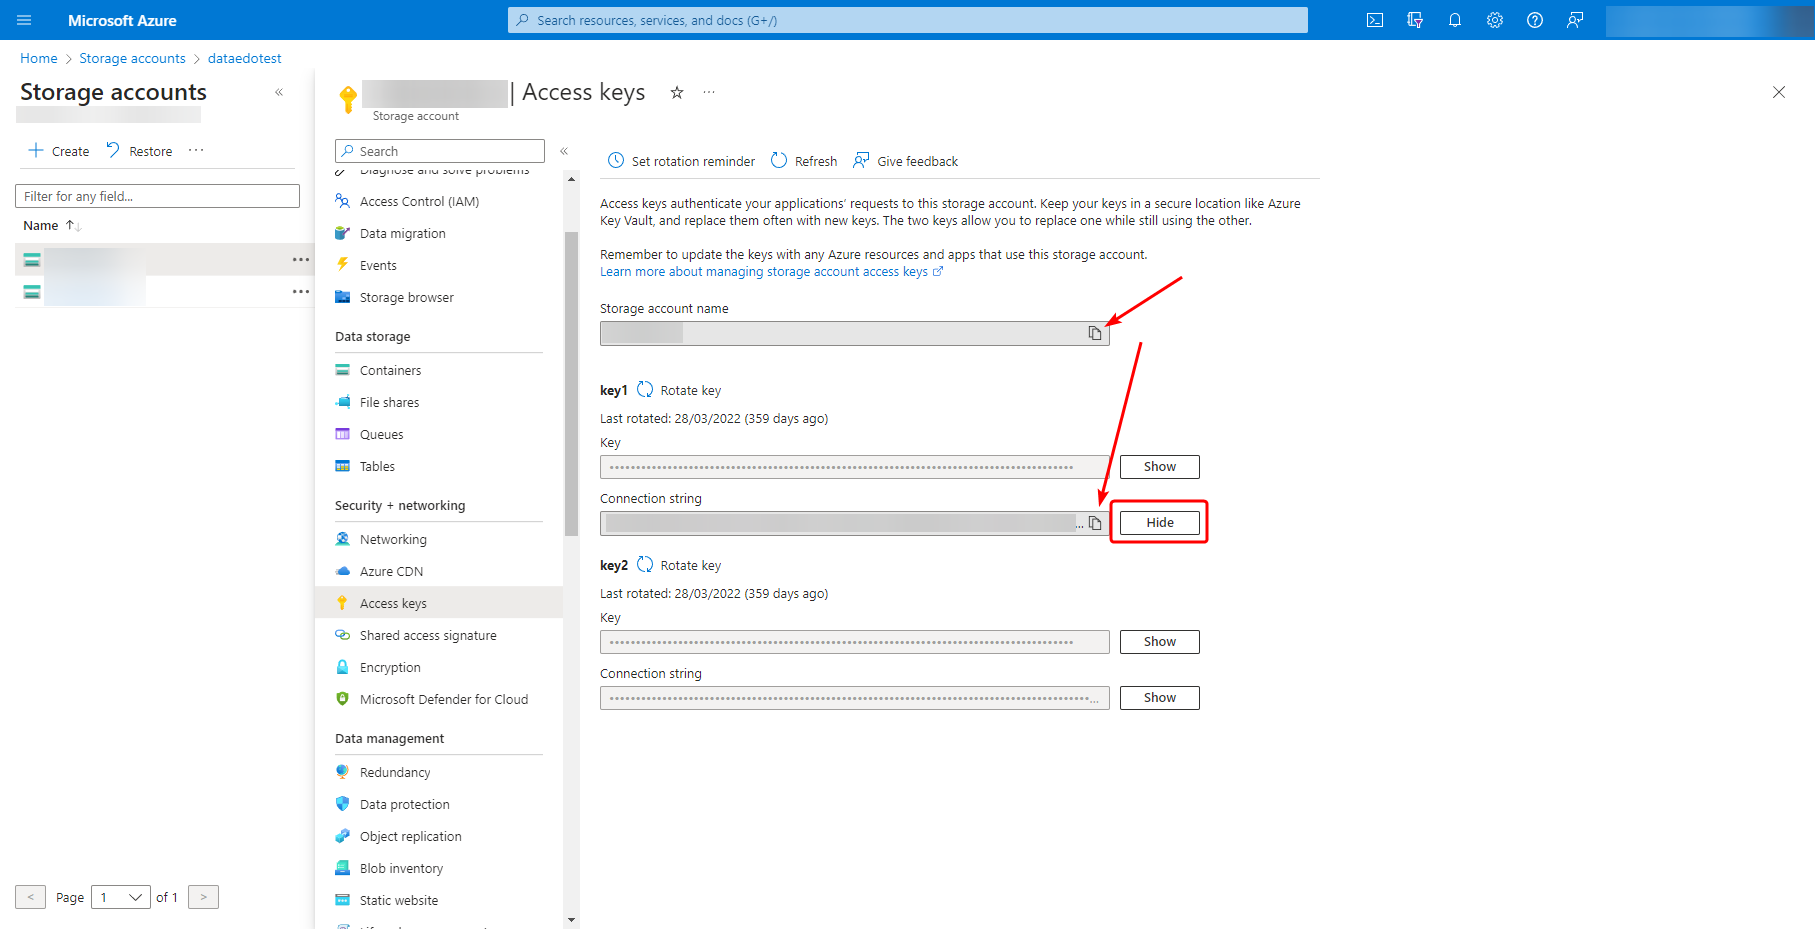
- Paste connection string in Dataedo connector window:
Public container
Some of the containers can be accessed publicly, without the need for any authentication. In such cases, Dataedo will require you to provide storage account name and container name. Obtaining the first one is described in How to find storage account name in Azure section. Public container name can be found in the following way:
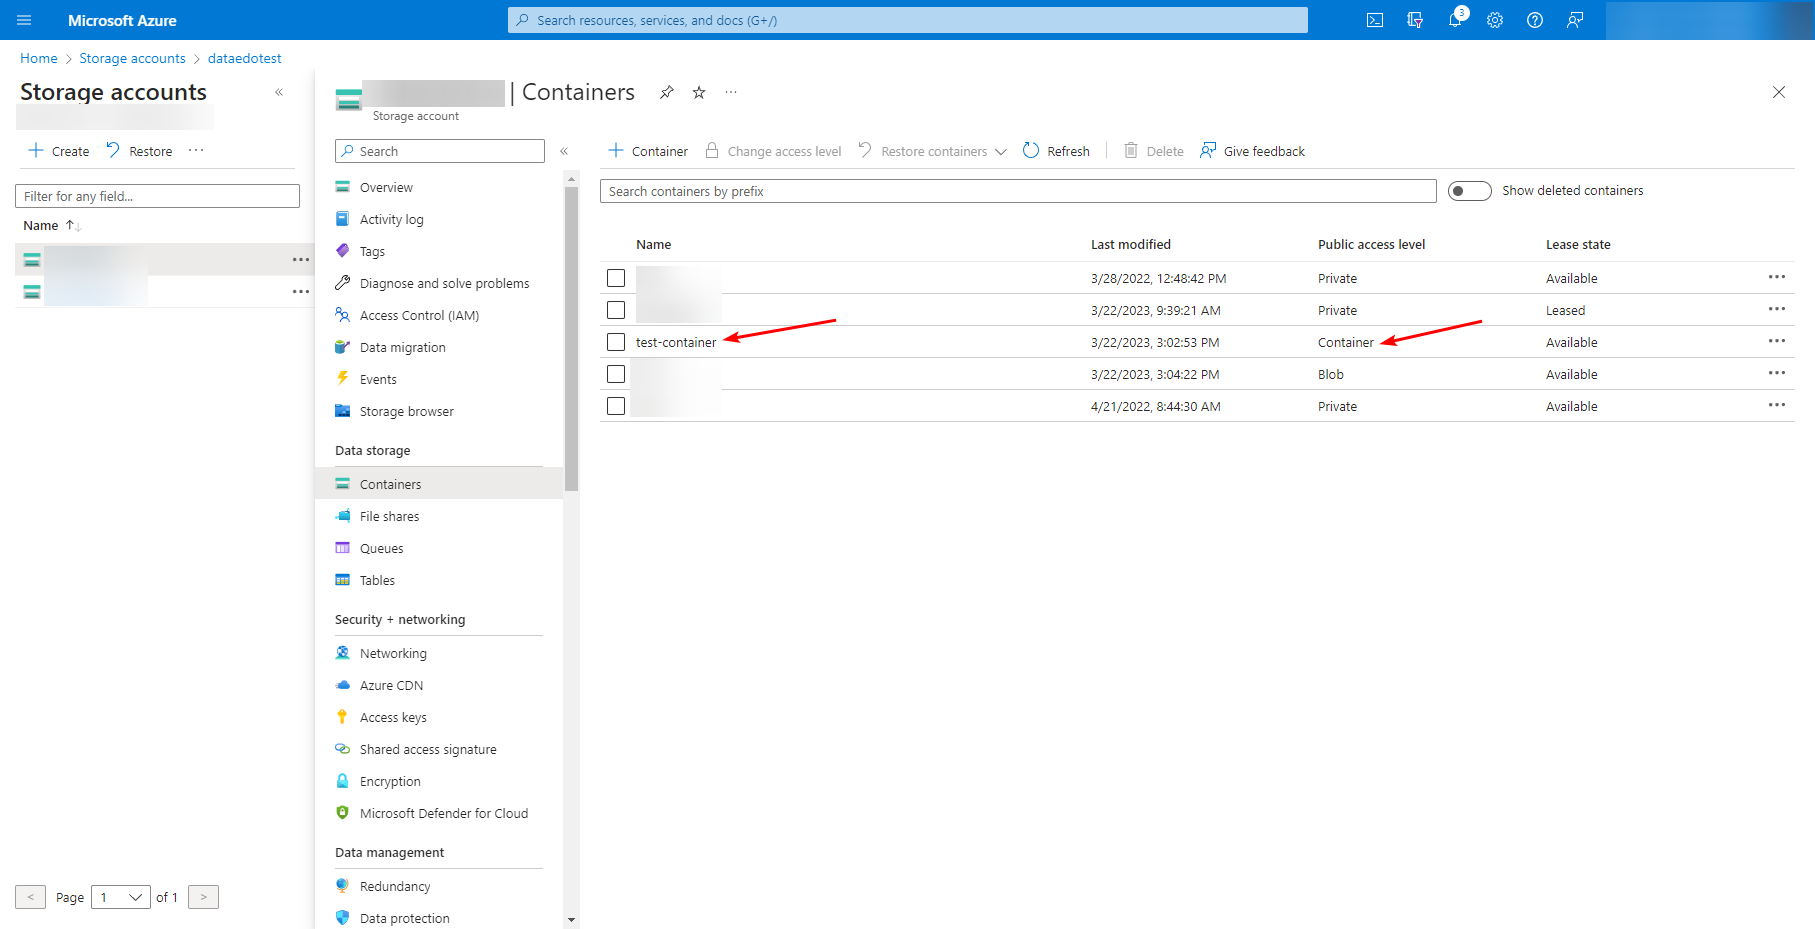
- Search for Storage Accounts, and open the one you would like to document.
- On the side tab, look for Containers and open that page:
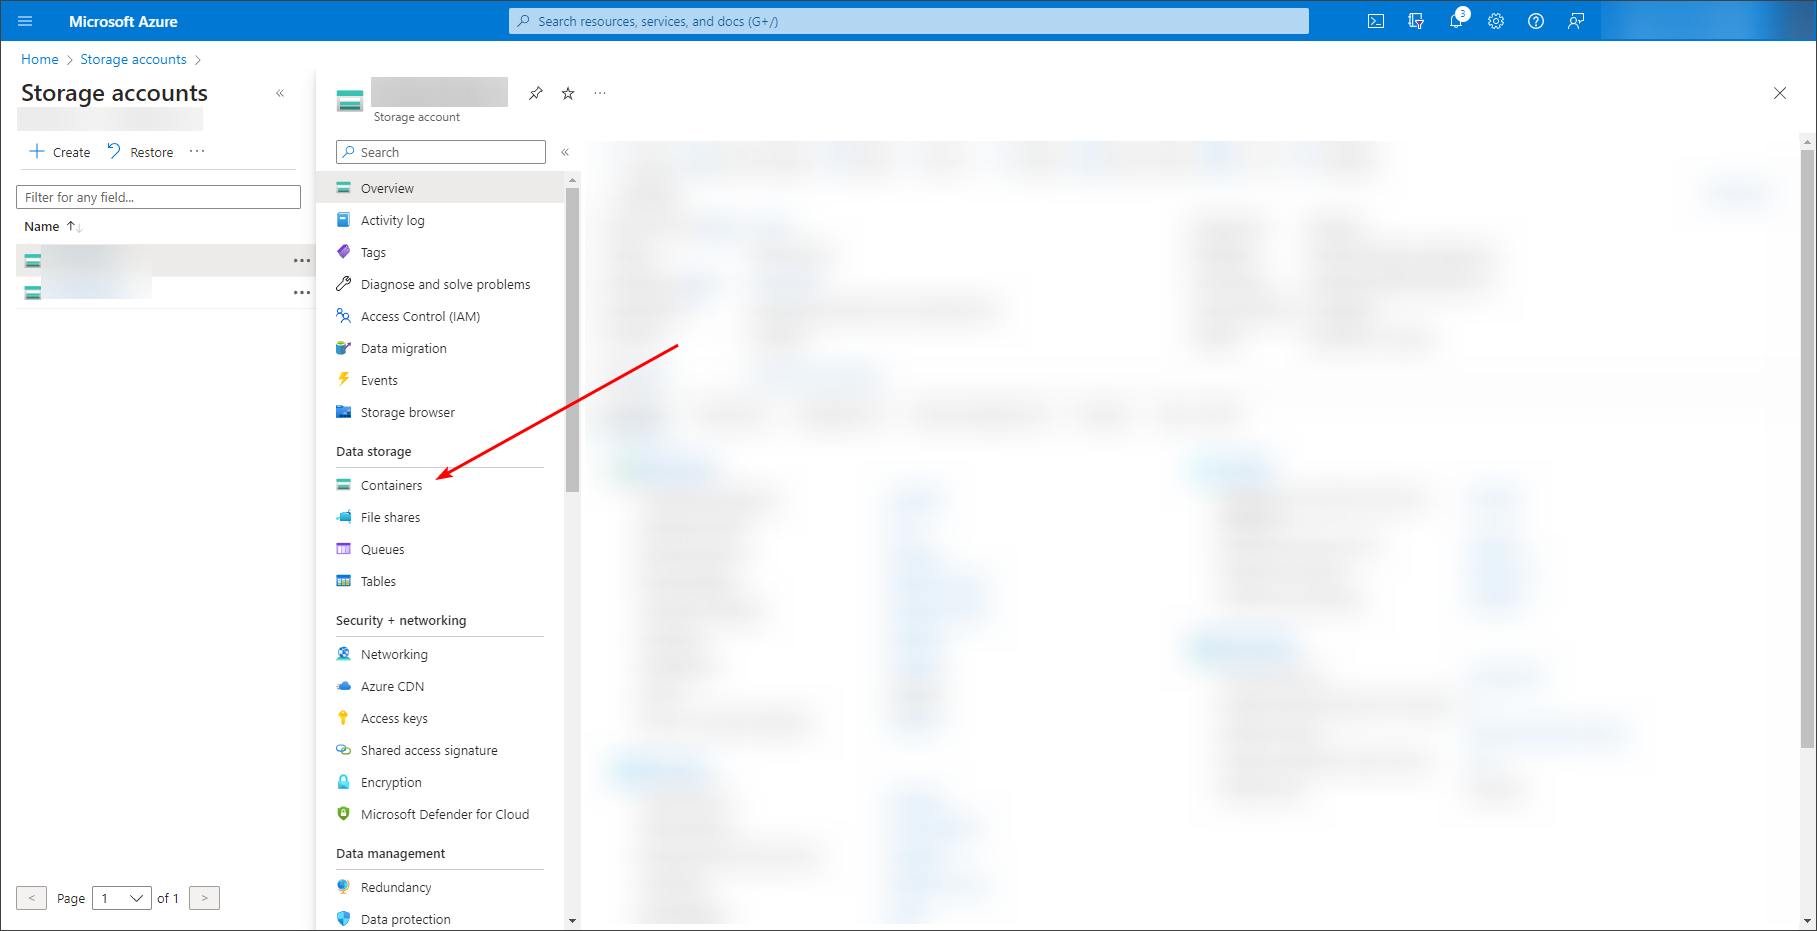
- On the Containers page you will find a list of containers available in Storage Account. Make sure the selected container has Container access level.
Connecting to Azure Blob Storage
Connect
Once you have filled in the required connection details, hit the Connect button.
Once connected, set the documentation title.
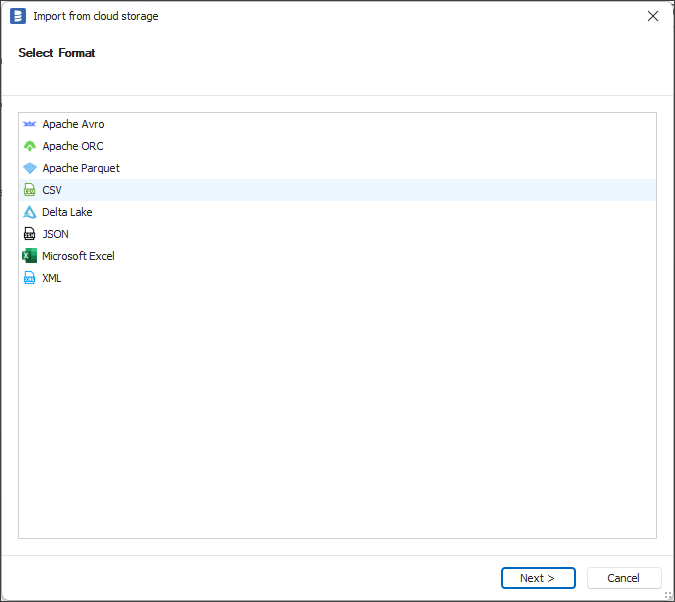
Select format (optional)
On the next screen, you will need to select the format of files that are going to be documented. This step is optional, as if you select files in different formats, Dataedo will automatically detect the format and use the appropriate connector.
Select files
On the next screen, select files that are to be documented. As stated earlier, files can be in various formats. In the next step, Dataedo will try to document files based on their extensions.
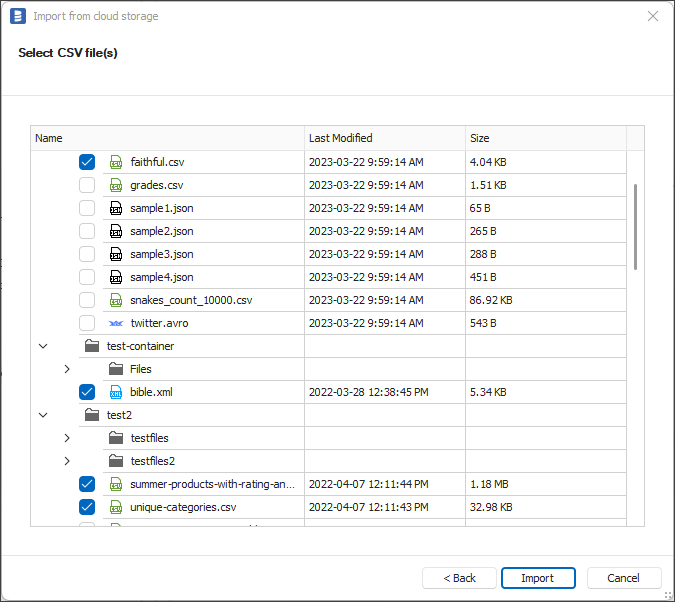
Once you have selected files, hit the Import button.
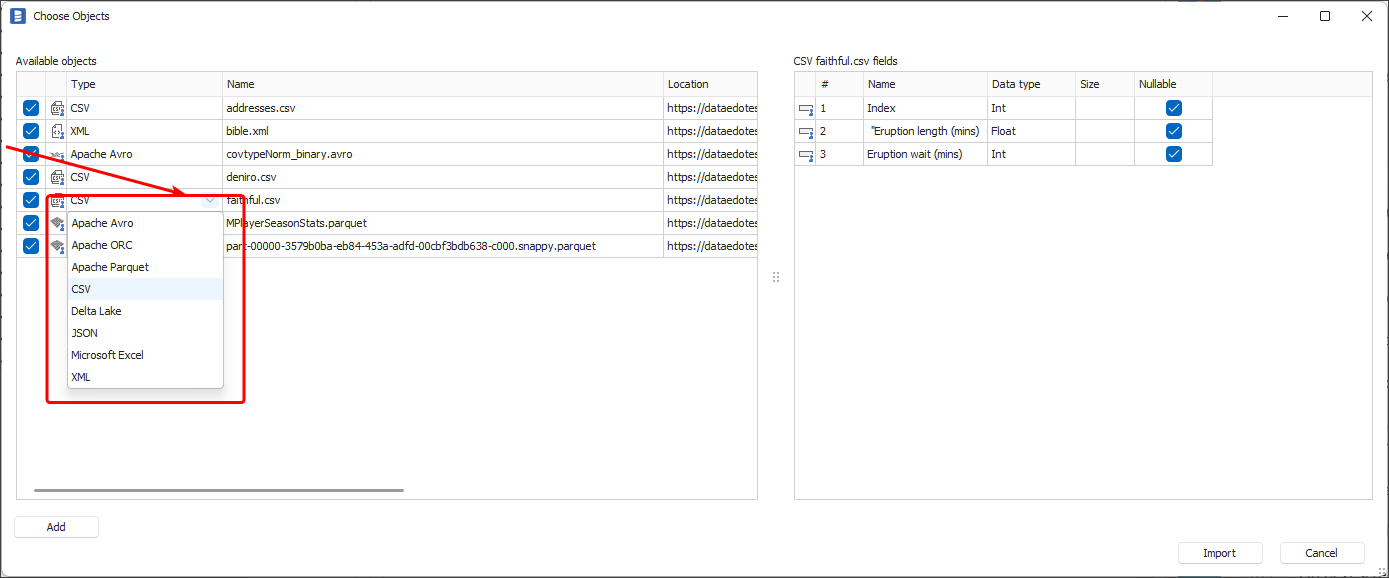
Choose Objects to import
During this step, you can check/uncheck objects and their columns/fields for import. To verify columns/fields, select a file from the list. Furthermore, you can change the format which Dataedo recognized, by expanding the list in the Type column.
Import
Once you're sure everything is correct, hit the Import button to import selected files.
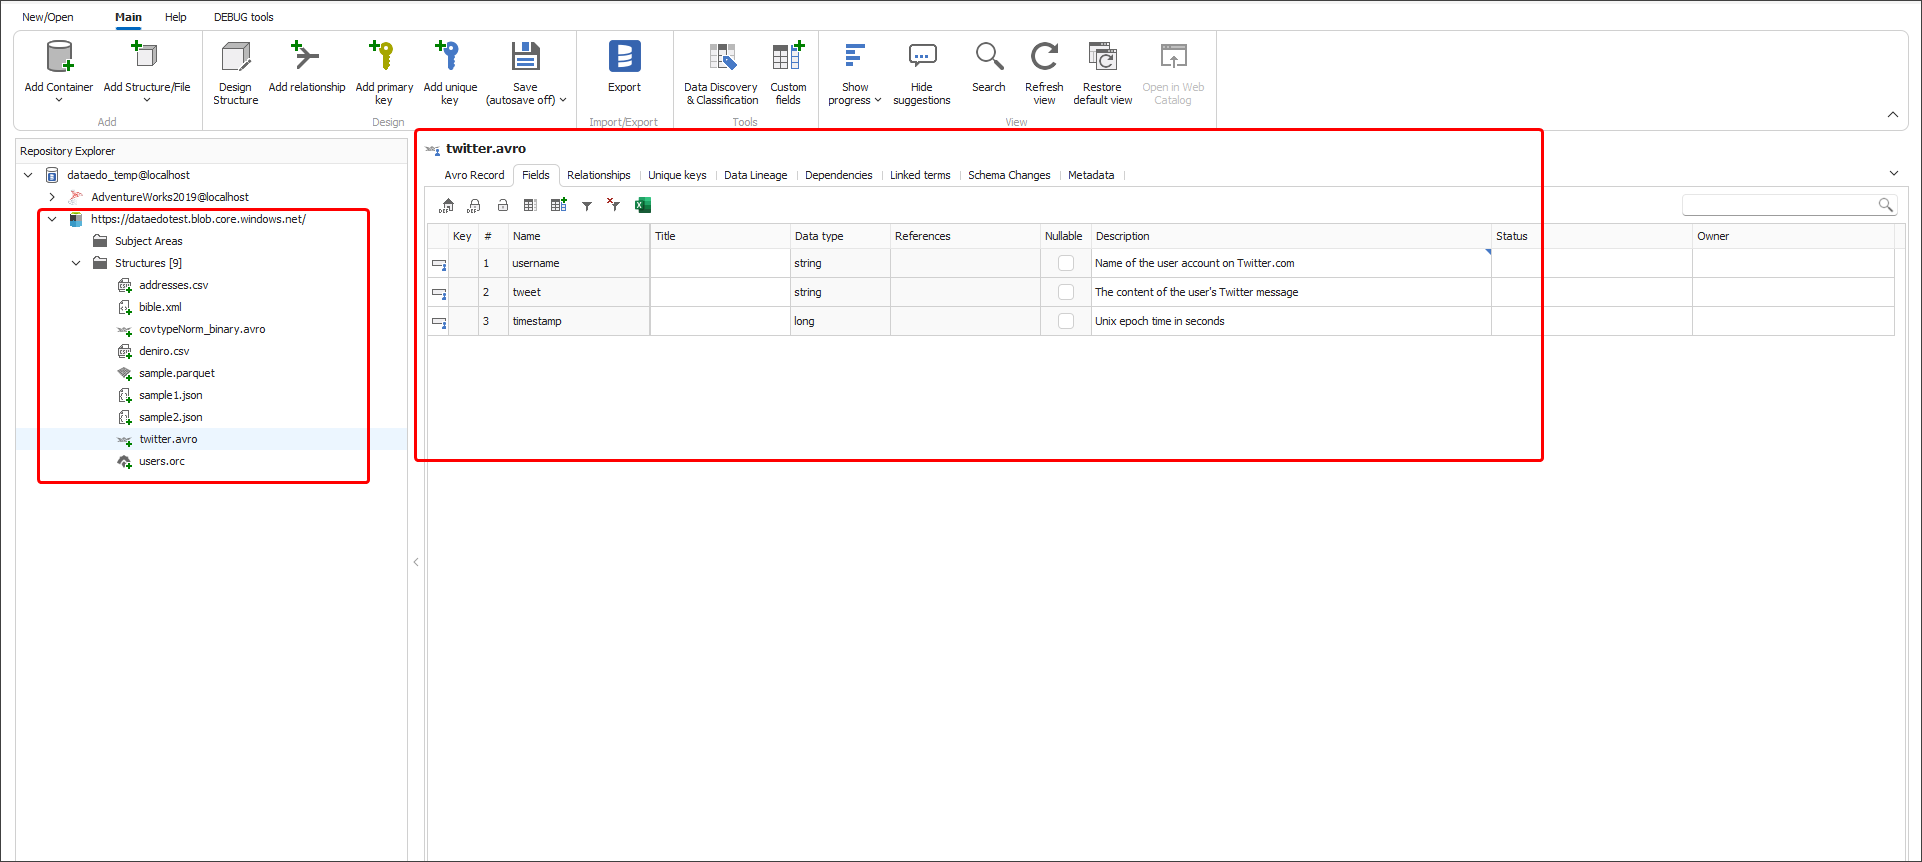
Outcome
Selected files' metadata was loaded into a new documentation.
Data profiling
Dataedo does not support profiling objects stored in Blob Storage directly. However it can be done via Synapse Analytics and Databricks connectors if data from Blob Storage is referenced by External tables. Those tables can be profiled just as other tables.
To learn more about External Tables in mentioned sources visit:

