Manual Data Lineage in Portal
Data Lineage can be edited by users with Edit permissions only
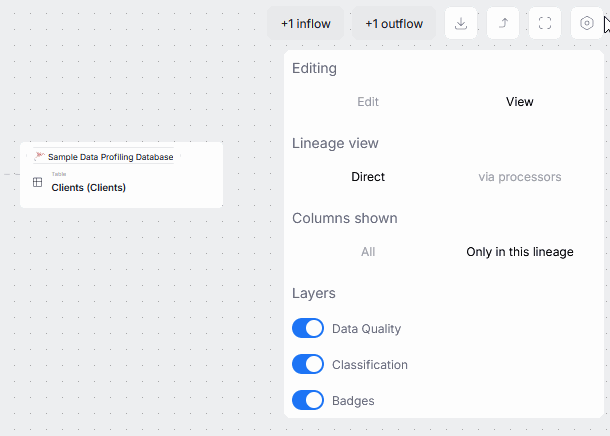
To start creating Manual Lineage, click the options icon in the lineage view and enable Edit mode. Remember to turn it off when you are finished.
There are two editable Lineage views: Diagram, and Processes. Both let you map how data flows between objects, but they differ in scope and flexibility. The Diagram view lets you define straightforward links between objects (including one-to-one data transformations and transitions), while the Processes view allows you to diligently document local procedures behind the data flow and transformations within your object, including complex, multi-column relations.
Since simple changes made to Lineage Diagrams can very often intertwine with more complex, hidden processes, they are harder to revert, and cannot always be deleted after they are saved in, they also can't be edited from the diagram tab. Changes made in the processes tab on the other hand, can be easily edited and deleted after saving. Finally, since they offer a broader editing environment, changes that can no longer be reverted or edited from the diagram view, can still be modified in processes.
Terminology
There are a few key terms and concepts that you need to understand before creating manual lineage.
Inflows and Outflows
Inflows and outflows relate to the flow of data. Inflows are all the columns that your object inherits from other objects, while outflows are the columns it passes on to the next object in lineage.
On the UI level, inflows and outflows are represented by the lines coming in and out of nodes. The plus icons you see in Edit Mode are used to add new flows. The one to the left of your object is used for the inflows, while the one on the right for the outflows.
Node
A node is simply an object's representation in the lineage view. It is not the object itself — removing a node from lineage, will delete that node and lineage links going out from it to other objects, but it will not delete the object from your repository, its hidden lineage links, or other nodes representing it.
Lineage scope and context
When viewing lineage, you always work in the local scope of the object. This means that the lineage is displayed based on the columns of your selected object that participate in lineage. This scope is called lineage context.
When creating manual links you can still add columns from outside of the context. If that happens, you will see an appropriate notification. When you save the lineage after edits, that column will be saved in the correct place, but it will not be visible in the original object's lineage view.
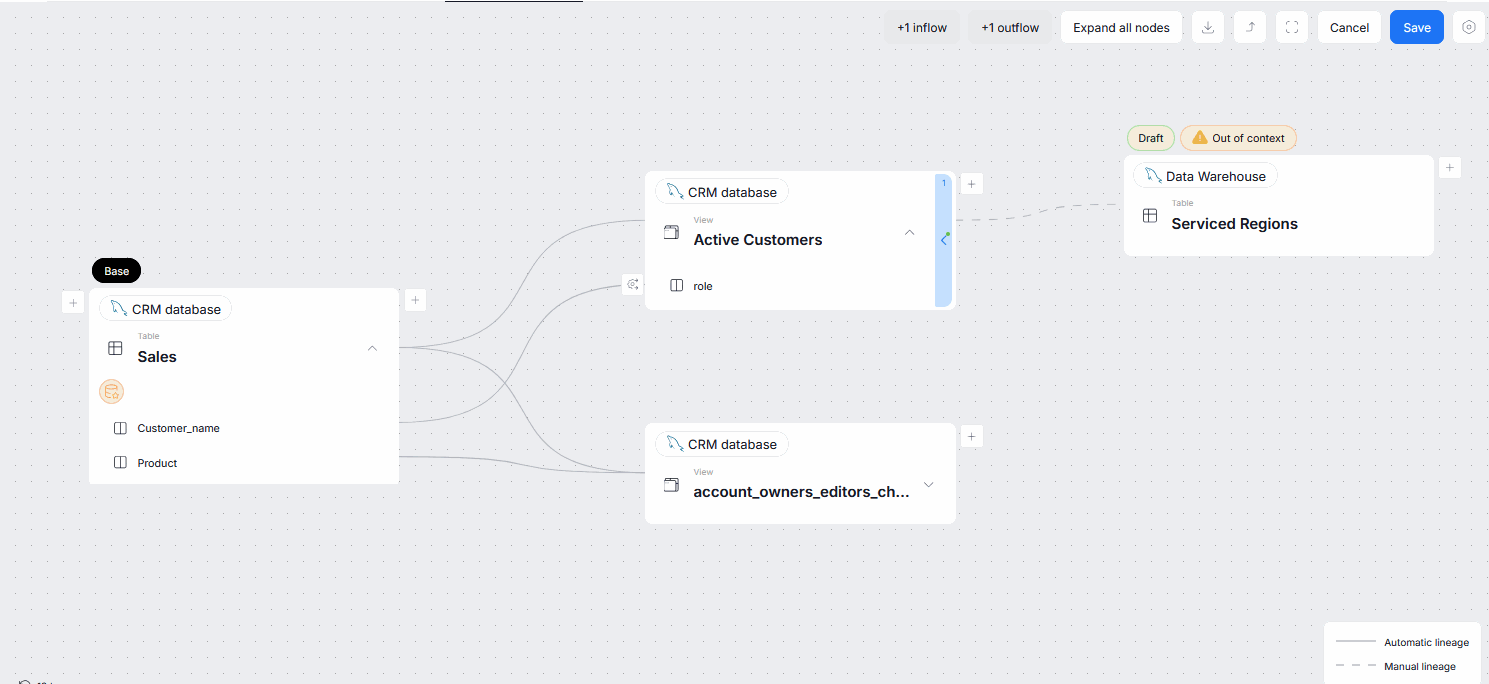
To help with this abstract explanation, let us present an example. Suppose you have a Sales table with a Customer_name column. This column is then passed to an Active Customers table. So you add an outflow from Sales to Active Customers. All mentioned columns are still in the local scope.
Now, suppose that Active Customers also has a Country column which is inherited from another source. You add an outflow between the Country column of Active Customers and the Country column of a Serviced Regions table. Because the Country column was never a part of the original table's (Sales) lineage context, it is added in an Outside Scope. When you save your edited lineage, Country's in and outflows will disappear from your lineage view. The manual link was saved, it is simply not visible in the current context. If you move to Active Customers or Serviced Regions, that lineage link will be visible.
Explaining local scope
Editing in the Diagram view
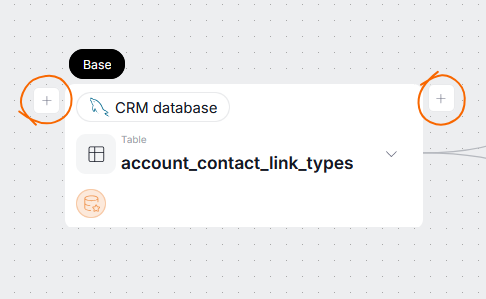
In edit mode, you can add links to every node visible in the object's lineage view. The Base node represents the object whose lineage context you are currently viewing.

Establishing a new link
To start the manual lineage process, click the plus icon, depending on whether you want to establish an inflow (left) or an outflow (right).
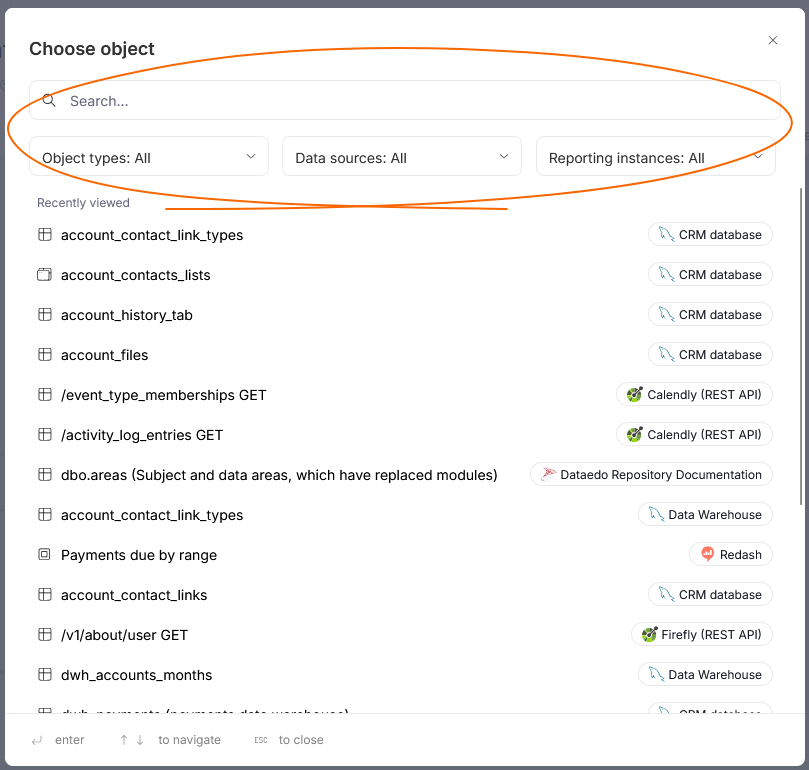
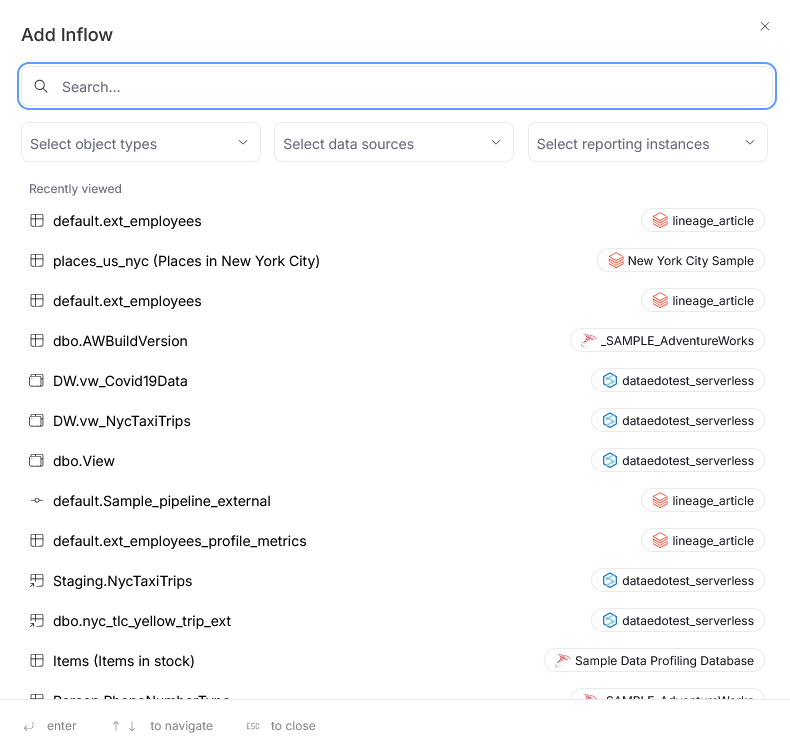
This opens a popup, where you have to select an object you want to map in relation to the selected node. You can restrict which objects are displayed using filters or the search bar. Objects that are already a part of lineage will be grayed out.
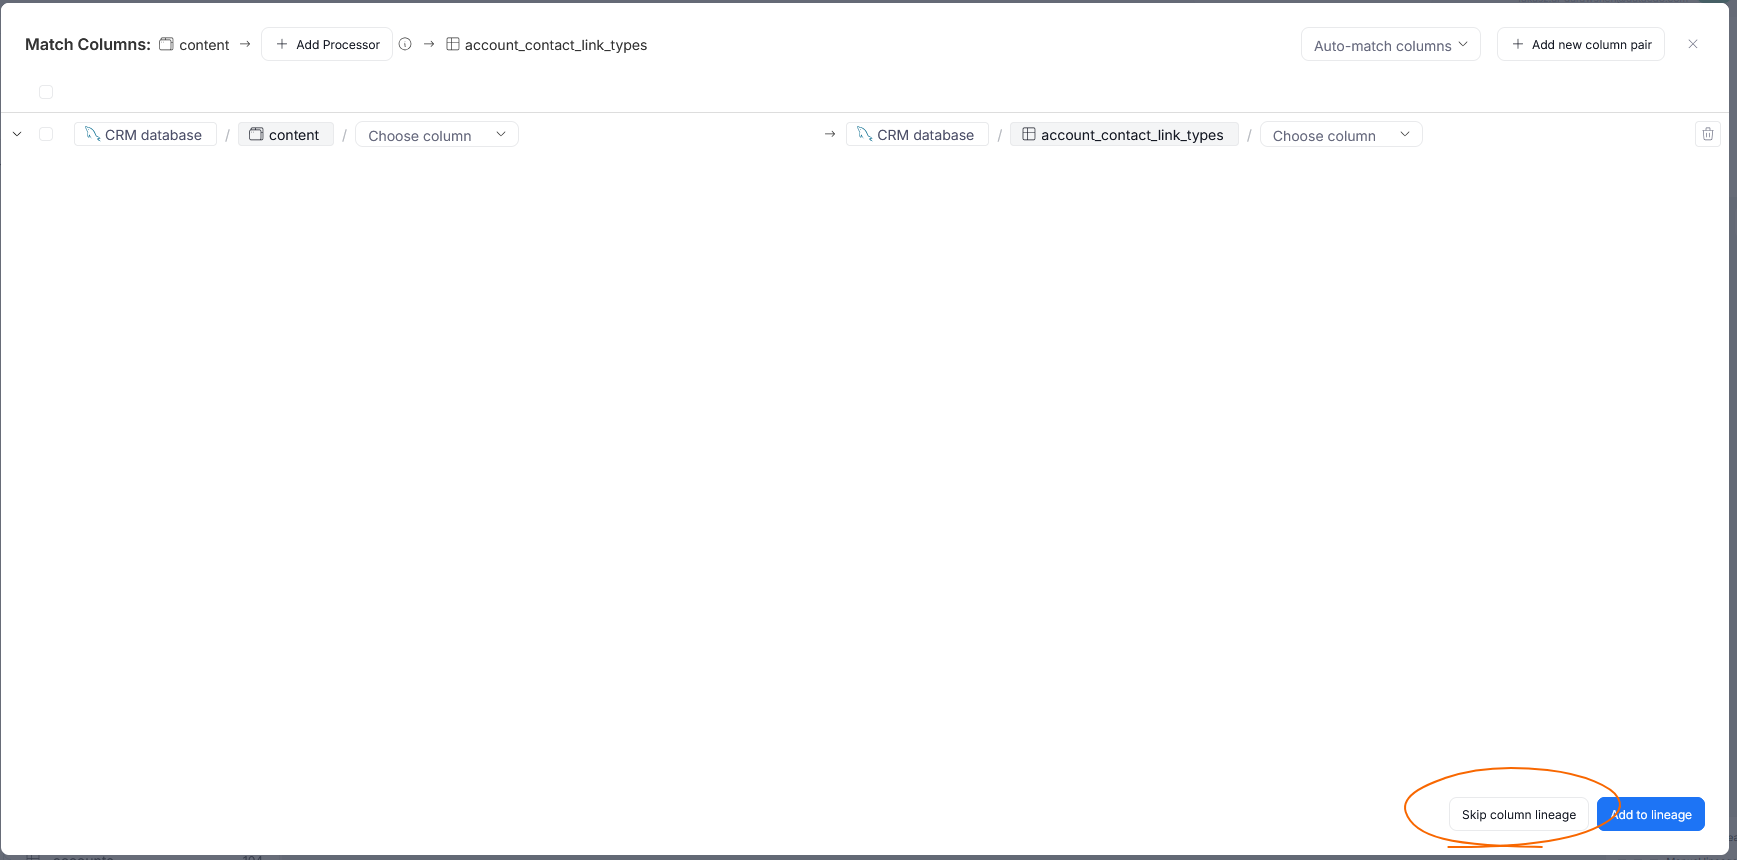
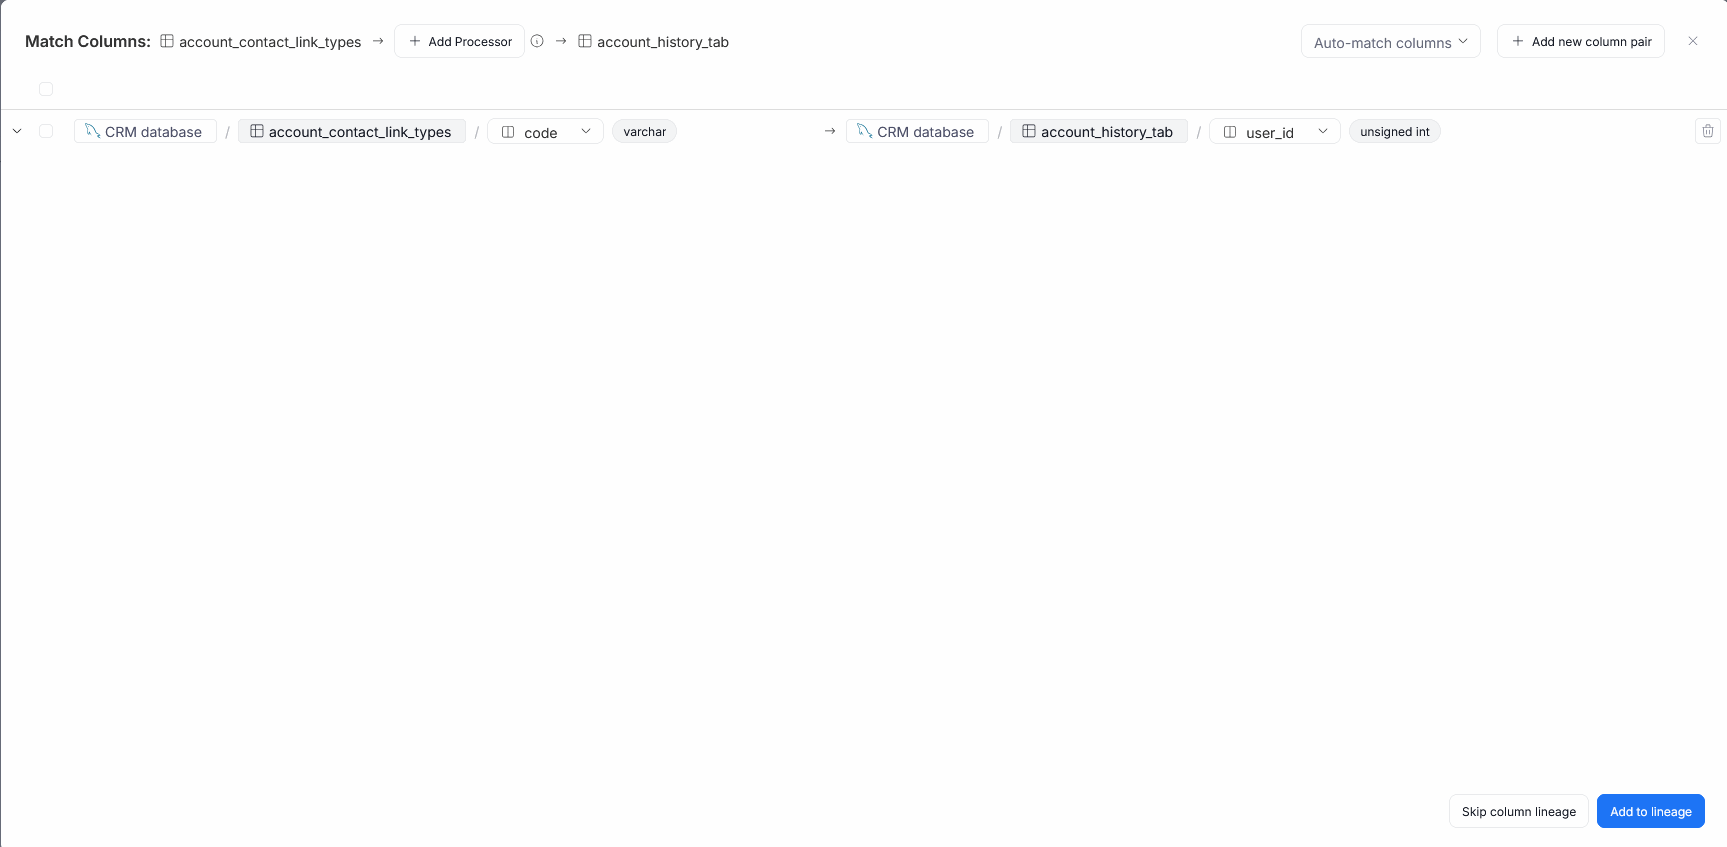
When you select an object, you will see a next popup. By this point, you have established the most basic correspondence — object to object mapping. If that satisfies you, you can finish the process by clicking Skip column lineage.
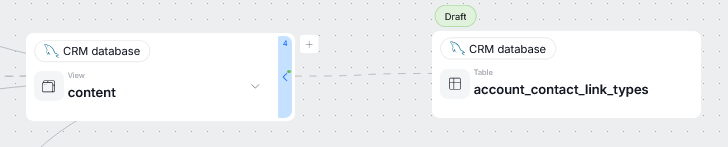
On the lineage diagram, this connection will be denoted by a single line between two objects, without any column links.
Mapping column lineage
If you want a more detailed link in your lineage diagram, you should take advantage of column mapping. In the pop-up you see after selecting an object, you have to select columns that you want to map. When you click the Choose a column field, a drop-down with all selected object's columns will appear. Each column's data type is displayed to the right of its name.
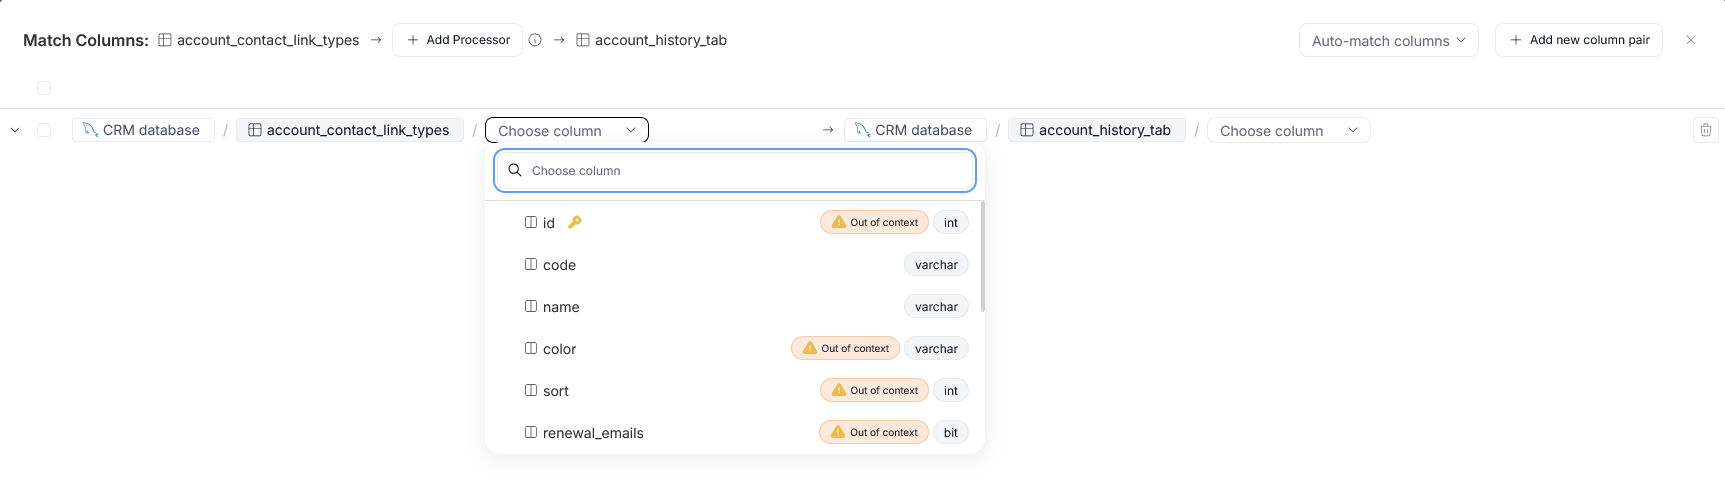
If you want to add more correspondences, you can use the Add new column pair button.
Advanced column mapping
Use the arrow button on the left side of a column pair to extend its summary. In there, you can define extra parameters of the link.
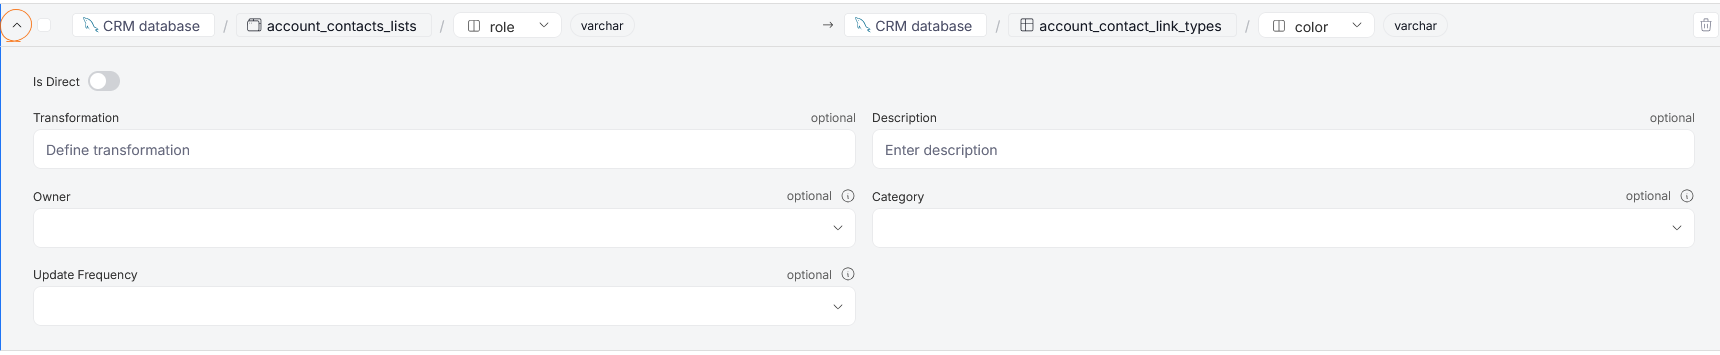
You can establish whether the connection is Direct (column is moved directly between objects without any transformations), using the is Direct toggle. You can also define the transformation between the two mapped columns, and optionally add a description to the connection. If any Custom Fields are enabled for Column Lineage, you can assign those as well.
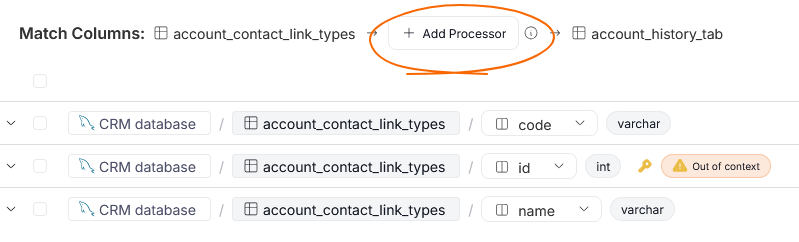
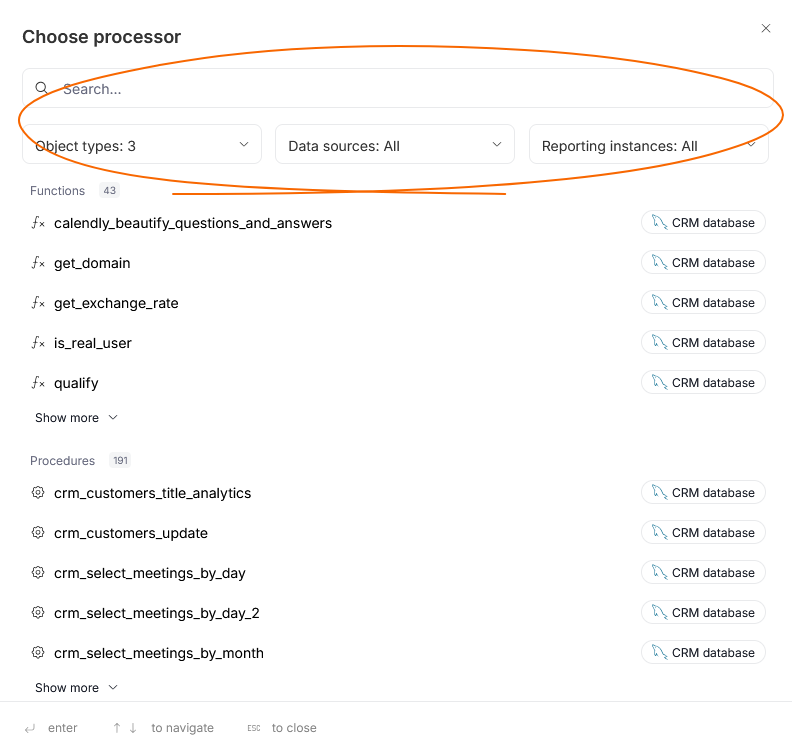
Add processors
Processors are responsible for processes behind data transformation and data flow between your objects. You can add a processor using the Add Processor button.
In the popup that appears, you can optionally select which object you want to choose as a processor. You can also narrow down the options using filters or a searchbox.
Auto-match columns
You can also take advantage of our matching algorithms to automatically create pairs of potentially related columns. To do that, use the Auto-match columns section.
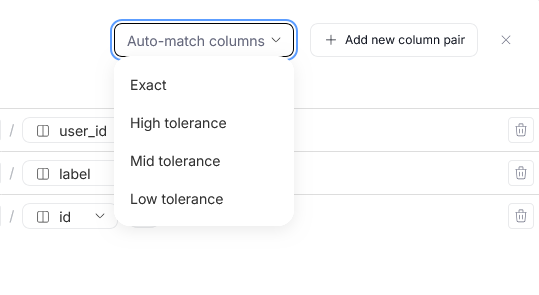
You can choose from one of four pre-defined protocols:
- Exact — only column pairs where both column names are exactly identical (including capitalization, accents, and special characters) are created
- High — only column pairs where both column names are identical after normalization (ignoring capitalization, accents, special characters etc.) are created
- Medium — after normalization, column names can differ by a few characters (usually around two) so that a pair is created
- Low — pairs are created when column names differ by up to two syllables after normalization, when the base name is modified by affixes, or if the column names differ in word order
The protocol you select, depends on your needs. Exact and High are best if you are interested only in columns sharing the same name, while Medium is best suited for situations where column names can differ due to use of grammatical or case affixes (plural endings, gender agreement, case endings etc.). Finally, Low is best suited for complex, multi-word column names, or column names with numbers in them.
Column pairs added using auto-match will be marked with the Auto tag on the Column Matching pop-up, so you can easily identify them. However, the tag will disappear if you manually adjust their parameters.
Deleting pairs
If you added a column pair by accident, or are not satisfied by a pair suggested using Auto-match, you can delete it using the trash bin icon.

If you want to delete multiple pairs at once, select the unwanted pairs using checkboxes, and click the Delete button that will appear above the list of pairs.

Delete object from Diagram view
Currently, only lineage nodes that take part in simple lineage (only two objects take part in a relationship) can be deleted.
In the edit mode, you can remove a node from the lineage view. To do so click the trash bin icon next to a node.
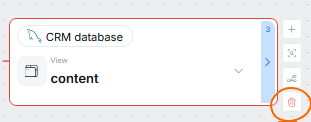
There is a difference in interactions, depending on whether you are deleting a completely new node (marked as Draft on the diagram) or a one which has been already saved and added to lineage.
Removing an unsaved node, will also delete all subsequent lineage links and other new nodes stemming directly from it.
If deleting a saved node, only the chosen node is removed. This means that the object's representation and all visible lineage links coming in and out of it will be removed from the lineage view. However, this object's columns participating in other processes will remain intact.
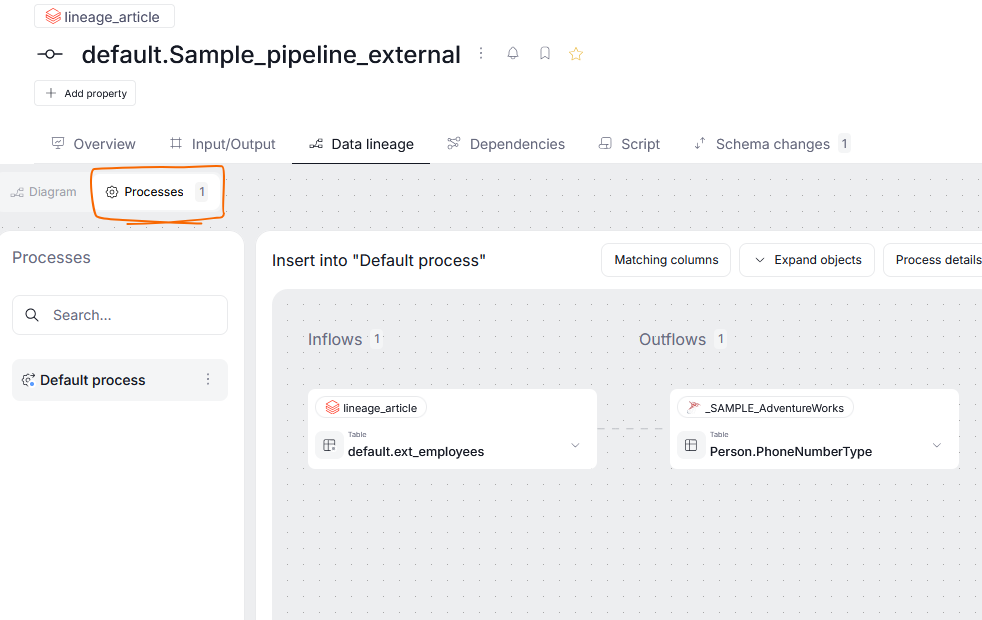
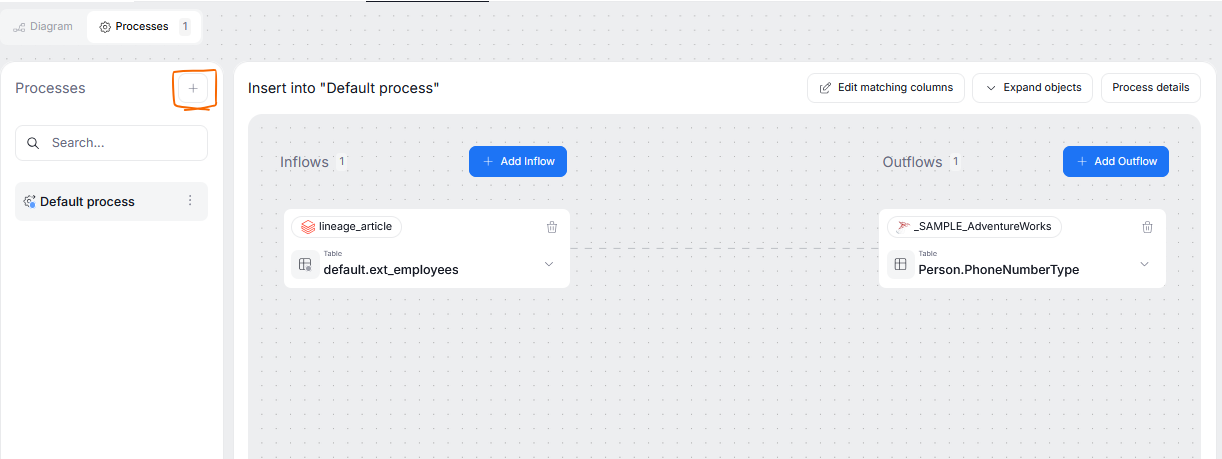
Editing in the Process view
Processes are an important part of Data Lineage, since they assist in data flow and transformations. While most processors can be extracted automatically during metadata imports, Dataedo gives you the option to manually add new processes or edit existing ones. This can be done in the object's Processes tab, where you can see a list of all processes where your currently viewed object is a processor
The Processes tab gives you full control over documenting mechanisms governing your data's flow: you can define inflows and outflows independently, edit the process script, and manage column correspondences.
Using Processes tab differs from assigning processors in the Diagram tab in two main ways:
- Processors added via the Diagram Tab are saved without any further configuration; you cannot define further flows, establish column transformations or attach a script. The Processes tab on the other hand gives you more control over extra parameters
- Adding a processor in the Diagram Tab basically establishes a process where the mapped objects act as inflows or outflows for another processor. In the Processes tab you are explicitly mapping relations where your viewed object is the processor
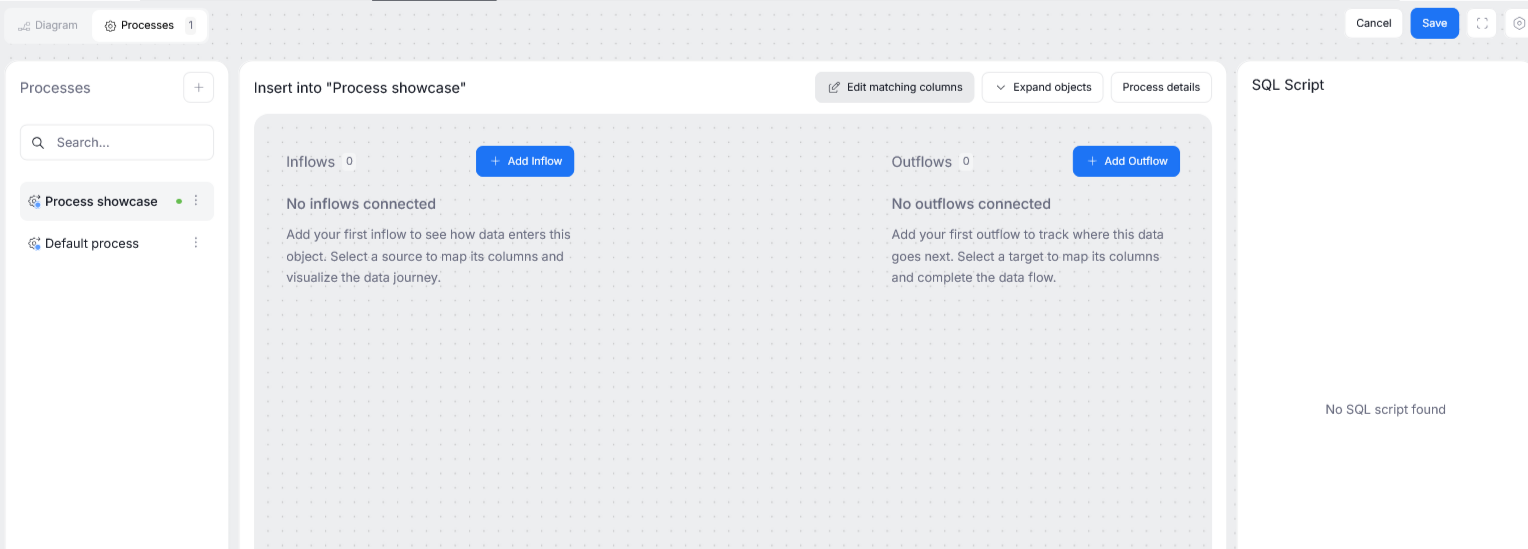
Adding a new process
To add a process, make sure you are in edit mode and click the plus icon on top of the processes list.
You will see a popup asking you to name your process, and add its description. You can also paste the script governing any potential data transformation handled by your process. The process created this way will always have your currently viewed object set as a processor.

Editing a process
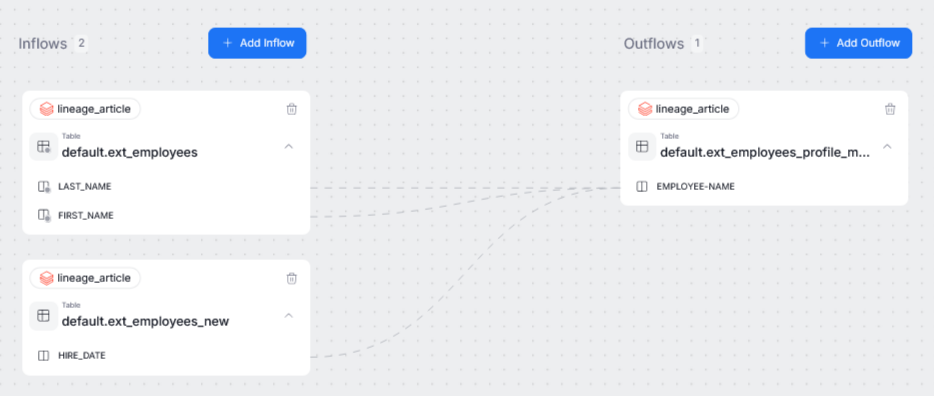
When you select a process from the process list, you will see its overview. The overview's left side represents inflows, and the right side its outflows. So, in other terms — the objects on the left side are those whose columns are used as inputs for your processor, and the objects on the right receive the data that has already been passed through the processor.
The inflows and outflows have to be added separately. This is because processors are asymmetric in nature, you can have multiple inflows but only one outflow, or the other way around. To add an inflow or an outflow, use their corresponding button.
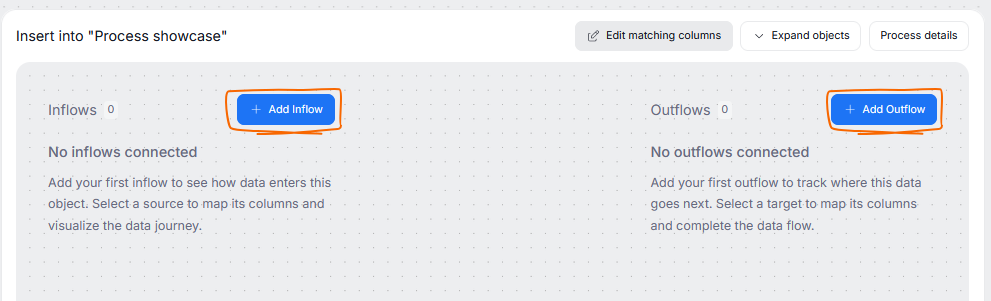
This opens a popup, where you can select an object from the list of objects in your repository. Clicking an object will automatically add it to the process.
Matching columns
Processes can involve entire object-to-object transformations, however more often they are concerned only with singular columns. Once the inflows and outflows of a process are defined (either manually or automatically during Lineage Extraction) you can map the columns to represent where the transformed data comes from. This can be done using the edit matching columns button.
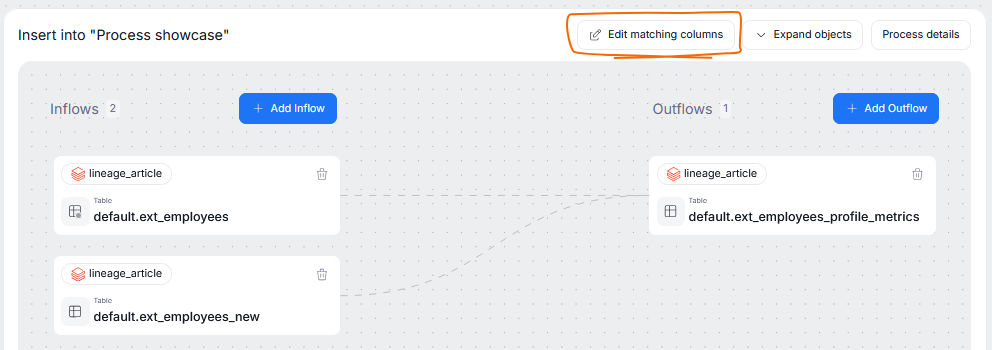
This brings up the popup identical to the one from column-mapping in manual lineage.. The only difference between them, is that you can select only columns from the objects that are already added in the processor.
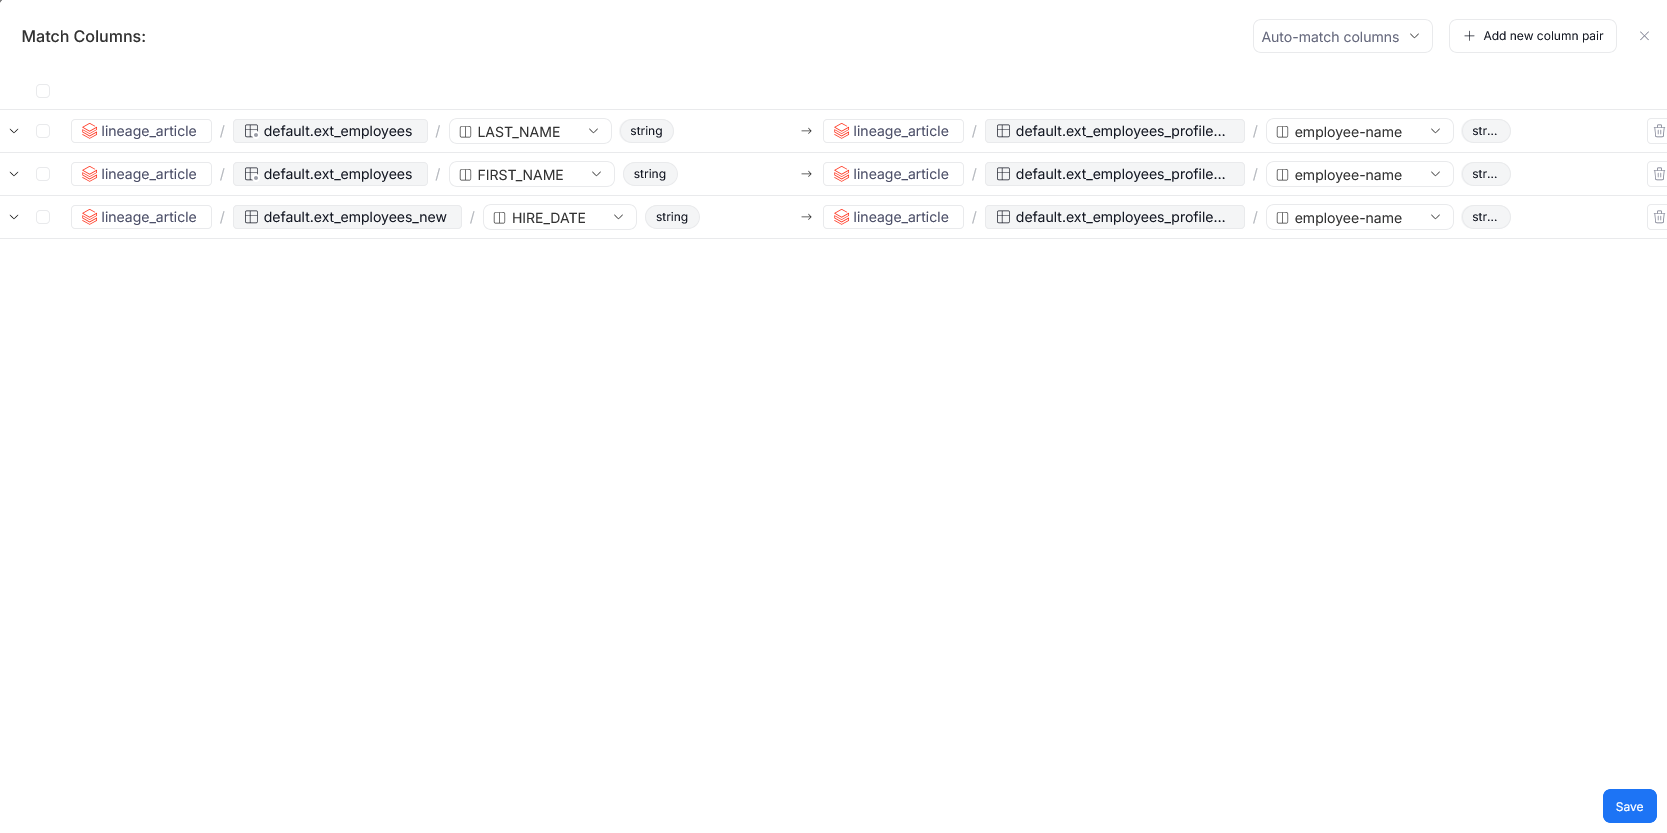
After saving, the column relationships can be viewed in the process diagram.
Editing script
You might want to attach a script to your process, to illustrate how the transformation takes place. If you have not added it during process creation, you can still edit it by selecting your process from the list, clicking the three dots menu and selecting Process details.
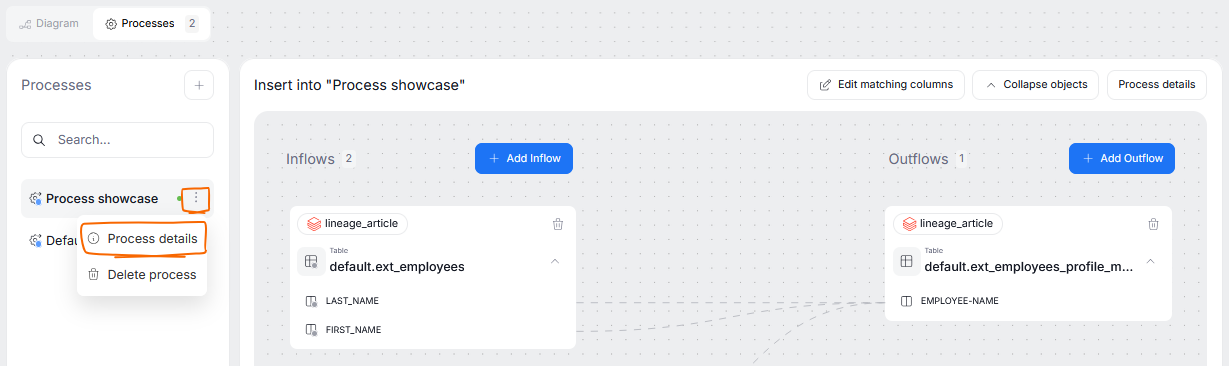
This opens a window, where you can edit your process details, including the attached script.
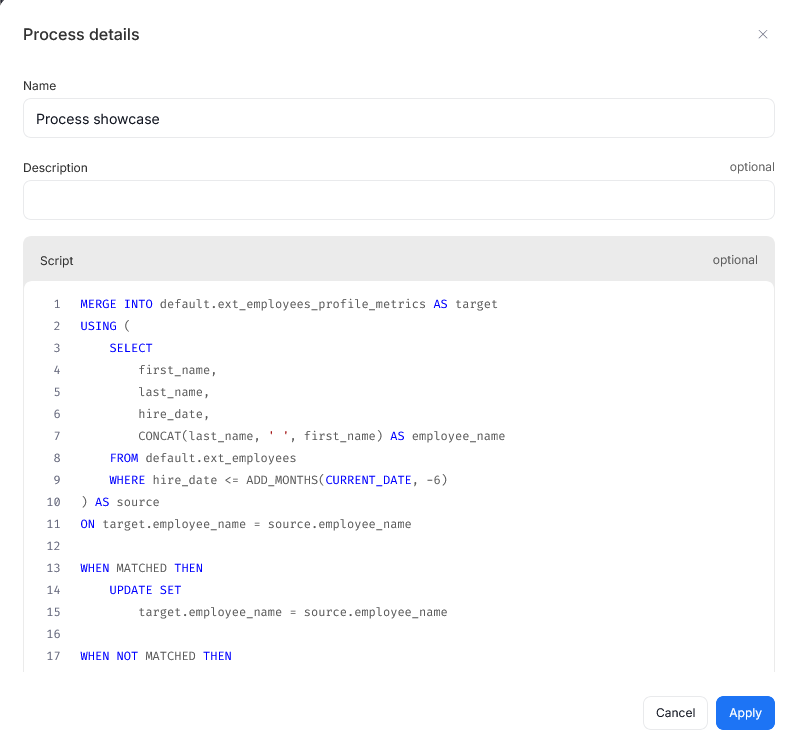
A script attached to a process will be visible to the right of a process diagram.

Unsaved progress
If you make any changes in the processes tab (adding a new process, editing an existing one) the changes will not be saved until you do it manually. To help you quickly check which processes were edited since the last manual save, Dataedo will mark them with a green dot.

Save lineage state
Lineage Diagram and Processes Diagram are treated as two separate workspaces — so always make sure to save one of them before moving onto editing the next one
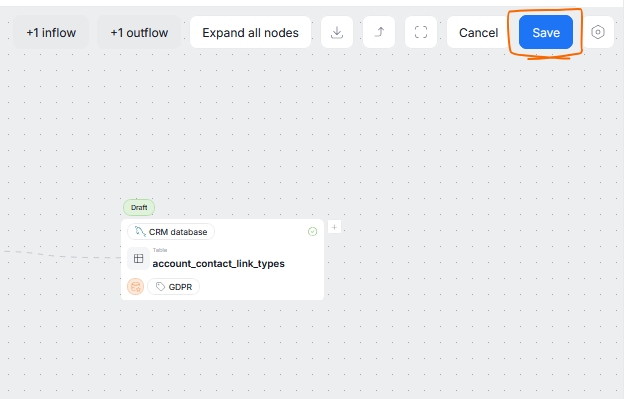
Changes you made in your Lineage View are not automatically saved to your repository. If you want to commit and save your changes, so that they can be viewed by others in your organization, press the Save icon visible in the top right corner of lineage view. This icon is visible only if there are any changes to save.