Amazon Redshift - Connecting to Database
Introduction
We recommend using metadata import in the Portal as the primary method of connecting your data sources.
The Portal offers significant advantages compared to the Desktop application:
- Import multiple sources in a single flow.
- Schedule recurring tasks (metadata import, profiling, and data quality checks).
- Manage connections centrally.
Import through Desktop is still available and allows importing one source at a time.
You can find the instructions at the bottom of this page.
Prerequisites
Network access
Dataedo connects to the Redshift endpoint over the standard SQL protocol on port 5439 (by default). The cluster or Serverless workgroup has to be reachable from wherever Dataedo runs:
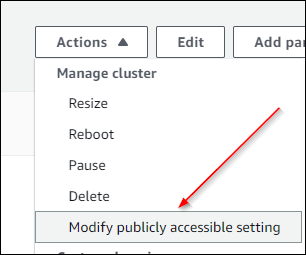
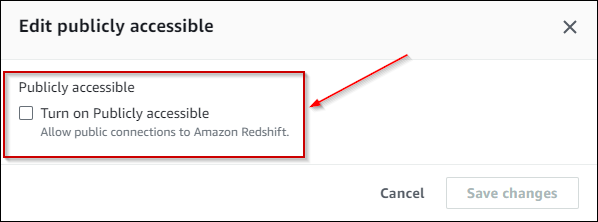
- Dataedo Agent or Desktop outside the cluster VPC — the cluster needs Public accessibility turned on, and its security group has to allow inbound traffic from the machine running Dataedo.
- Dataedo Agent inside the same VPC — public accessibility is not required; a security group rule allowing the Agent's subnet is enough.
Account privileges
Metadata import needs read access to the system catalog of the documented database. COPY-command import and table statistics need additional privileges — see Required access level.
Importing Metadata in Dataedo Portal
Entry point
To start the Metadata Import flow, make sure you have the Connection Manager role.
Then navigate to:
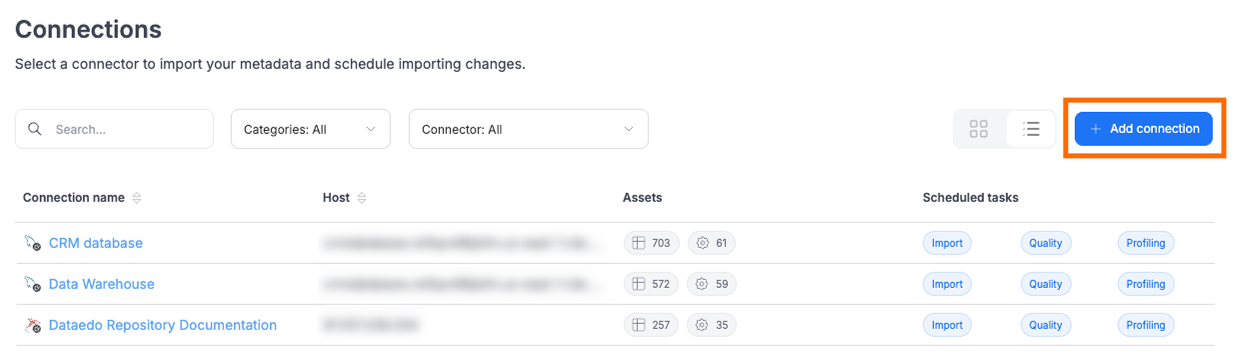
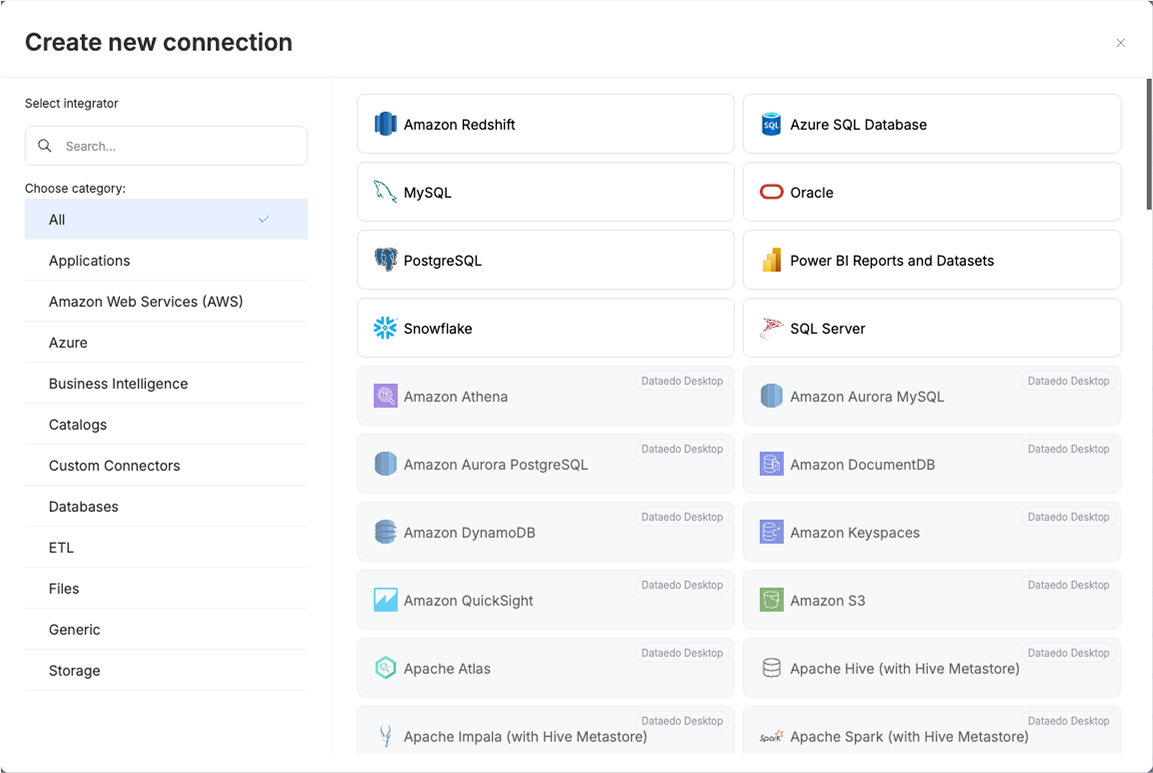
Connections → Add new connection → Amazon Redshift
This will open the import wizard described in the following steps.
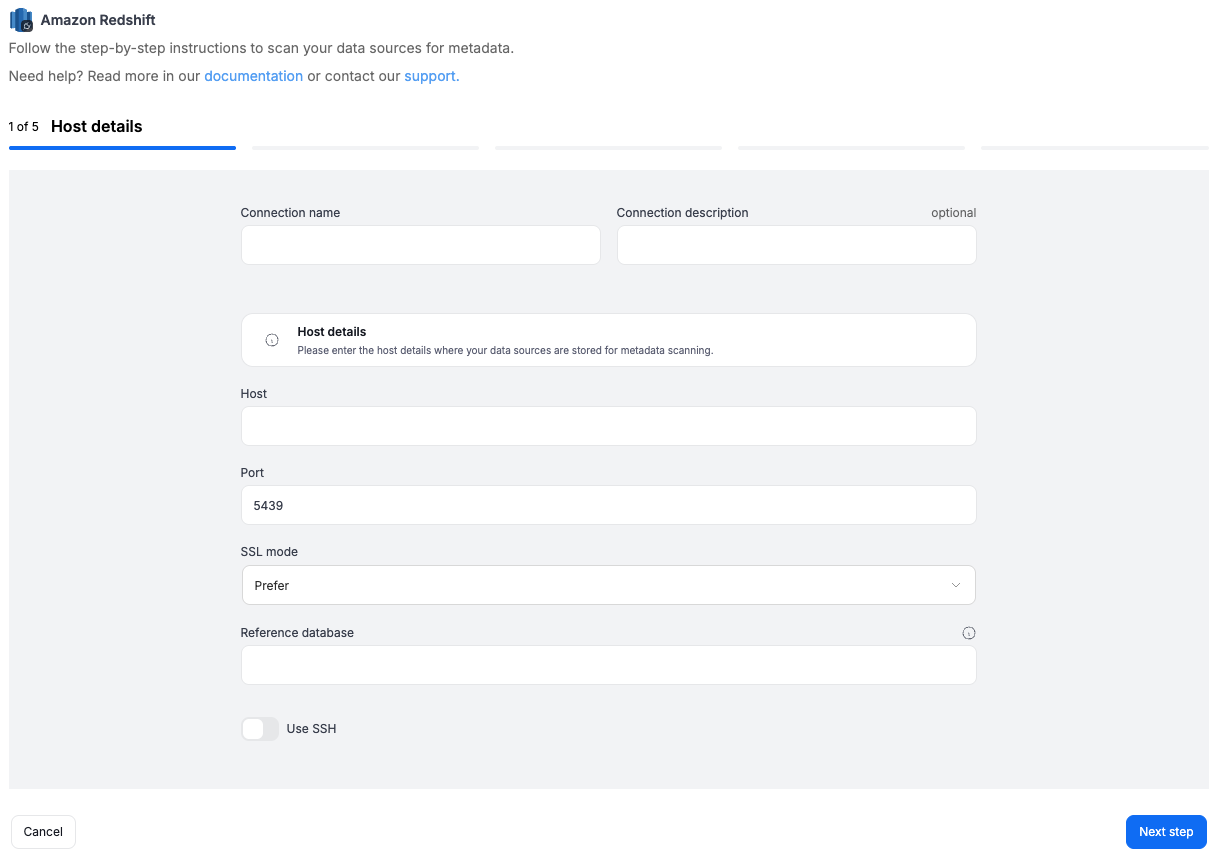
Step 1. Host details
Provide the connection details such as host, port, SSL mode and reference database.
You will also be asked to name the Connection.
- Host - the Redshift endpoint address, for example
sample.eu-west-1.redshift.amazonaws.com. - Port -
5439unless the cluster uses a custom port. - SSL mode:
- Disable - don't use SSL.
- Require - connect with SSL. If the server doesn't support SSL, the connection won't be established.
- Reference database - the database Dataedo connects to first, in order to list the remaining databases.
A Connection in Dataedo represents a saved configuration for accessing a data source.
It can be reused for future imports and scheduling.
Step 2. Credentials
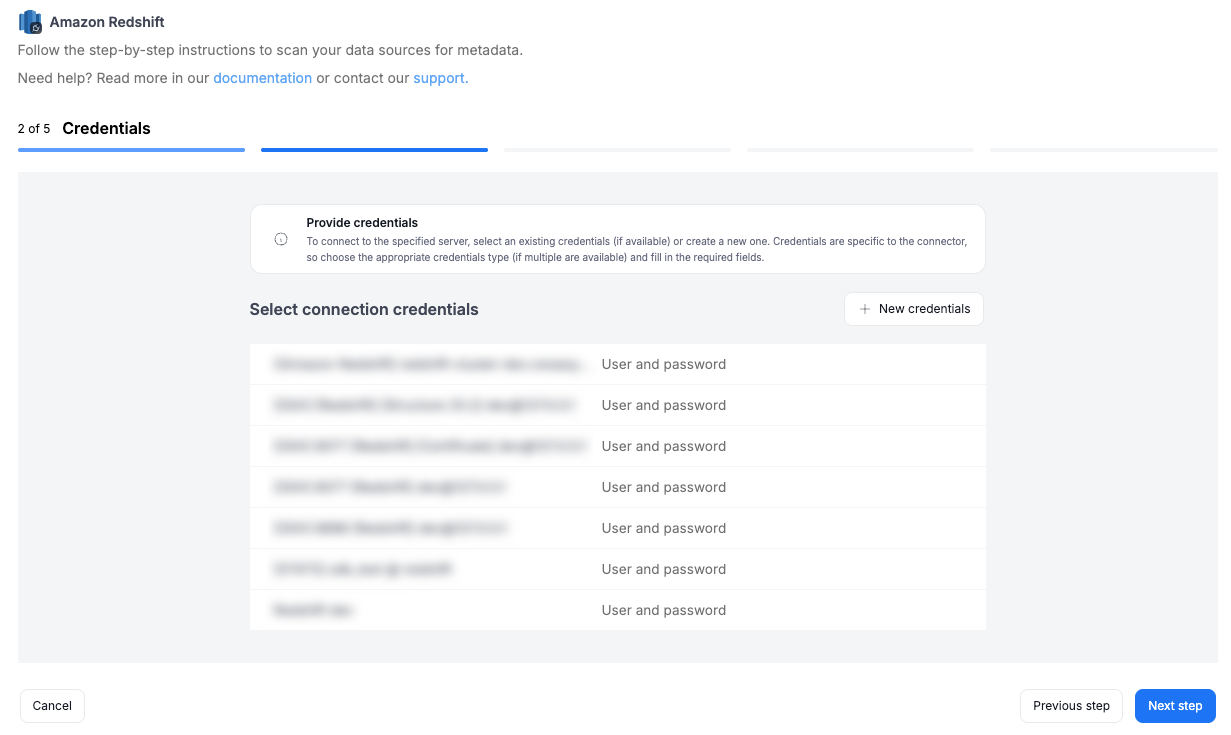
Choose credentials from the list of existing ones available for the selected connector, or add new credentials. Redshift accepts a user name and password — either a native Redshift user or an IAM-managed one.
Step 3. Databases
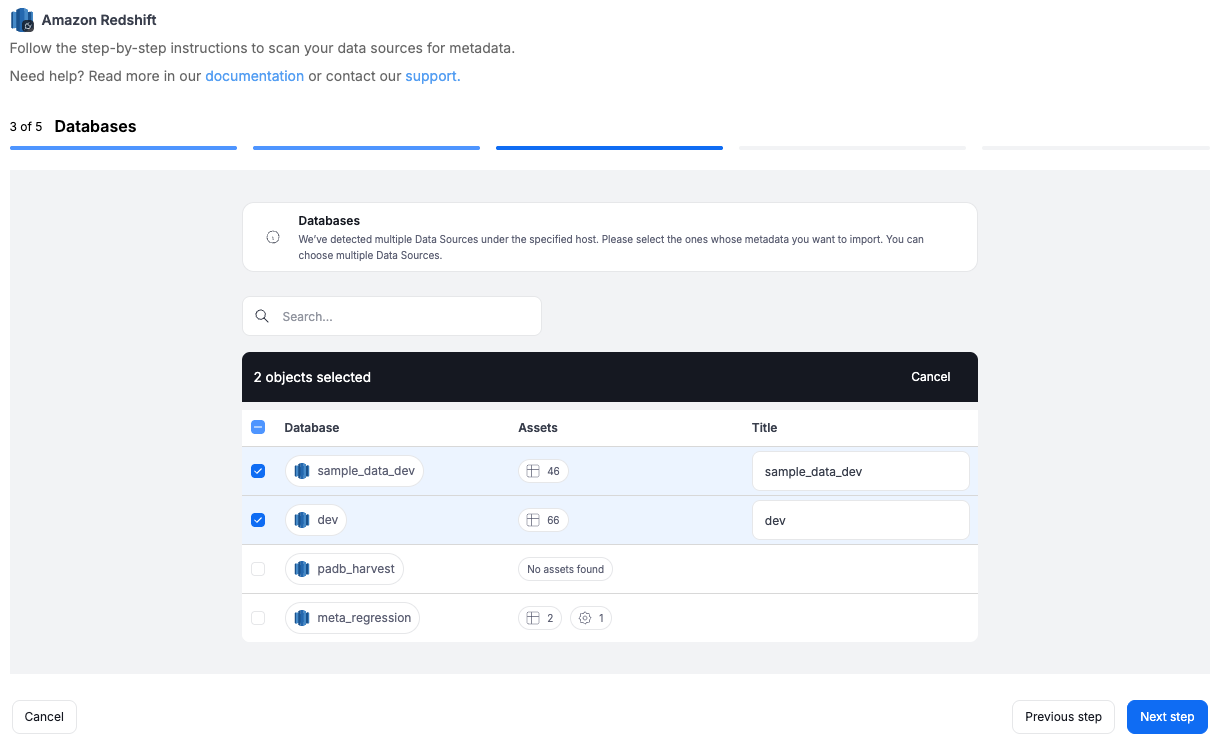
During one import you can read the metadata of up to 20 data sources. You can reuse the same connection to import more sources later.
- The Portal will display all databases accessible with the provided credentials.
- You can select multiple databases at once and use the search box to narrow down results.
- Each selected database should be given a Title, which will be visible in Dataedo.
- At this step, the Portal also retrieves the number of assets in each source.
Redshift exposes no Extended properties, so the wizard skips that step. Custom field values have to be filled in manually in Dataedo after import.
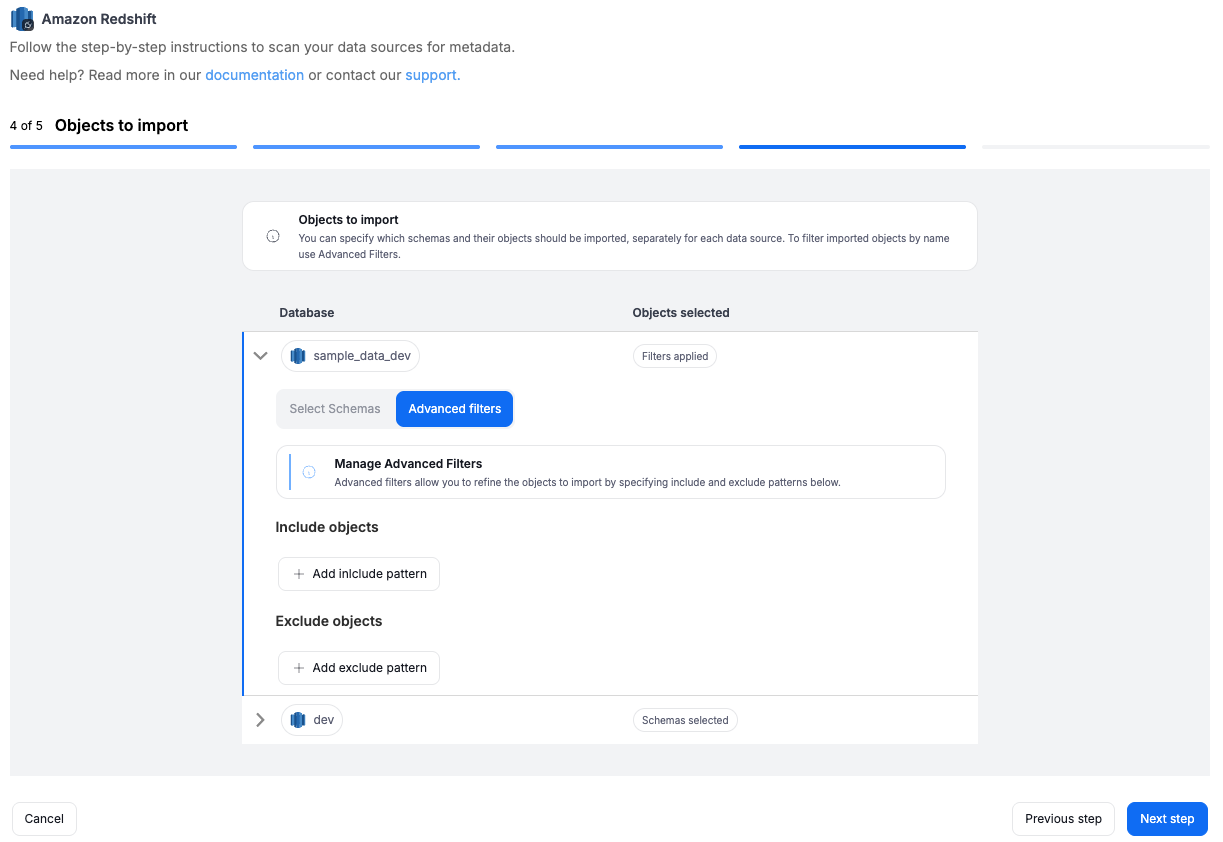
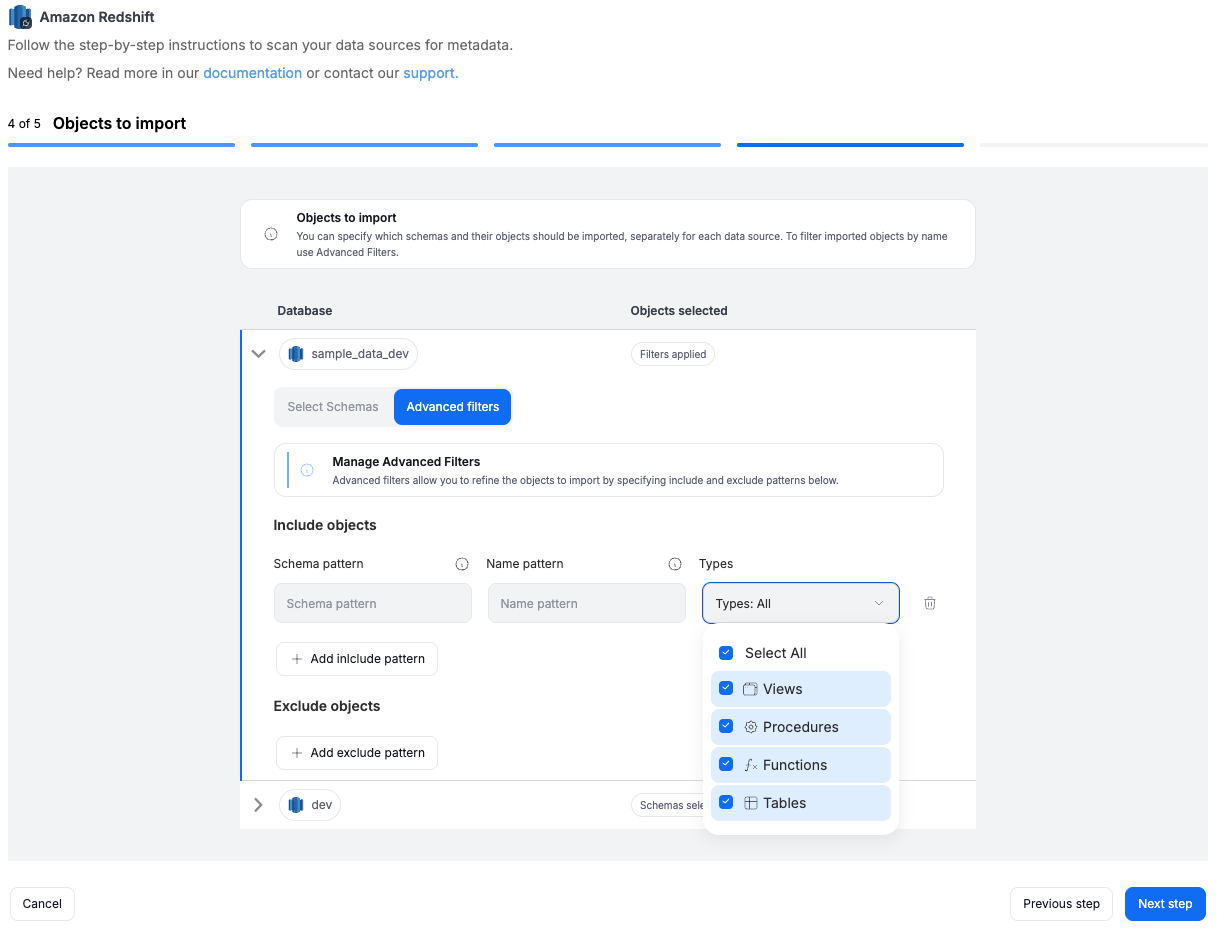
Step 4. Objects to import
For each selected database, you can refine which objects to import:
- Select schemas and object types (tables, views, procedures, functions).
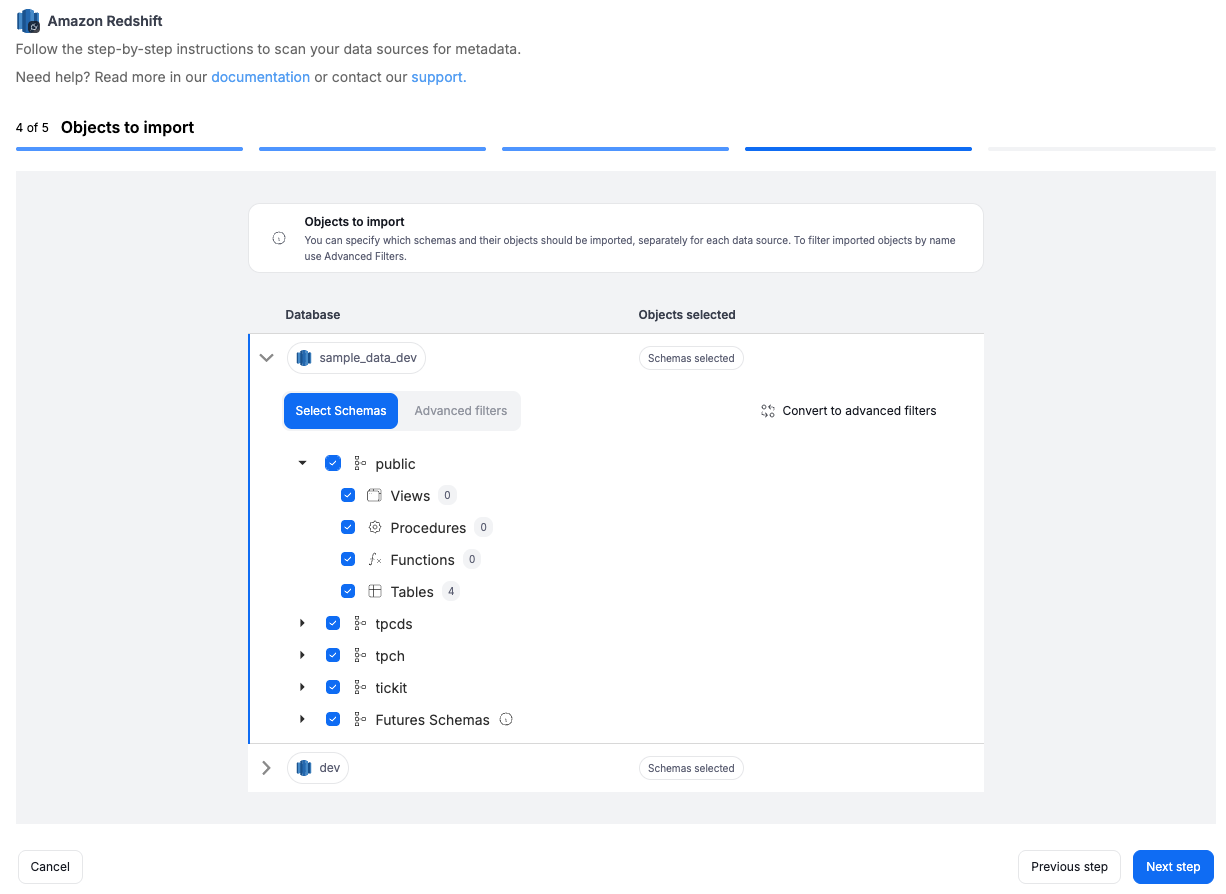
- Use Advanced filters to include or exclude objects with:
- schema patterns
- name patterns
Step 5. Linked sources (optional)
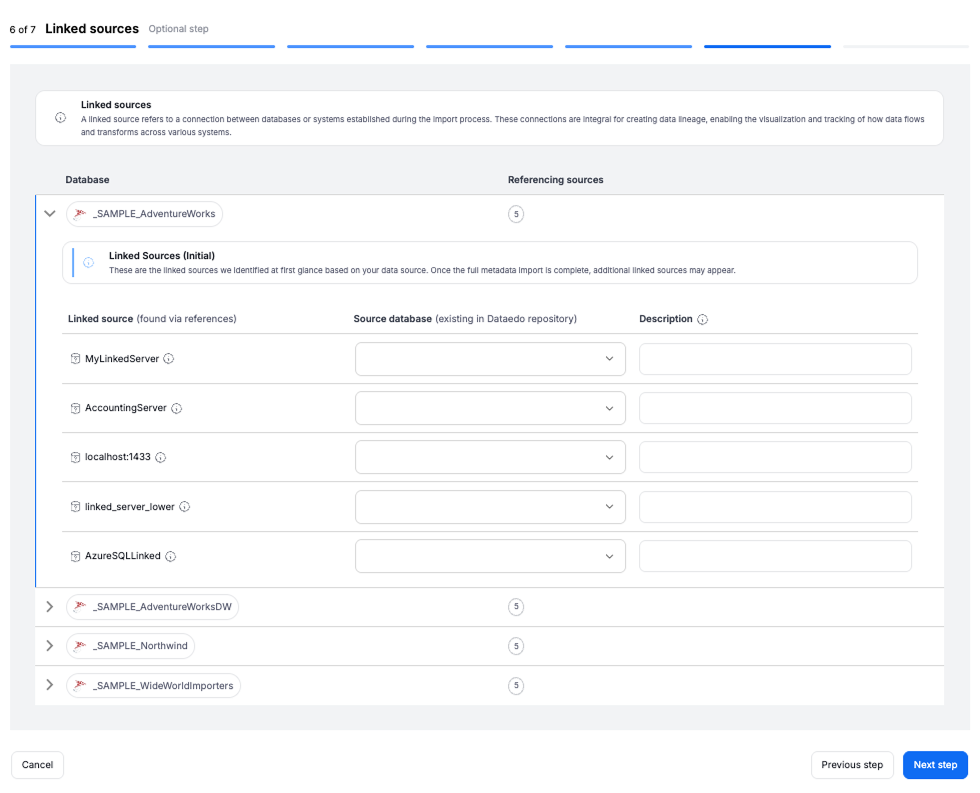
A linked source refers to a connection between databases or systems established during the import process.
They are essential for data lineage, enabling visualization and tracking of how data flows and transforms across systems.
For Redshift, linked sources come from external-table and COPY-command S3 locations and from external schemas over AWS Glue Data Catalog, Hive, PostgreSQL, and Amazon Kinesis.
In this step, you can map linked sources to existing Dataedo sources. This mapping can also be updated later in the Connection details. To learn more read the detailed article about linked sources.
Step 6. Schedule
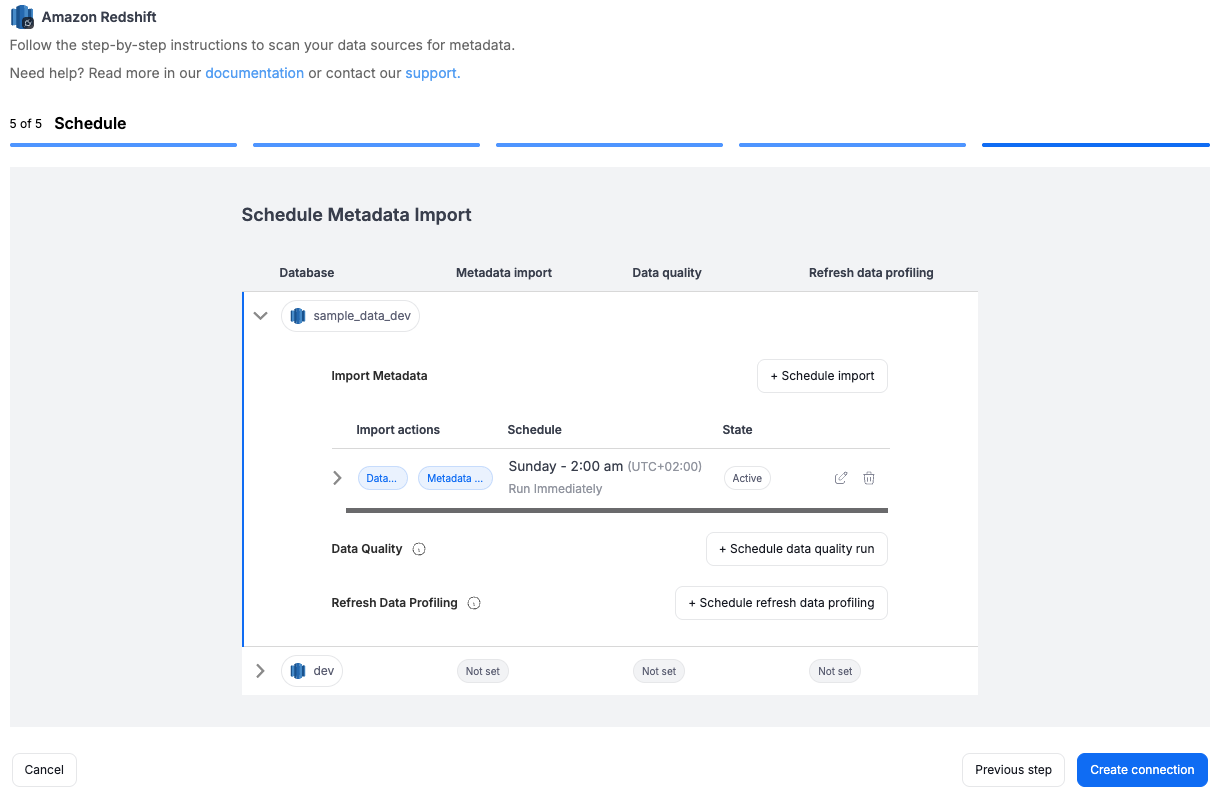
Configure scheduling options for each source individually:
- Define tasks you want to schedule (Metadata Import, Data Quality run, Refresh Profiling).
- Run daily, on selected weekdays, or on specific days of the month.
- Choose an exact time of execution.
- Task state:
Active– the task will run as scheduled.Draft– the task is saved but not executed until switched to Active.
- Run immediately – when checked, the task will also be executed right after clicking
Create connection.
Within one source, only one task of a given type can have Run immediately selected — checking it on another import task clears it from the previous one. Each source in the import can have its own task marked to run immediately.

You must configure at least one import task in the schedule section.
If you skip this, an empty database will be created and no metadata will be imported.
Import actions
Each metadata import task carries a set of options. For Redshift these are:
- Data lineage
- Build lineage – create data lineage during the import.
- Parse SQL – parse view, materialized view, procedure, and function scripts to build column-level lineage.
- Data lineage from query history – import COPY commands from
SYS_QUERY_HISTORYand build lineage from them. This option is what makes COPY commands appear in the catalog at all, and it requires elevated privileges — see Required access level.
- Metadata extraction
- Append only – never remove objects that disappeared from the source.
- Import dependencies – read view dependencies from
INFORMATION_SCHEMA.VIEW_TABLE_USAGE. - Import row count and statistics – import table statistics.
- Reimport all objects – for Redshift, every import already re-reads the whole schema, so this option changes nothing.
Metadata sync (writing descriptions back to the source) is not available for Redshift, so the wizard shows no metadata sync section. Comments can still be exported from Dataedo Desktop.
Importing Metadata in Dataedo Desktop
Metadata import is also possible using Dataedo Desktop.
In this mode, you can only import one source at a time.
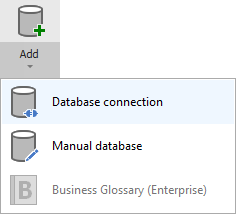
To connect to Amazon Redshift, click Add documentation and choose Database connection.
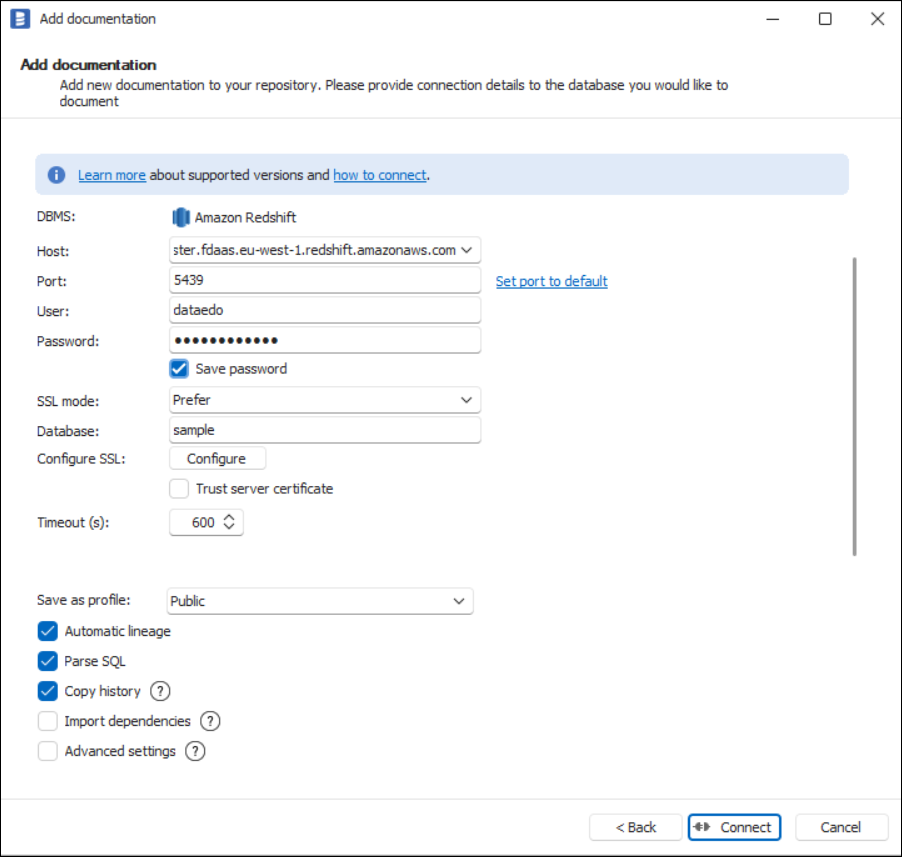
On the connection screen choose Amazon Redshift as DBMS.
Connection details
Provide database connection details:
- Host - provide an address of the Redshift endpoint,
- Port - change the default port of the Amazon Redshift instance if required,
- User - provide the username of the user (either native or IAM) that has access to the Redshift database,
- Password - provide the password for the given username,
- SSL mode:
- Disable - don't use SSL,
- Require - connect with SSL. If the server doesn't support SSL, the connection won't be established,
- Database - type in the database name. Desktop does not list Redshift databases, so the name has to be entered manually.
You can find most of the connection details in AWS Console -> Redshift Cluster options in the Endpoint field.
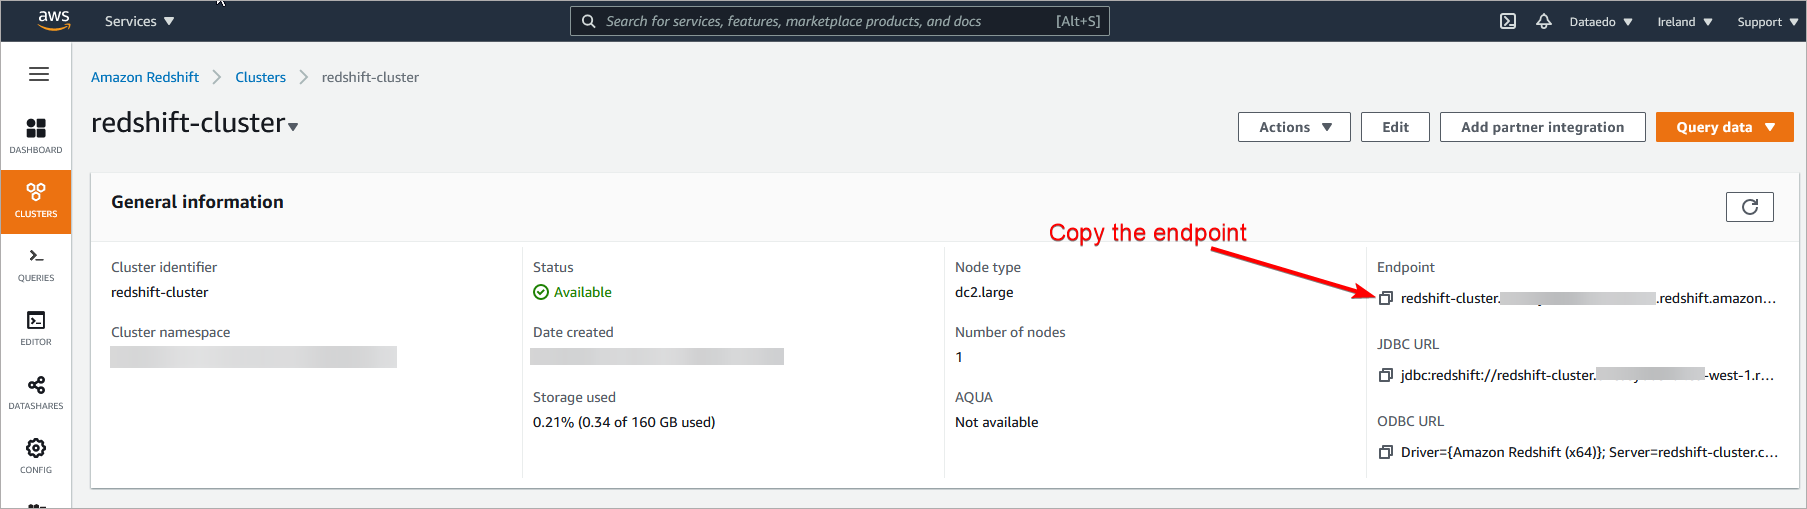
In the endpoint URL, you can find the following connection details:

Saving password
You can save the password for later connections by checking the Save password option. Passwords are saved in the repository database.
Importing schema
When the connection is successful, Dataedo will read objects and show a list of objects found. You can choose which objects to import. You can also use advanced filter to narrow down the list of objects.
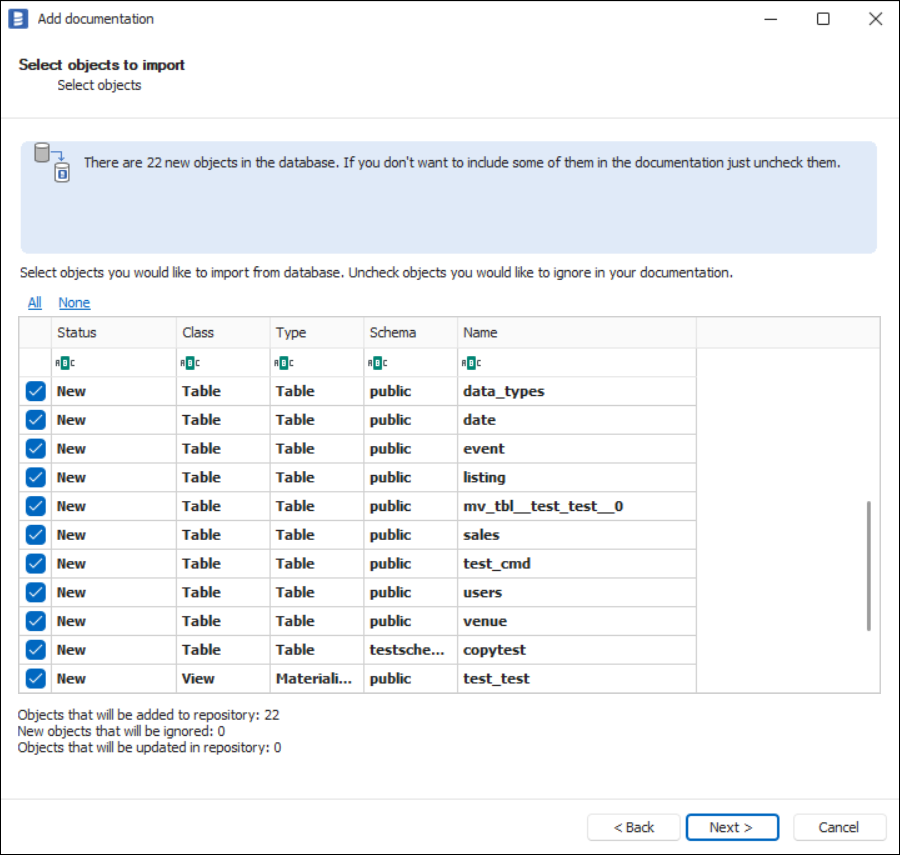
Confirm the list of objects to import by clicking Next.
The next screen will allow you to change the default name of the documentation under which your schema will be visible in the Dataedo repository.
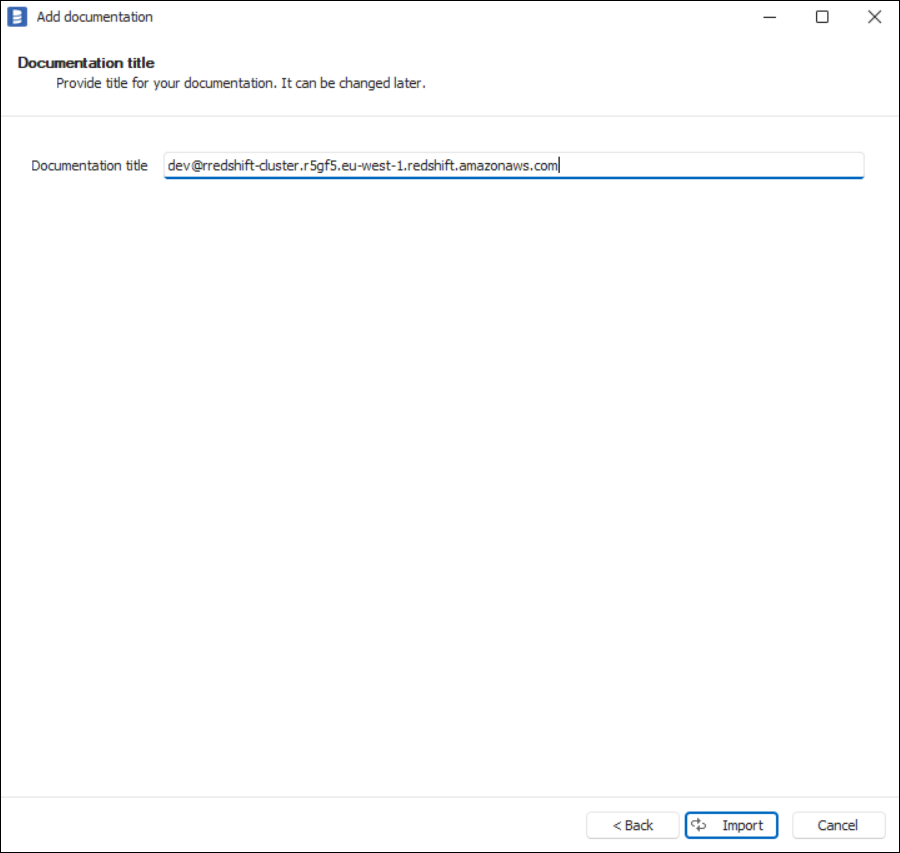
Click Import to start the import.
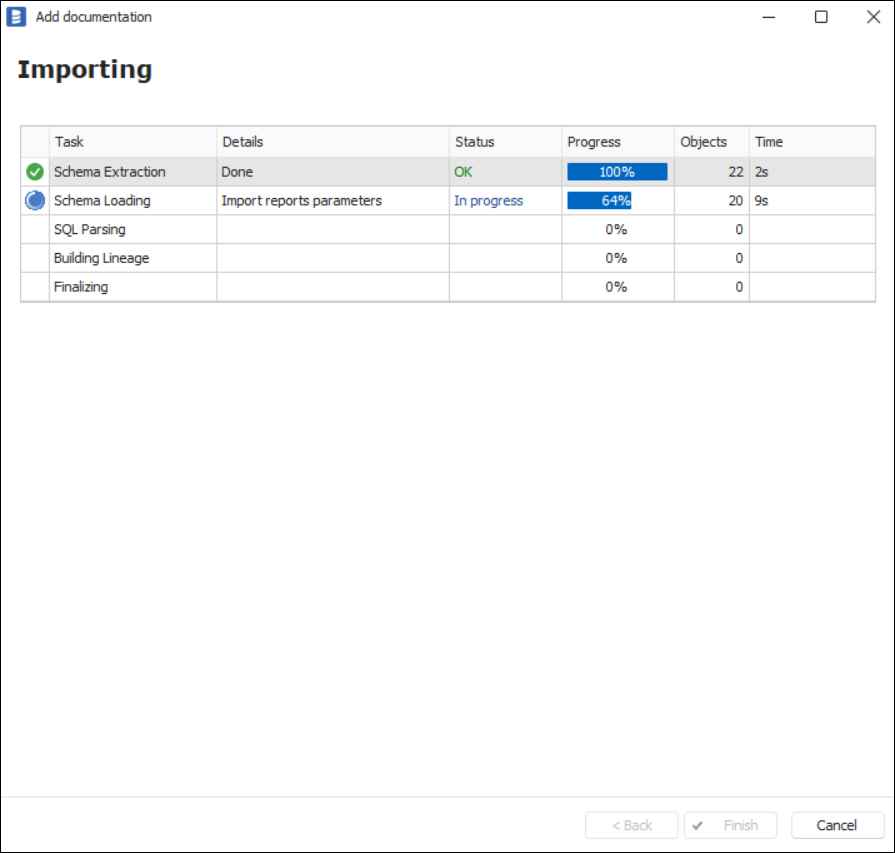
When done, close the import window with the Finish button.
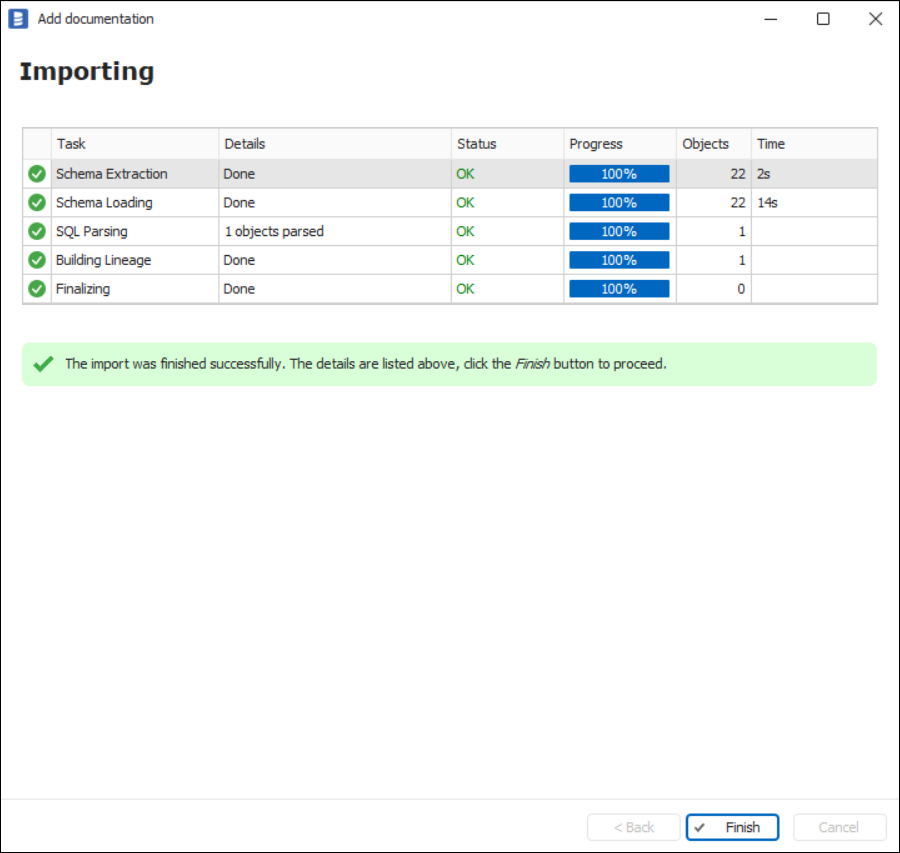
Your database schema has been imported to new documentation in the repository.
Importing changes
To sync any changes in the schema in Redshift and reimport any technical metadata, simply choose the Import changes option. You will be asked to connect to Redshift again and changes will be synced from the source.
Exporting comments to Redshift
Dataedo Desktop can write descriptions back to the source as Redshift comments — Export comments to database in the documentation's action menu. This is the only write-back path for Redshift; the Portal has no metadata sync for this connector.

