Creating rule instances
Creating rule instances
The Dataedo data quality feature offers more than 80 predefined rules that can be applied to columns in tables from supported connectors, ensuring your data meets specific quality standards. The key components of Dataedo data quality feature are Rules and Instances:
- Rule: A rule defines the criteria for what constitutes "good" or “acceptable” data. For example, the "allowed values" rule checks whether column values match a predefined list you provide. These rules serve as essential guidelines for effective data validation.
- Instance: An instance refers to the application of a rule to a specific column in your dataset. It represents the evaluation of data based on the parameters you define for that column.
In Portal, you can select a rule, assign it to a column, and view the results for the corresponding instance. A single column can have multiple rules, but each rule must be assigned individually, as each may require different parameters. Additionally, you can edit or remove rules independently, providing flexibility in how they are managed.
Creating instance entry points
You can create an instance in Dataedo portal using three different methods:
Method 1: From a column
- Search for the column you want to assign rules to.
- Navigate to its Data Quality tab.
- Click the Create rule instance button.
- A window will open where you can select an available rule to apply to the column.

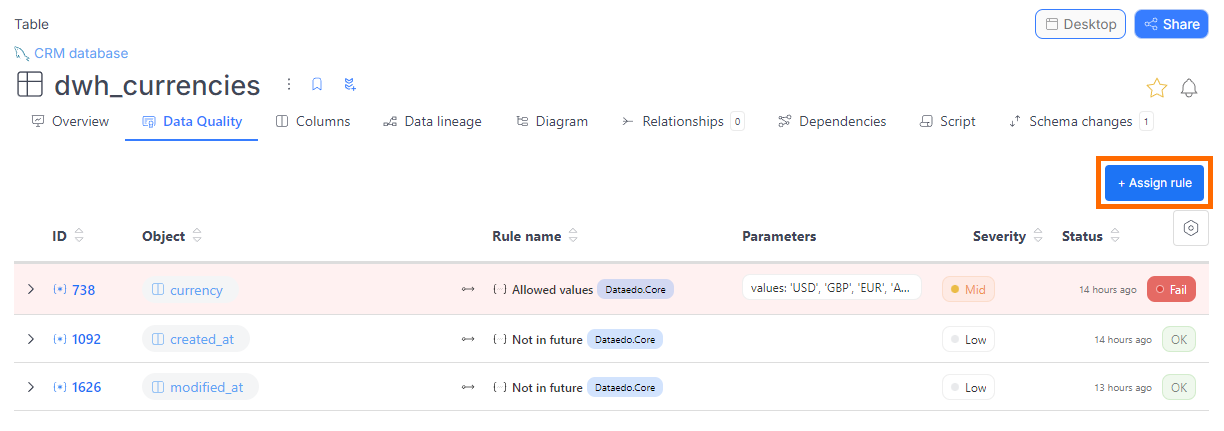
Method 2: From a table
- Find the table you're interested in.
- Navigate to its Data Quality tab.
- Click the Create rule instance button.
- Select a column from the table, then choose the rule you want to apply.
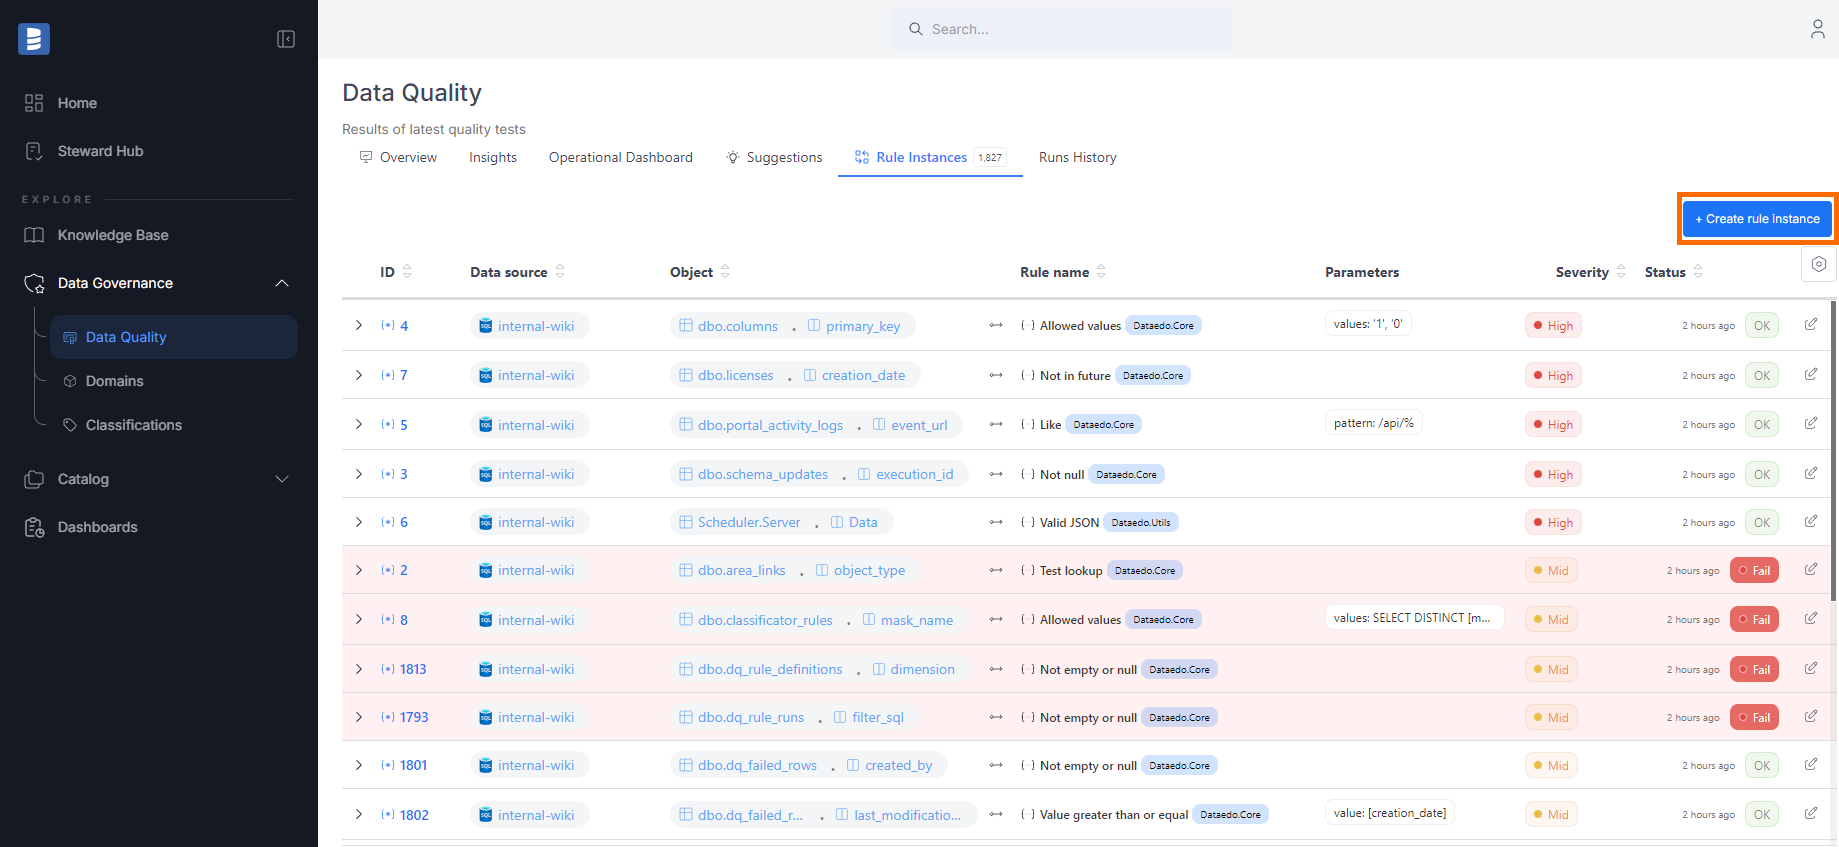
From the Data Quality tab
- Navigate to the Data Quality tab in the main menu.
- Go to the Rule Instances tab.
- Click the Create rule instance button.
- A popup will guide you through selecting a data source, table, and column, followed by choosing a rule.
Once you've chosen the method to create your rule instance, you’ll move on to assigning the rule.
Assigning a rule
If you want to create a custom SQL rule, check out the Custom SQL rules guide.
Step 1: Select a rule
After selecting a column, the first step is to choose a rule. Each rule has the following attributes:
- Name and description: Explains what the rule checks.
- Library: The rule belongs to a specific library. In the future, you'll be able to create your custom rule library.
- Applicable column types:
- All: Can be assigned to any column type.
- Text: For string-type columns only.
- Date: For date-type columns only.
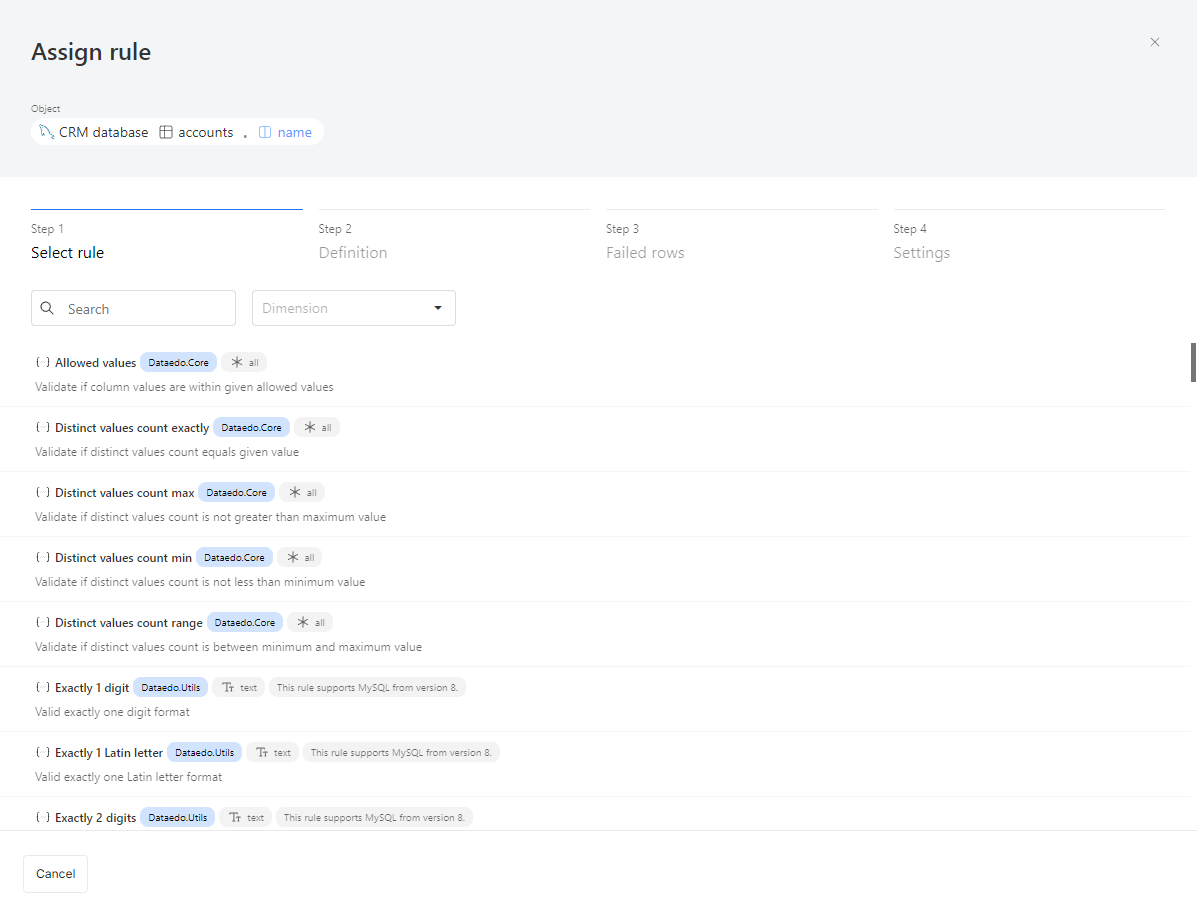
If there are any warnings (for example, rule compatibility issues with an older connector version or missing native support), you’ll see them here.

Step 2: Parameters and filters
Some rules require additional parameters to function, while others don't. For example:
- Not null: No extra parameters are required; it simply checks if the selected column contains any null values.
- Allowed values: Requires a list of valid values. The rule checks if the column data matches this list.
- Value range: Requires defining a minimum and maximum value. Any data outside this range will be flagged.
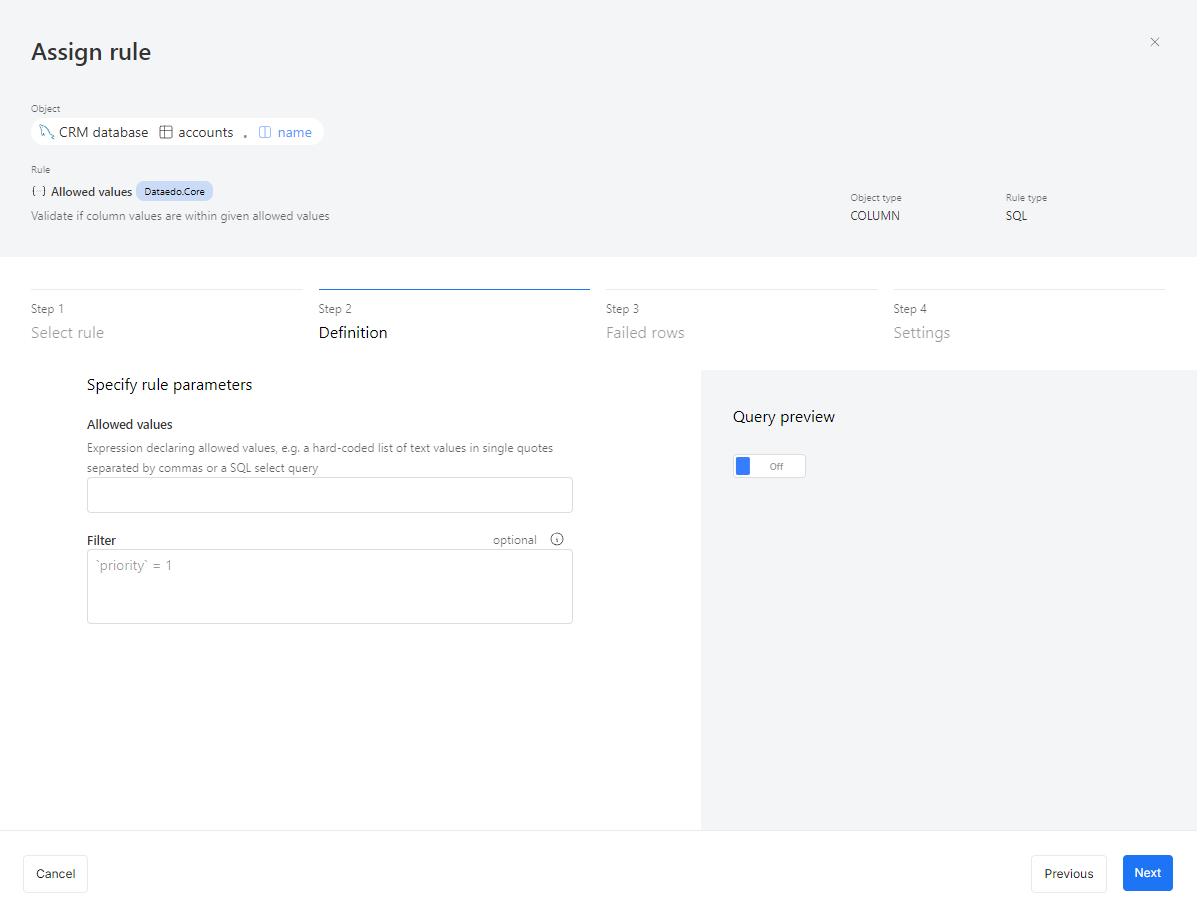
After entering the required parameters, an optional Filter field will appear. This parameter allows you to limit which records are checked in the instance. For example:
- You might skip checking email validity for records created before 2015, when your company started email validation.
- You might want to only check invoices marked as high priority.
To apply a filter, you can create a query specific to the records you want to include. Filter syntax may vary depending on your connector. For example:
- For SQL Server: Use
[priority] = 1. - For MySQL: Use
priority = 1.
Make sure to use the correct syntax supported by your connector.
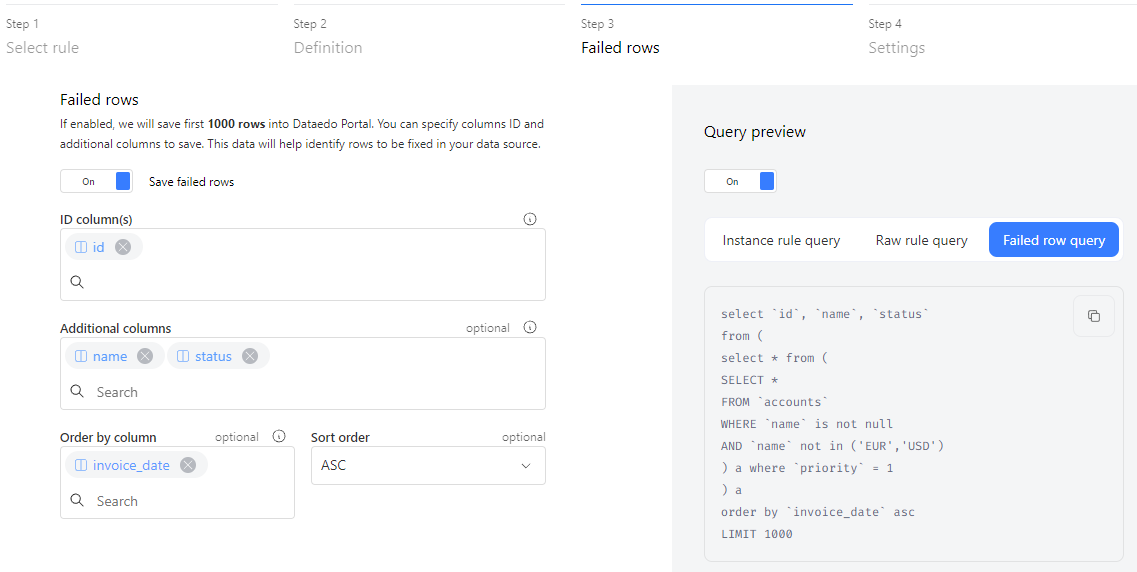
The Parameters and filters step also lets you preview the queries used to check the column's data. On the right-hand side, a toggle will let you view two types of queries:
- Raw rule query: Displays the rule's definition with parameter placeholders.
- Instance rule query: Shows the query with the table, column names, and applied parameters and filters.

Step 3: Failed Rows
By default, Dataedo collects only numeric statistics about your data quality (e.g., how many rows were tested and how many passed or failed). In this step, you can choose to save the failed rows for easier identification and resolution.
If you activate this option, Dataedo saves some of the failed rows. The number of saved rows is 1000 by default, however you can increase it up to one million by adjusting the Amount of saved failed rows parameter.

The ID column(s) are required to uniquely identify each row. This field is prefilled with the Primary Key of the selected table. If there's no Primary Key, you'll need to specify one or more columns as unique identifiers.
The second field in this step is Additional columns, where you can list other columns to help identify the failed rows. You can also sort the results by one or more specific columns.
There is also a source link field. You can use it to configure a link that will take you straight to your original Data Source if any failing rows are detected.
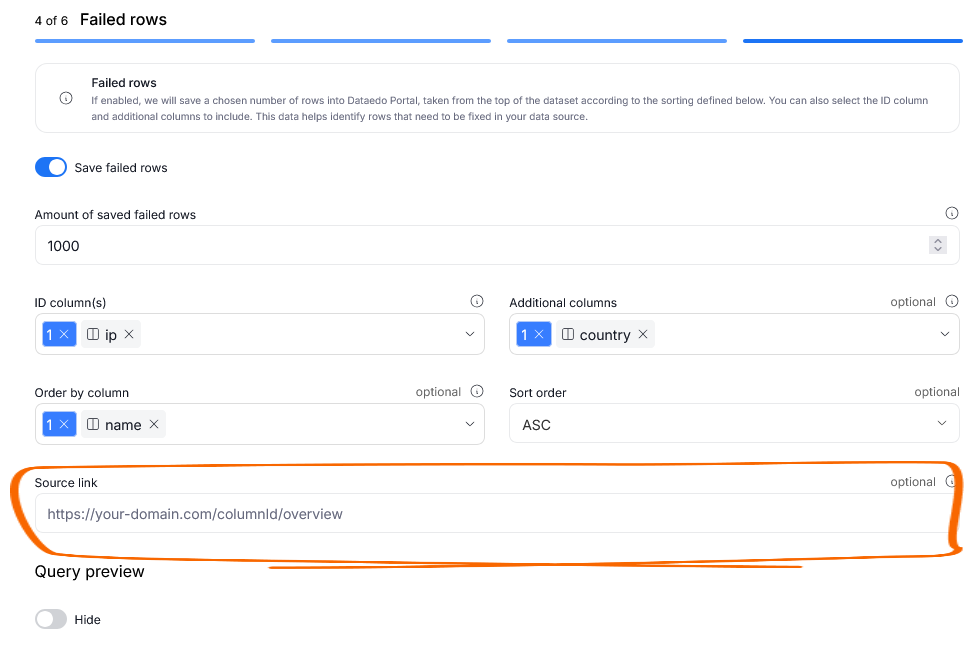
The link should be constructed by adding the URL to your original data source or its location in your CRM software, and the name of the row that contains the potentially failing cell. Typing @ in the textbox, brings up a list of available columns. If your Data Management software has a separate state for edition, you can add a suffix (for example: /edit) at the end of the link.
There is no need to input the rowID, it will be automatically supplied by Dataedo using available data.
The configured link will appear in the Failed Rows grid. You can use it to quickly fix the issue in your source.
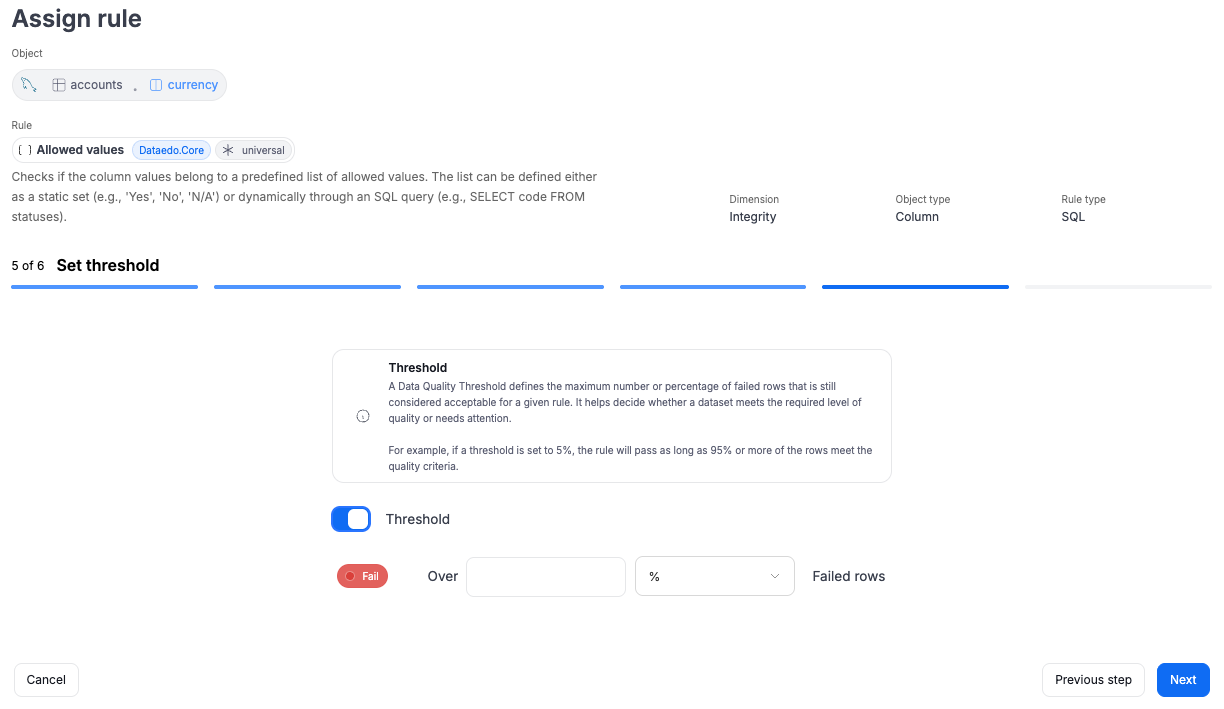
Step 4: Set Threshold
By default, Dataedo marks a rule instance as fail if even a single row does not meet the rule’s conditions. In some scenarios, this may be too restrictive. To allow for a margin of error, you can configure a threshold that determines when an instance should be marked as fail versus ok.
When creating a rule instance, you can enable threshold configuration using a toggle. Once activated, two types of thresholds are available:
- Percentage threshold – The instance will be marked as fail if the number of failed rows exceeds the specified percentage (e.g., 5%).
- Numeric threshold – The instance will be marked as fail if the number of failed rows exceeds a fixed number (e.g., 100 rows).
If no threshold is set, the default behavior applies: even one failed row results in a fail status.
Thresholds can be edited at any time after saving the instance. You can also apply them in bulk to multiple existing instances, saving time when adjusting rules across larger datasets.
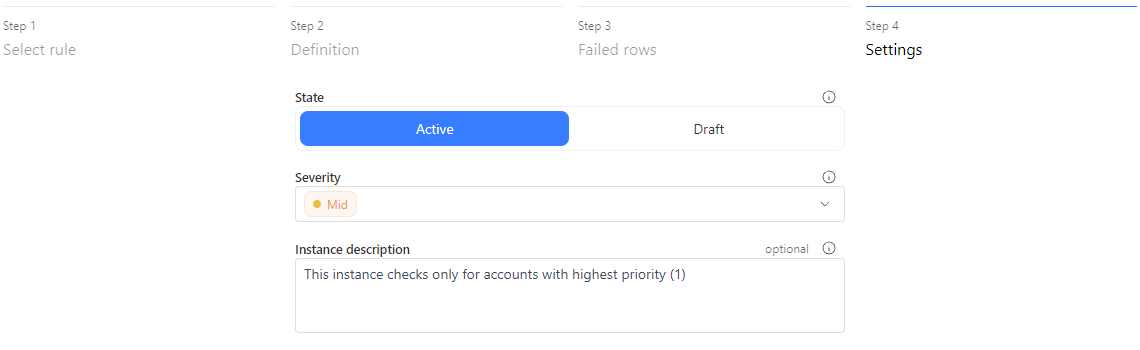
Step 5: Settings
The final step is to set up the instance. Here, you can choose the state of the instance:
- Active: The rule will run during every scheduled Data Quality check.
- Draft: The rule will be created but will only run once it's set to active. You can change the state at any time by editing the instance.
You can also define the severity of the instance, which helps prioritize rule runs. For example, you might schedule critical rules to run daily, while lower-severity rules could run weekly. Finally, the Instance description field lets you note important details, such as when a filter is applied. This helps business users understand that the rule only checks a specific subset of data.
Rule Examples
Dataedo offers over 90 built-in Data Quality rules, which can be freely reused by users when creating rule instances. Those rules cover most basic Data Quality scenarios, reducing the number of custom rules and extra work needed from your Data Stewards.
To give you a feel of what kinds of rules are available, let us provide a few examples:
Allowed Values -> Checks if all of column's values belong to a predefined set of allowed values. You can either use a closed list, or create a dynamic one using SQL queries
Is Fresh -> Checks if the column contains recent values. You define "recentness" by providing a number of days for which the cell is considered fresh (eg: last 7 days, or last 20 days, etc.)
Must be null -> Checks if the column's cell are null. Can help with detecting cells that should be empty but are not
No suspicious dates -> Checks if the column's cells contain well-formed, plausible dates
Row count between -> Checks if the Column's row number fits in a range defined by the User
Unique -> Checks if all of the column values are unique
Valid e-mail address -> Checks if values follow proper e-mail address formatting

