Custom SQL rules for Data Quality
Beyond predefined rules, you can now create custom rules using SQL queries. These rules provide flexibility to test specific conditions and tailor rules to your data quality requirements.
Follow this guide to see how how to set up permissions and create custom SQL rules.
Permissions
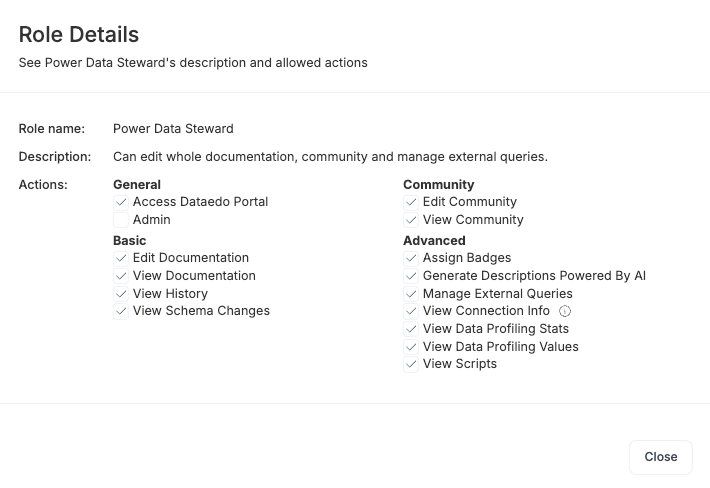
Since custom rules allow direct querying of your data, you must have Power Data Steward assigned to create them. This role is required to create and manage custom SQL queries. It includes all Data Steward capabilities, plus the additional Manage External Queries permission.
Create a custom SQL rule
Start the rule creation wizard
-
Go to Data Governance > Data Quality and select the Rule Instances tab.
-
Click the Add Data Quality check button.
-
If you have the Power Data Steward role, a dialog will appear, allowing you to choose between:
- An existing (either pre-defined or reusable) rule
- Creating and using a new reusable rule
- A one-time Custom SQL Rule (select this option)

Step 1: Definition
In the Definition step:
-
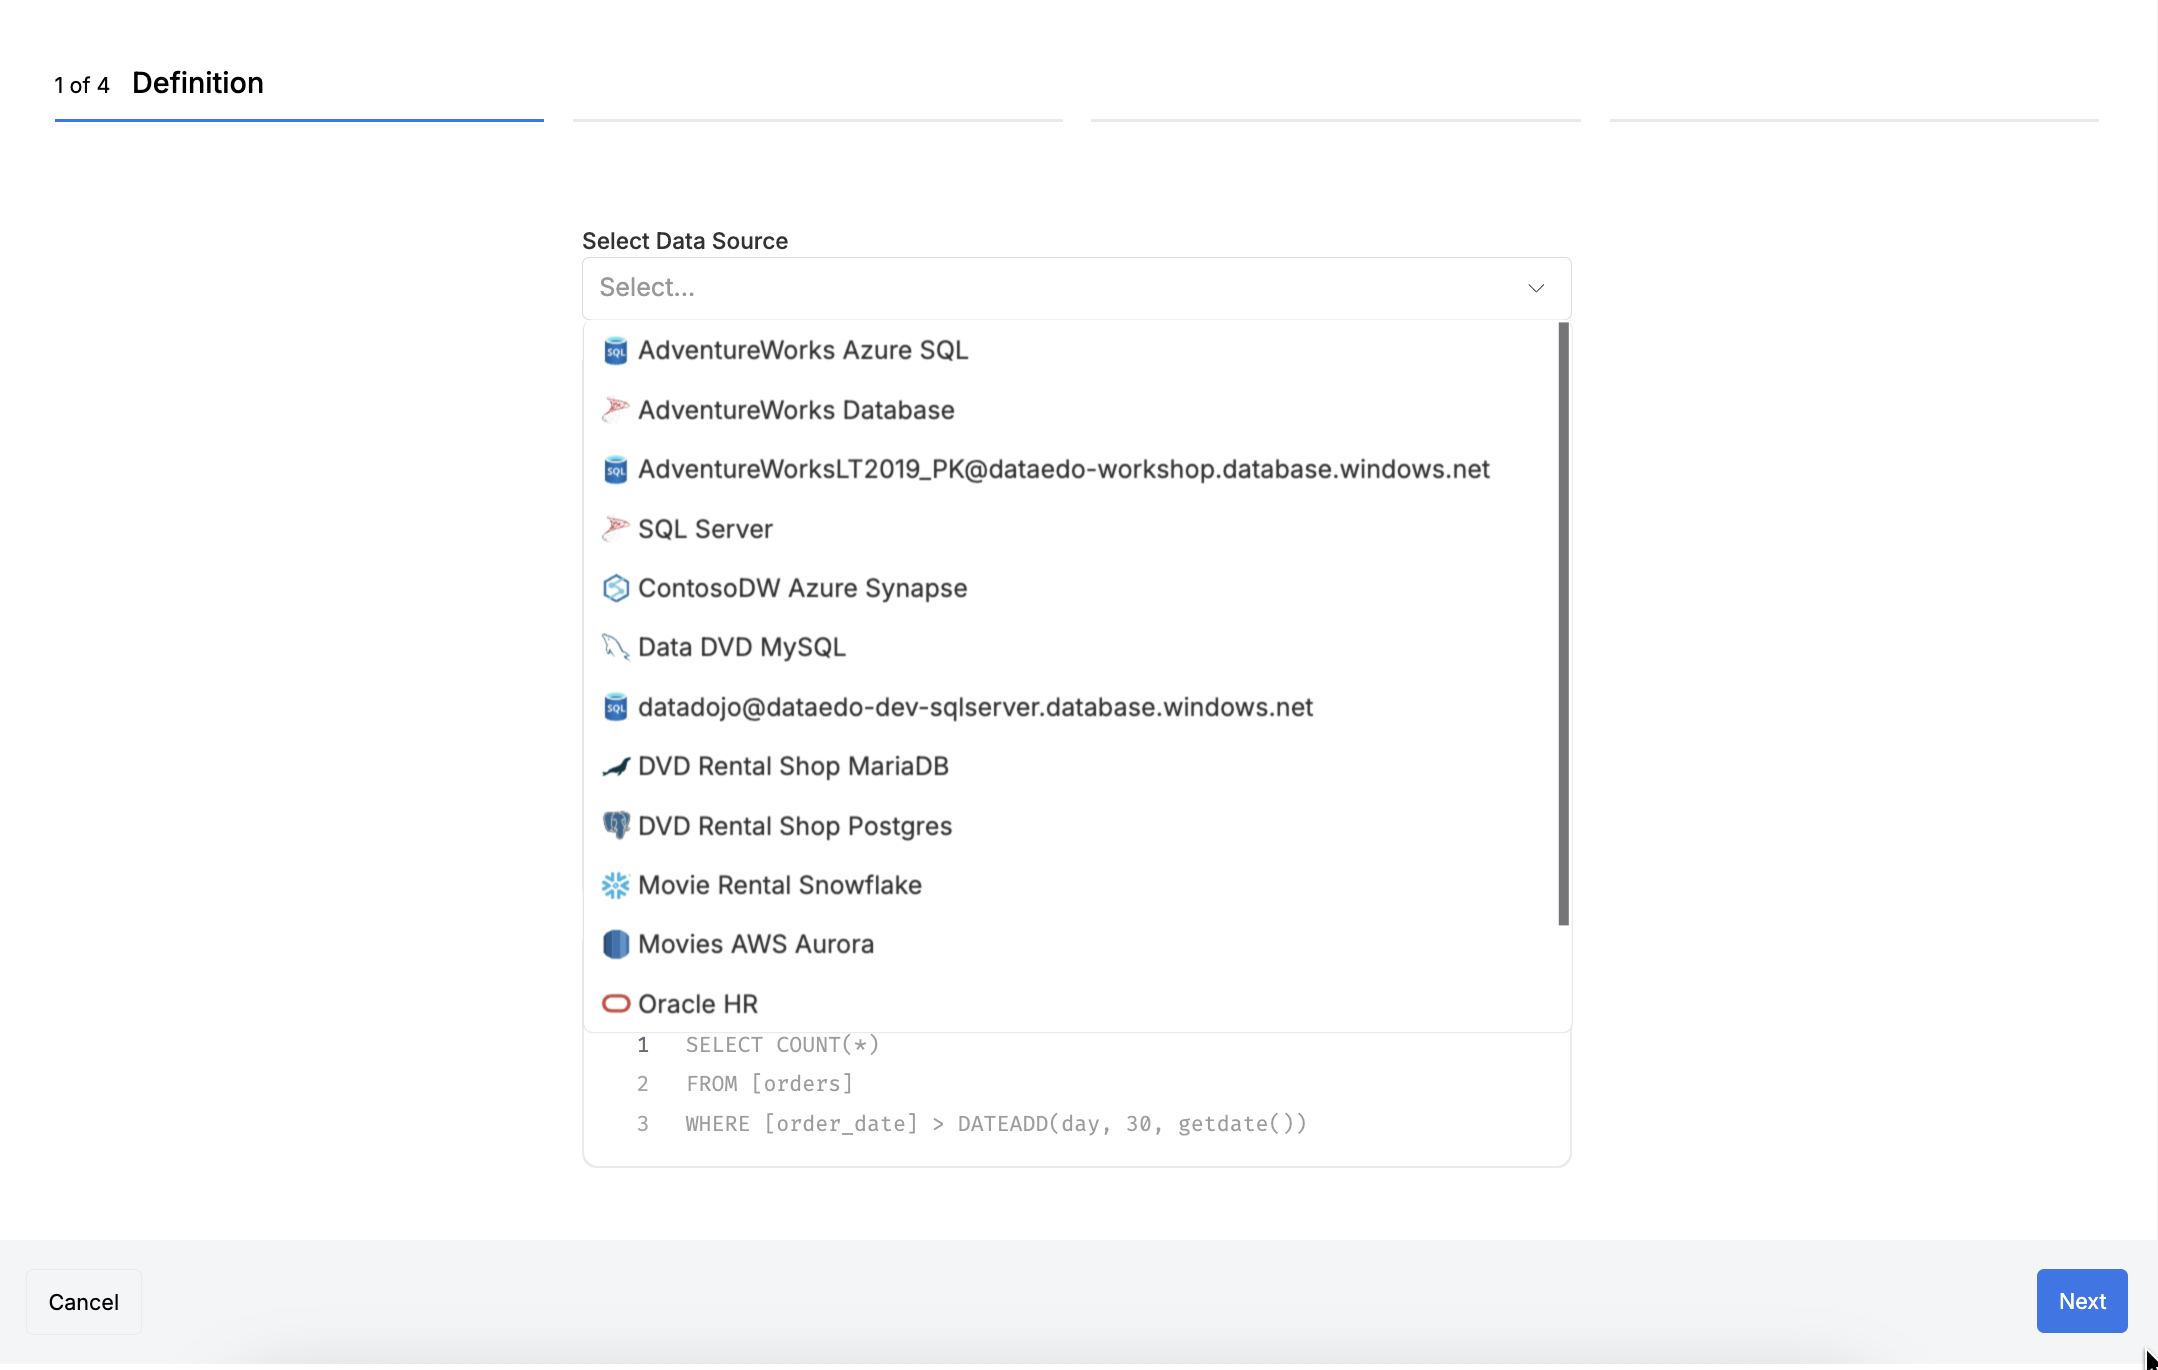
Choose the database where your SQL rule will run. The dropdown menu lists only data sources supported for Data Quality feature.
-
Write an SQL query that defines the condition to be checked. The query must return rows that fail the data quality rule — these rows will be flagged as errors.
Sample custom SQL querySELECT * FROM orders WHERE status NOT IN ('shipped', 'delivered');cautionIn order for your custom rule to run properly ensure that the first column returned by your query contains unique values. Duplicate values will trigger an error.
-
Now Define tested rows count.
This query specifies the total number of rows tested by the rule. It helps contextualize results but is not required.
Sample custom SQL query for tested rowsSELECT COUNT(*) FROM orders;
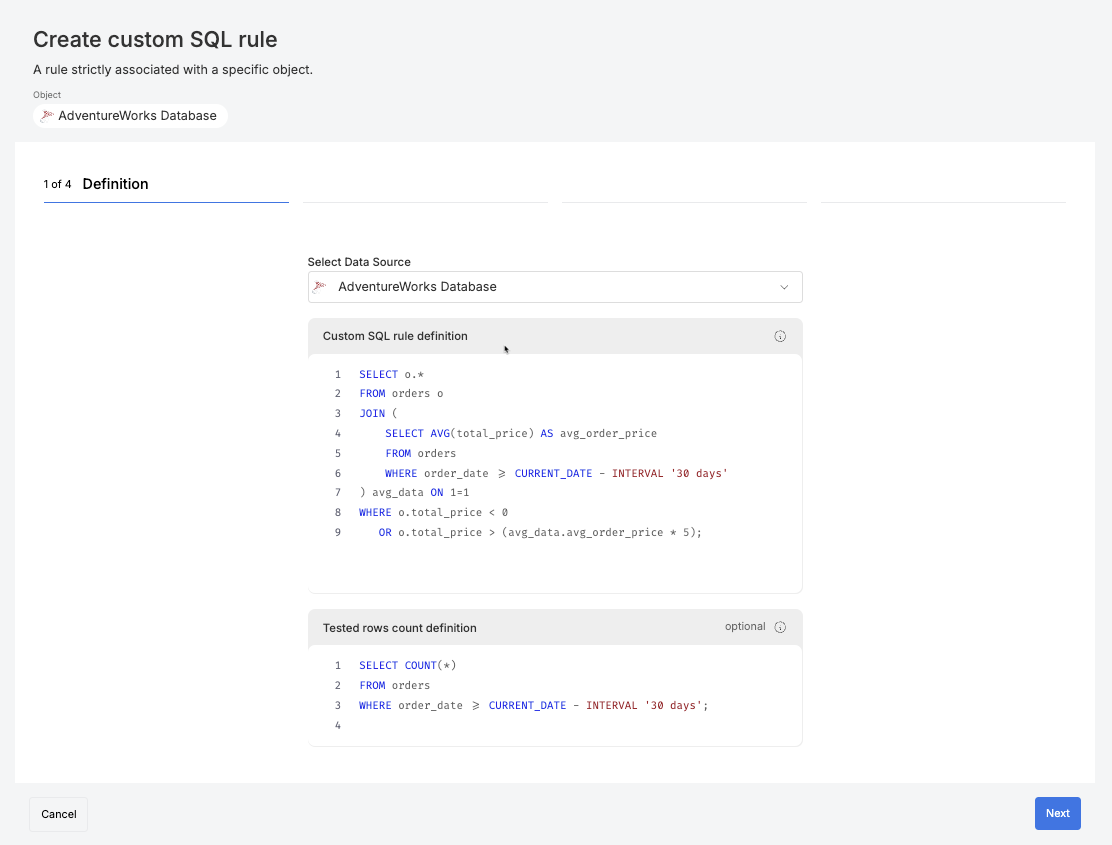
Both input fields support syntax highlighting for better readability.
Keep in mind that custom queries are not validated, giving you full control over the SQL logic.
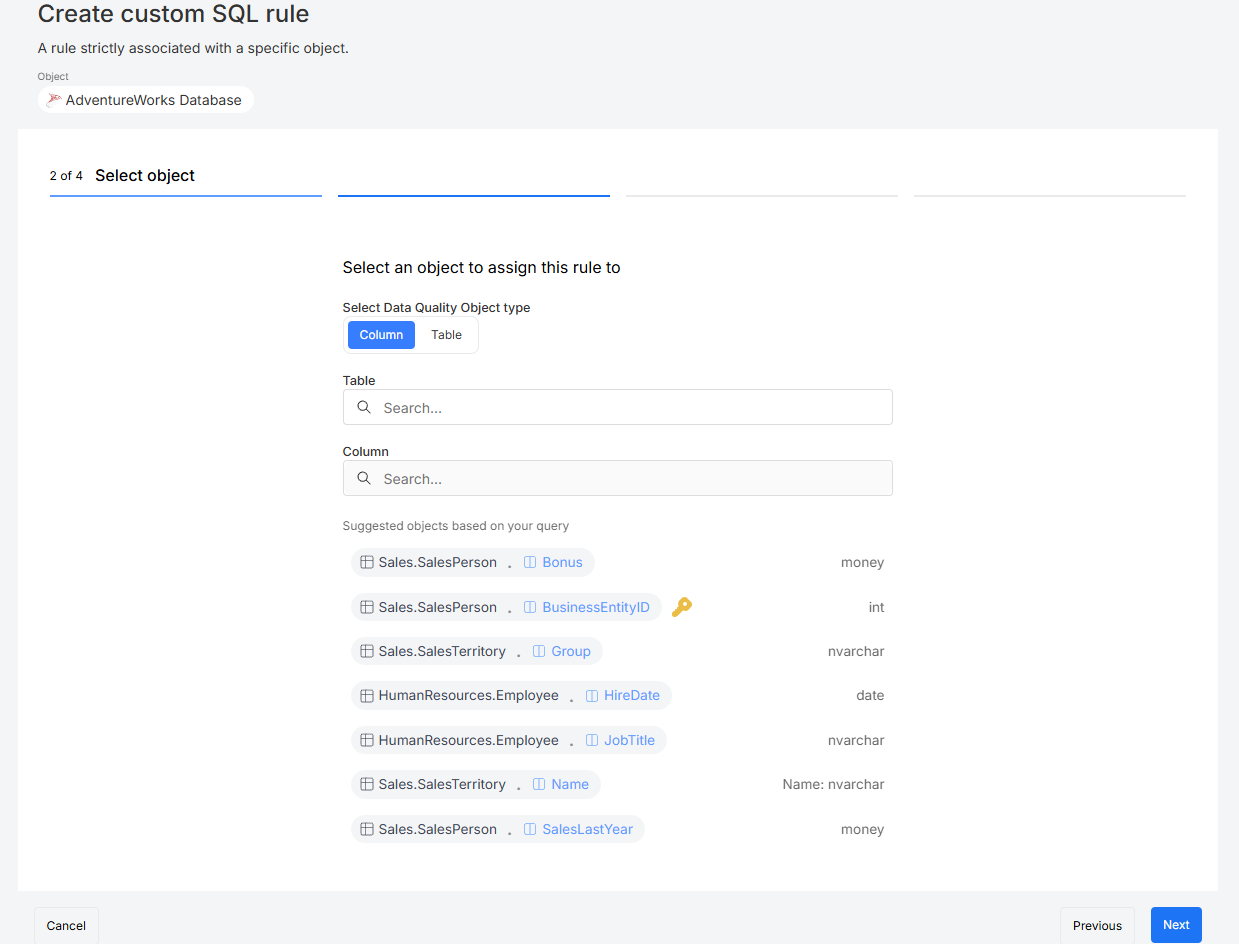
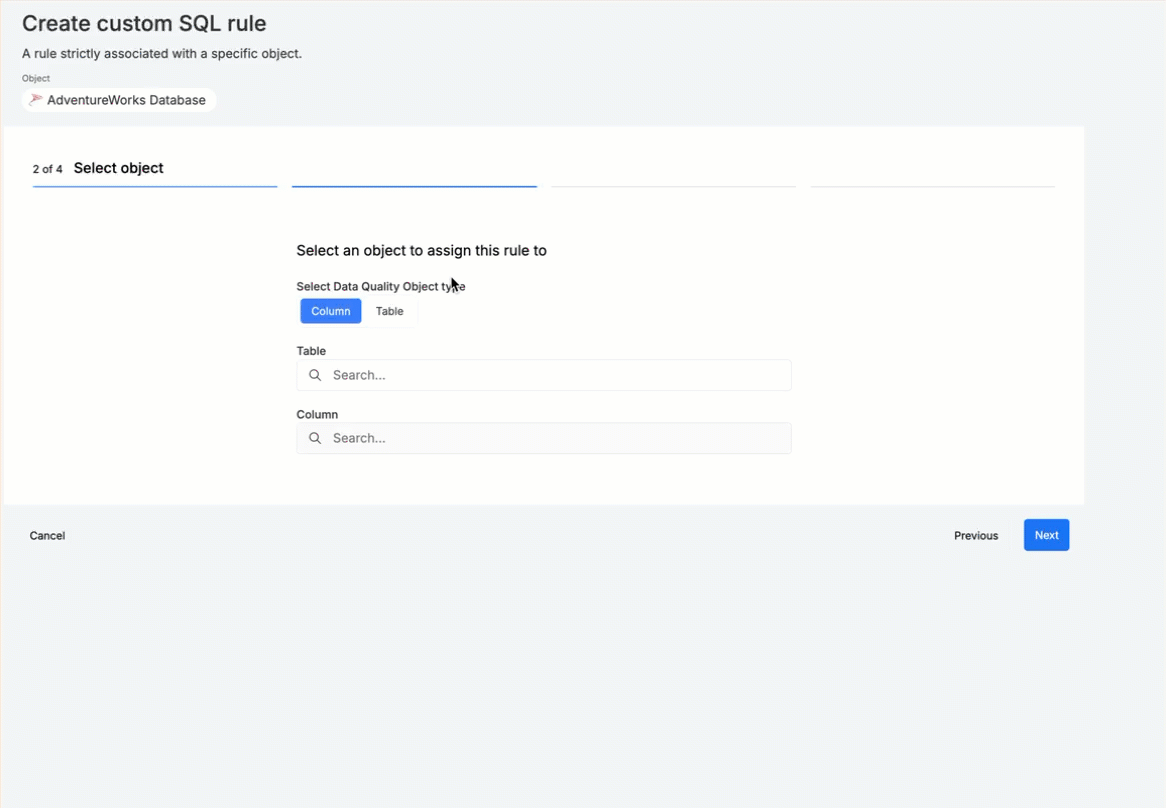
Step 2: Select object
Define the Object Type:
- Column-based rule: Select a table first, then choose a column.
- Table-based rule: Choose from available tables.
A search input helps you quickly locate the correct object.
Suggestions for available objects appear based on the query entered in the first step.
If you're selecting a column, suggestions for matching columns are shown, along with inputs for both the table and column names.
If you're selecting a table, suggestions for matching tables are shown, with an input to specify the table name.
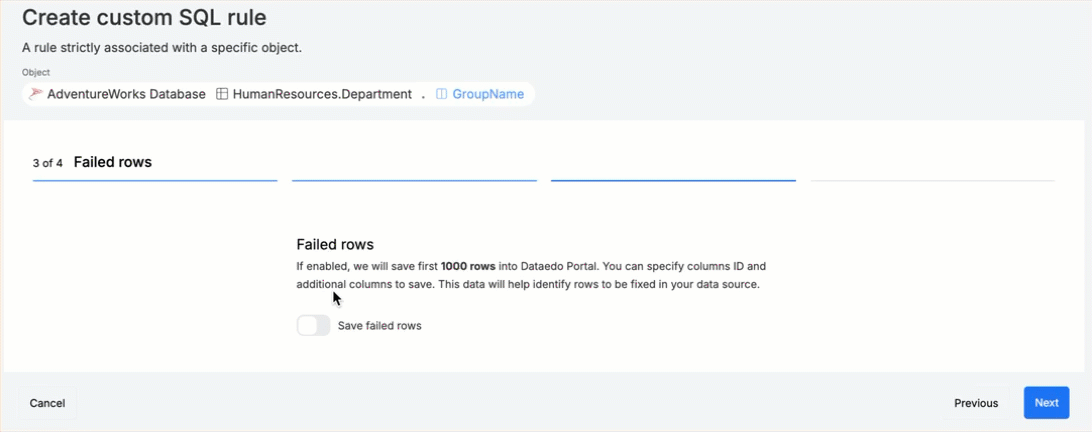
Step 3: Save failed rows
By default, failed rows are not saved. To activate this feature, activate the Save Failed Rows option. This allows storing and analyzing rows that do not meet the rule’s conditions.
Step 4: Set Threshold
The threshold of Rule Instances determine when a rule instance is counted as a fail. Thresholds are explained in more detail here.
Turn this on if you want to override the default behavior of fails being triggered by even a single row failing a check. You can then set the acceptable threshold as either a percentage or a number of failing rows.

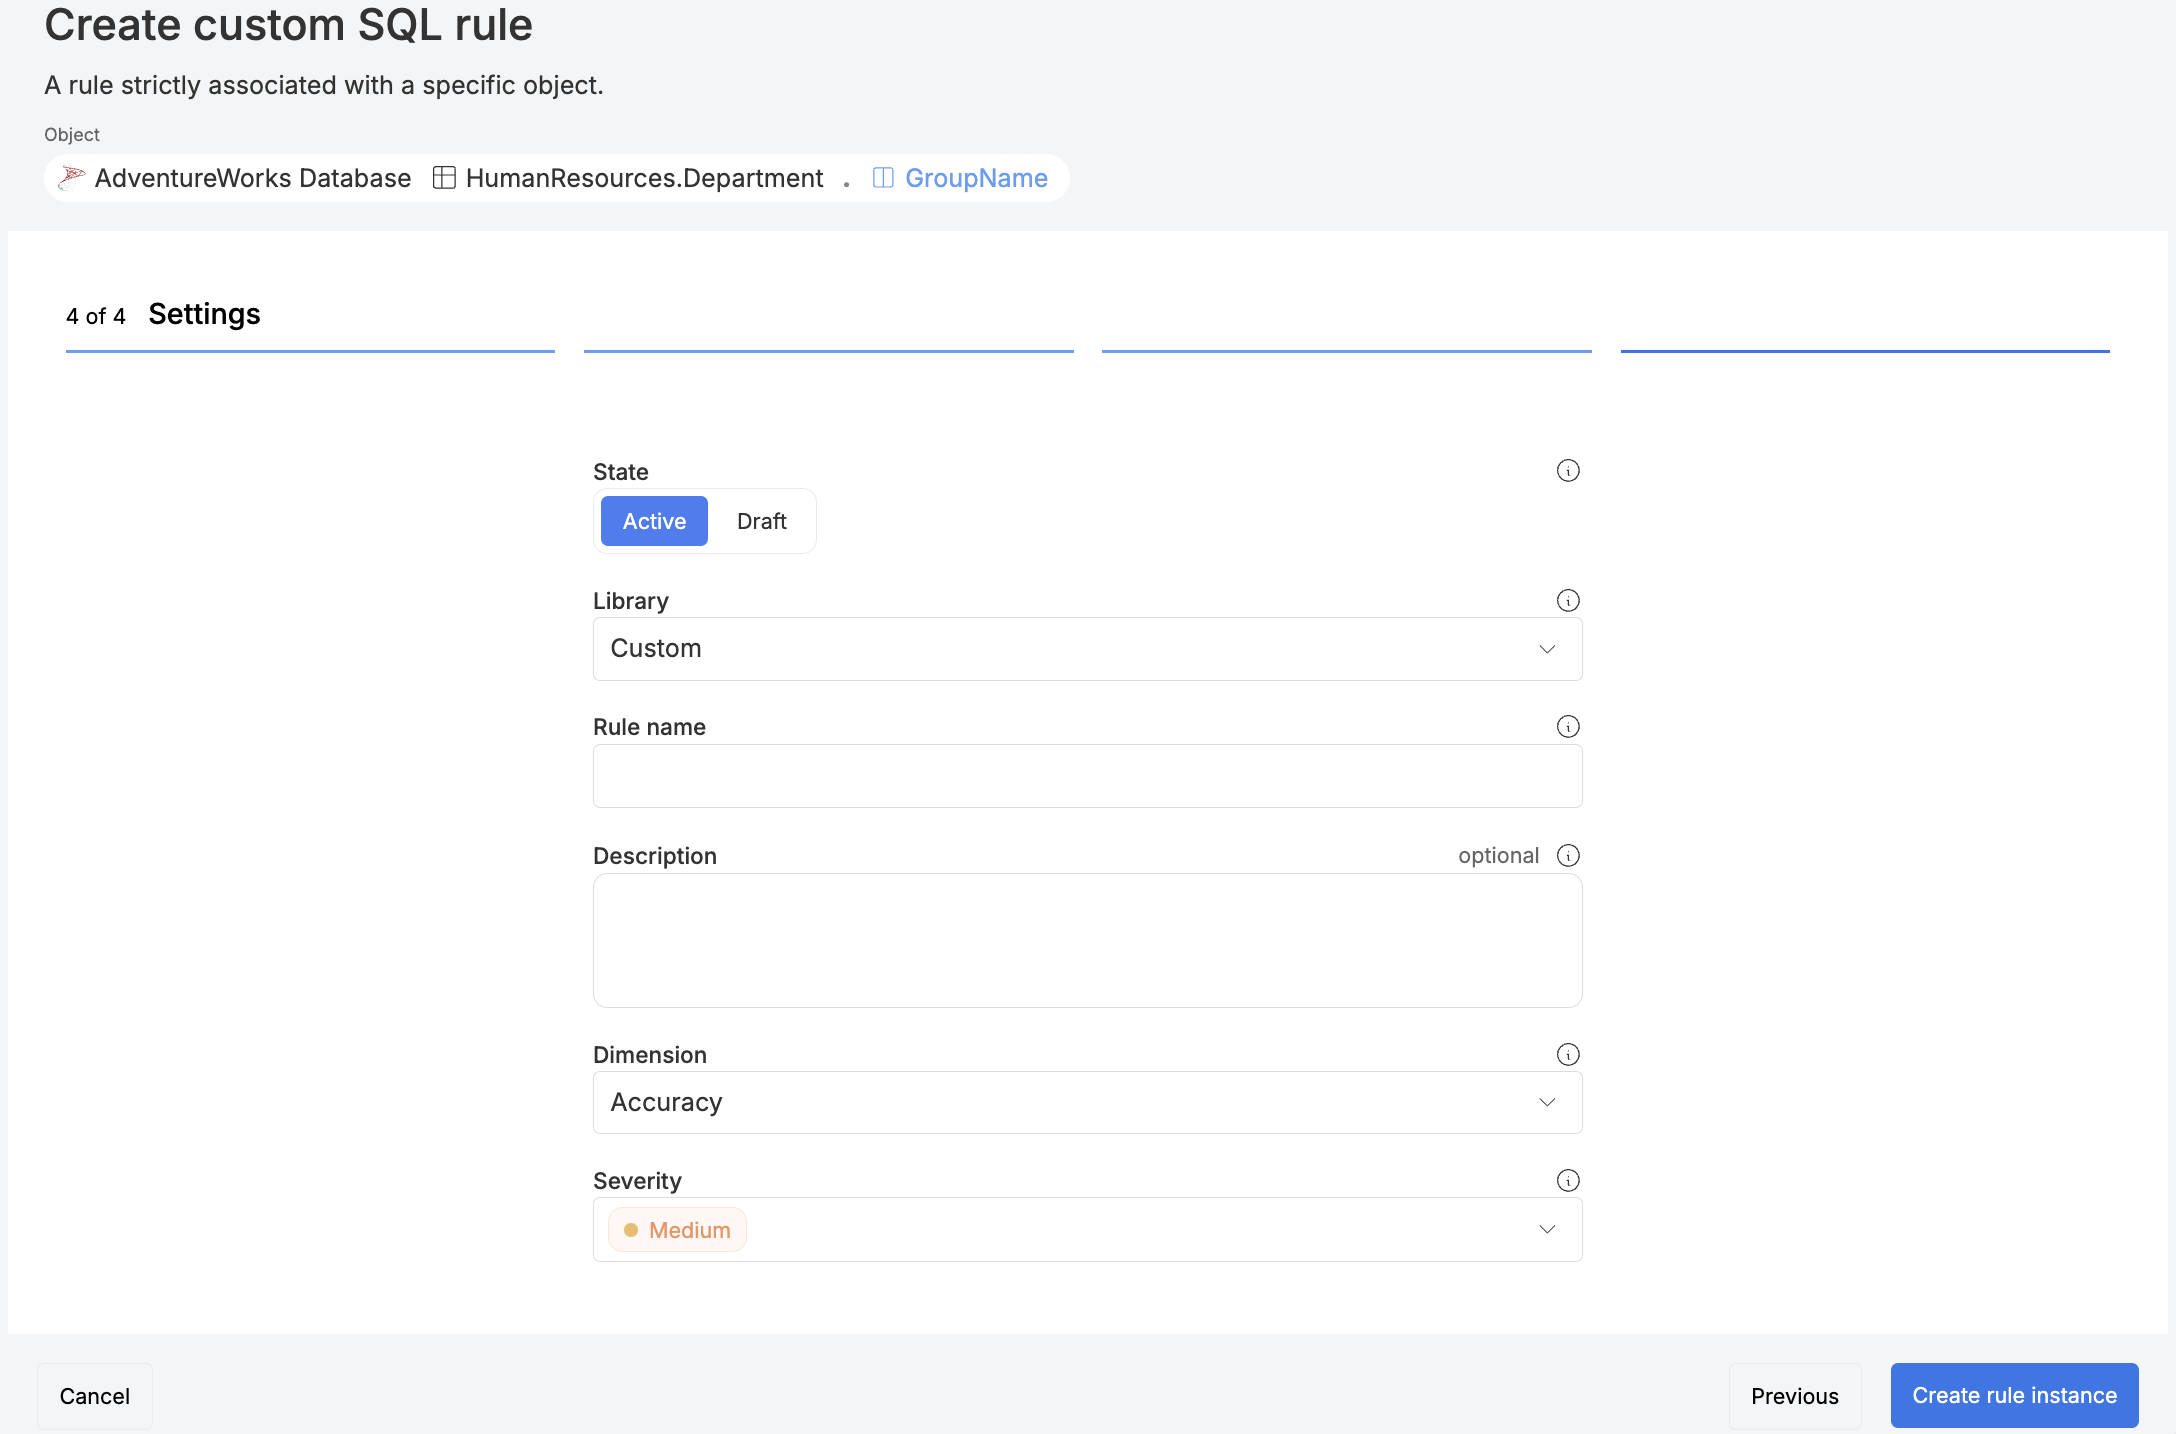
Step 5: Settings
- Enter a name and an optional description for the rule
- Assign it to a Library to keep rules organized
- Define the Severity level for failed rows
- Click the Create rule instance button to save the rule
Once saved, the custom SQL rule will be applied to incoming data, helping to identify and address quality issues efficiently.
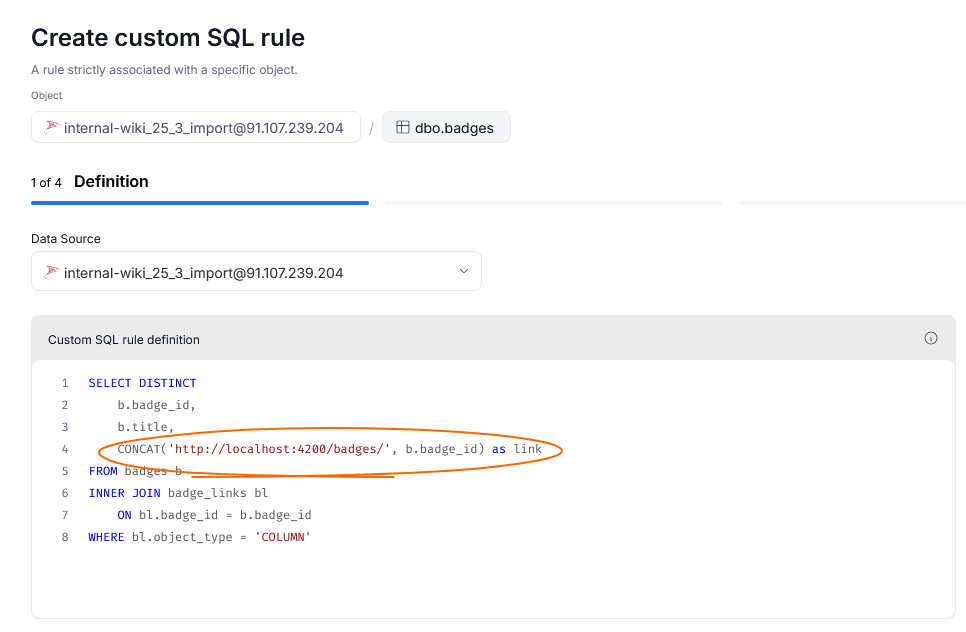
Link extraction with Custom Rules
During definition you can construct your SQL query so that it extracts links from failing rows.
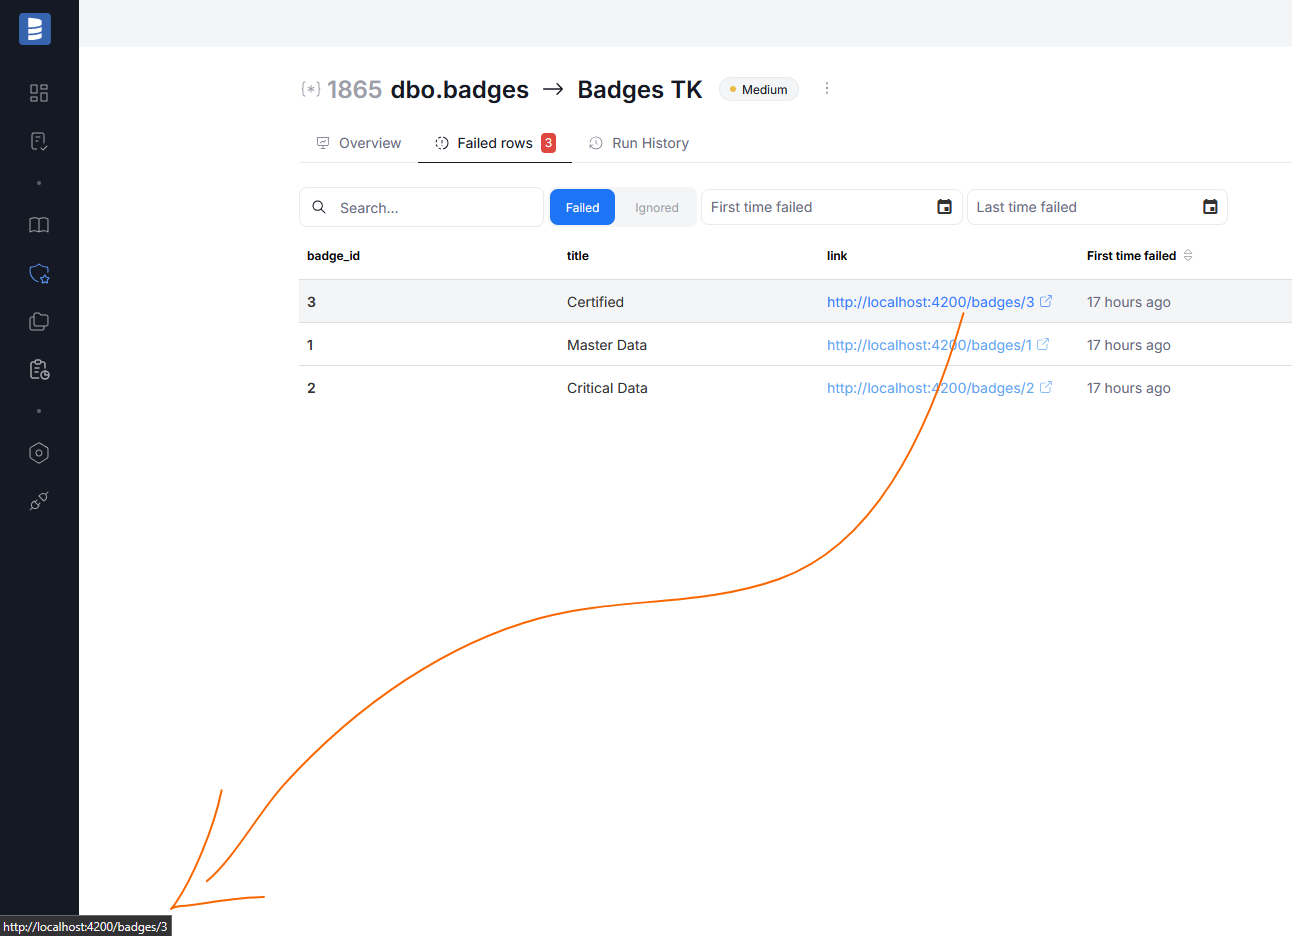
If links can be extracted, they will be displayed and clickable in the Failed rows tab, when inspecting Data Quality results.