Steward Hub — Glossary
The Glossary module allows you to create new Glossary Terms and link them with columns, as well as manage the Workflow stages of your Terms.
View
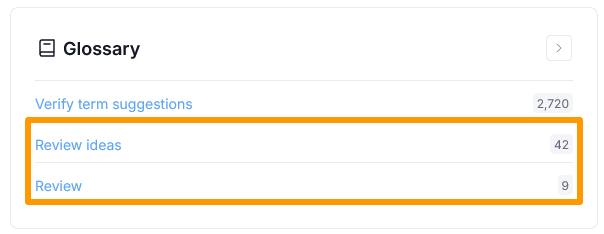
The Glossary module shows an overview of suggestions for proper management of your Terms. These are:
- Term suggestions [1]
- Workflow actions [2]
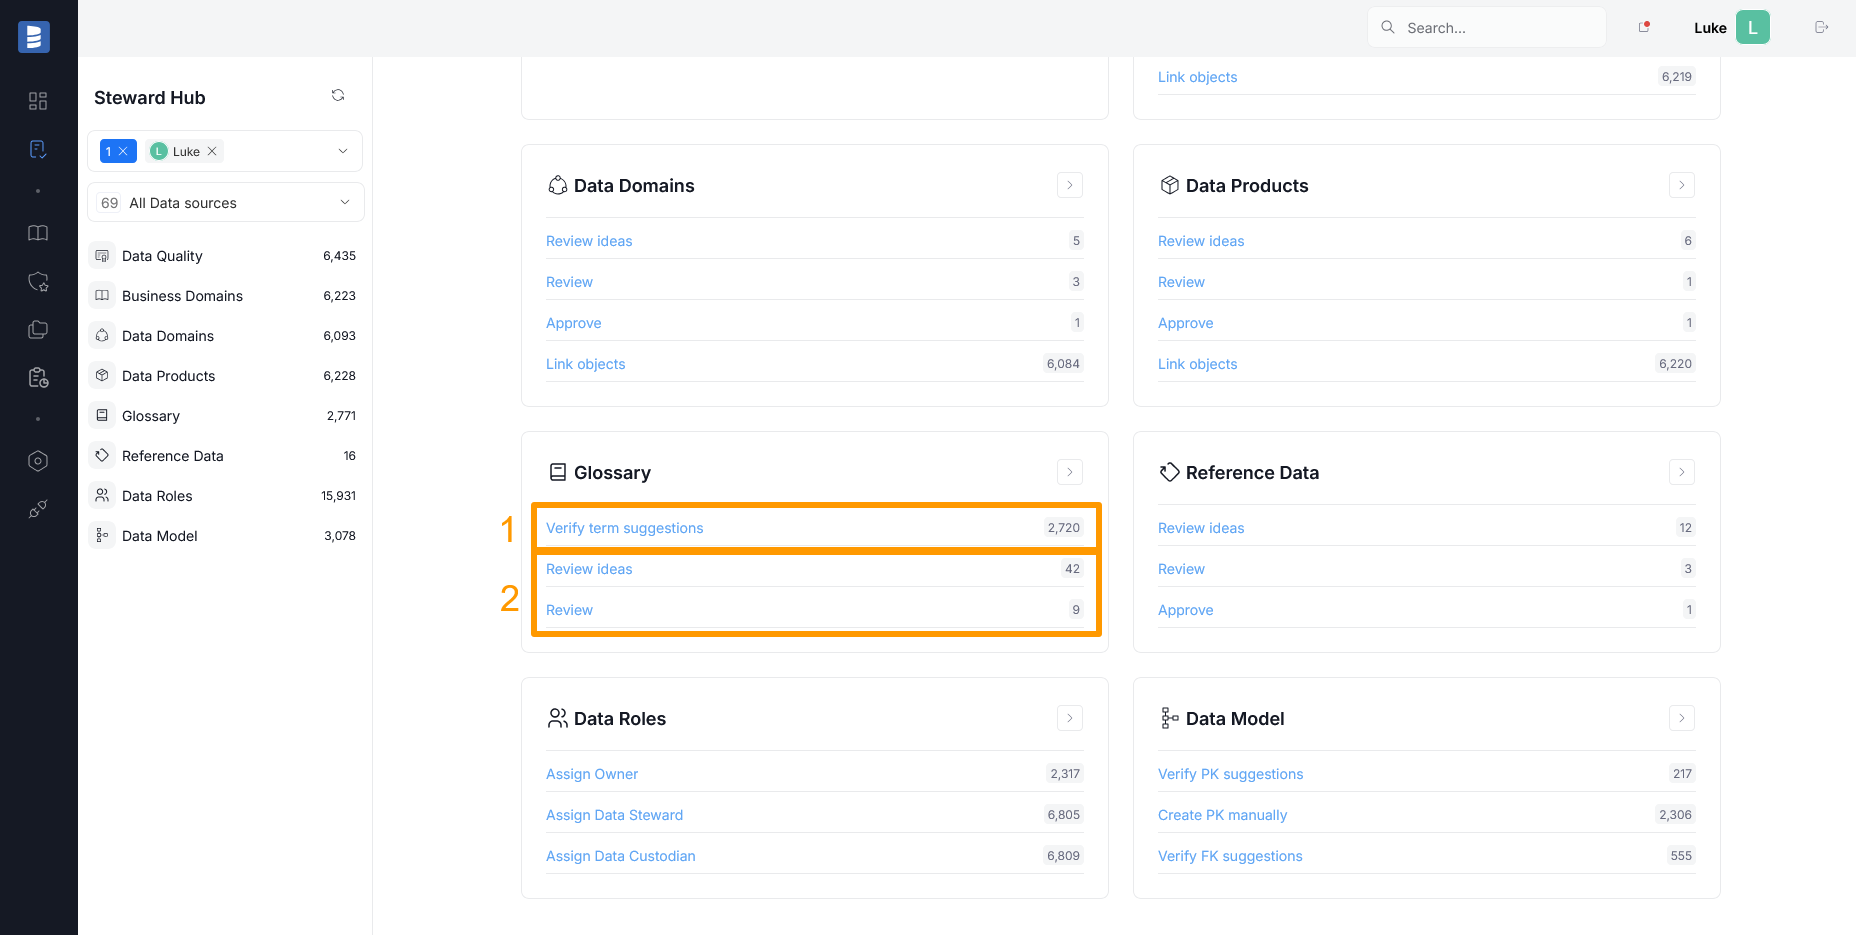
Glossary suggestions
New Terms are suggested based on common words and collocations found in column names of your Data Assets. These Terms can be reviewed after clicking the Verify term suggestions text in the Glossary module.
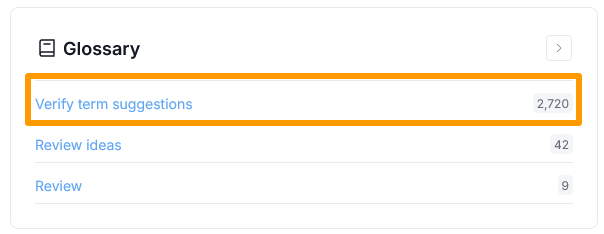
You should see a list of suggested Terms. If there are no suggestions visible, try refreshing the Steward Hub. You can use the search bar [1] to look for suggested Terms containing a specific phrase. Every suggestion can be expanded using the down arrow icon [2] to see which columns could potentially be related to it. You can use the search bars under the Column header [3] and Object header [4] to further filter out the columns you see.
Accepting suggested Terms
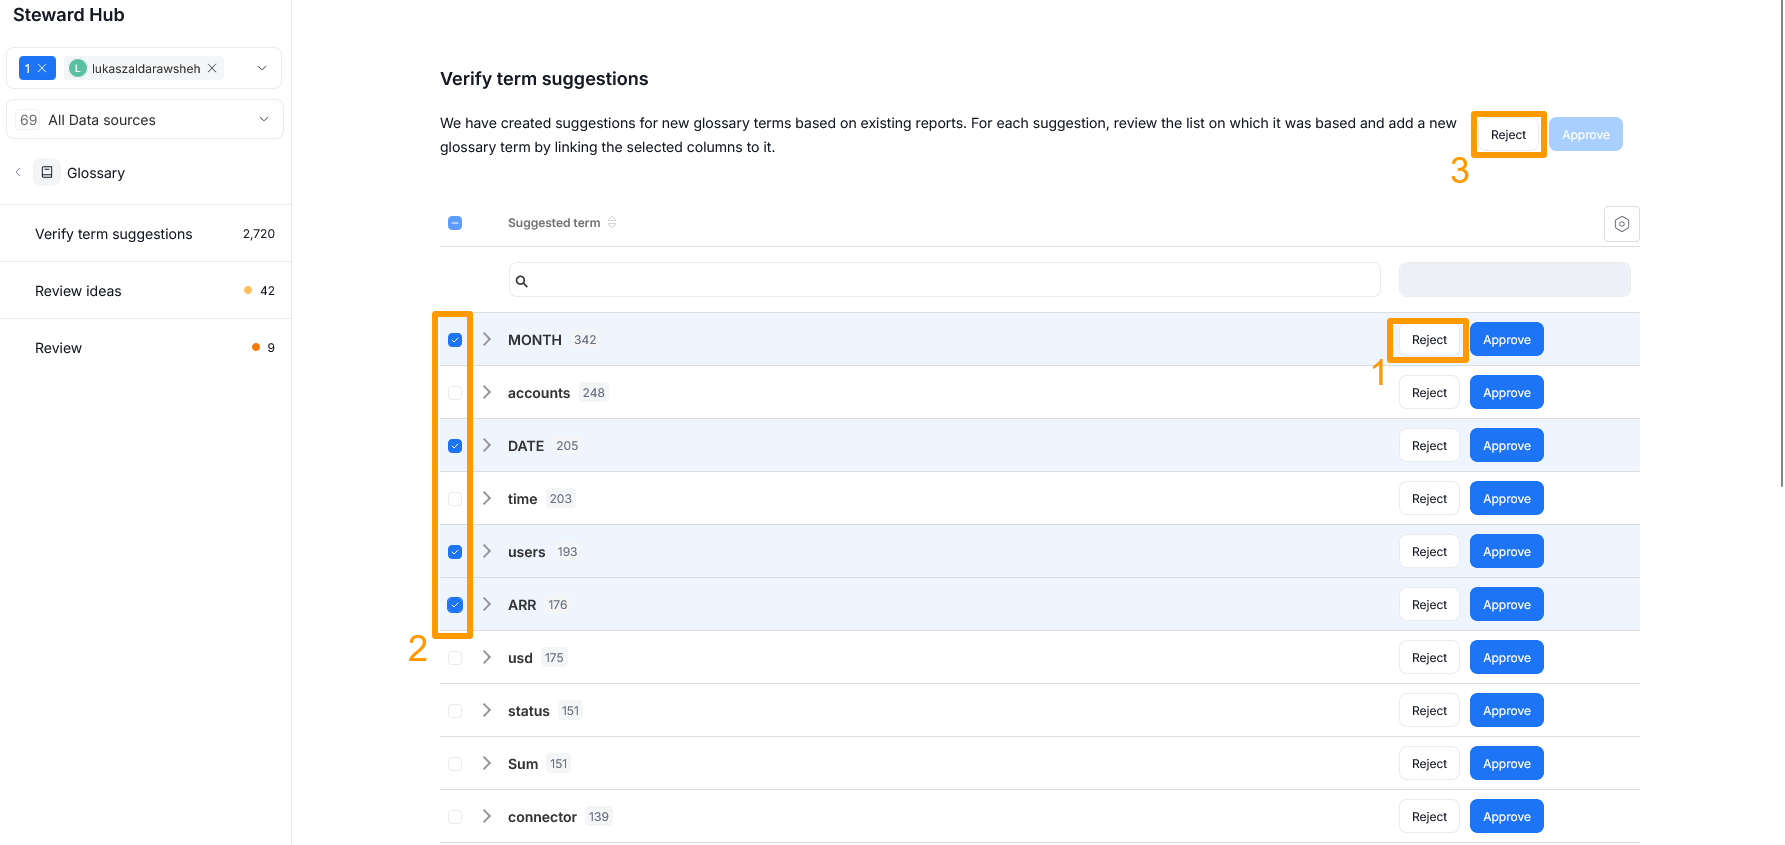
You can only approve one suggested Term at a time, since every Term has to be assigned to a Glossary. To accept a suggestion click on the Approve button next to its name.
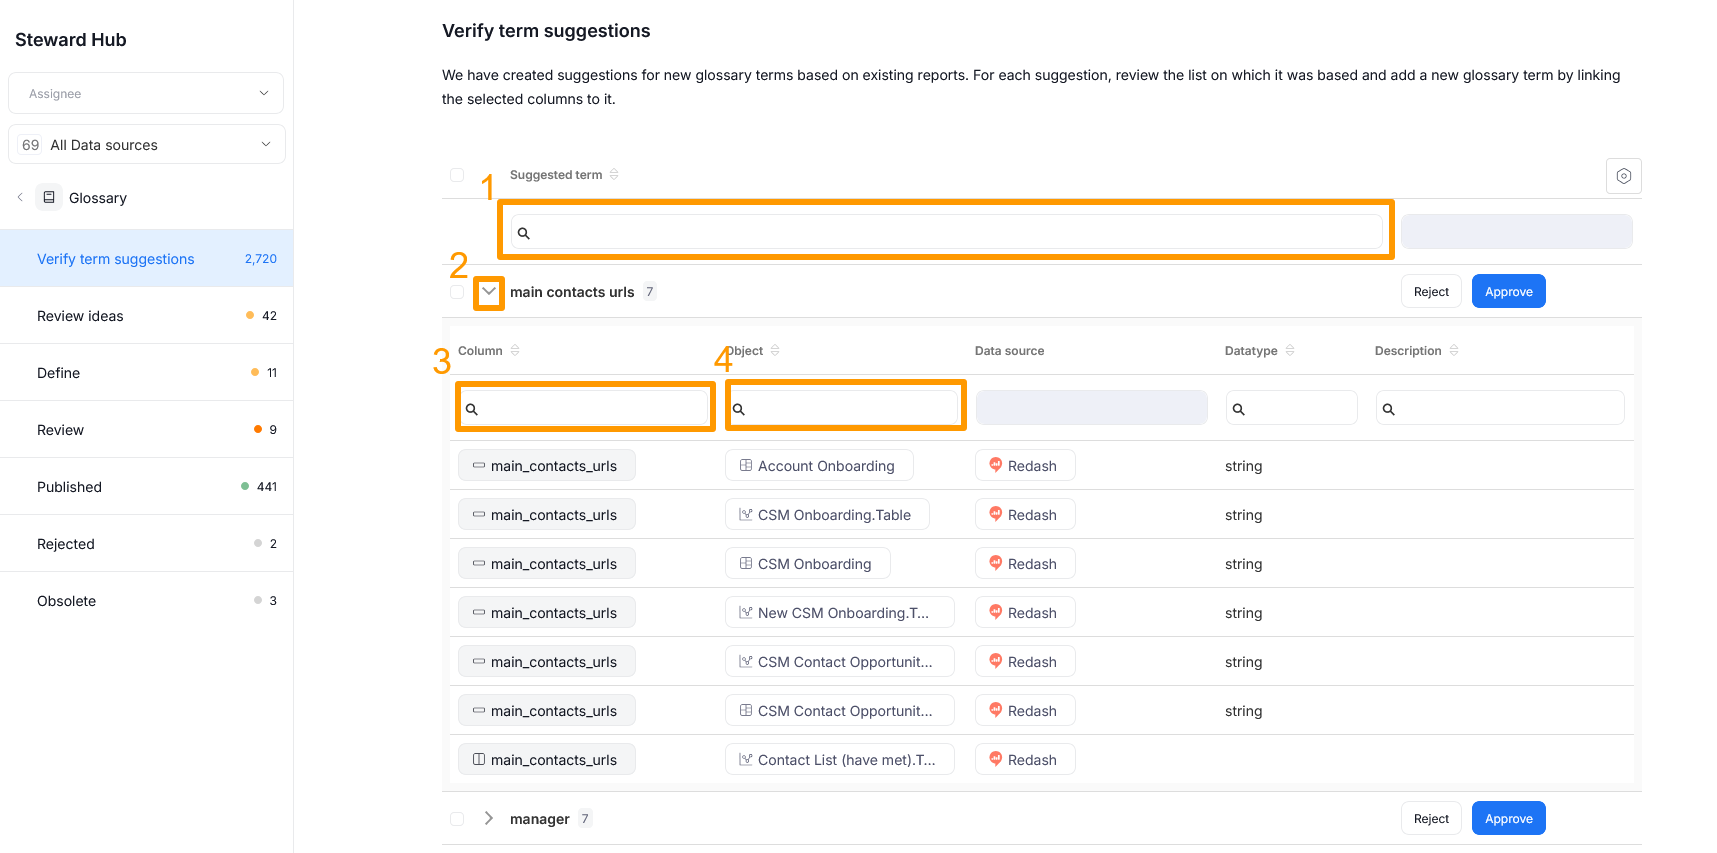
This opens a pop-up, where you are prompted to specify the new Term's entry type [1], and choose the Glossary (or its nested Term) that will serve as a parent for the new Term [2].
By default, the Term will be linked with all suggested columns. If you want to change that, uncheck the Select all suggested columns checkbox [1]. If this is done, you will see a table where you can manually choose the linked columns. If you filtered columns in the previous step, only the filtered ones will be shown. If you need to filter the presented columns further, you can click the Settings [2] icon to open column search bars.
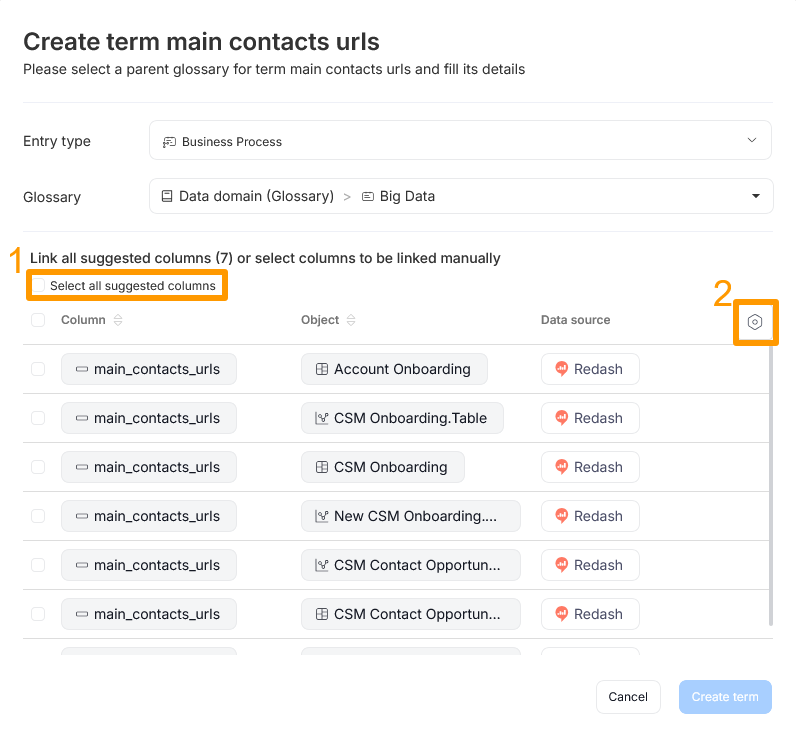
After everything is specified, click Create Term to make a new Term, place it in a Glossary and link it with the selected columns.
Rejecting suggested Terms
You can also reject suggested Terms. This action can be done for a singular Term, by clicking the Reject button in a relevant row [1] or as a bulk procedure by checking the boxes [2] next to all the terms you want to reject, and clicking Reject [3] in the top part of the page.
Workflow actions
The visibility of certain workflow actions depends on User Roles and User Assignment. Read more here
Workflow actions are displayed according to the CTA text configured for Workflows. In this article we are using CTA texts from the standard Dataedo Workflow.
Certain Workflow Stages require special actions from Users. The Steward Hub offers a quick way to view Terms requiring your attention, and perform the necessary actions either in bulk or individually.
To review pending actions, first, click the CTA text matching the action you are interested in. For example, selecting Review ideas will show all objects in the Idea status, waiting for initial approval before they can be worked on.
If you need to take a look at a Term, clicking its name will open that object's page, where you can review all information in detail.
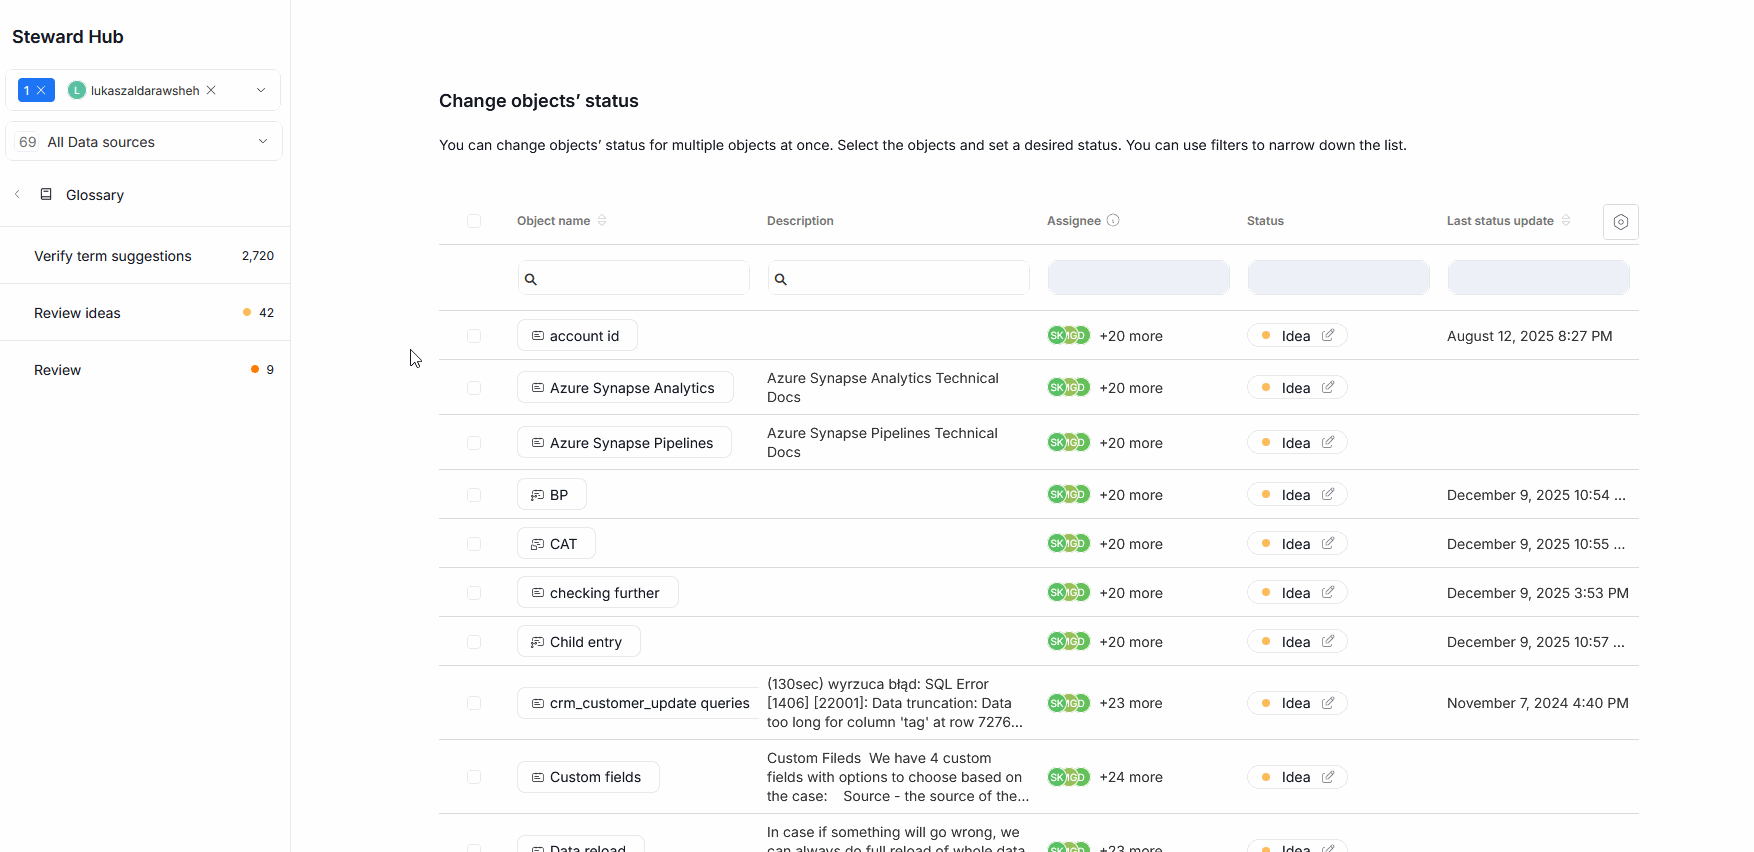
To change the Workflow status of a singular object, click its current status in the Status column. A pop-up will appear, asking you to assign a new status. Once you select it, click Save to save your changes.
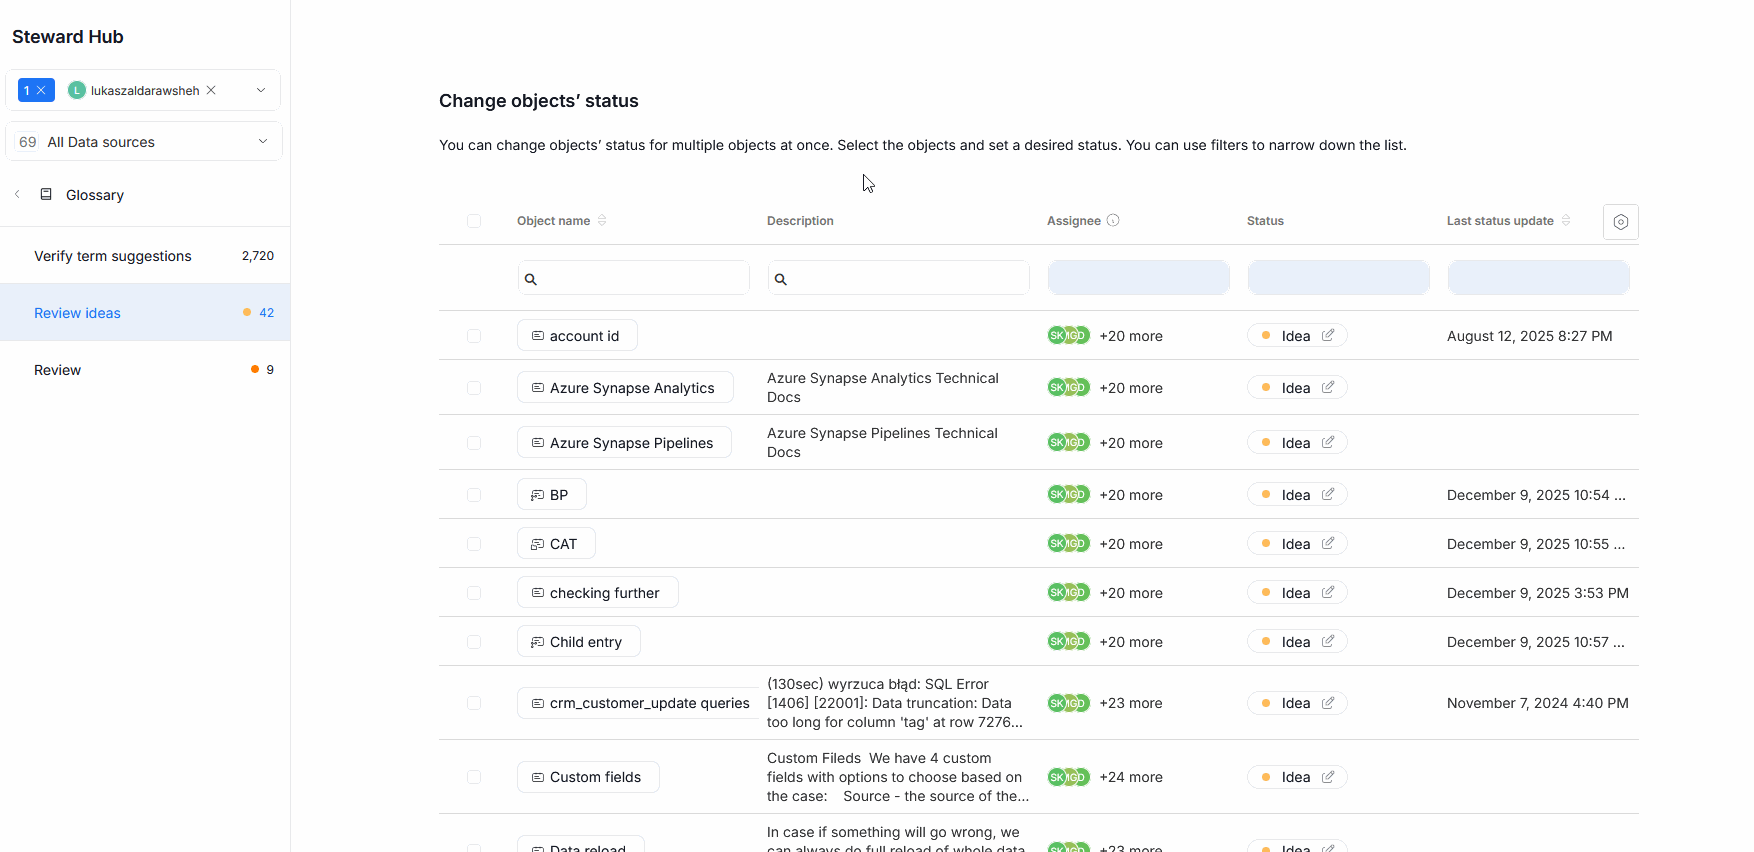
It is also possible to change the status of multiple objects at once. To do so, select all relevant objects using a checkbox [1] next to their name (or use the checkbox next to the Object name column header [2], to select all objects displayed on the current page instead). After that, click the Move to status button [3]. A pop-up prompting you to select the new workflow status for all selected objects will appear. Once you select it, click on Save to confirm your changes.


