Configure Data Profiling
There are three modes of Data Profiling:
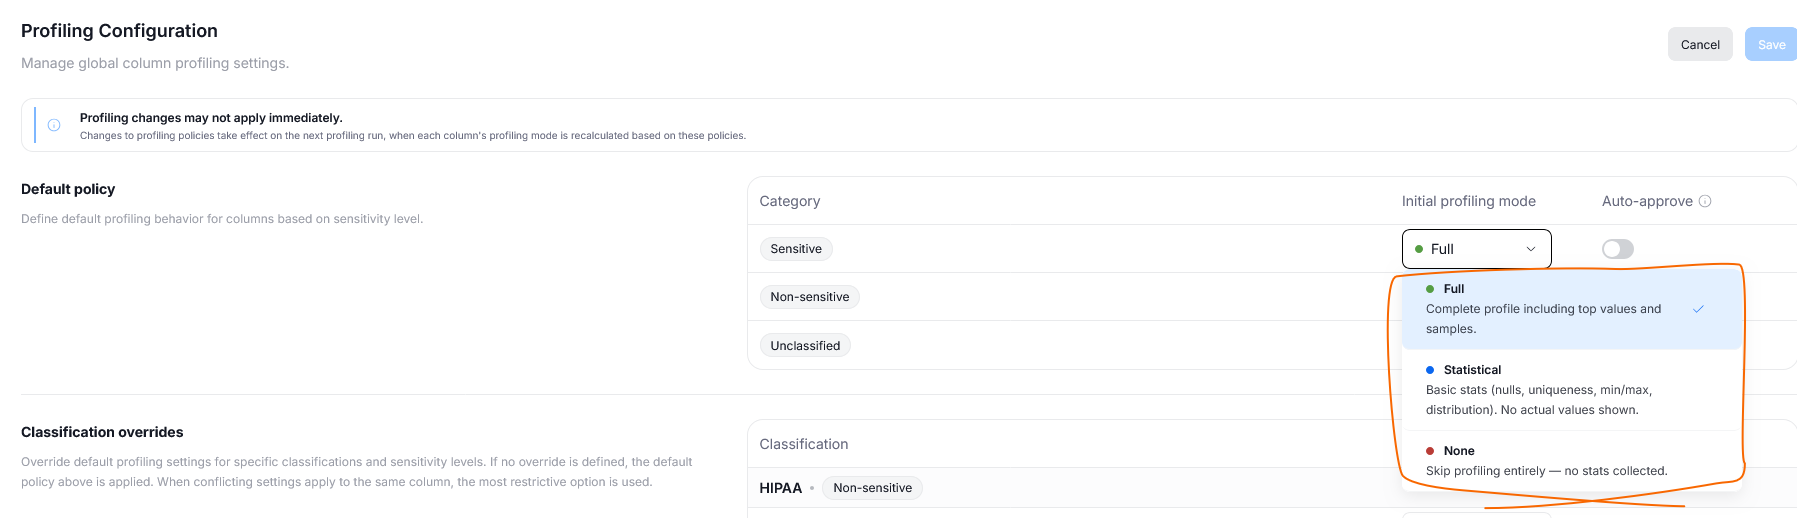
- Full — profiling results will include exemplary data points; things like minimum and maximum values, value distribution, cardinality, or top values will be displayed
- Statistical — in the results, any actual data points will be hidden. Displayed information will relate to things like mean length or data patterns
- None — no profiling will take place
Configure Profiling
Profiling can make parts of your dataset visible to users; therefore, it is necessary to have full control over which sources are profiled and in what mode.
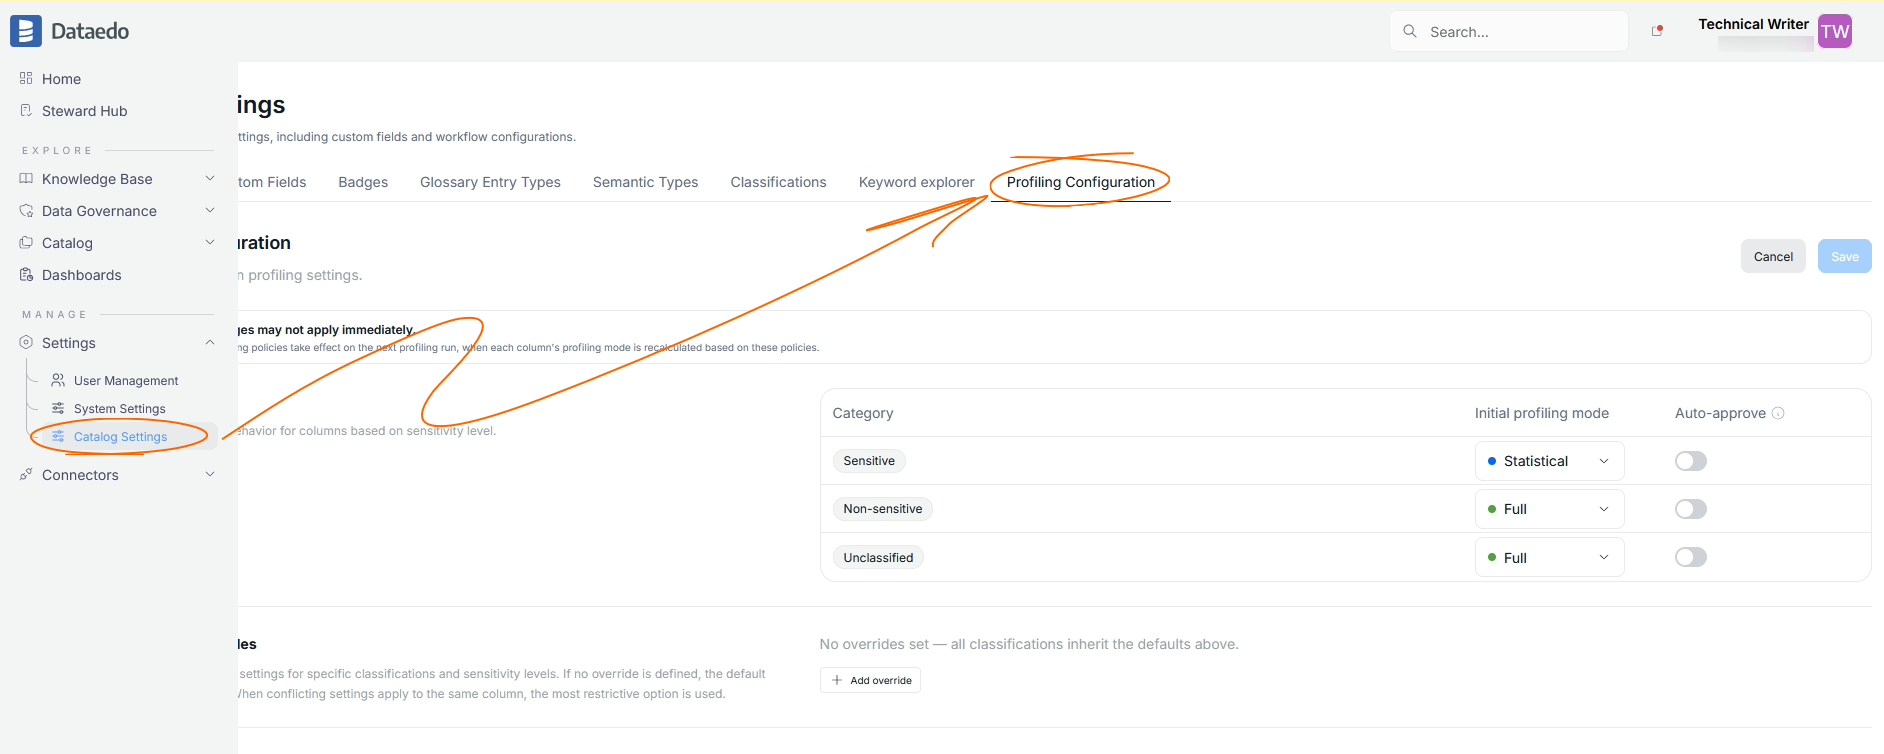
You can configure Data Profiling settings by going to Settings > Catalog Settings and opening the Profiling Configuration tab.
Global Settings
The first section you will see is Default Policy. This governs the global behavior of profiling.
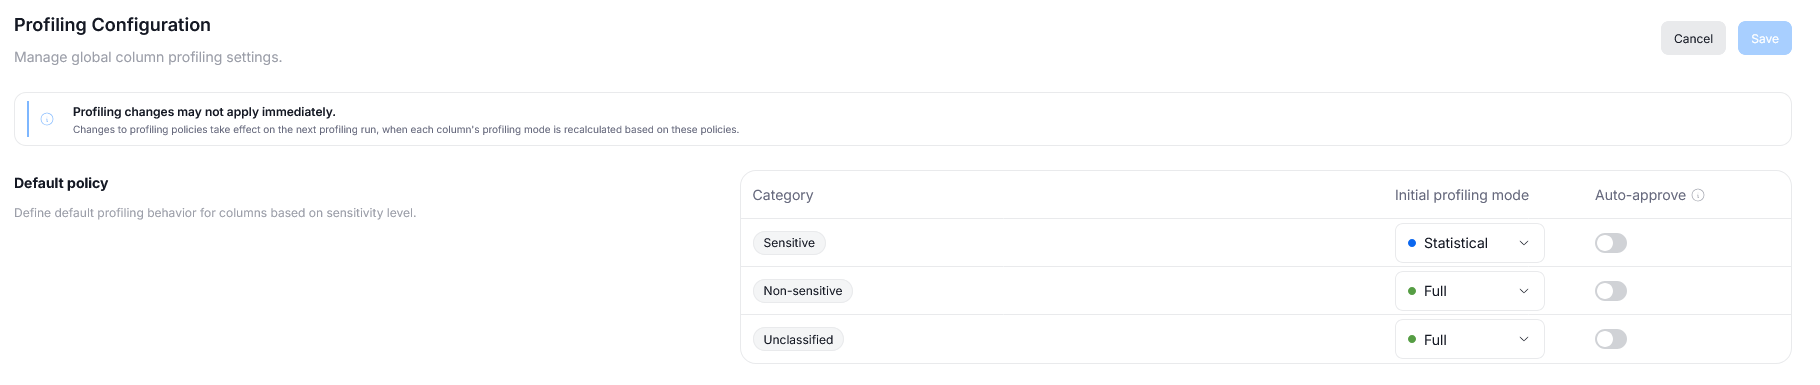
You can set up separate profiling modes for the different confidentiality levels defined during Data Classification — Sensitive and Non-sensitive. The third category — Unclassified — decides the profiling behavior for data sources that do not have a data classification set up. To change a profiling mode for a given category, click the colored dot next to its name. This opens a dropdown where you can choose your desired mode.
The second parameter that you can set for each category is Auto Approve. This determines whether results will be published for users immediately after profiling is finished (if enabled), or whether a Data Steward will still have to approve them (if disabled). This setting is turned off by default.

Exceptions
You might want to override some of the global settings. Let us imagine, for example, a situation where you want almost all of Non-sensitive data to receive full profiling and be automatically published. However, one of the classifications you are using — HIPAA — refers to medical details. Therefore, you want to make it so that even non-sensitive data receives some degree of confidentiality and has only statistical profiling. In this situation, you would use the Classification overrides section.
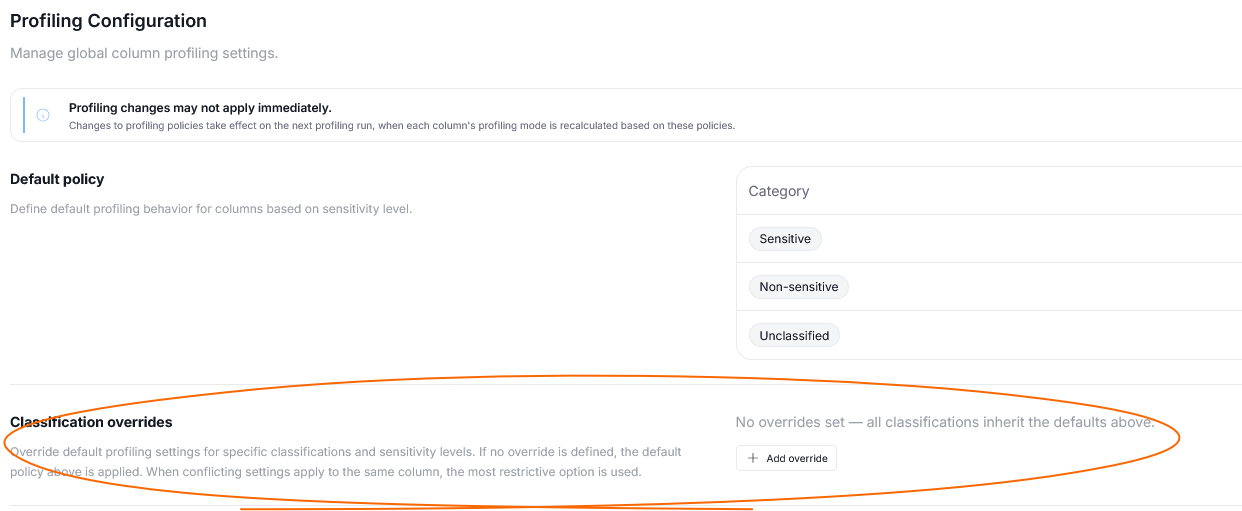
Click the Add override button to start configuring an exception.

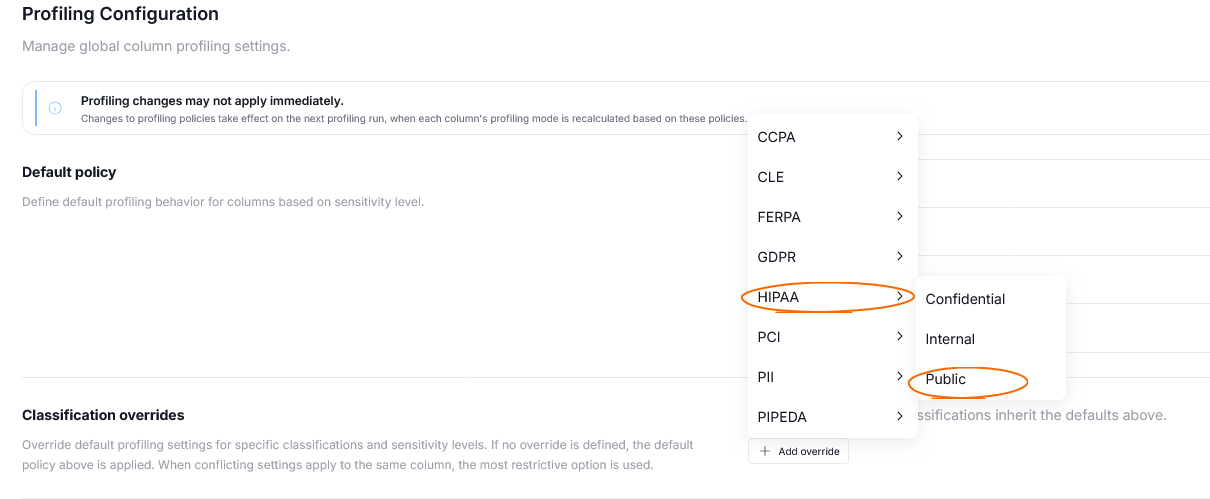
A dropdown will appear, where the names of all classifications saved in your repository are shown. When you hover over a name, an additional modal with the names of all of its sensitivity levels will appear. For HIPAA, only the Public sensitivity level is classified as Non-sensitive. So we will add an override only for it.
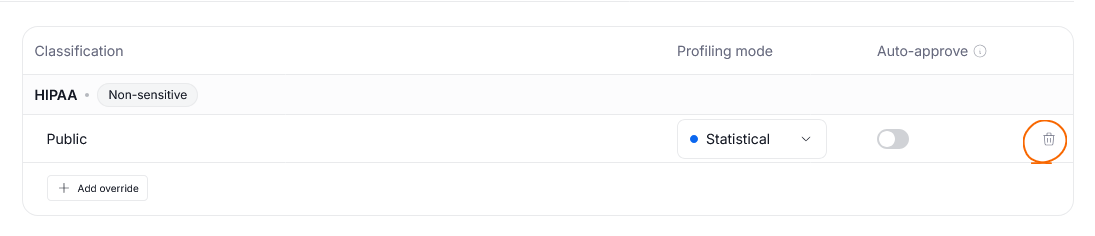
This adds the Public sensitivity of HIPAA to the overrides grid. You can set up its profiling behavior in the same manner as you did with the global profiling configuration. For our purposes, Public should receive only statistical profiling and must be approved by a Data Steward to make sure we remain compliant. This overrides the default behavior of non-sensitive sensitivity levels, which are usually auto-approved and profiled in full.

You can delete any overrides you have previously configured by clicking the trash can icon.
Clashes
Since one data source can be classified with multiple classifications, it can happen that overrides clash with each other — or, in other words, that one data source will end up having multiple conflicting overrides applying to it. In such situations, the most restrictive override will apply.
Changes to Settings
You can change the profiling settings at any time. This means that there are some interactions to keep in mind.
Timeline of Changes
New profiling options will apply only the next time a profiling task is carried out. This means that even if you change a profiling mode of a certain category from Full to Statistical, you will still be able to see the results of the previous full profiling until profiling is carried out again.
If you want the changes to apply immediately, you can manually run profiling tasks for all affected sources using the Scheduler.
Published/Unpublished
Changes to profiling publishing settings do not apply to already published profiling results.
So, toggling Auto Approve off will not affect any profiling results that have already been published. They will remain visible. However, any new profiled columns will have to be approved.
The interaction, however, works differently for unpublished column profiling. If you have some unpublished columns but then enable Auto Approve, they will become automatically published after the next profiling run.
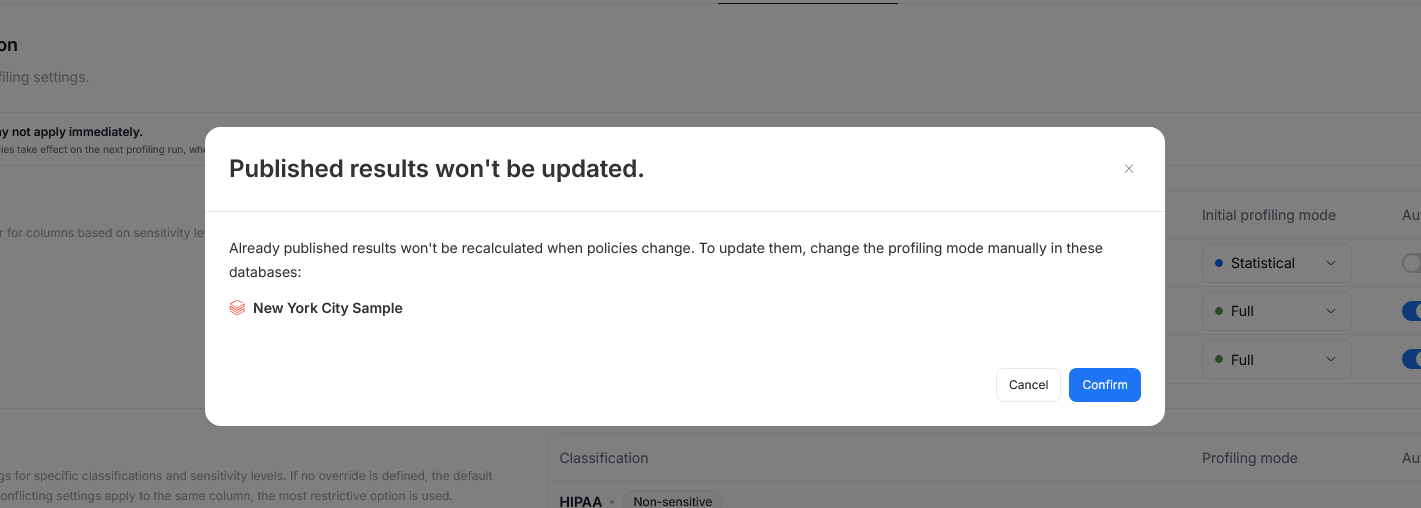
When saving a Profiling configuration, you will receive a warning listing all the Data Sources that have to be re-checked.