Bulk import Terms
Bulk import is available to users with Edit permissions to the target Glossary.
Instead of adding Terms one by one, you can create and update many of them at once from a spreadsheet. A single import can:
- create new Terms, together with their hierarchy
- update the title, Entry Type, description, parent and custom fields of existing Terms
Each import works within one Glossary. If any row of the file has an error, nothing is saved.
To add or update assets of a data source or reporting, see Bulk add and update assets.
Starting the import
There are two ways to star the bulk import of terms.
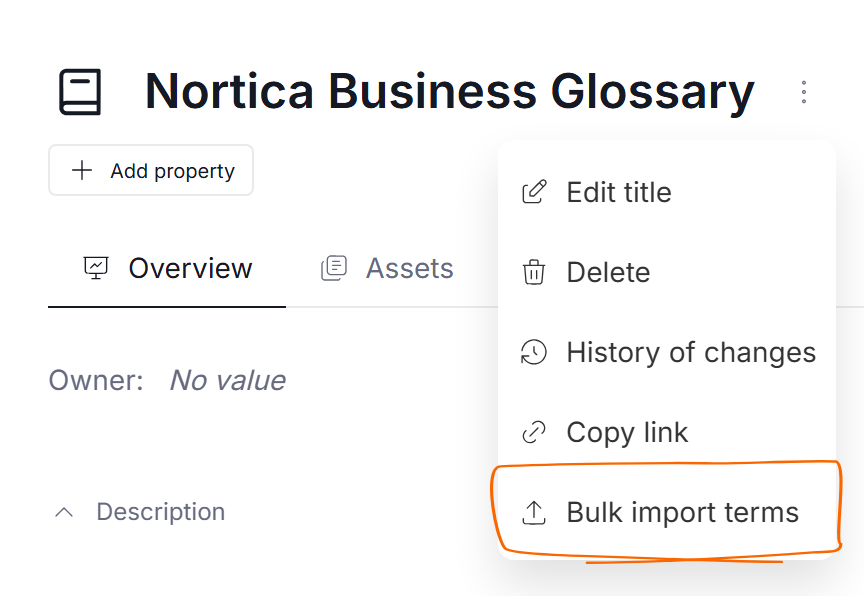
You can open the target Glossary, click the three dots button next to its name, and select Bulk import terms. This opens a wizard that takes you through three steps: uploading the file, mapping its columns, and previewing the result.
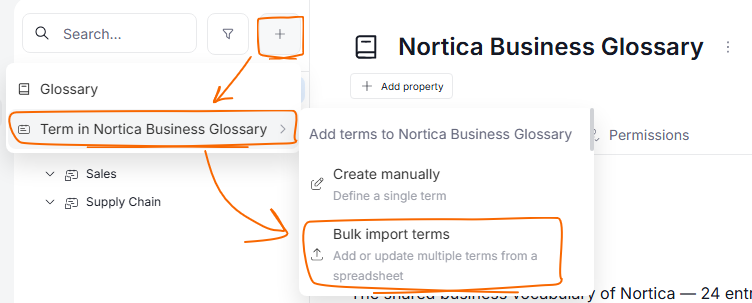
Alternatively, click the + icon in the glossary navigation sidebar, hover over the glossary you want to edit and select Bulk import terms
Step 1: Prepare and upload the file
You can prepare the file in two ways:
- From the template: click Copy template in the upload window. This copies the column headers to your clipboard. Paste them into an empty spreadsheet and fill in one Term per row.
- From an Excel export: export the Glossary to Excel, edit the Glossary Terms sheet, and upload the whole workbook back. Use this to update existing Terms.
Drop the file into the upload window or click Choose file, then click Next step.
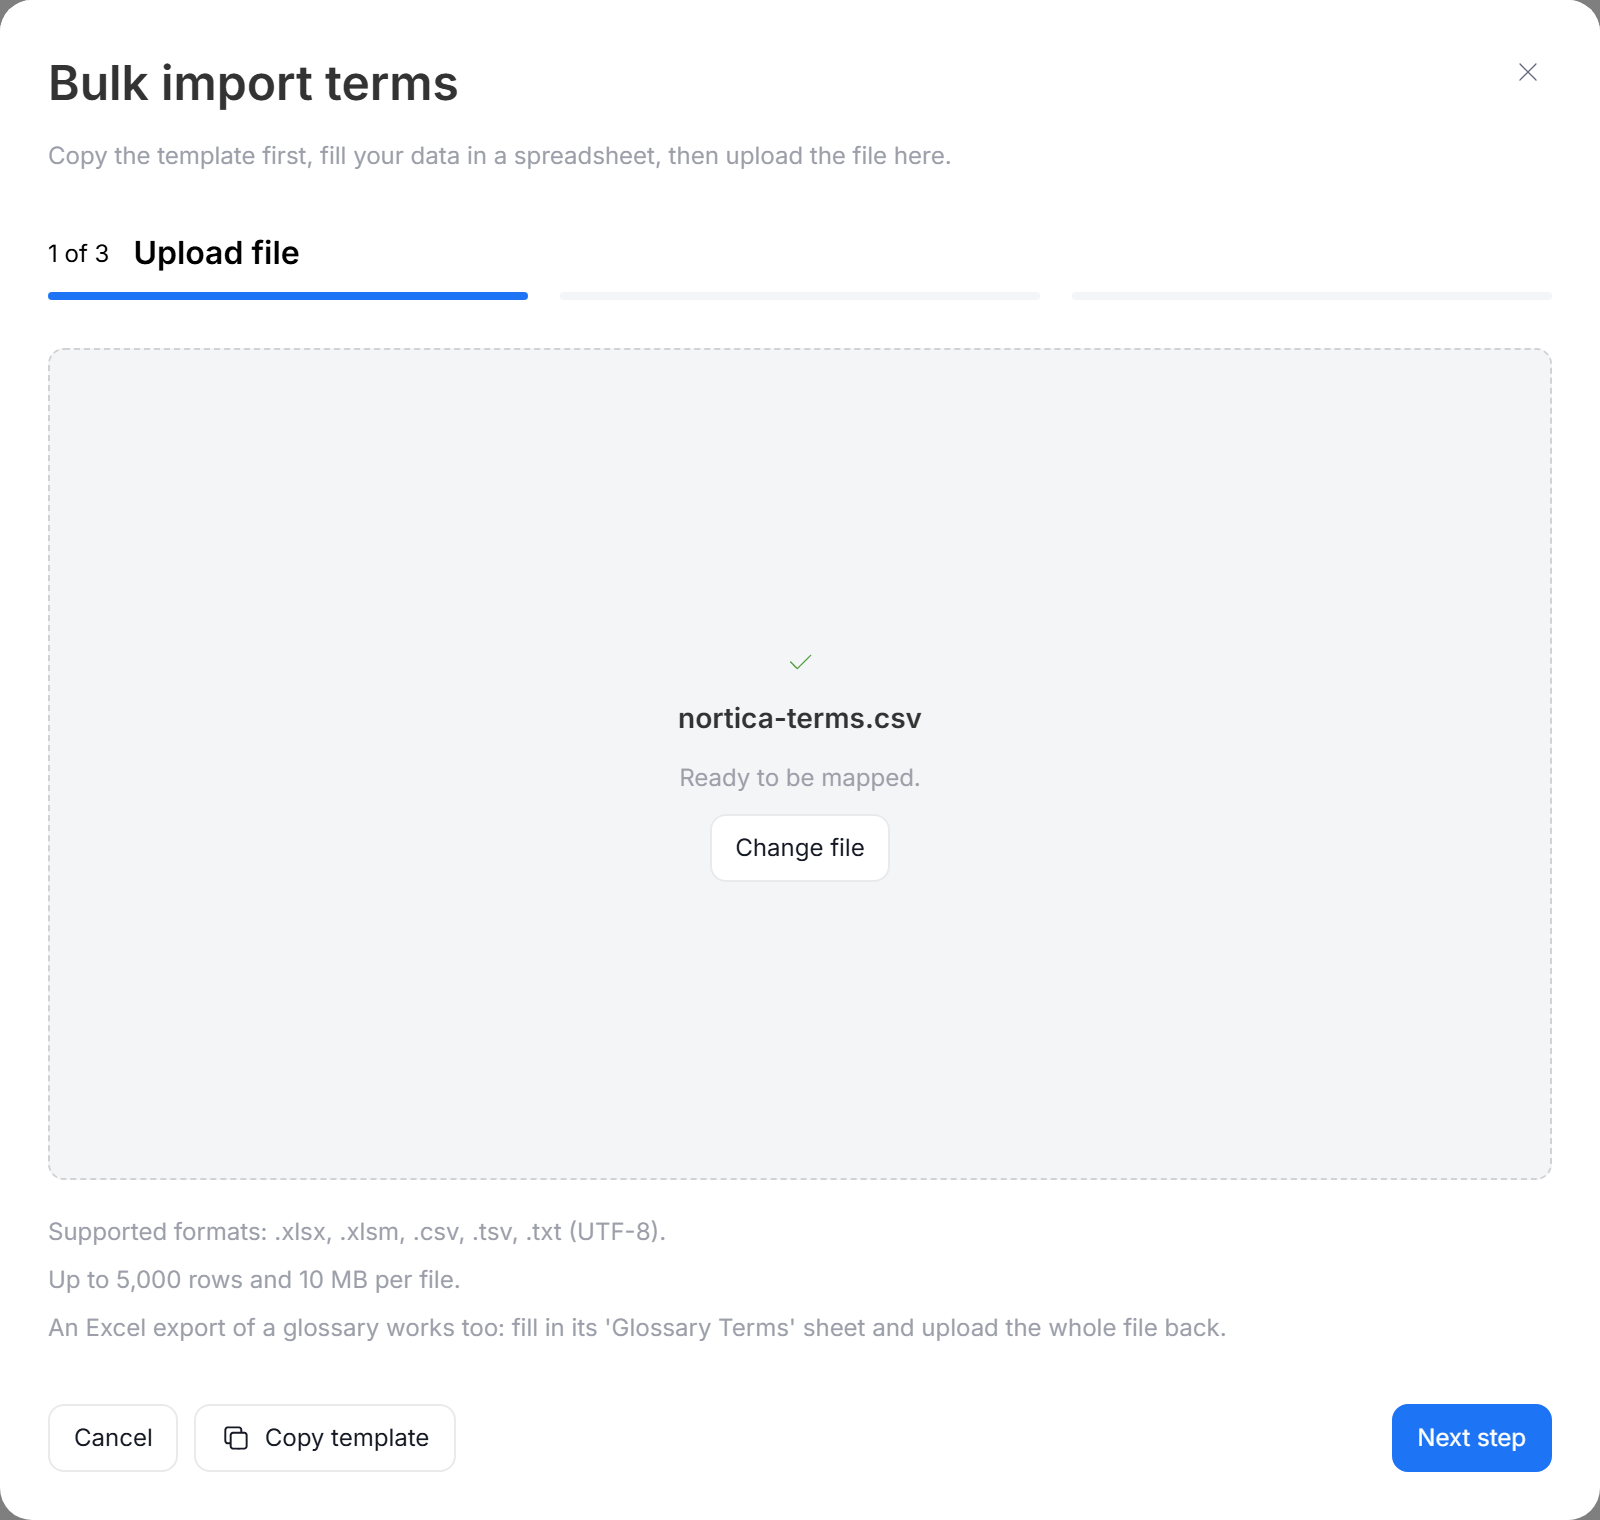
The file has to meet the following requirements:
| Requirement | Value |
|---|---|
| Supported formats | .xlsx, .xlsm, .csv, .tsv, .txt |
| Maximum size | 10 MB |
| Maximum number of rows | 5,000 |
| Maximum hierarchy depth | 20 levels |
| Encoding of text files | UTF-8 |
| Header | The first row must name the columns, and column names must be unique |
Excel 97-2003 files (.xls) are not supported. Save the file as .xlsx first. If you save a CSV from Excel, choose CSV UTF-8 (Comma delimited) to keep special characters.
Template columns
| Column | Required | Description |
|---|---|---|
| Entry title | Yes | The name of the Term, up to 80 characters |
| Entry type | Yes | One of the Entry Types defined in your repository, for example Term or Category |
| Parent entry title | No | The title of the parent Term |
| Parent entry type | No | The Entry Type of the parent Term |
| Description | No | Plain text. Each line becomes a separate paragraph. |
| Custom fields | No | One column per custom field that is visible for Terms |
Step 2: Check field mapping
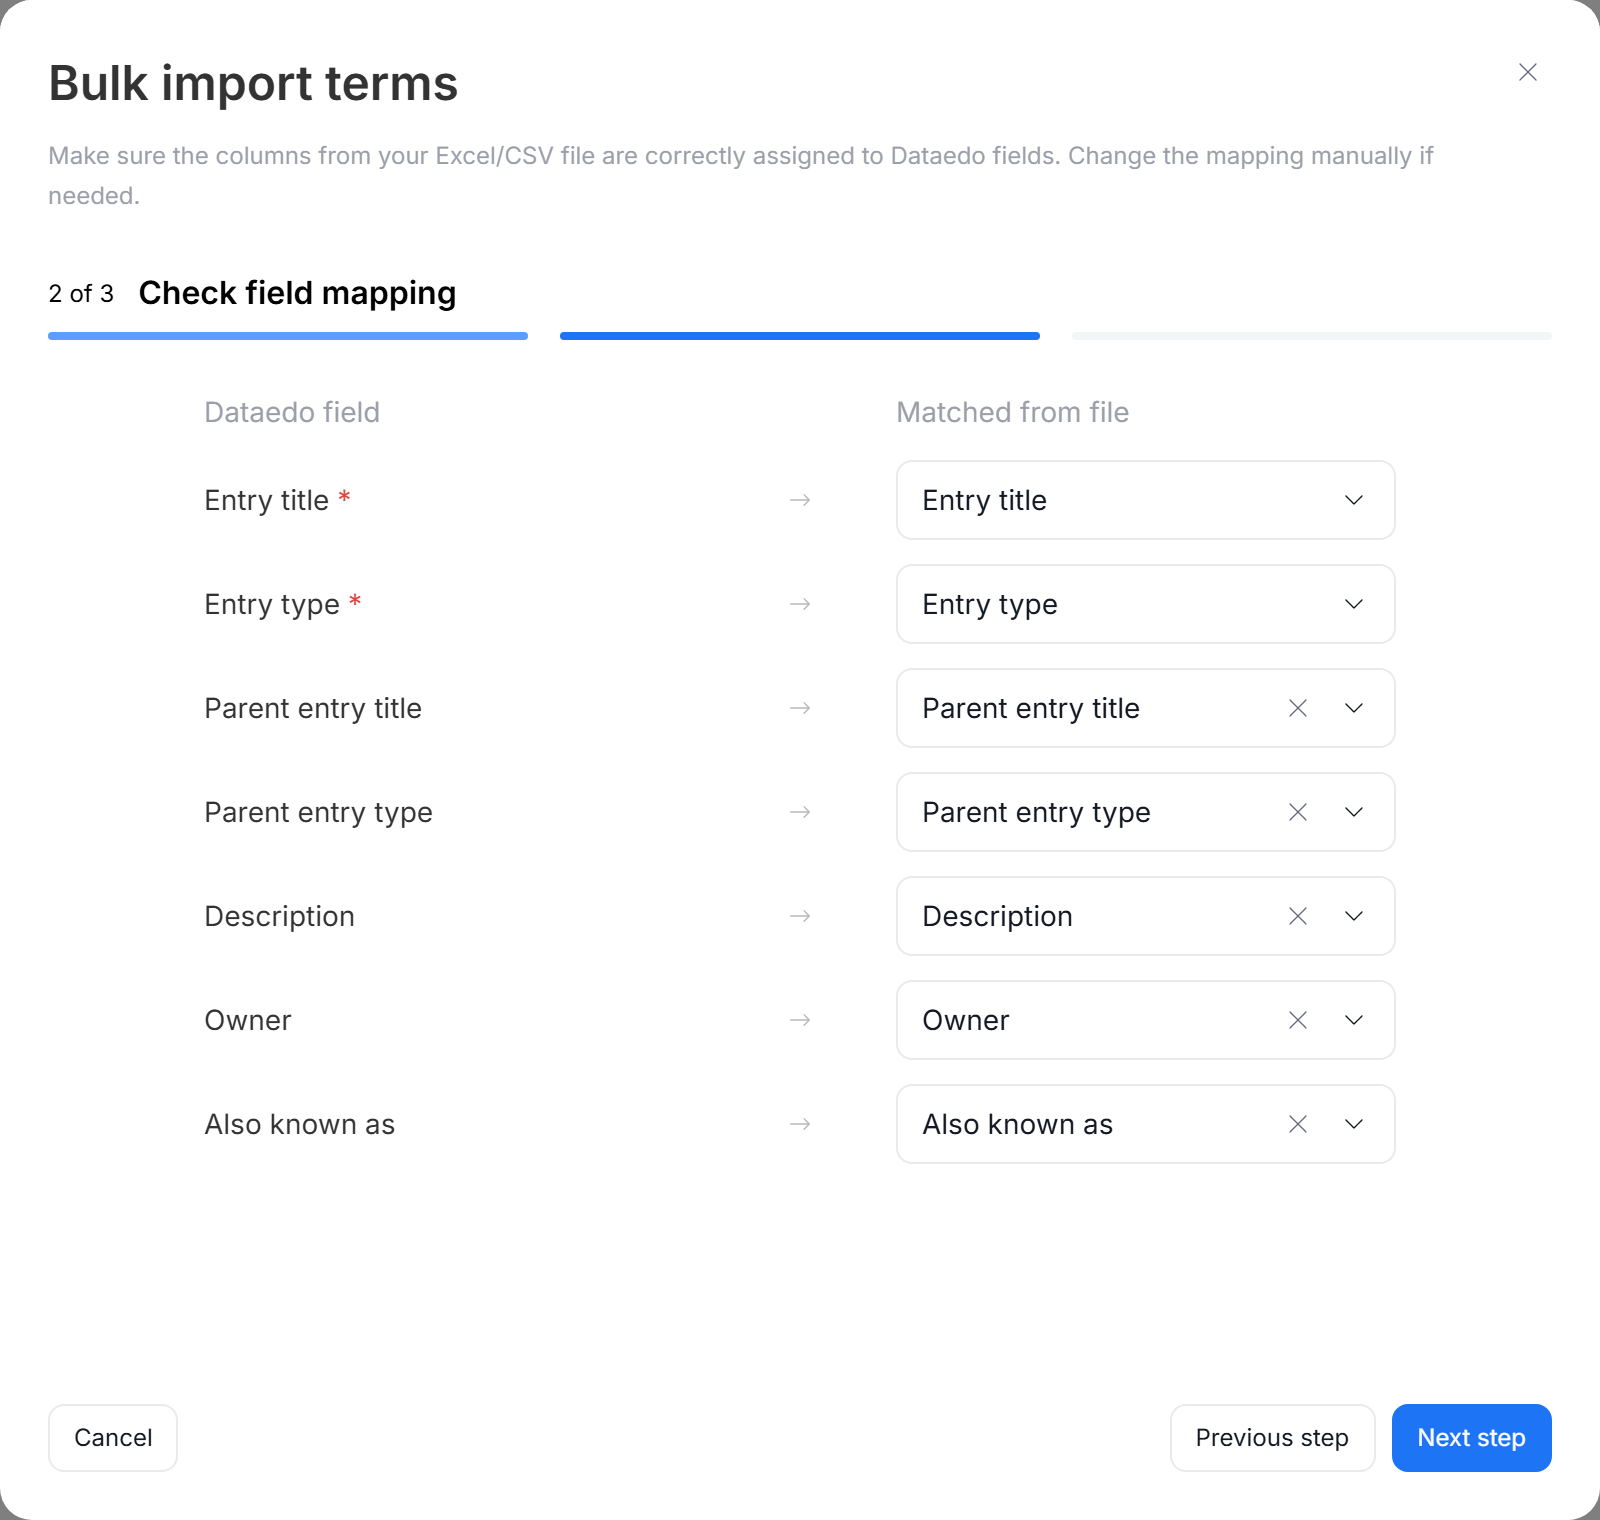
Dataedo automatically matches the columns of your file to Dataedo fields. Check the suggested mapping and change it if needed. Entry title and Entry type must be mapped. Fields set to Not mapped stay unchanged.
Step 3: Preview and save
The summary at the top of the preview shows what the import will do: how many Terms will be created, updated and moved, and how many existing values will be cleared. Rows that need your attention are listed first. Hover over a highlighted cell or row to see the details.
Data preview
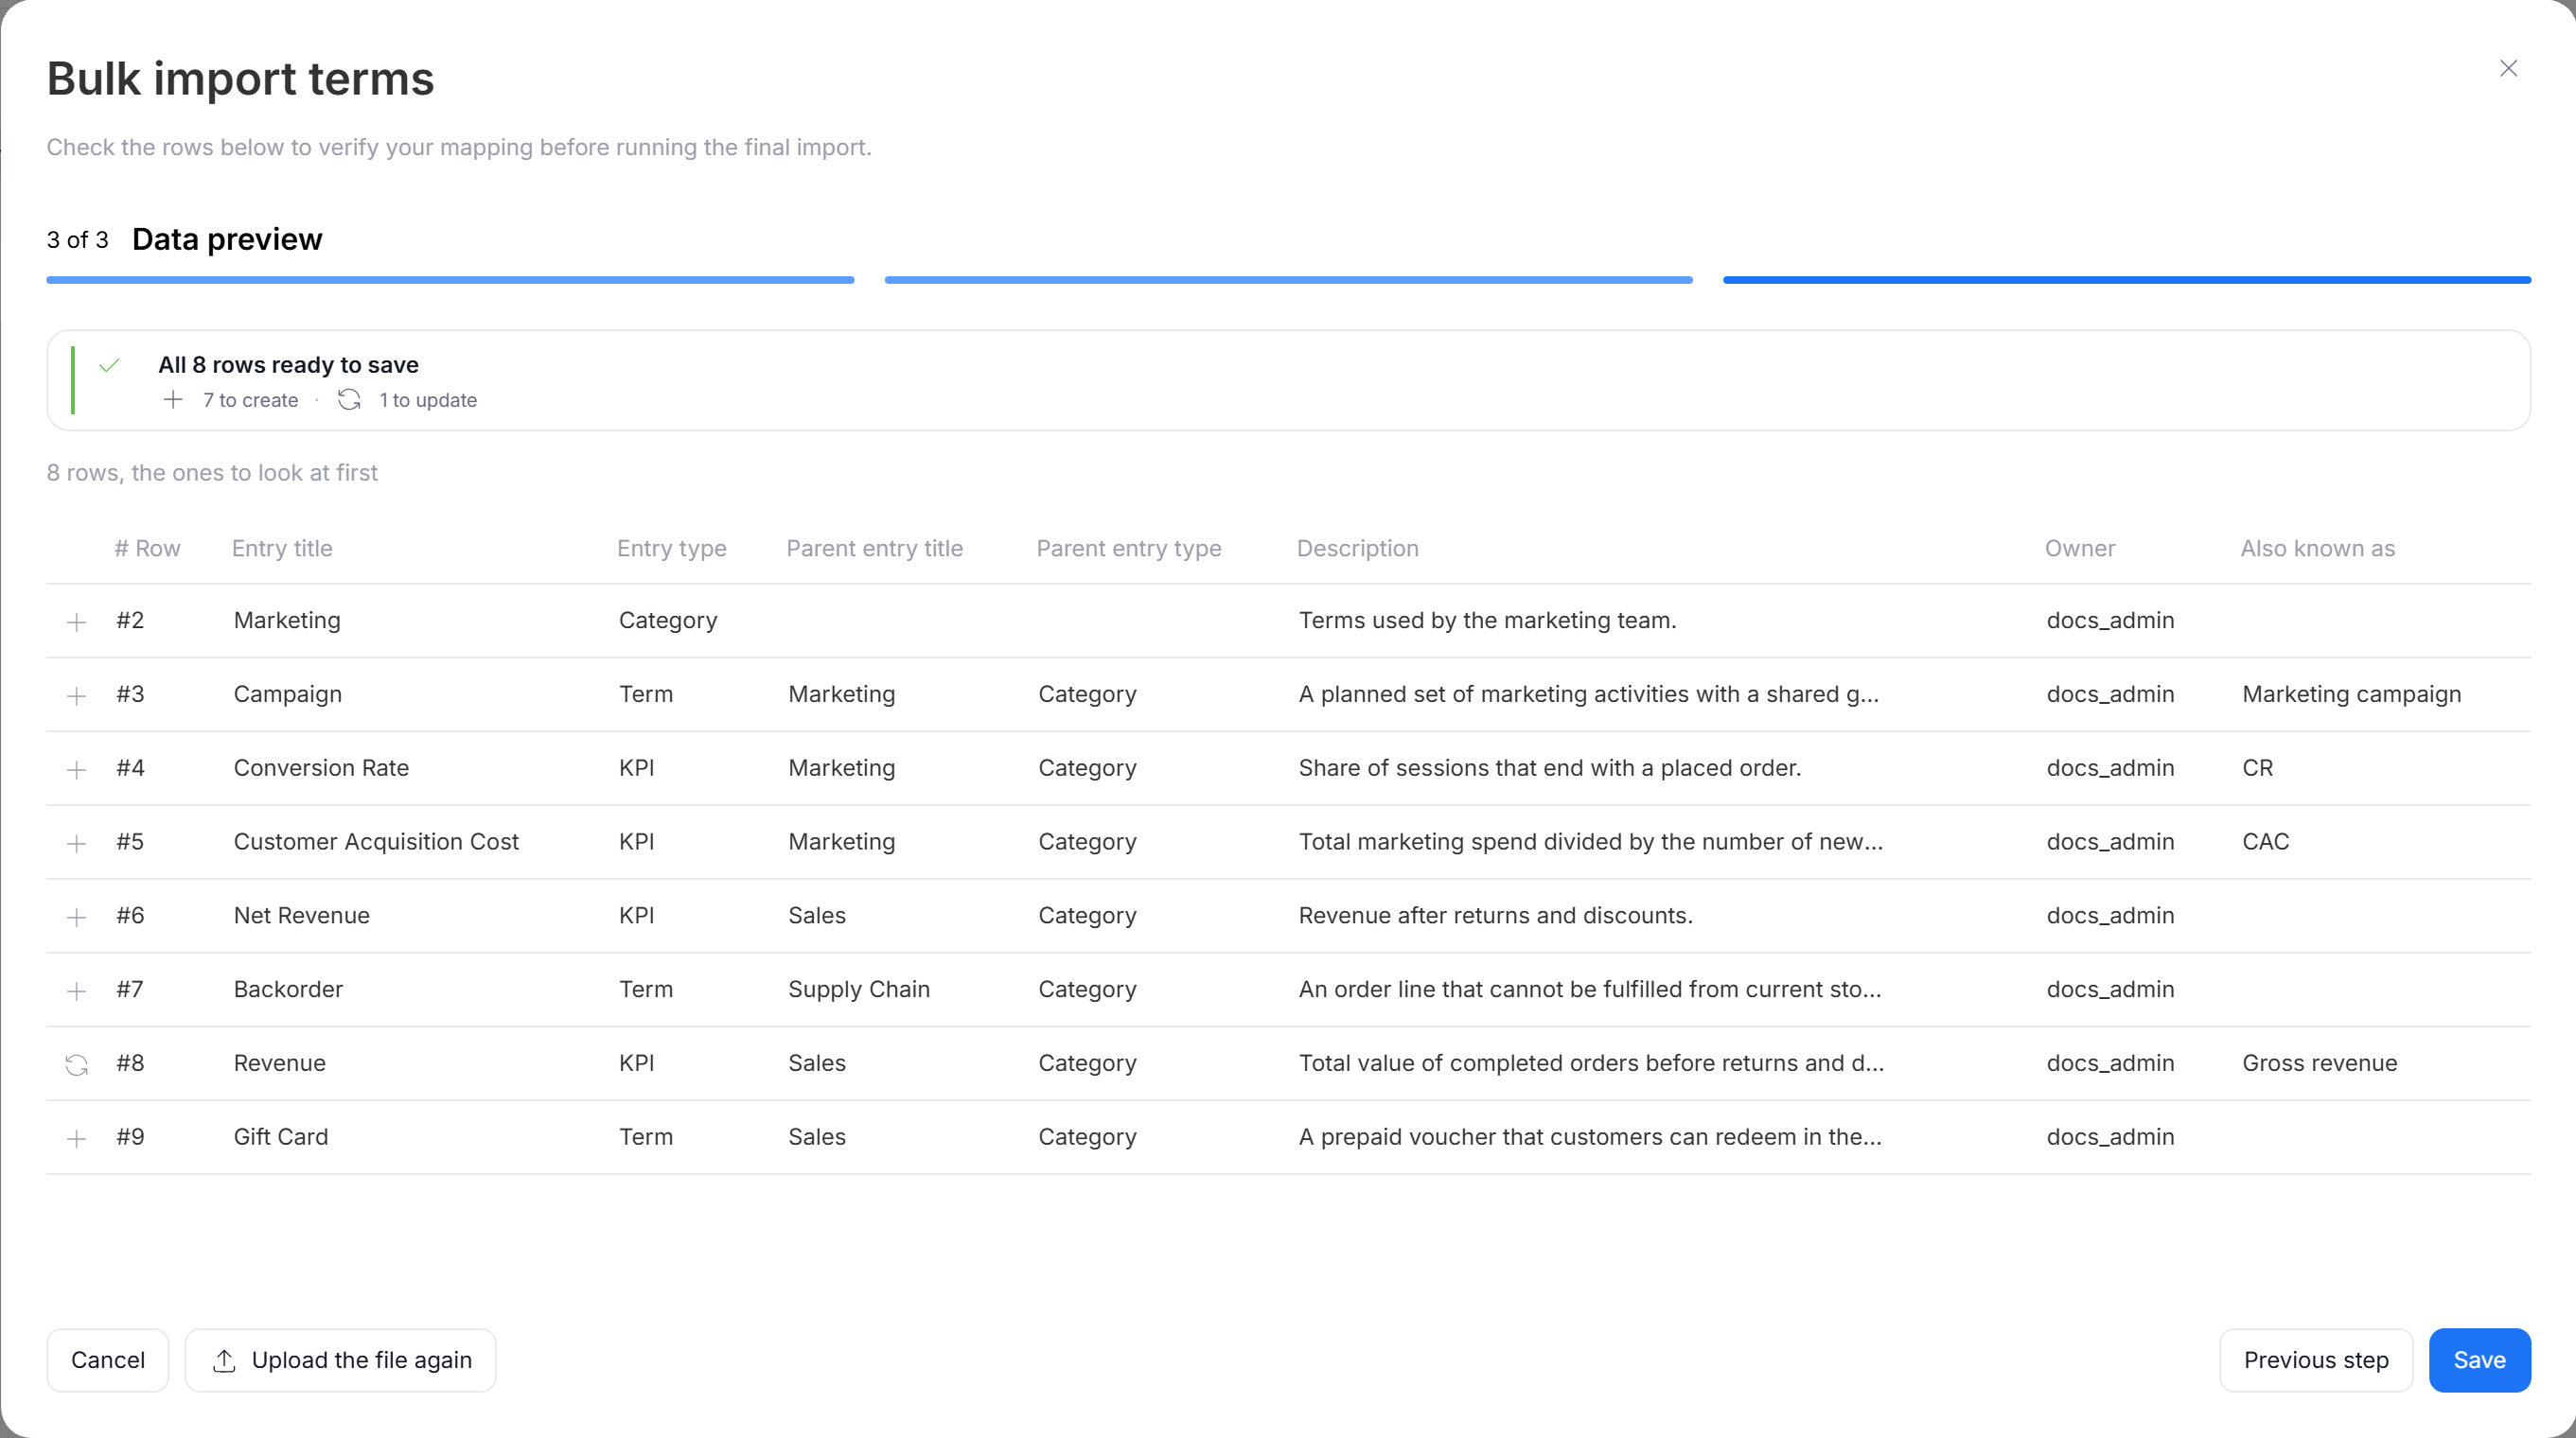
- If the file has errors, fix them in your spreadsheet and click Upload the file again. Your mapping is kept.
- If the file has no errors, click Save. Keep the page open until the save finishes.
When the import is finished, you will see how many Terms were created and updated.
Clicking Cancel or leaving the page during the save stops the import, and nothing from the file is kept.
Updating existing Terms
Whether a row creates a new Term or updates an existing one depends on the file you upload:
- Template file: a row updates the existing Term with the same title and Entry Type. If there is no such Term, the row creates a new one.
- Excel export: rows are matched by the Term ID column, so you can also change the titles of existing Terms. You cannot add new Terms this way — use the template instead.
Empty cells
An empty cell in a mapped column clears the existing value. To leave a field unchanged, set its column to Not mapped in Step 2.
Building the hierarchy
To place a Term under a parent, fill in both Parent entry title and Parent entry type. The parent can be an existing Term or a Term from another row of the same file, so you can import a whole hierarchy at once.
If a row names a different parent for an existing Term, the import moves that Term, together with its children. The preview warns you about every such move.
Custom field values
| Custom field type | Accepted values |
|---|---|
| Checkbox | TRUE/FALSE, T/F, YES/NO, Y/N, 1/0 |
| Date | A date cell in Excel, or text in the YYYY-MM-DD format |
| Closed list | One of the field's values, in any letter case |
| Open list | One value, saved as typed |
| Multi-value closed list, tags | Values separated by commas |
| User | Logins of active users, separated by commas |
After the import
New Terms get the initial workflow status (Idea if you use the default workflow). Publish them to make them visible to Viewers.
Users who follow the Glossary or the imported Terms get a single notification about the import, instead of one per Term.
Common errors
| Error | How to fix it |
|---|---|
| Unknown Entry type | Use the name of an Entry Type that exists in your repository. |
| Incomplete parent | Fill in both parent columns, or leave both empty. |
| Parent that does not exist | Make sure the parent exists in the Glossary or in the file, with the same title and Entry Type. |
| Ambiguous parent or entry | More than one Term has this title and Entry Type. Rename one of them in the Glossary. |
| Same entry described twice | Remove the duplicated row from the file. |
| Parent hierarchy loops | A Term cannot be placed under itself or under one of its children. |
| Unknown user | Use the login of an active user. |
| Excel error in a cell | A formula in the cell returned an error, for example #N/A. Fix the formula, or clear the cell. |

