Custom fields
Custom fields are user-defined metadata that can be attached to various data structure and documentation elements, such as tables and columns.
Basics
A Custom Field is an additional field that you can add to better describe objects in your documentation. You can add a custom field to one or more of the following elements:
- Areas
- Domains
- Modules
- Data products
- Report objects
- Table objects
- Columns
- Column lineages
- Program objects
- Parameters
- Triggers
- Keys
- Lookups
- Lookup values
- Table relations
- Terms
Each custom field is defined at the repository level and applies to all objects of the type to which it's attached.
When adding a new Custom Field, you can choose from one of the eleven predefined field types. Each type accepts only specific input types:
- Text --> free-form text
- Drop-down list (closed) --> exactly one value chosen from a list defined during field creation
- Drop-down list (open) --> exactly one value that can be chosen from a list or typed in manually
- Multi-select drop-down list --> one or more values chosen from a list defined during field creation
- Tags --> one or more values chosen from a list. New list items can be added using text input
- Number --> an integer
- Date --> a date provided in a valid format defined during field creation
- Checkbox --> a Yes/No binary value
- User selection --> exactly one User from the list of existing users
- Color --> a color chosen from a predefined palette
- URL --> a valid URL address
Displaying Custom Fields
Dataedo Portal displays the Custom Fields grid at the bottom of each object's overview, showing most of its enabled Custom Fields. Empty fields are displayed as No value.
As an exception, Tags, Owners, and Subject Matter Experts are displayed in the object's sidebar instead.

Depending on the custom field's configuration, your input can appear as:
- Plain text matching your input (for text, single-value lists, numbers, checkboxes, and user selection)
- Comma-separated list (for multi-select lists and tags)
- Color box matching the selected color (for colors)
- Date matching your selected format (for dates)
- Clickable hyperlink (for URLs)
Managing Custom Fields in Portal
Custom Fields can be defined only by users with edit permissions (Data Stewards, Power Data Stewards, and Approvers).
Accessing Custom Fields settings
Navigate to Settings>Catalog Settings and switch to the Custom Fields tab. From there, you can define new Custom Fields or edit existing ones.

Adding a new Custom Field
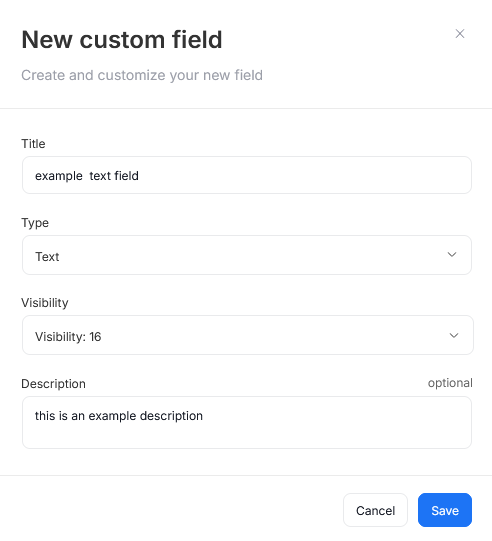
When you click the Add Custom Field button a pop-up will appear. In there, you will be asked to provide a name (Title) for your new Custom Field, select its Type, and specify which objects it should be enabled for (Visibility). You can also provide a Description, specifying the Custom Field's purpose for your organization's needs.
Some types require additional information. Types with extra requirements are: all Drop-down lists and Tags, which require you to provide a comma-separated list of default values (Definition), and Date, which requires you to provide a template matching your organization's preferred date notation (Format).
After providing the required information, click the Save button to save your Custom Field.
Custom field creation pop-ups
Editing existing Custom Fields
You can also use the Custom Fields tab to manage existing Custom Fields. Click on the three dots next to your chosen Custom Field to open the menu and choose either the edit or delete button.
The edit pop-up offers the same functionalities as the one used to create new fields.
Changing the Type of an existing Custom Field can cause loss of data if the new type does not support the same input type as the previous one.
Managing Custom Fields in Desktop
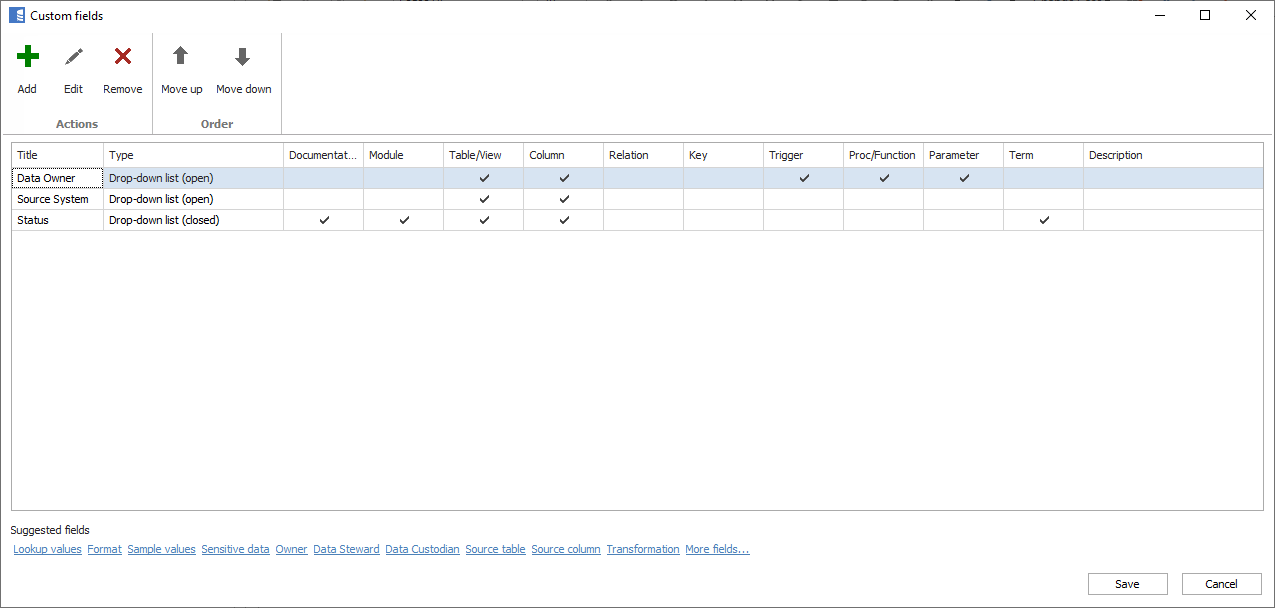
To define Custom Fields, click the Custom fields button in the ribbon.

This opens the Custom Field administration panel where you can view and edit the list of Custom Fields defined in the repository.
Adding a field
To add a field, click the Add button or choose a predefined field (see below).
Once you click Add, a form with field definition will show. Provide a unique name for the field, field scope, and an optional description for future reference.
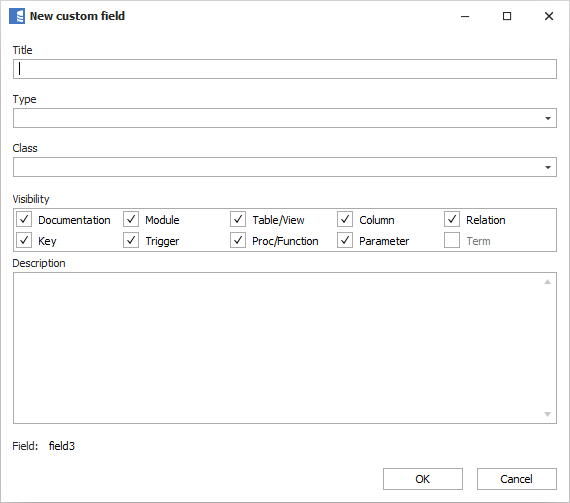
Confirm with OK and once you have defined all the fields, save changes with the Save button.
Setting field scope
Field scope defines which data element the field will be added to.

Adding predefined fields
You can quickly add one of our predefined Custom Fields simply by clicking on the predefined fields at the bottom of the form:

Removing fields
Removing a field removes all data from it permanently.
To remove a field, select it and click the Remove button.

Then, click the Save button to confirm the change.
Sorting
You can change the default field order using the Move up and Move down buttons. It will impact display order in the application and exports.

Editing Custom Fields
After you define Custom Fields, you will notice that additional text fields will show up next to relevant objects.
Here are a few examples of where you can find Custom Fields:
Module:

Table list:
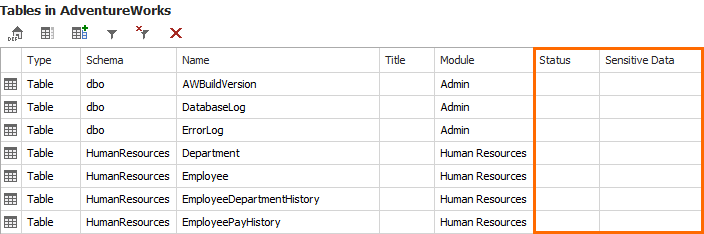
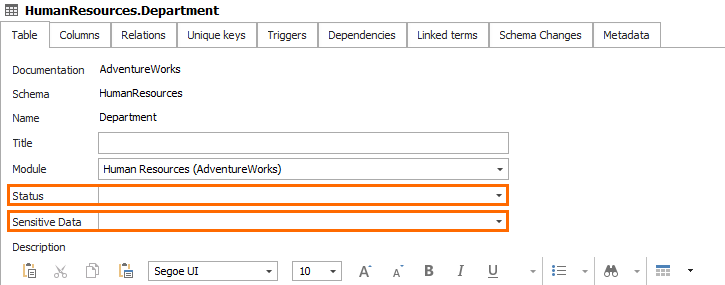
Table:
Columns:

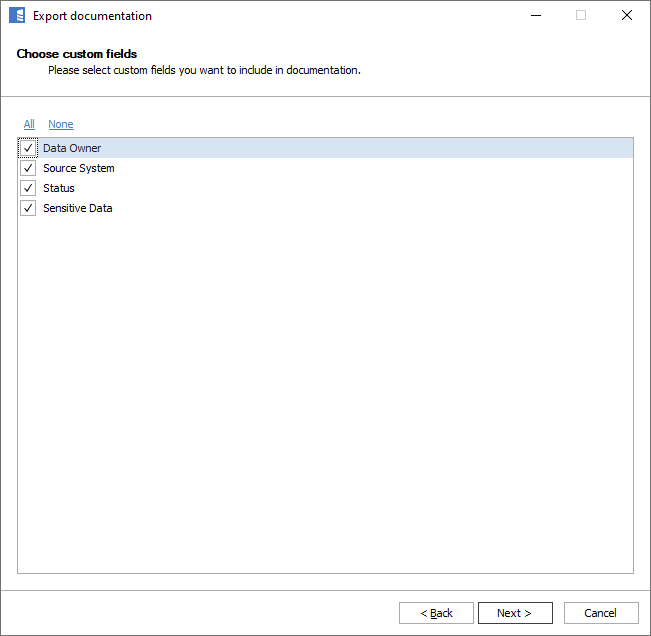
Exporting
You can choose which Custom Fields should be exported on the Choose custom fields screen:
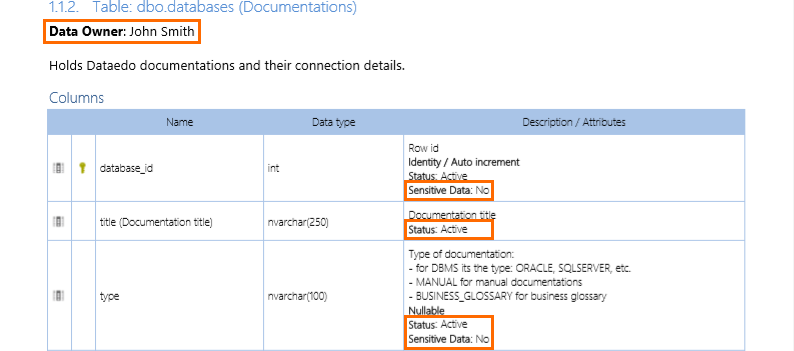
In exported files, the custom field data are usually only visible when they are filled.
Custom fields in PDF export:
Custom fields in HTML export:
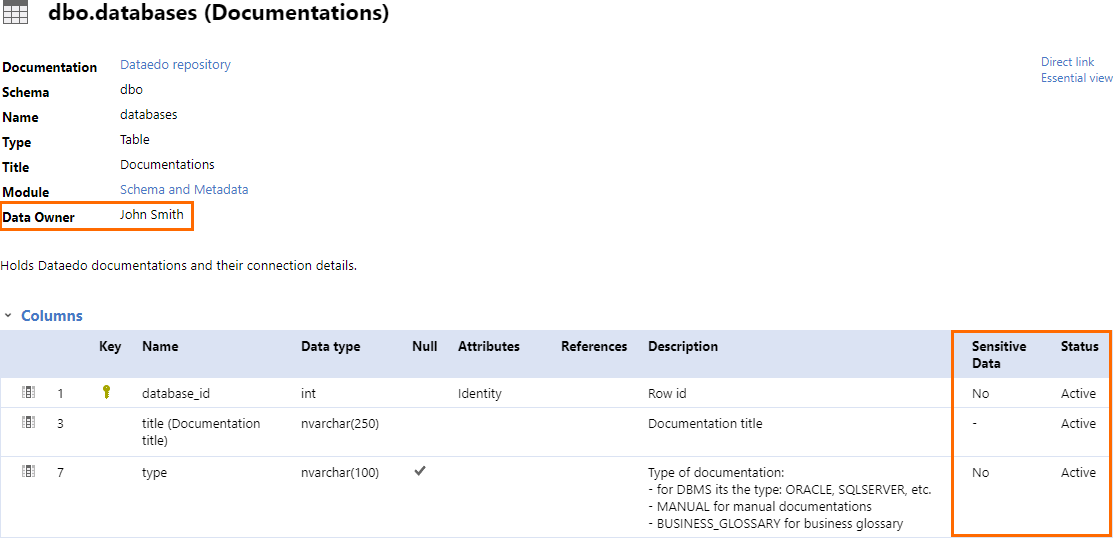
Custom fields in repository database
All Custom Fields are saved in relevant tables (e.g., in procedures or parameters tables) in columns named field1 to field40. To find which column holds the value of a specific field, check the second column of the query below:
select title as field_name,
       field_name as database_column_name
  from dbo.custom_fields
You can find out more about this in Dataedo repository documentation.
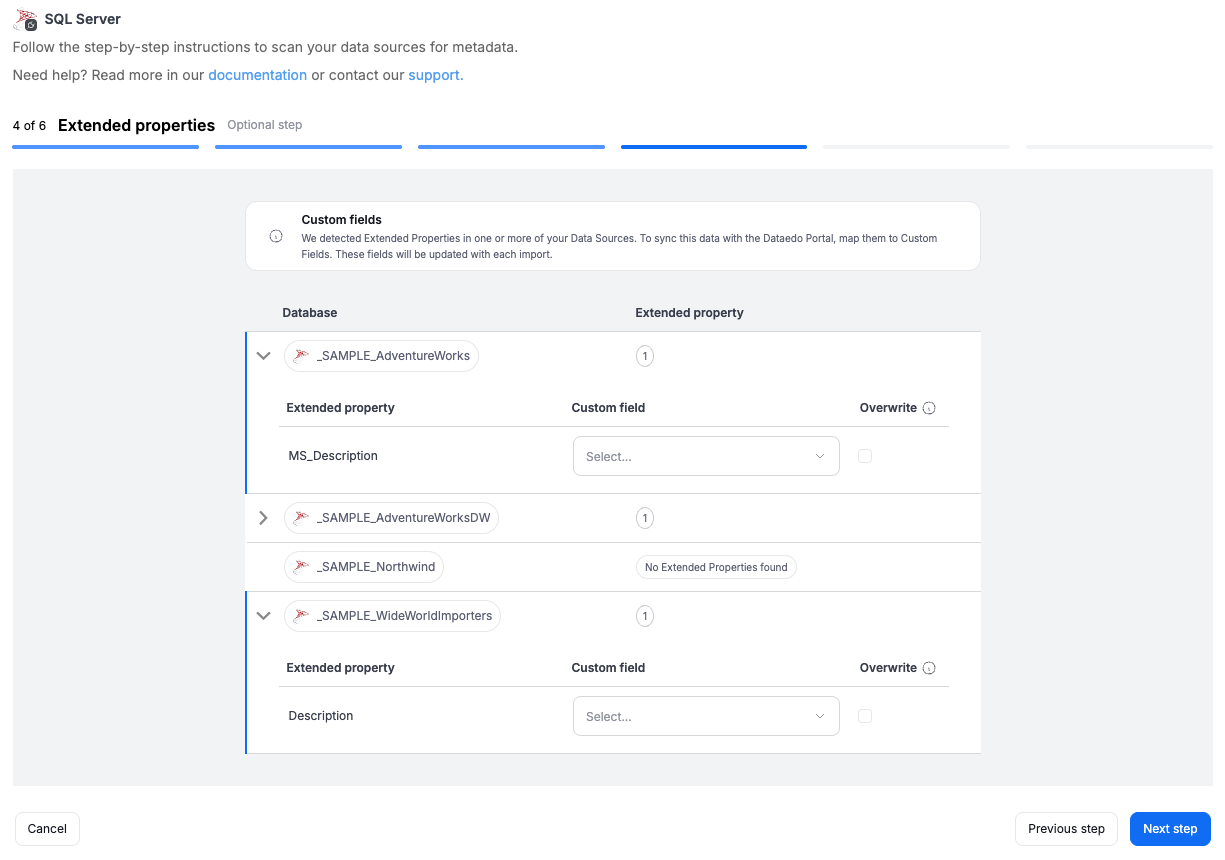
Importing/Exporting extended properties as Custom Fields
If your data source supports extended properties, these can be mapped onto Custom Fields when configuring Metadata Imports.
Learn more:

