Configure multiple agents
Before you can use multiple Agents, your Admin must connect them to your repository using the connection string.
If your organization processes large quantities of data, some data sources might require extra permissions to connect, or have limited accessibility. For security reasons, you would not want to grant a single Agent the full permission scope needed to reach every source. It is safer to run a separate Agent with elevated permissions that serves only that source. Dataedo's multiple Agent integration makes this possible.
You can review all of your configured Agents in the Settings view.
Settings
Go to Connectors > Settings and open the Agent tab. Scroll down to view and manage all Agents connected to your repository.
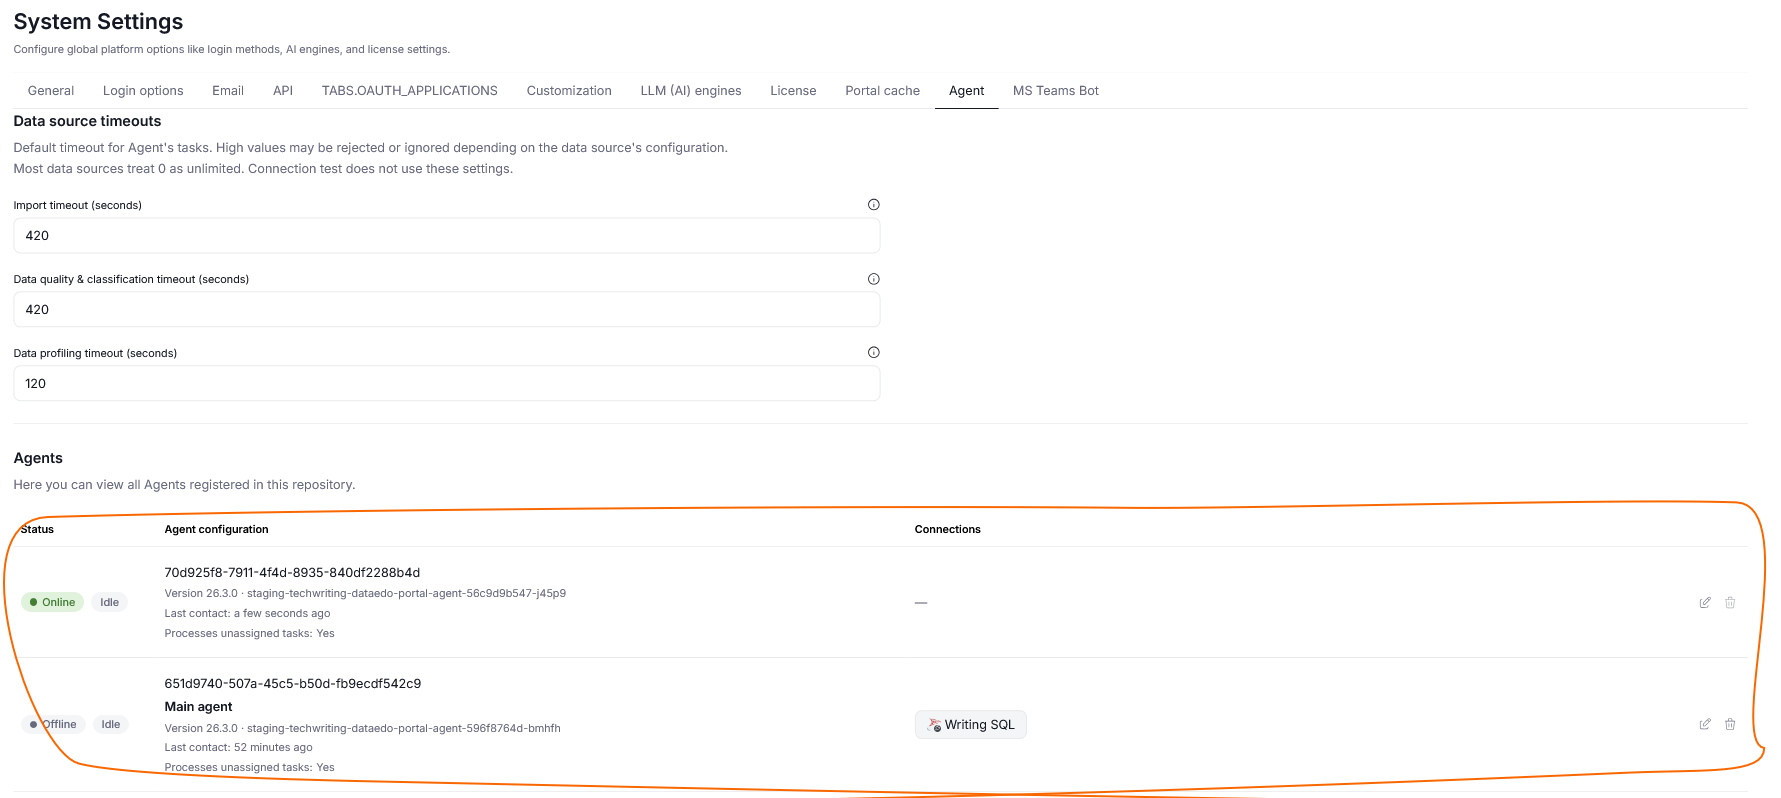
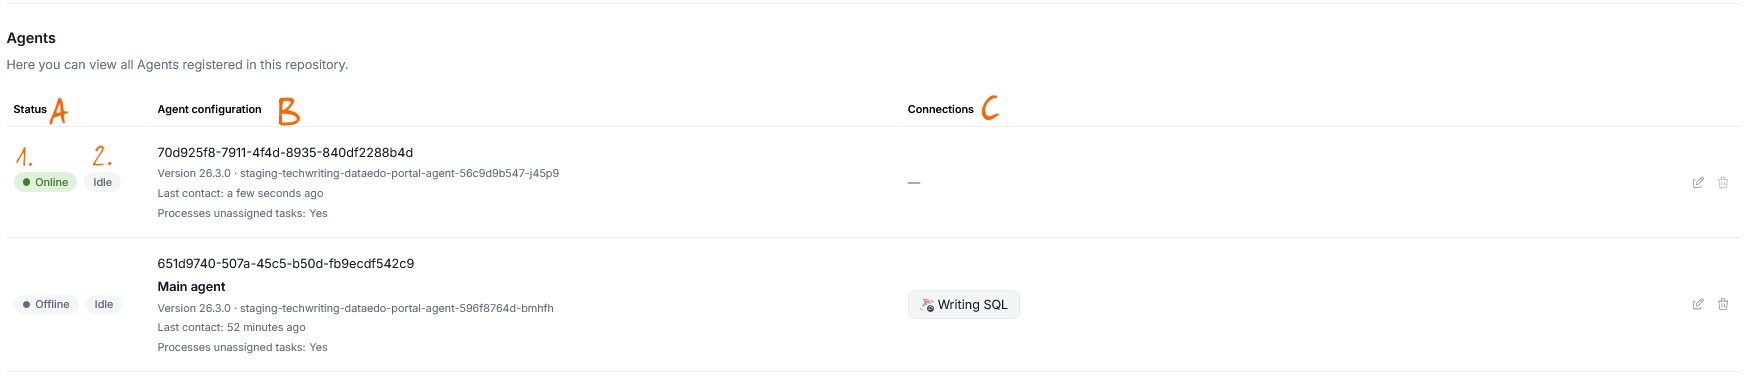
Each Agent in the list shows:
- Status [A] — whether the Agent is Online or Offline [1] — only online agents can process task. You will also see Activity [2] information — whether an agent is currently idle or performing a task. The status refreshes automatically at regular intervals, so you do not need to reload the page.
- Configuration [B] — the Agent's GUID, description, and other details, including whether the Agent can process tasks that do not have an Agent explicitly assigned.
- Connections [C] — the Connections assigned to the Agent. By default, only one is shown. When an Agent serves more than one Connection, you can hover over a +1 indicator to see the full list in a tooltip.
Editing an Agent
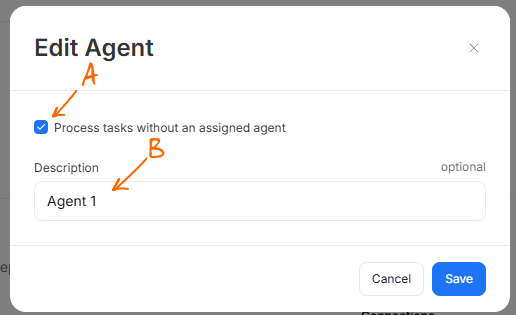
Click the Edit icon in an Agent's row to open its settings.

A popup will appear, where you can:
- enable the Process tasks without an assigned agent [A] option. This setting lets an Agent pick up any task whose Connection has no specific Agent assigned to it.
- enter a description [B]. Because the main identifier is a GUID, we suggest using the description as a short, recognizable alias for your Agent.
Assigning an Agent to a Connection
You can assign a specific Agent to a Connection so that only that Agent processes its tasks. Make this assignment either when you first schedule tasks for a source during Metadata Import, or later under Connectors > Connections. Alternatively, leave a Connection unassigned, in which case its tasks are picked up by any free Agent that has the Process tasks without an assigned agent option enabled.
When adding a Connection
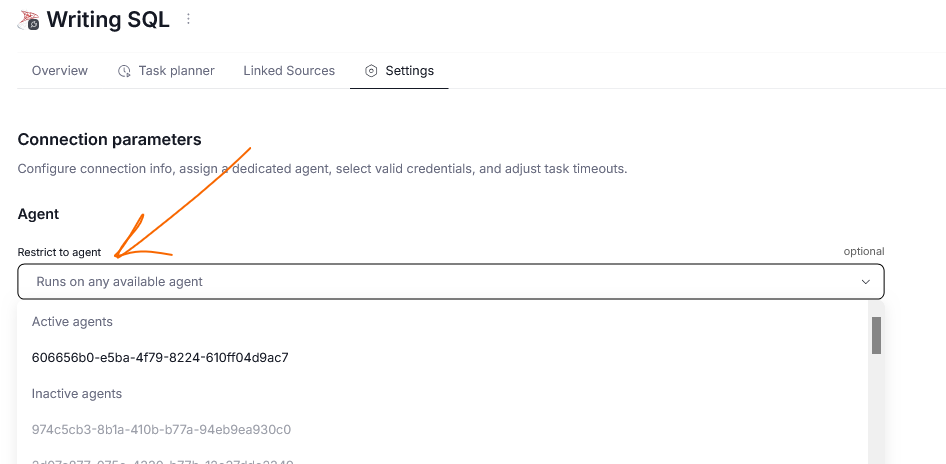
When adding a new Connection, you can assign a specific Agent in the Agent field (visible in the advanced settings section):
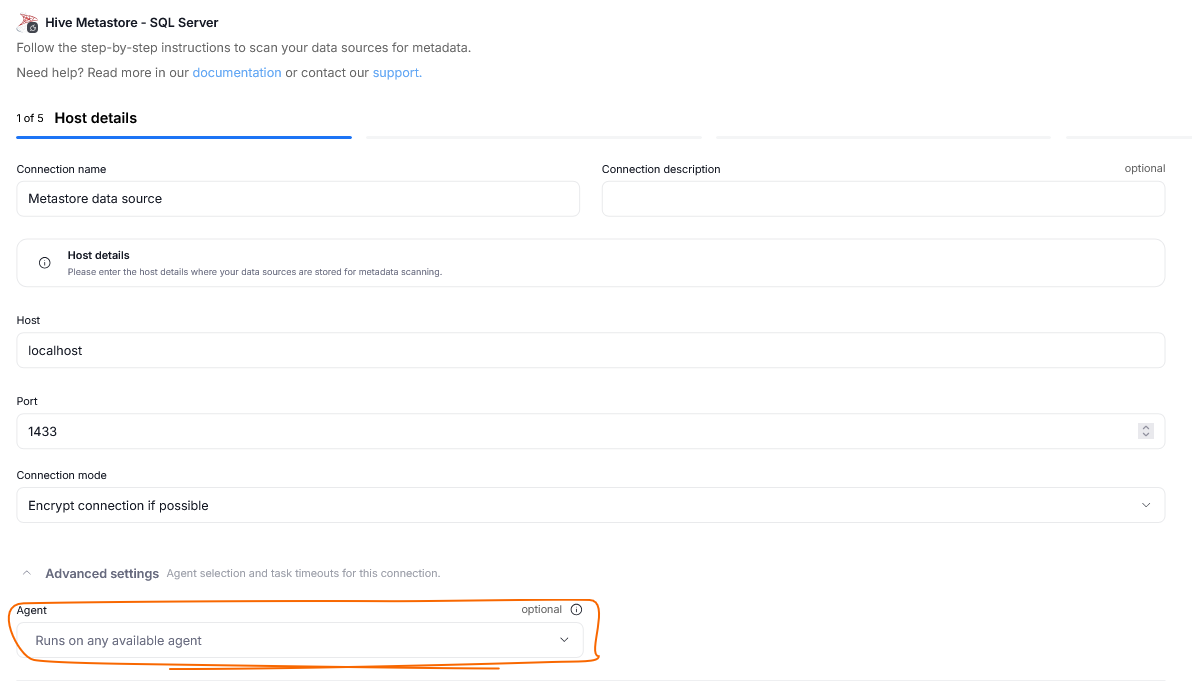
You have two options:
- leave the field empty — tasks are picked up by any online Agent that can process tasks without an assigned Agent.
- select an Agent from the list — only that specific Agent processes the Connection's tasks.
Selecting an Agent that is currently Offline triggers an error and prevents you from saving.
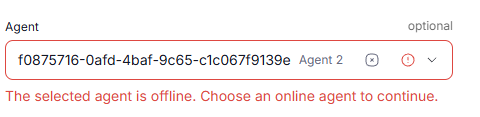
When editing a Connection
Open a Connection, go to its Settings tab, and click Edit.
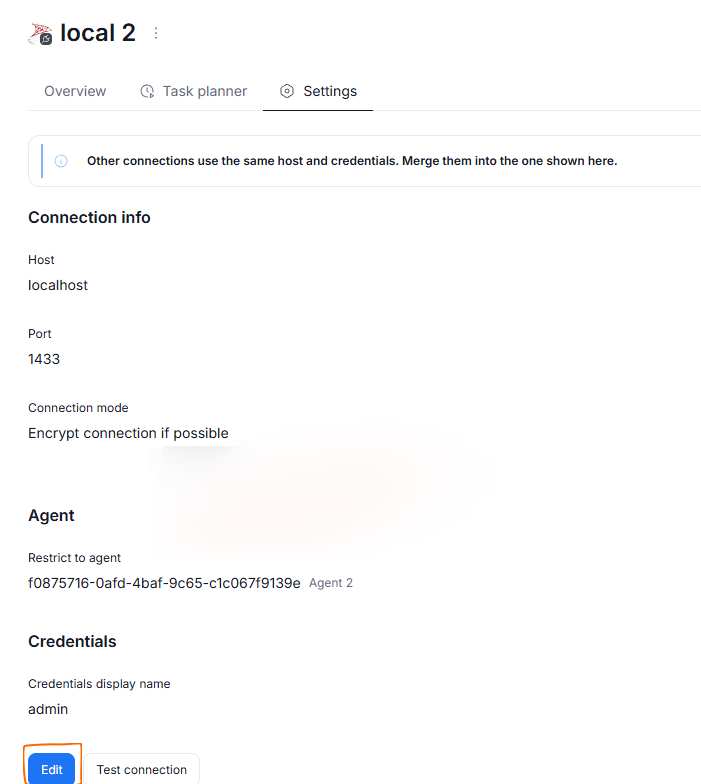
The Agent section will appear on top of the page. Use the restrict to agent field to change the assigned Agent, or clear it so that any free Agent can process this source's tasks.
Connection status
In the Scheduler's Task Planner tab, you will see a warning when an Agent responsible for performing a task is offline. Hovering over it shows a tooltip with the GUID and description of the unavailable Agent.
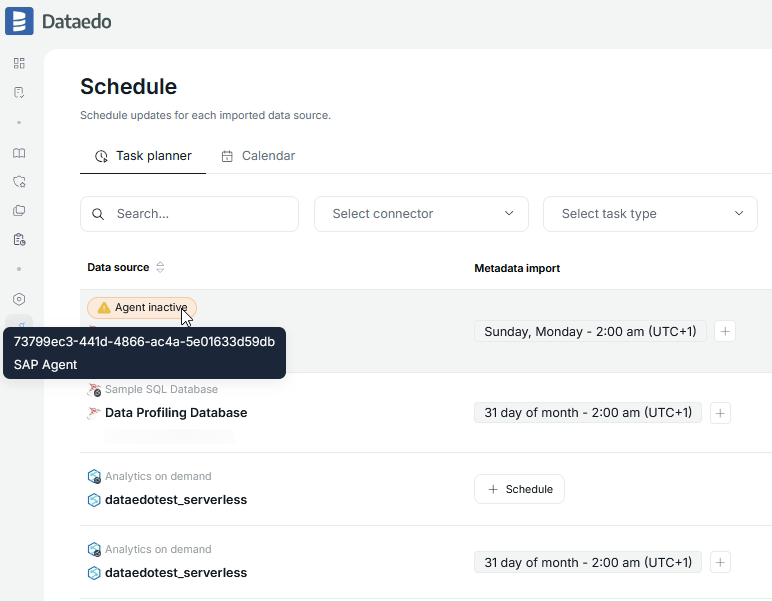
A Connection with no assigned Agent is Online whenever any Agent that has the Process tasks without an assigned agent option enabled is online.
Troubleshooting
If any scheduled jobs use a Connection whose assigned Agent is Offline, a banner is displayed to alert you. Contact your Admin to fix the issue.

Configuring more Agents
By default, a repository can have at most five Agents. This limit keeps operation smooth, since Agents can clash with one another and block or delay certain imports.
If you need to raise this limit, go to dbo.configuration in the Dataedo Repository and change the value of MAX_PARALLEL_AGENTS to set a new cap.

