Microsoft Teams notifications
Enabling notifications in Microsoft Teams for all users requires Admin permissions in both Dataedo and Microsoft Azure.
You can set up an MS Teams bot that will deliver notifications directly via a Teams chat, in parallel with email and in-app notifications. The bot can also deliver users' digest. Setting this up requires configuration in Azure and in Dataedo.
For a user to receive Teams notifications, all of the following conditions must be met:
- the administrator has completed the Azure and Dataedo configuration described below
- the user has the Dataedo Teams app installed
- the email address on the user's Microsoft account matches their email in Dataedo
- the user has Teams enabled for the relevant event types in Profile > Notifications
- the user has permissions to the object the notification concerns (Teams notifications follow the same visibility rules as all other channels)
The Teams bot will start sending notifications only after your first interaction with it (since an existing chat log is required). Under normal circumstances, this should happen automatically after the Dataedo Teams app is installed. In rare cases, you might have to prompt the bot manually using the help command.
Azure configuration
App Registration
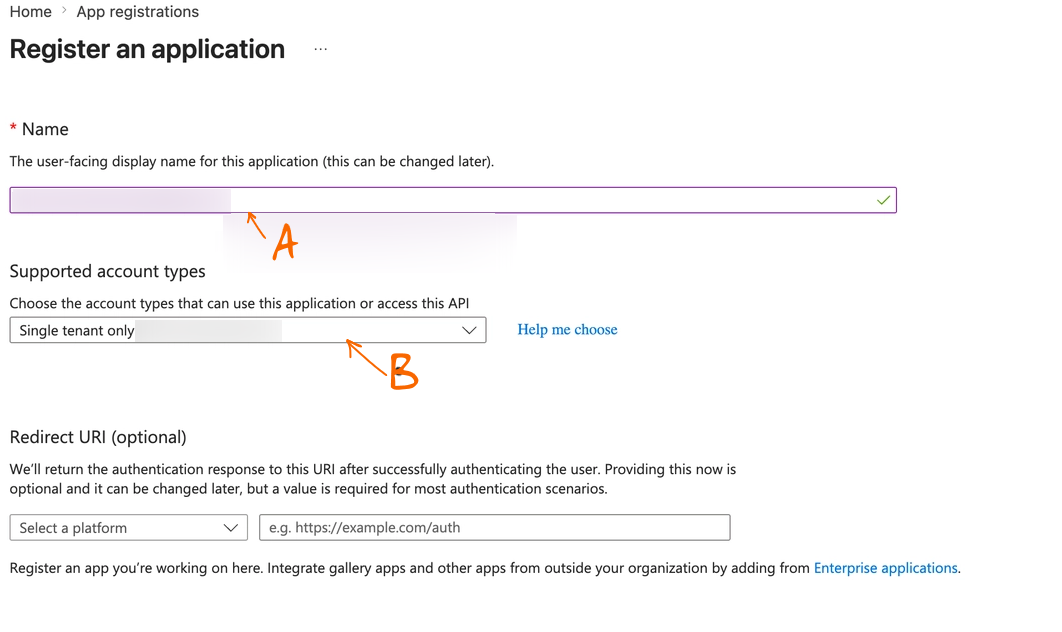
- In Microsoft Entra ID, go to App registrations > New registration.
- Give it a descriptive name [A] (e.g., Dataedo Teams Bot) and set Supported account types to Single tenant only [B]. Leave the Redirect URI empty.
- Click Register. Then, go to the Overview page and save the Application (client) ID and Directory (tenant) ID — you will need both when configuring Teams notifications in Dataedo.
Client Secret
- After setting up the app, while still in Microsoft Entra ID, go to Certificates & secrets > Client secrets > New client secret.
- Set the expiration to 6-12 months. It is important to plan the rotation manually, as Dataedo does not refresh secrets automatically.
- Click Add to create a secret. Immediately copy the value from the Value column — it will not be shown again after you leave the page.
Microsoft Graph
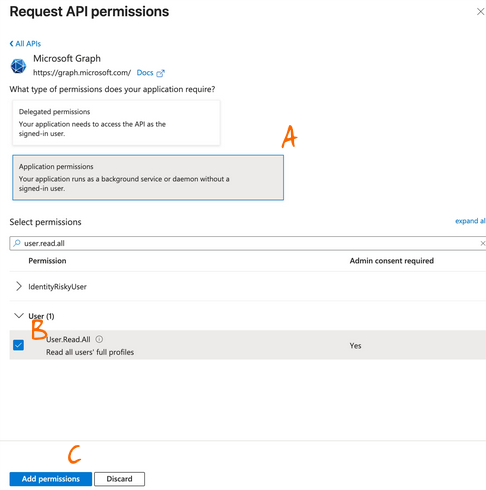
- Go to API permissions > Add a permission > Microsoft Graph > Application permissions [A].
- Search for the User.Read.All permission and add it using the relevant checkbox [B].
- Save your configuration by clicking Add permissions [C].
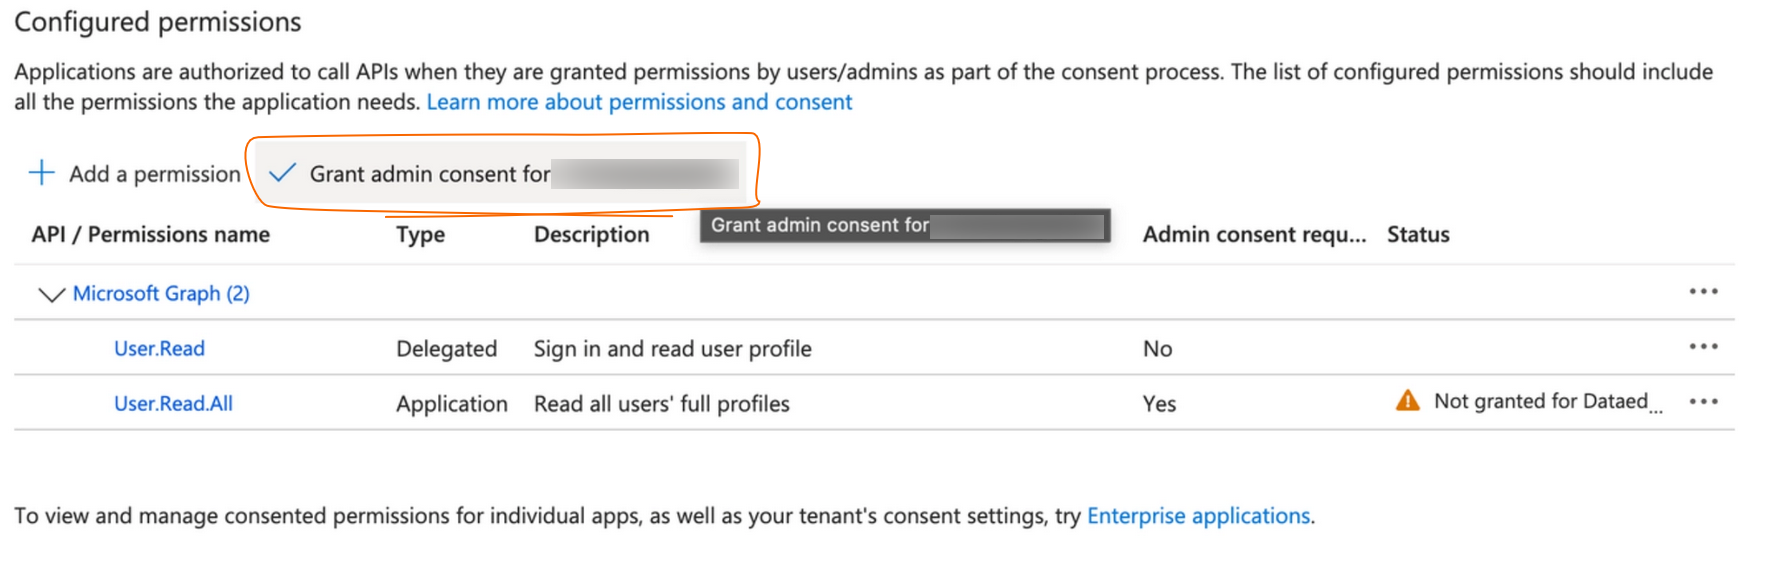
Afterward, in Configured permissions, click Grant admin consent for <your tenant> — this lets the bot deliver notifications.
Azure Bot
- Open Microsoft Entra ID and navigate to Create a resource > Marketplace > Azure Bot.
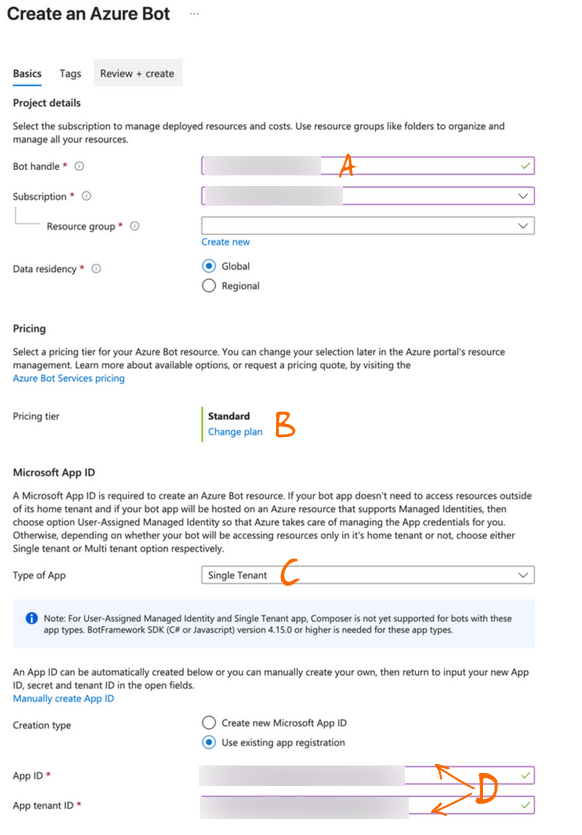
- Give your bot a unique, easily recognizable handle [A].
- Set a pricing tier appropriate for your organization [B]. The F0 (free) tier is sufficient.
- The Type of App [C] should match the one you created during App Registration.
- Select Use existing app registration, and paste the Application (client) ID into App ID and the Directory (tenant) ID into App tenant ID [D]. You should have saved both values during the App Registration step.
- Click Review + create to finish creating the bot.
Once the bot is created, go to its Settings and choose Configuration. Enter https://<YOUR-DATAEDO-PORTAL-ADDRESS>/api/messages as the Messaging endpoint.
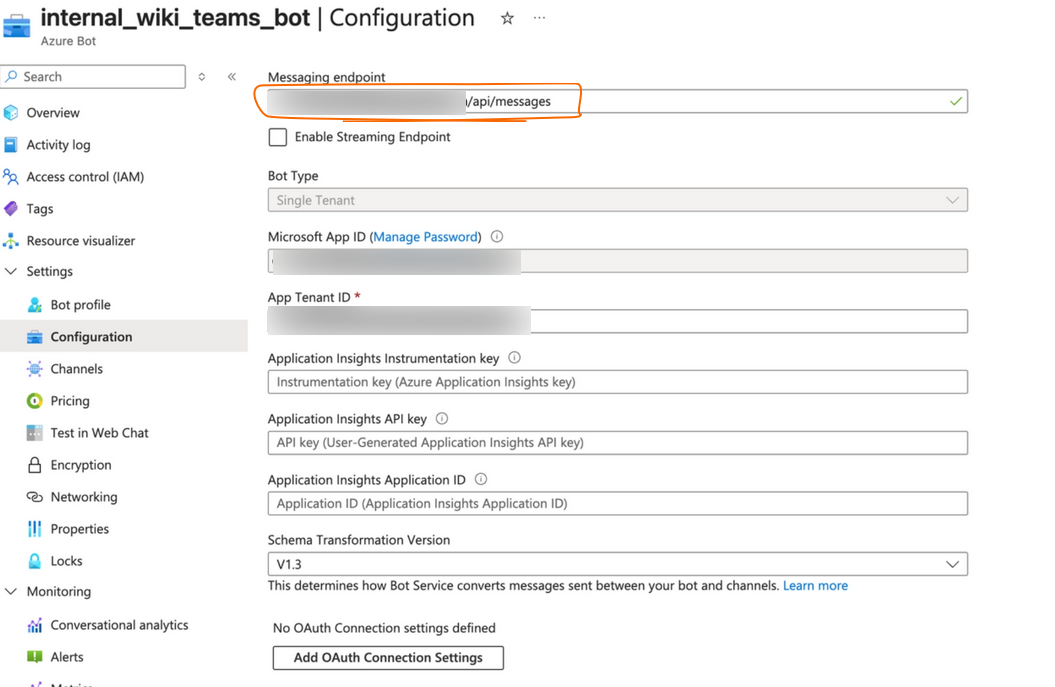
Dataedo Portal must be publicly accessible over HTTPS with a certificate from a trusted CA. The Bot Framework Service cannot connect to a local address or a self-signed certificate.
Still in the bot view, go to Channels > Microsoft Teams, select Microsoft Teams Commercial (or the matching option if you are on a Gov or EDU cloud), and click Apply.
Dataedo configuration
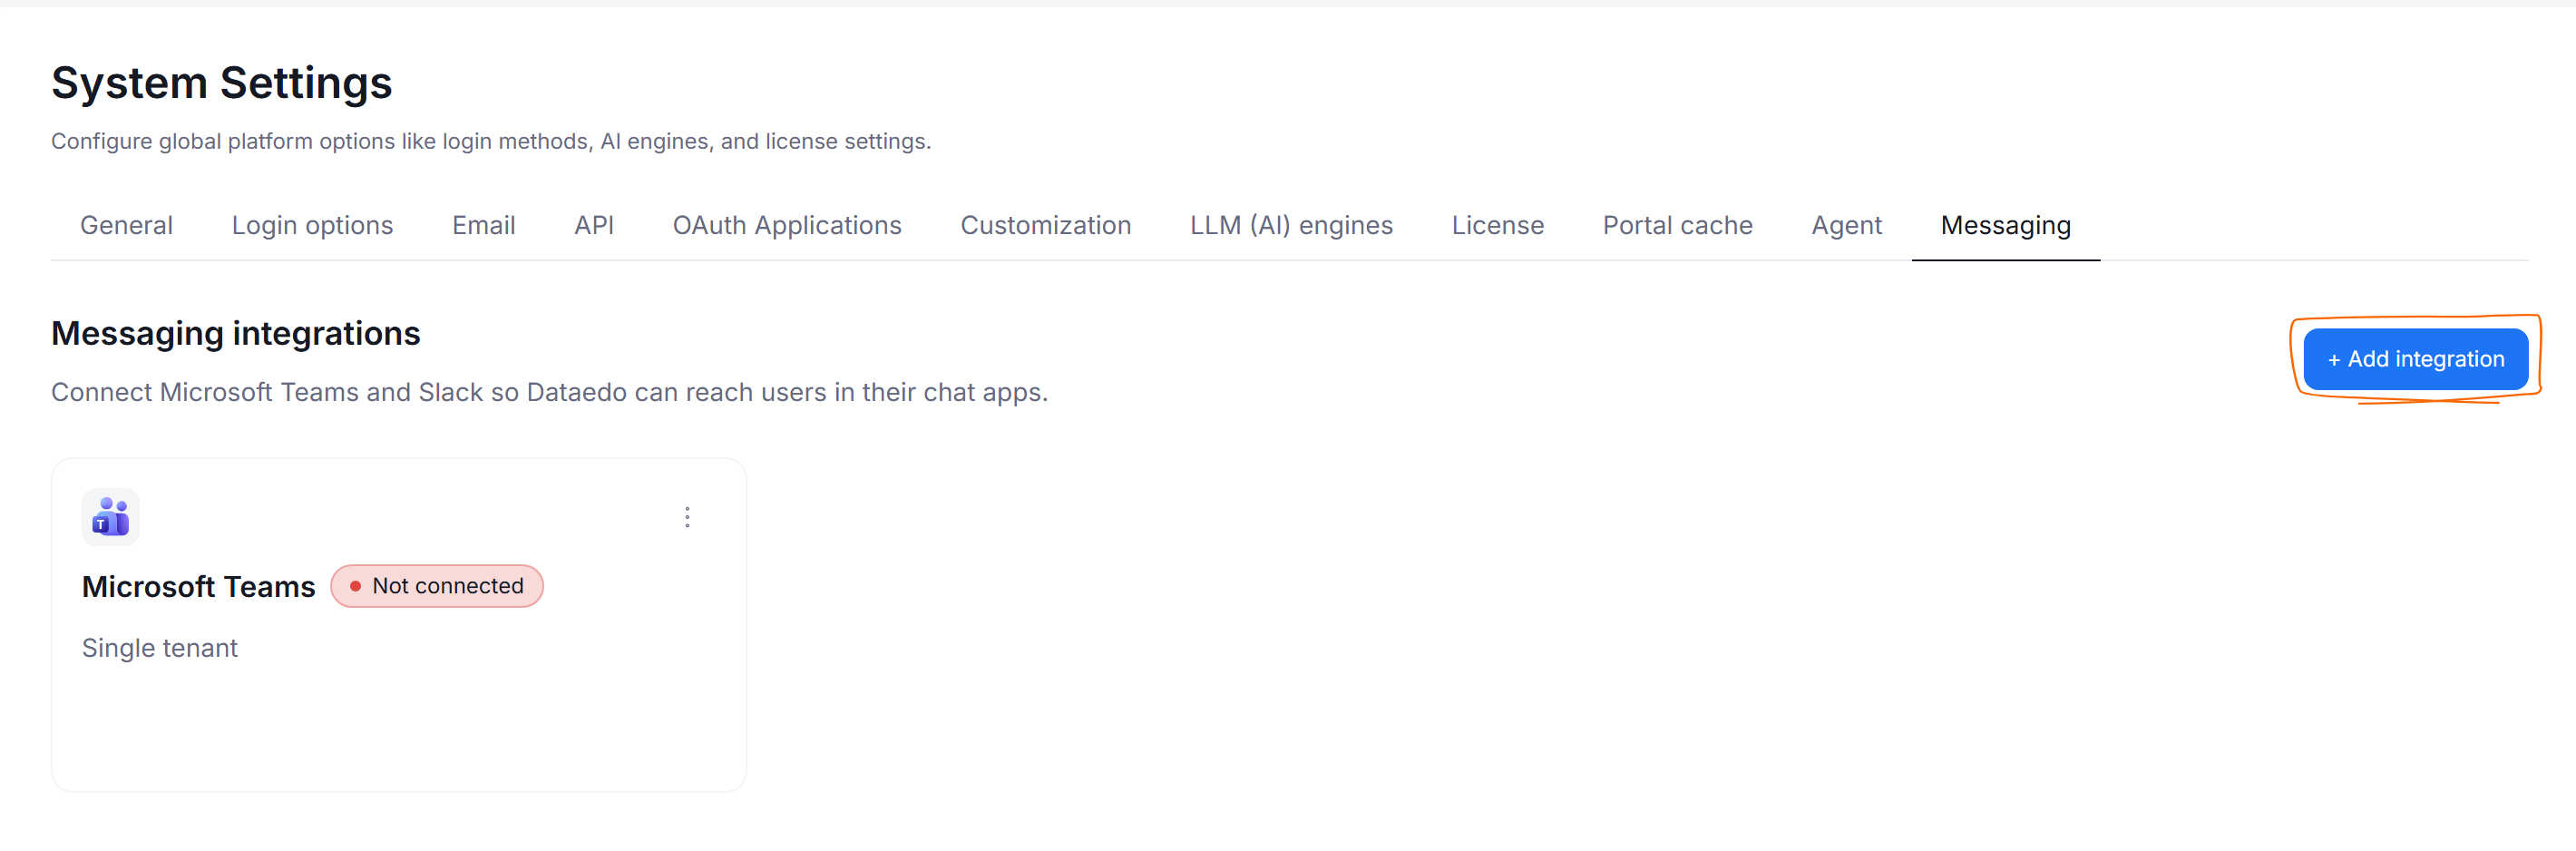
- In Dataedo Portal, navigate to Settings > System Settings > Messaging, click + Add integration, and choose Microsoft Teams.
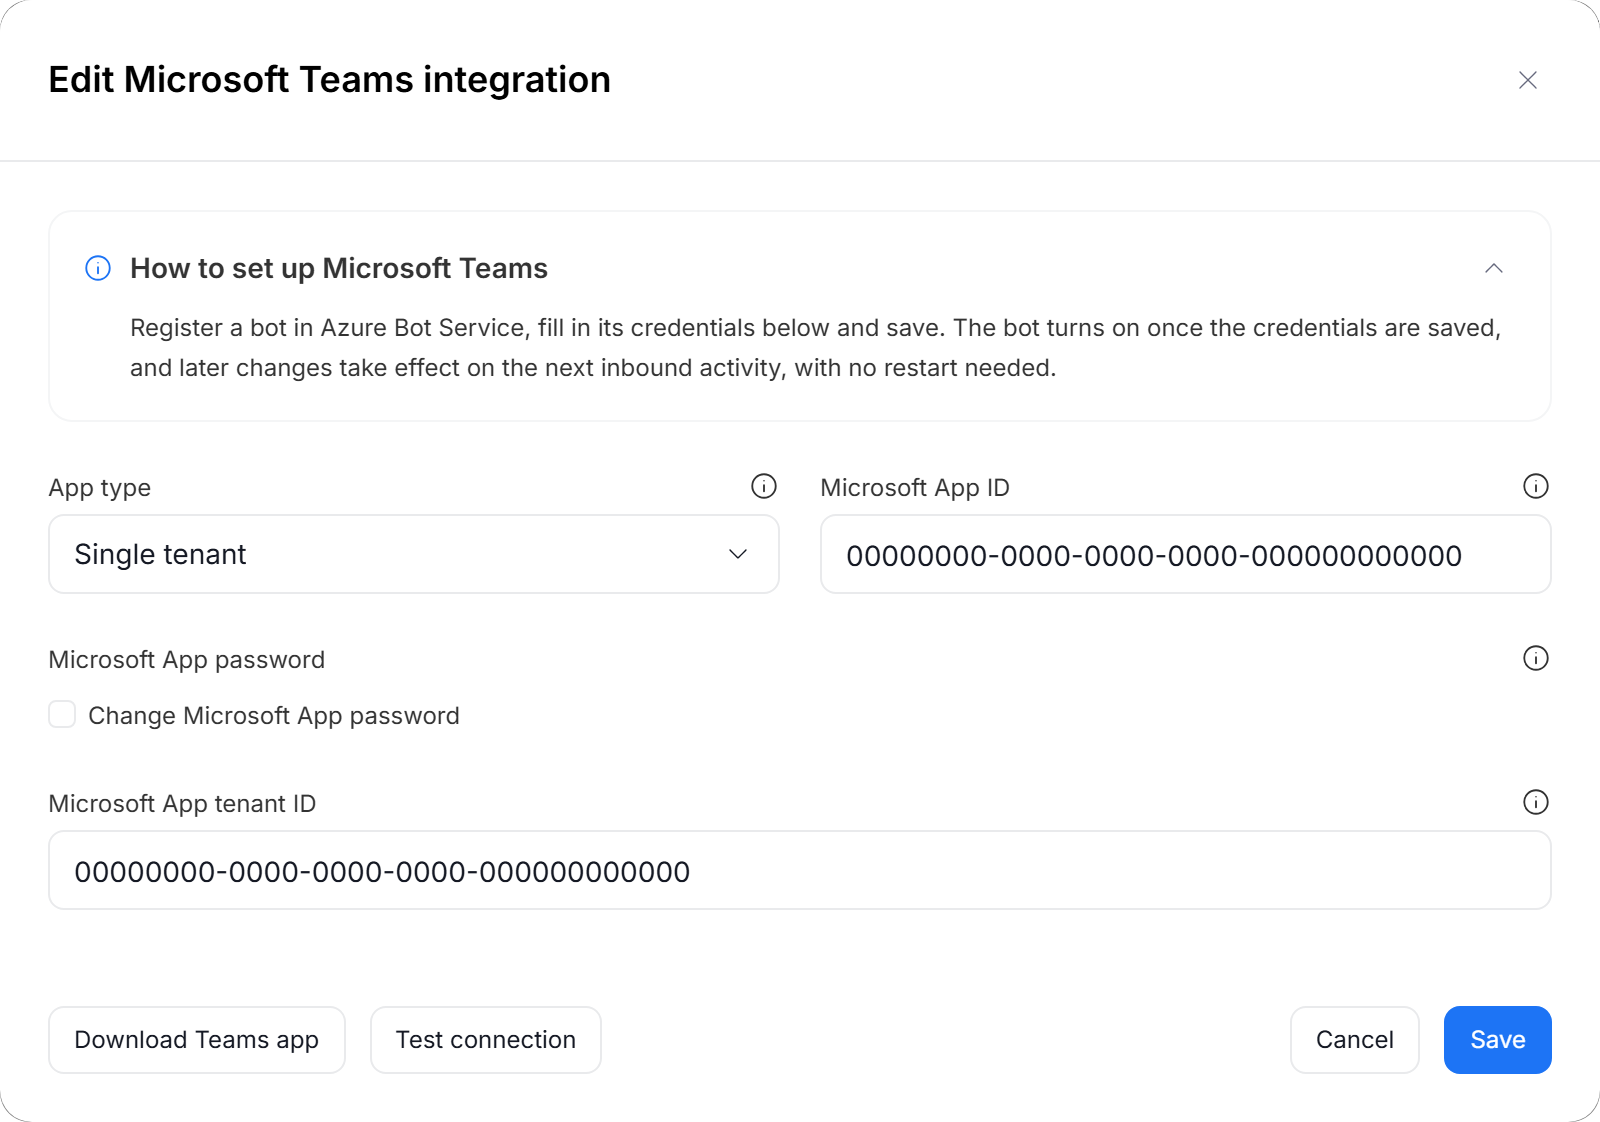
- Configure the App type, Microsoft App ID, and Microsoft App password using the values from the Azure steps above. If needed (when registering Single tenant or User-Assigned MSI app types), provide the Microsoft App tenant ID as well.
- Optionally, click Test connection to check whether Microsoft Entra ID accepts the credentials.
- Save your configuration. The integration appears as a card on the Messaging tab, showing whether it is Connected.
- Open the menu (⋮) on the integration's card and click Download Teams app [A] to download a
.zippackage containing the app manifest pre-filled with your bot ID.
Do not modify the contents of the .zip package.
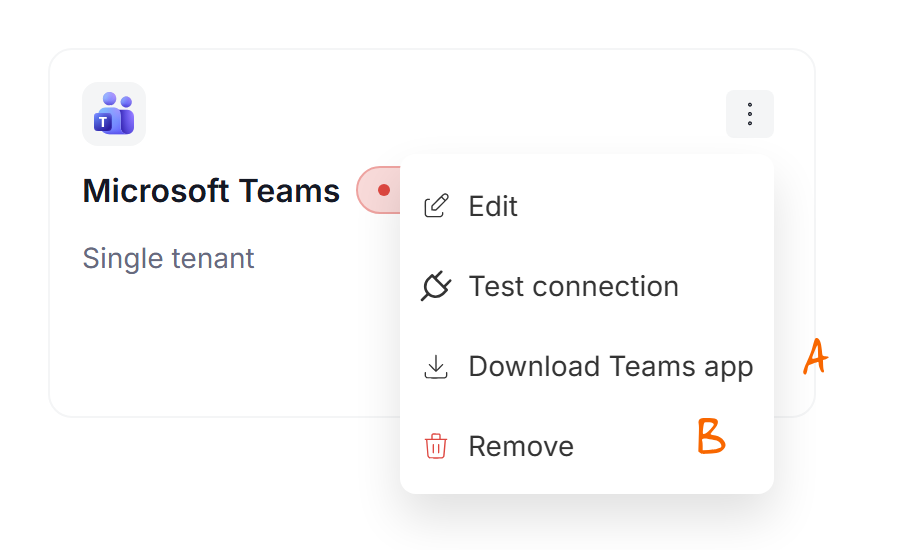
From the same menu, you can also Edit the credentials, Test connection again, or click Remove [B] to delete the connection details from Dataedo and disable the Teams integration. Pending Teams notifications stay queued and are delivered once new credentials are saved.
Deploying the app to users
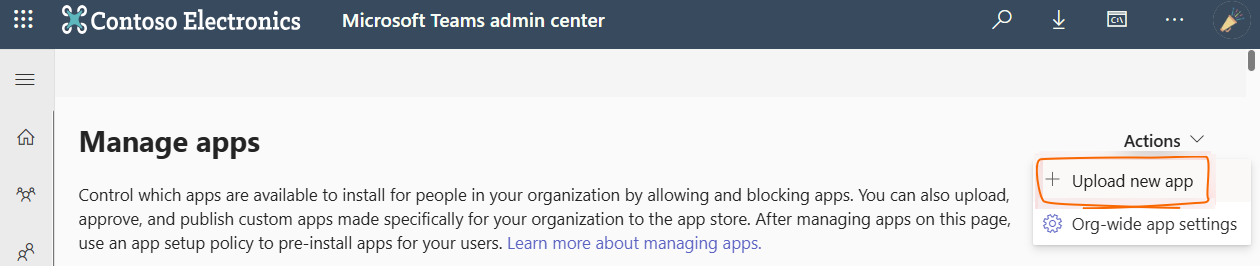
- Managed rollout (recommended): Open Teams Admin Center and go to Manage apps. Choose Upload new app and select the
.zipfile containing the Teams app.
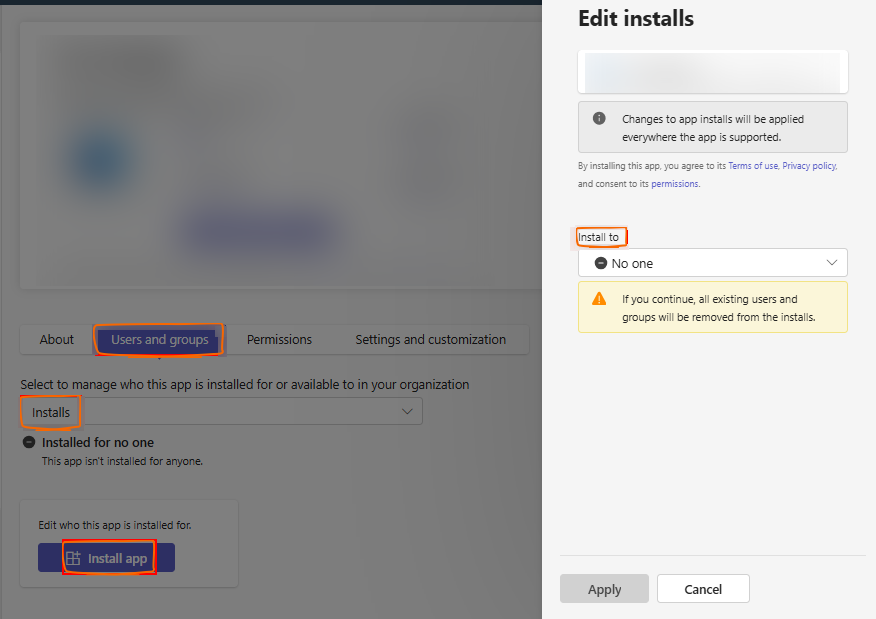
Then find the app in the list and open it. Go to the Users and groups tab to manually specify who will receive the app (here, depending on your organization's requirements, you can decide whether you want the app to be automatically installed for specified users, or choose which users can install the app themselves). If needed, adjust the Permission policies as well.
- Manual / testing: If you want to check the bot's behavior before deploying it to your users, open the Teams client and go to Apps > Manage your apps > Upload a custom app, where you can upload the
.zipfile. The Allow uploading custom apps policy must be enabled in Teams Admin Center for this option to be available.
Once the app is installed, Teams automatically creates a conversation with the Dataedo bot on the user's behalf. For a manual install, the user must send any message to the bot (e.g., help) to complete registration.

