OIDC (OpenID Connect)
OpenID Connect (OIDC) is an authentication protocol based on OAuth 2.0. You can configure it as one of the login options for your instance of Dataedo. As an admin, before using OIDC in Dataedo, you should configure it in your Identity Provider. Below, you can find instructions on how to carry out the integration for Okta and Keycloak.
OIDC in Okta
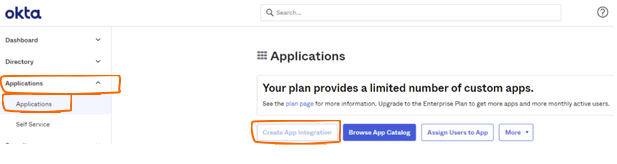
- Open Okta and navigate to Applications>Applications. Select Create app integration.
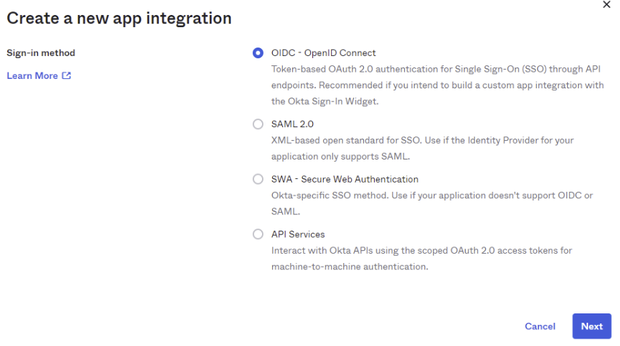
- A pop-up will appear. Select OIDC - OpenID Connect.
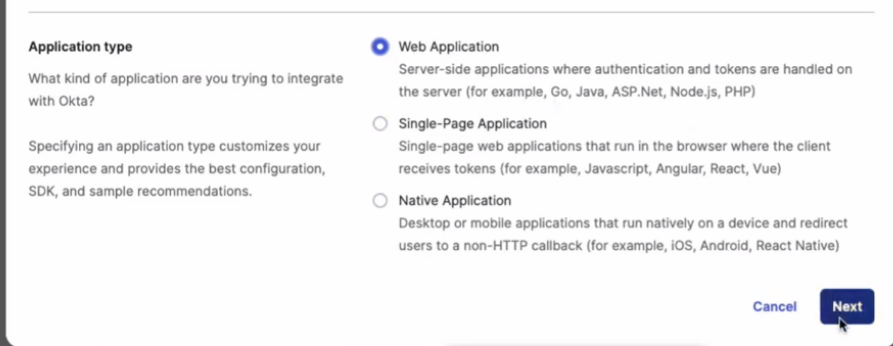
- Choose Web Application as the app type, then click Next.
- On the next screen you will provide general settings. Fill in the App integration name. Set Grant Types and DPoP in accordance with your organization's guidelines.
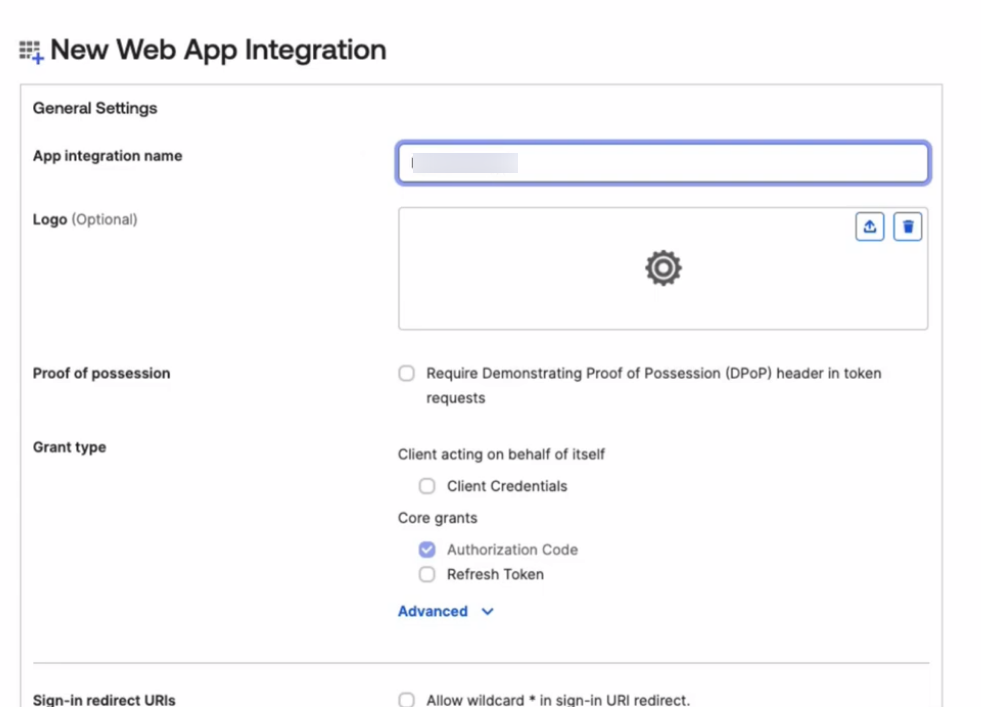
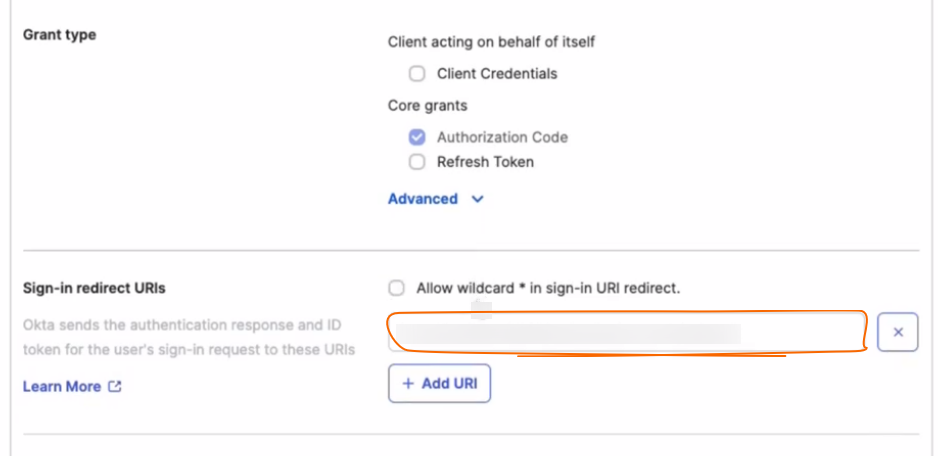
- Fill the Sign-in redirect URIs with the address your Dataedo Portal will be accessed on followed by
api/oauth2/authenticate/oidc(for example:api/oauth2/authenticate/oidc). Click Next.
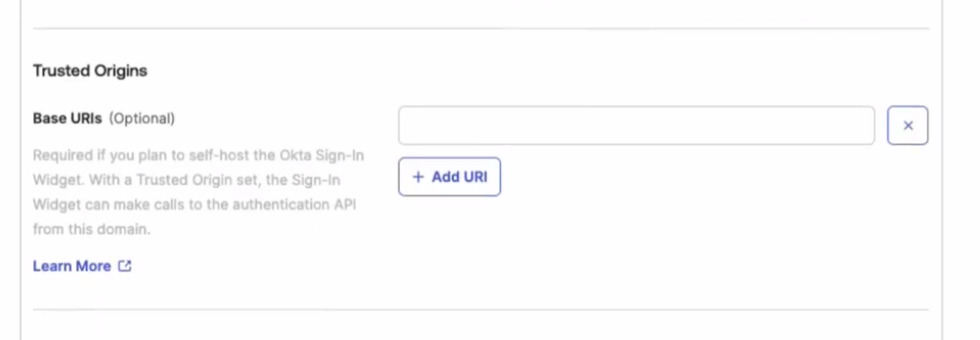
- Next, it the Trusted Origins section. You can leave it blank unless your organization demands special adaptations.
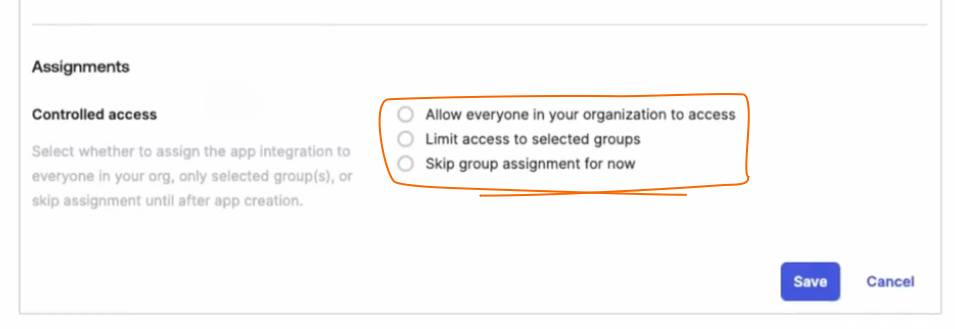
- In the Assignments section, decide which users in your Okta org can access the integration. By default, it is granted to everyone. Once everything is set up, click Save.
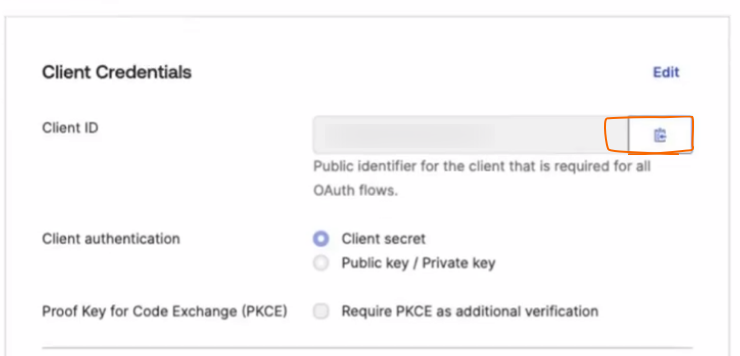
- Application overview will appear. Copy the Client ID. You will need it for setting up authentication in Dataedo later.
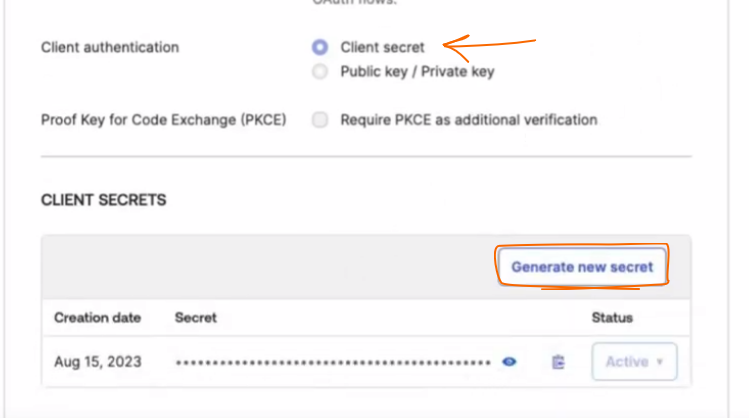
- Select Client secret as a client authentication method. This shows a panel where you generate a secret. Make sure to copy it immediately. You will only see the secret once, and it is required for Dataedo configuration.
OIDC in Keycloak
In Keycloak, you register Dataedo as a client inside your realm. The steps below use the current Keycloak Admin Console.
-
Open the Keycloak Admin Console and select the realm you want to use for Dataedo (do not use the
masterrealm in production). In the left menu, go to Clients and click Create client. -
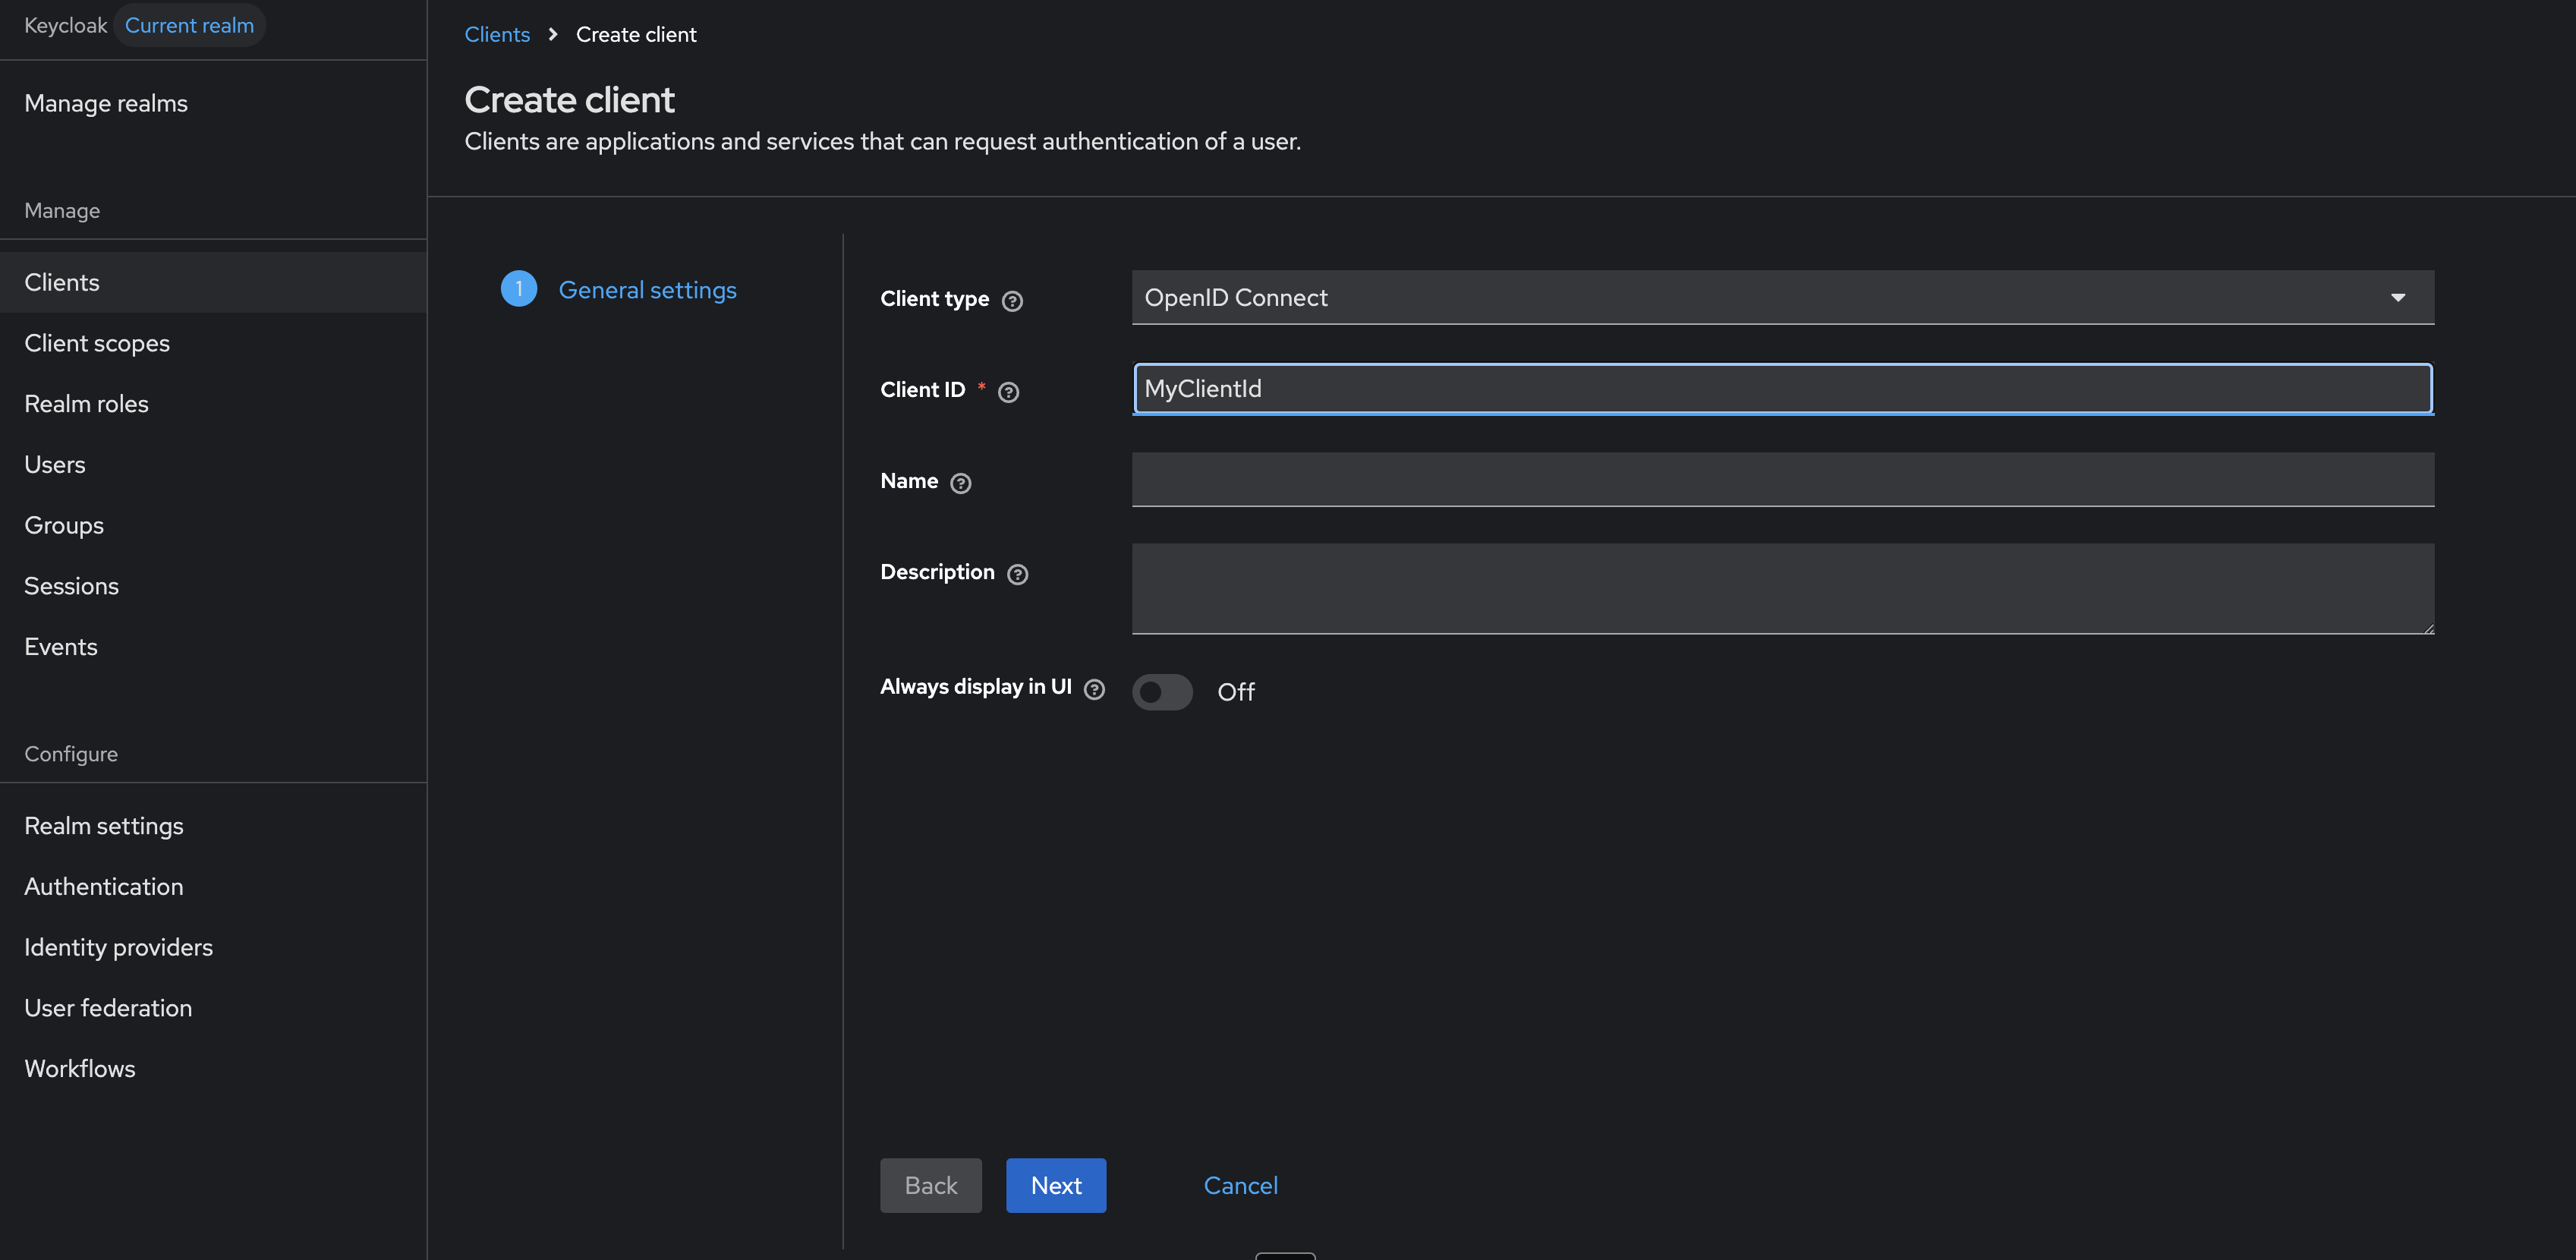
On the General settings step, set Client type to OpenID Connect and enter a Client ID (for example
MyClientId). Note this value — it is the Client ID you will enter in Dataedo. Optionally fill in a Name, then click Next.
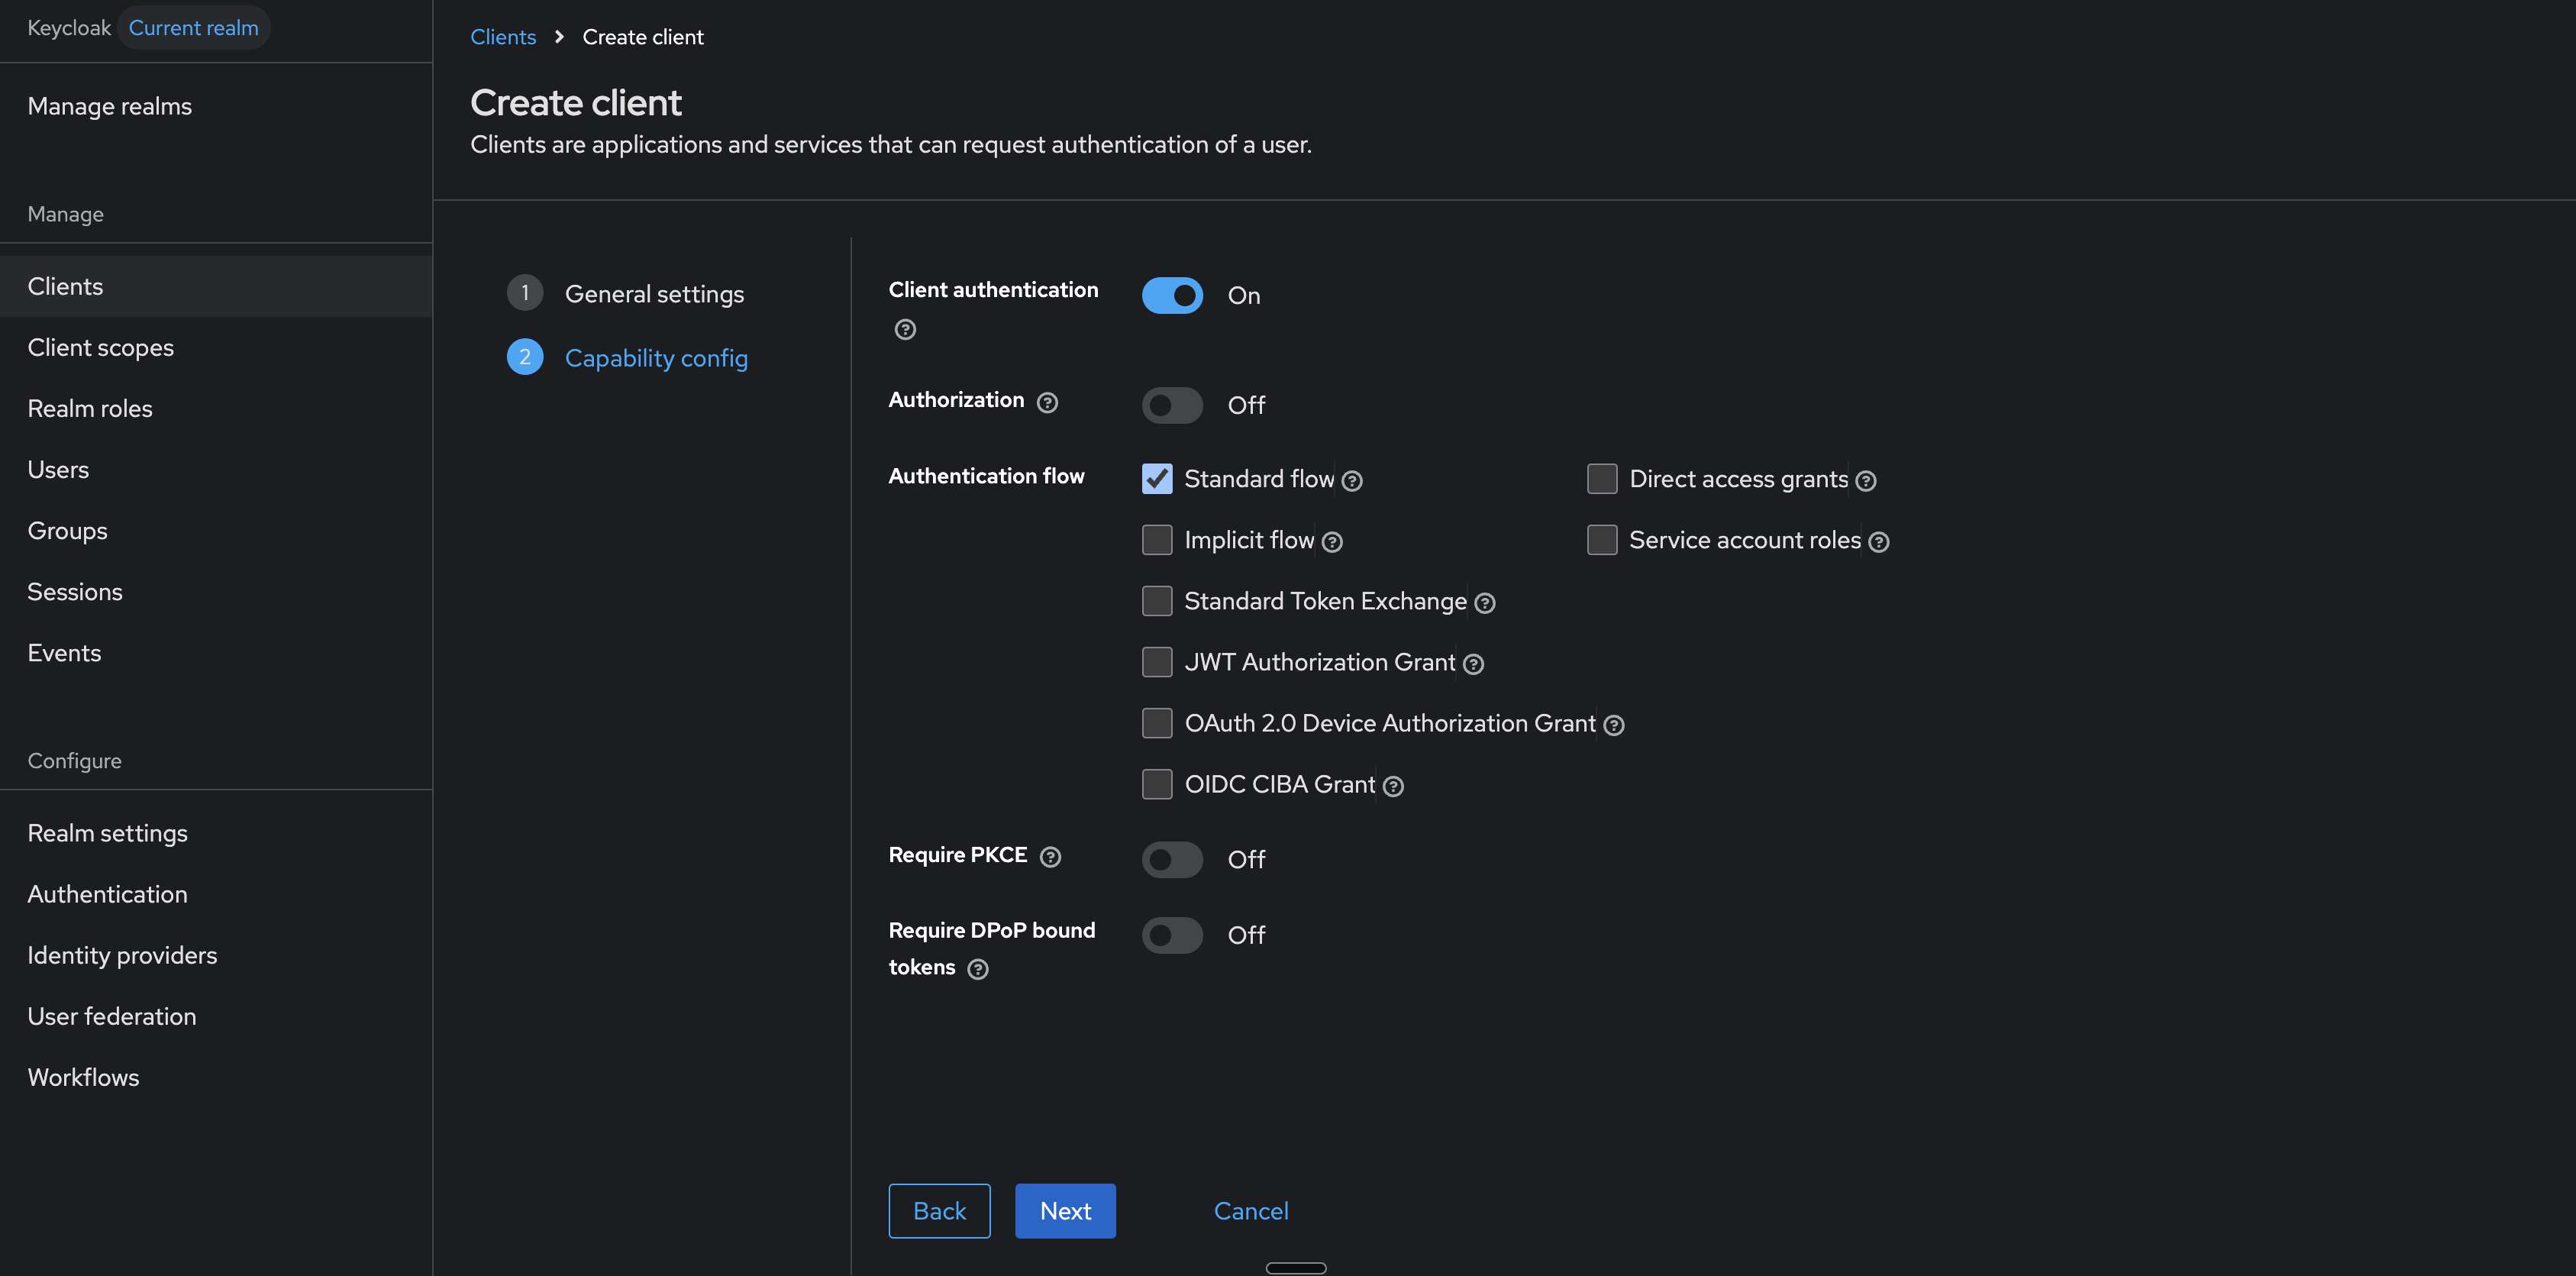
- On the Capability config step, turn on Client authentication. This makes the client confidential so that Keycloak generates a client secret. Keep Standard flow enabled — this is the Authorization Code flow that Dataedo uses. Leave the other options off unless your organization requires them. Click Next.
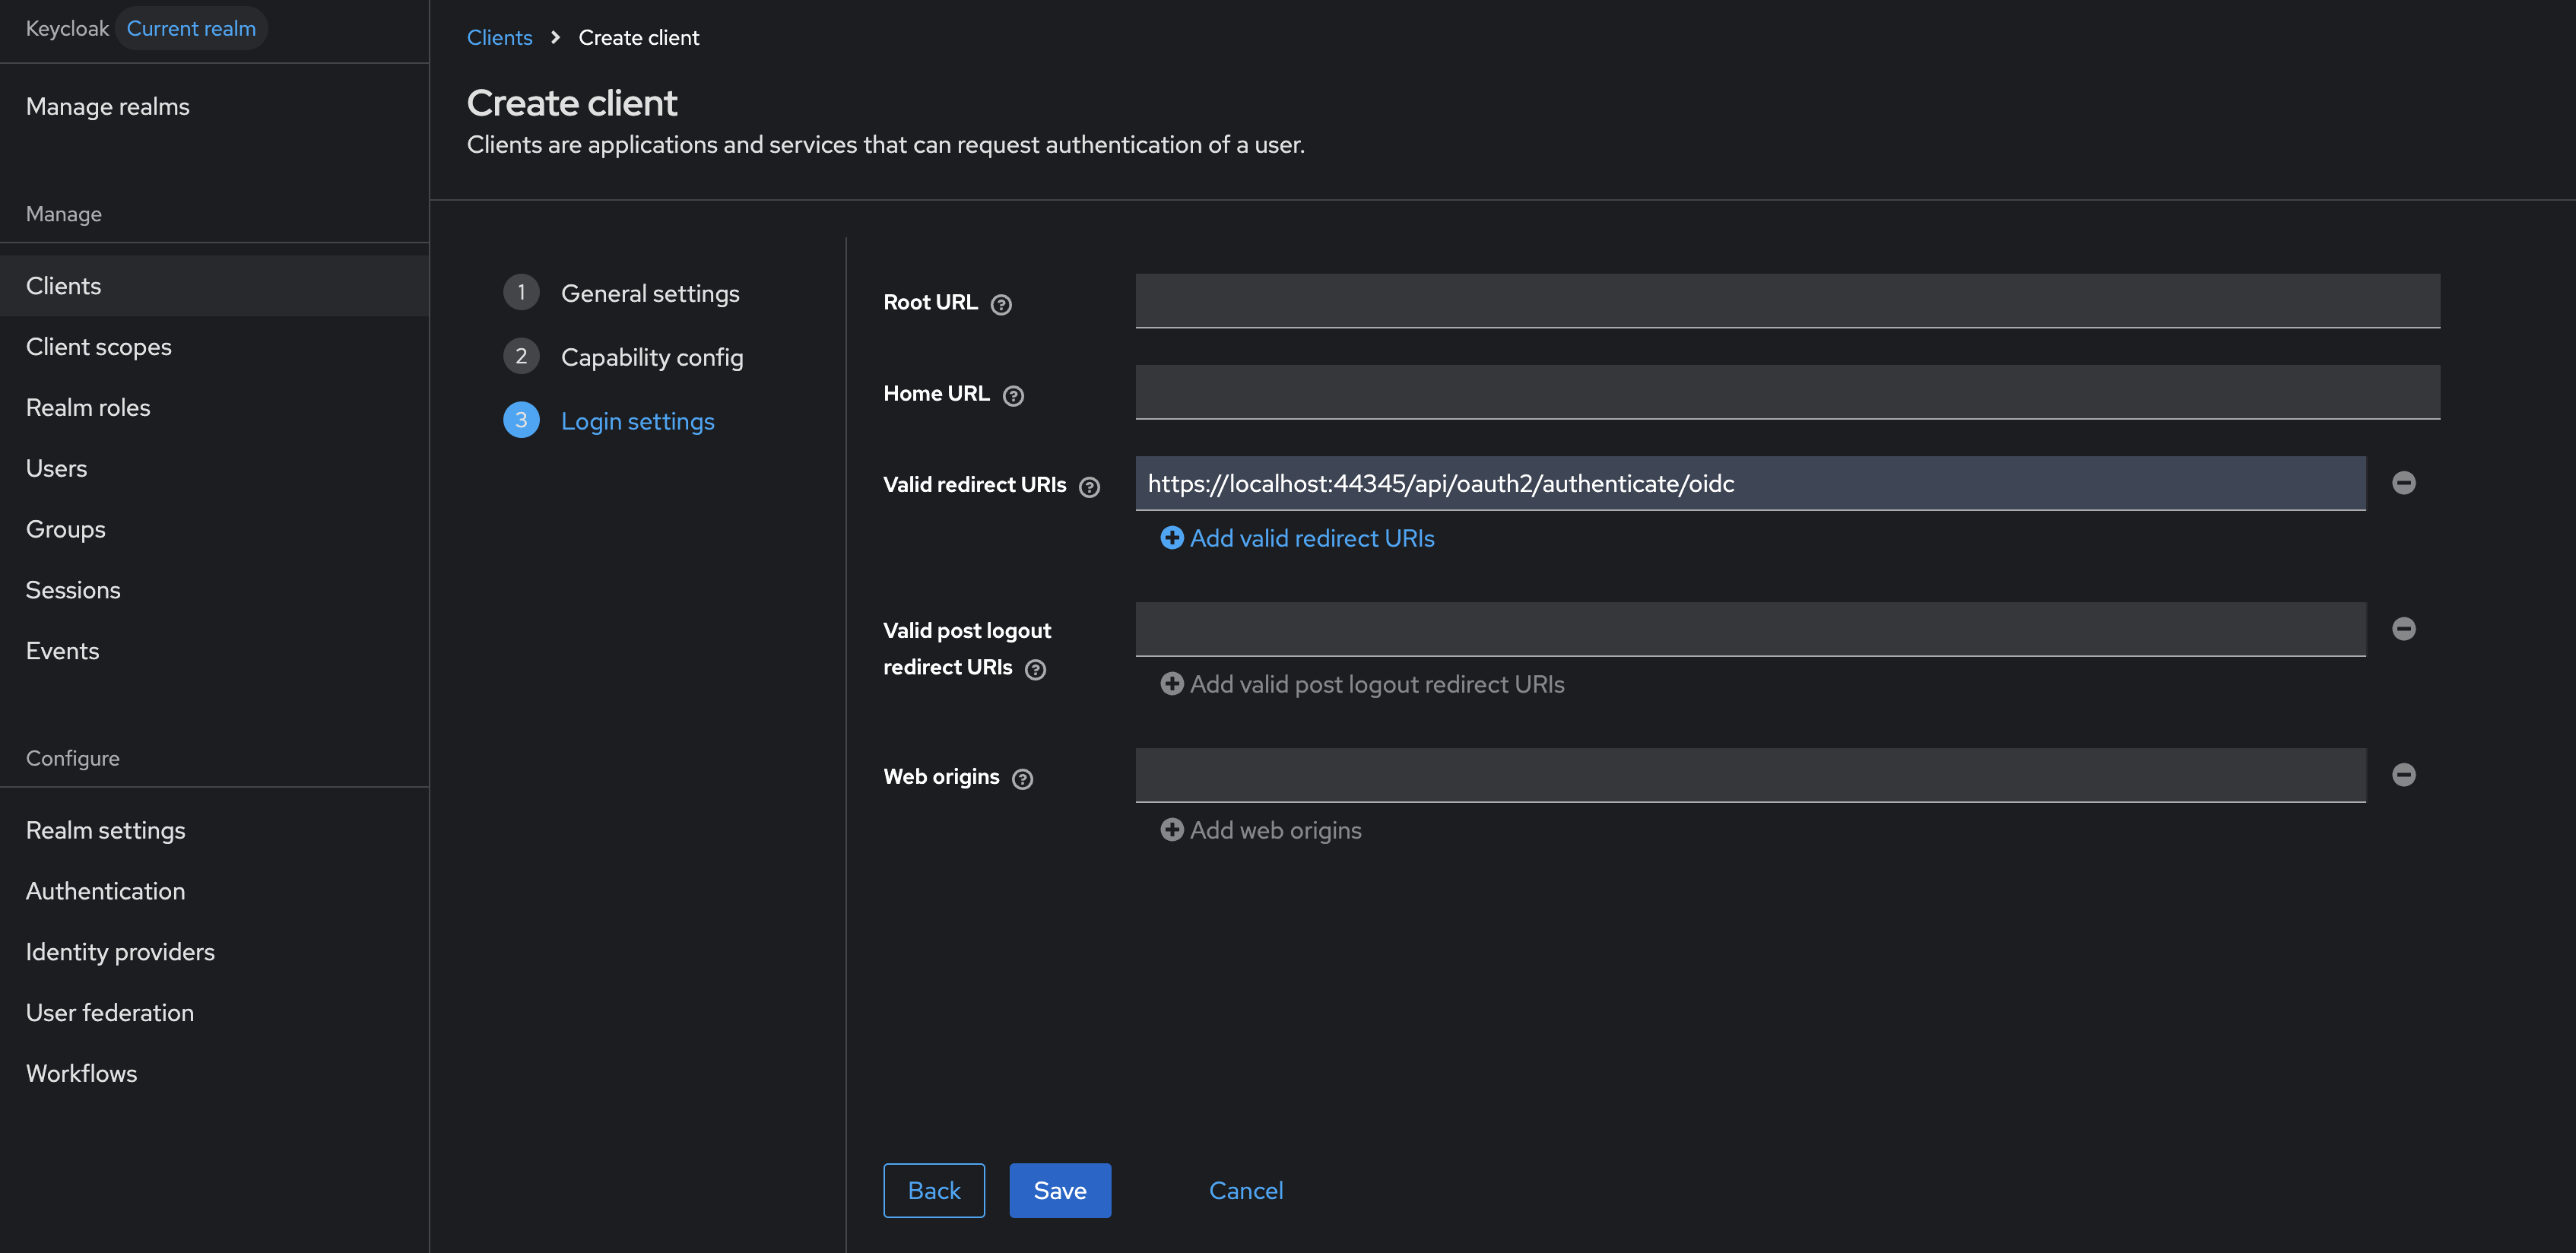
- On the Login settings step, fill in Valid redirect URIs with the address your Dataedo Portal is accessed on followed by
/api/oauth2/authenticate/oidc(for examplehttps://your-Dataedo-Web.address/api/oauth2/authenticate/oidc). This value must match the Redirect URI you configure in Dataedo. Click Save.
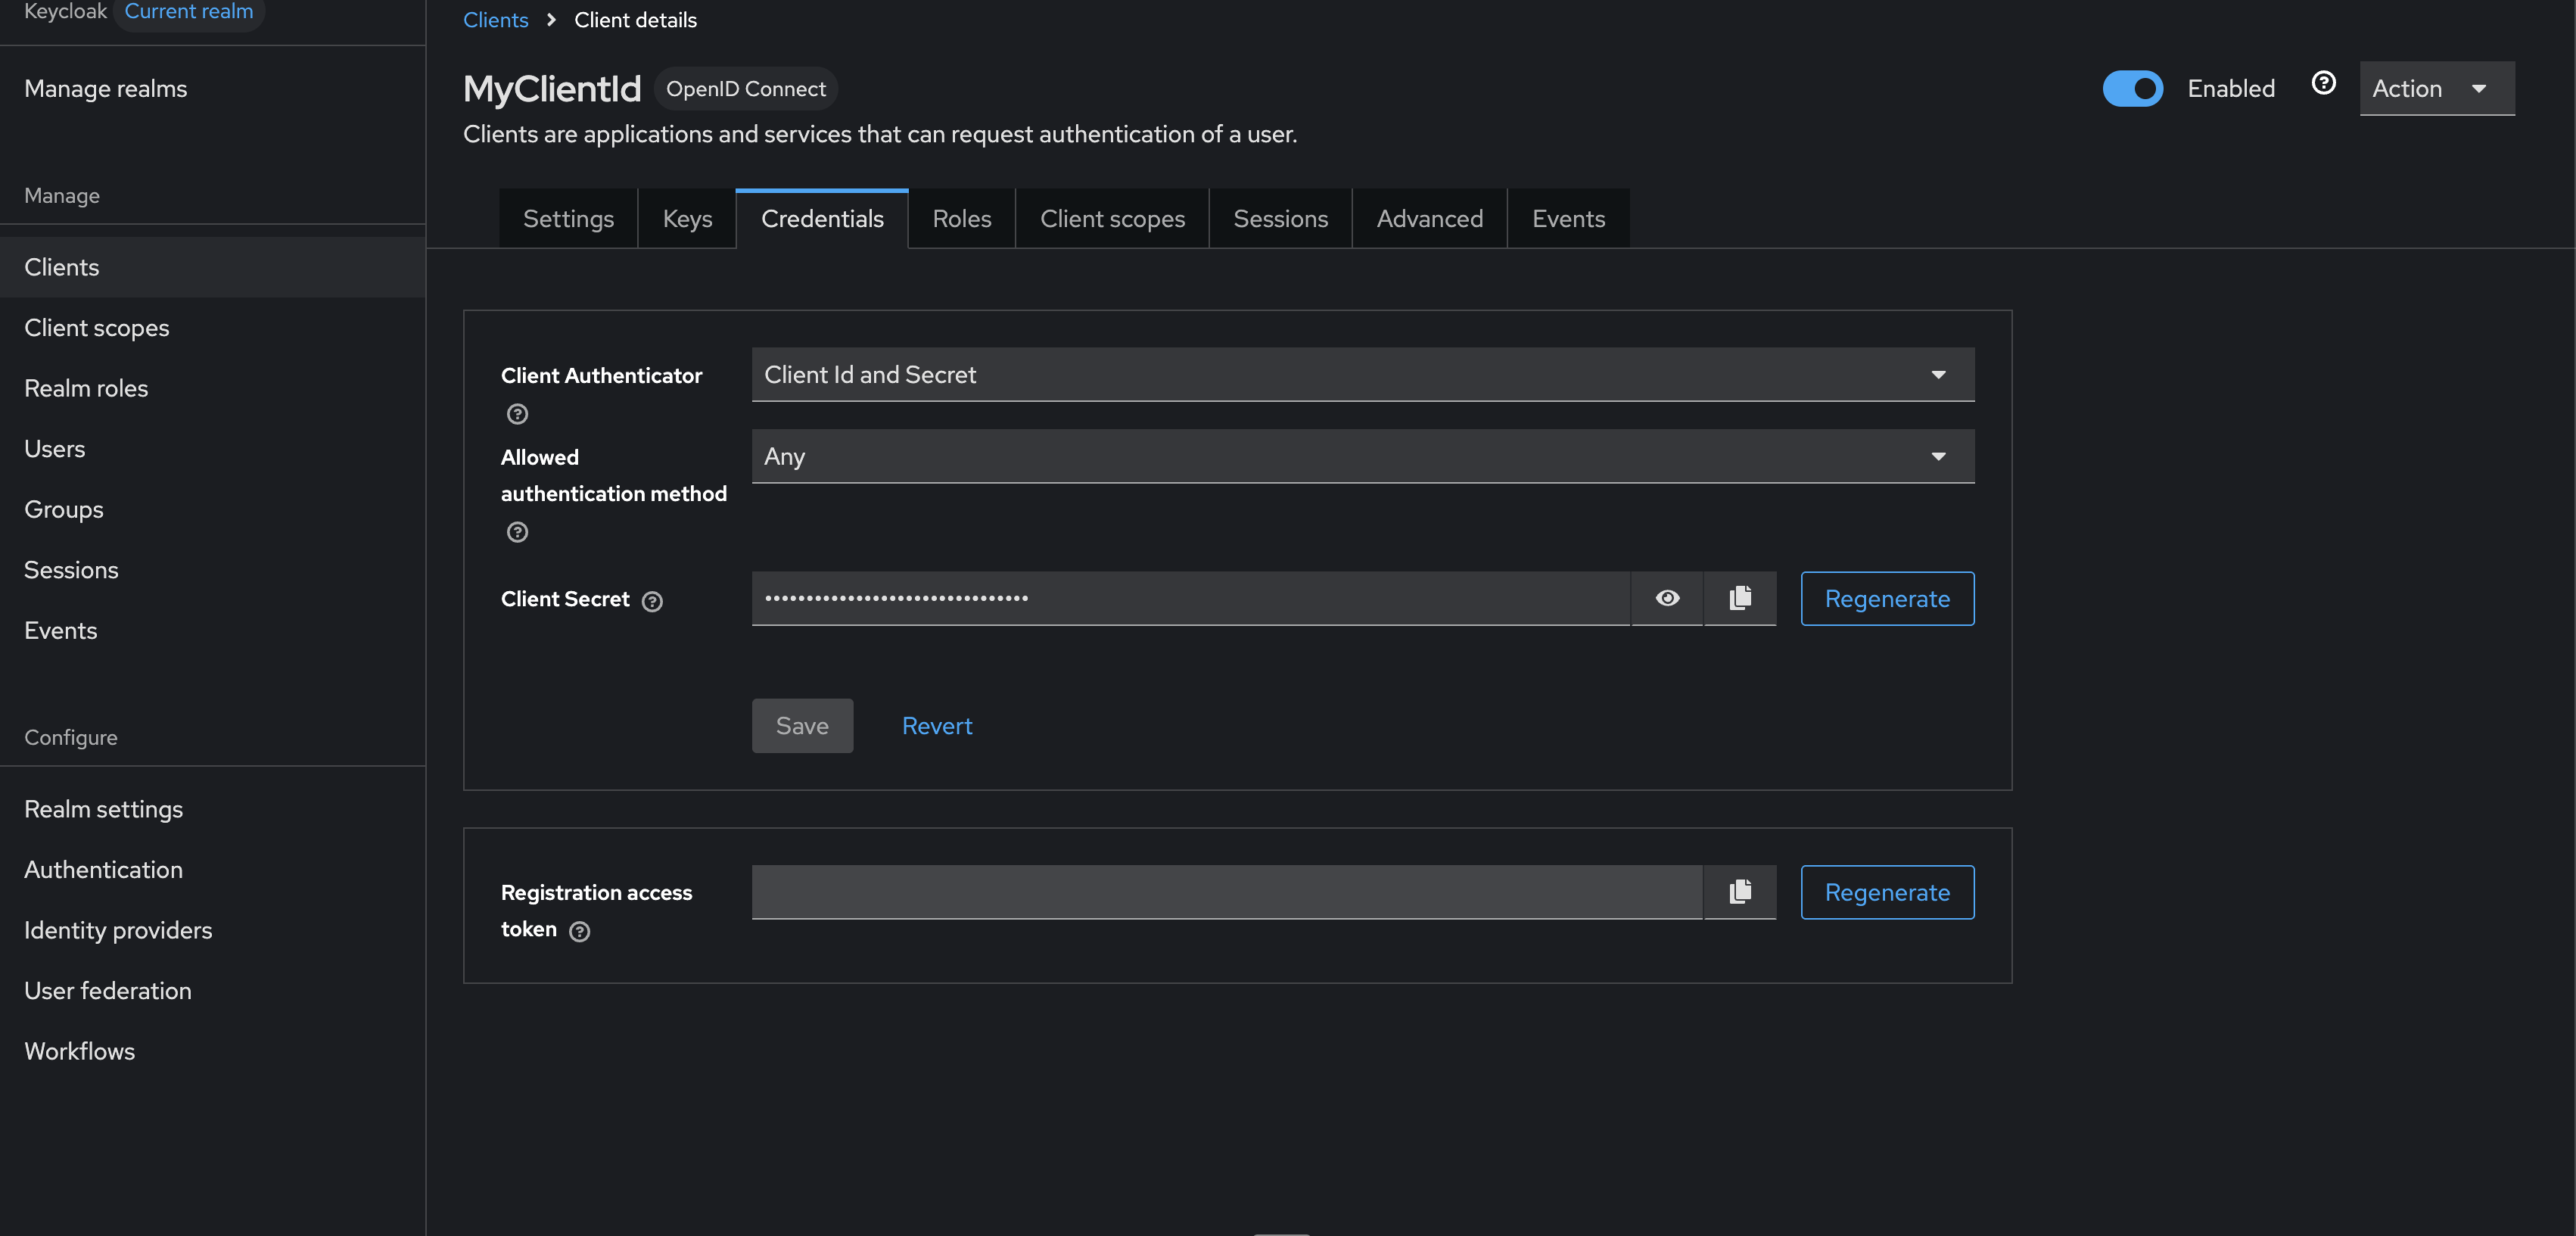
- Open the Credentials tab of the client and copy the Client secret. This is the Client Secret you will enter in Dataedo. Treat it like a password.
-
Determine your Issuer URL. For Keycloak it is the base URL of your server followed by
/realms/<realm-name>, for example:https://YourKeycloakURL.com/realms/your-realmDataedo uses this URL to discover the rest of the OIDC configuration automatically from the
/.well-known/openid-configurationendpoint, so you do not need to provide the individual endpoints yourself. You can find this exact endpoint listed under Realm settings > General > Endpoints > OpenID Endpoint Configuration.
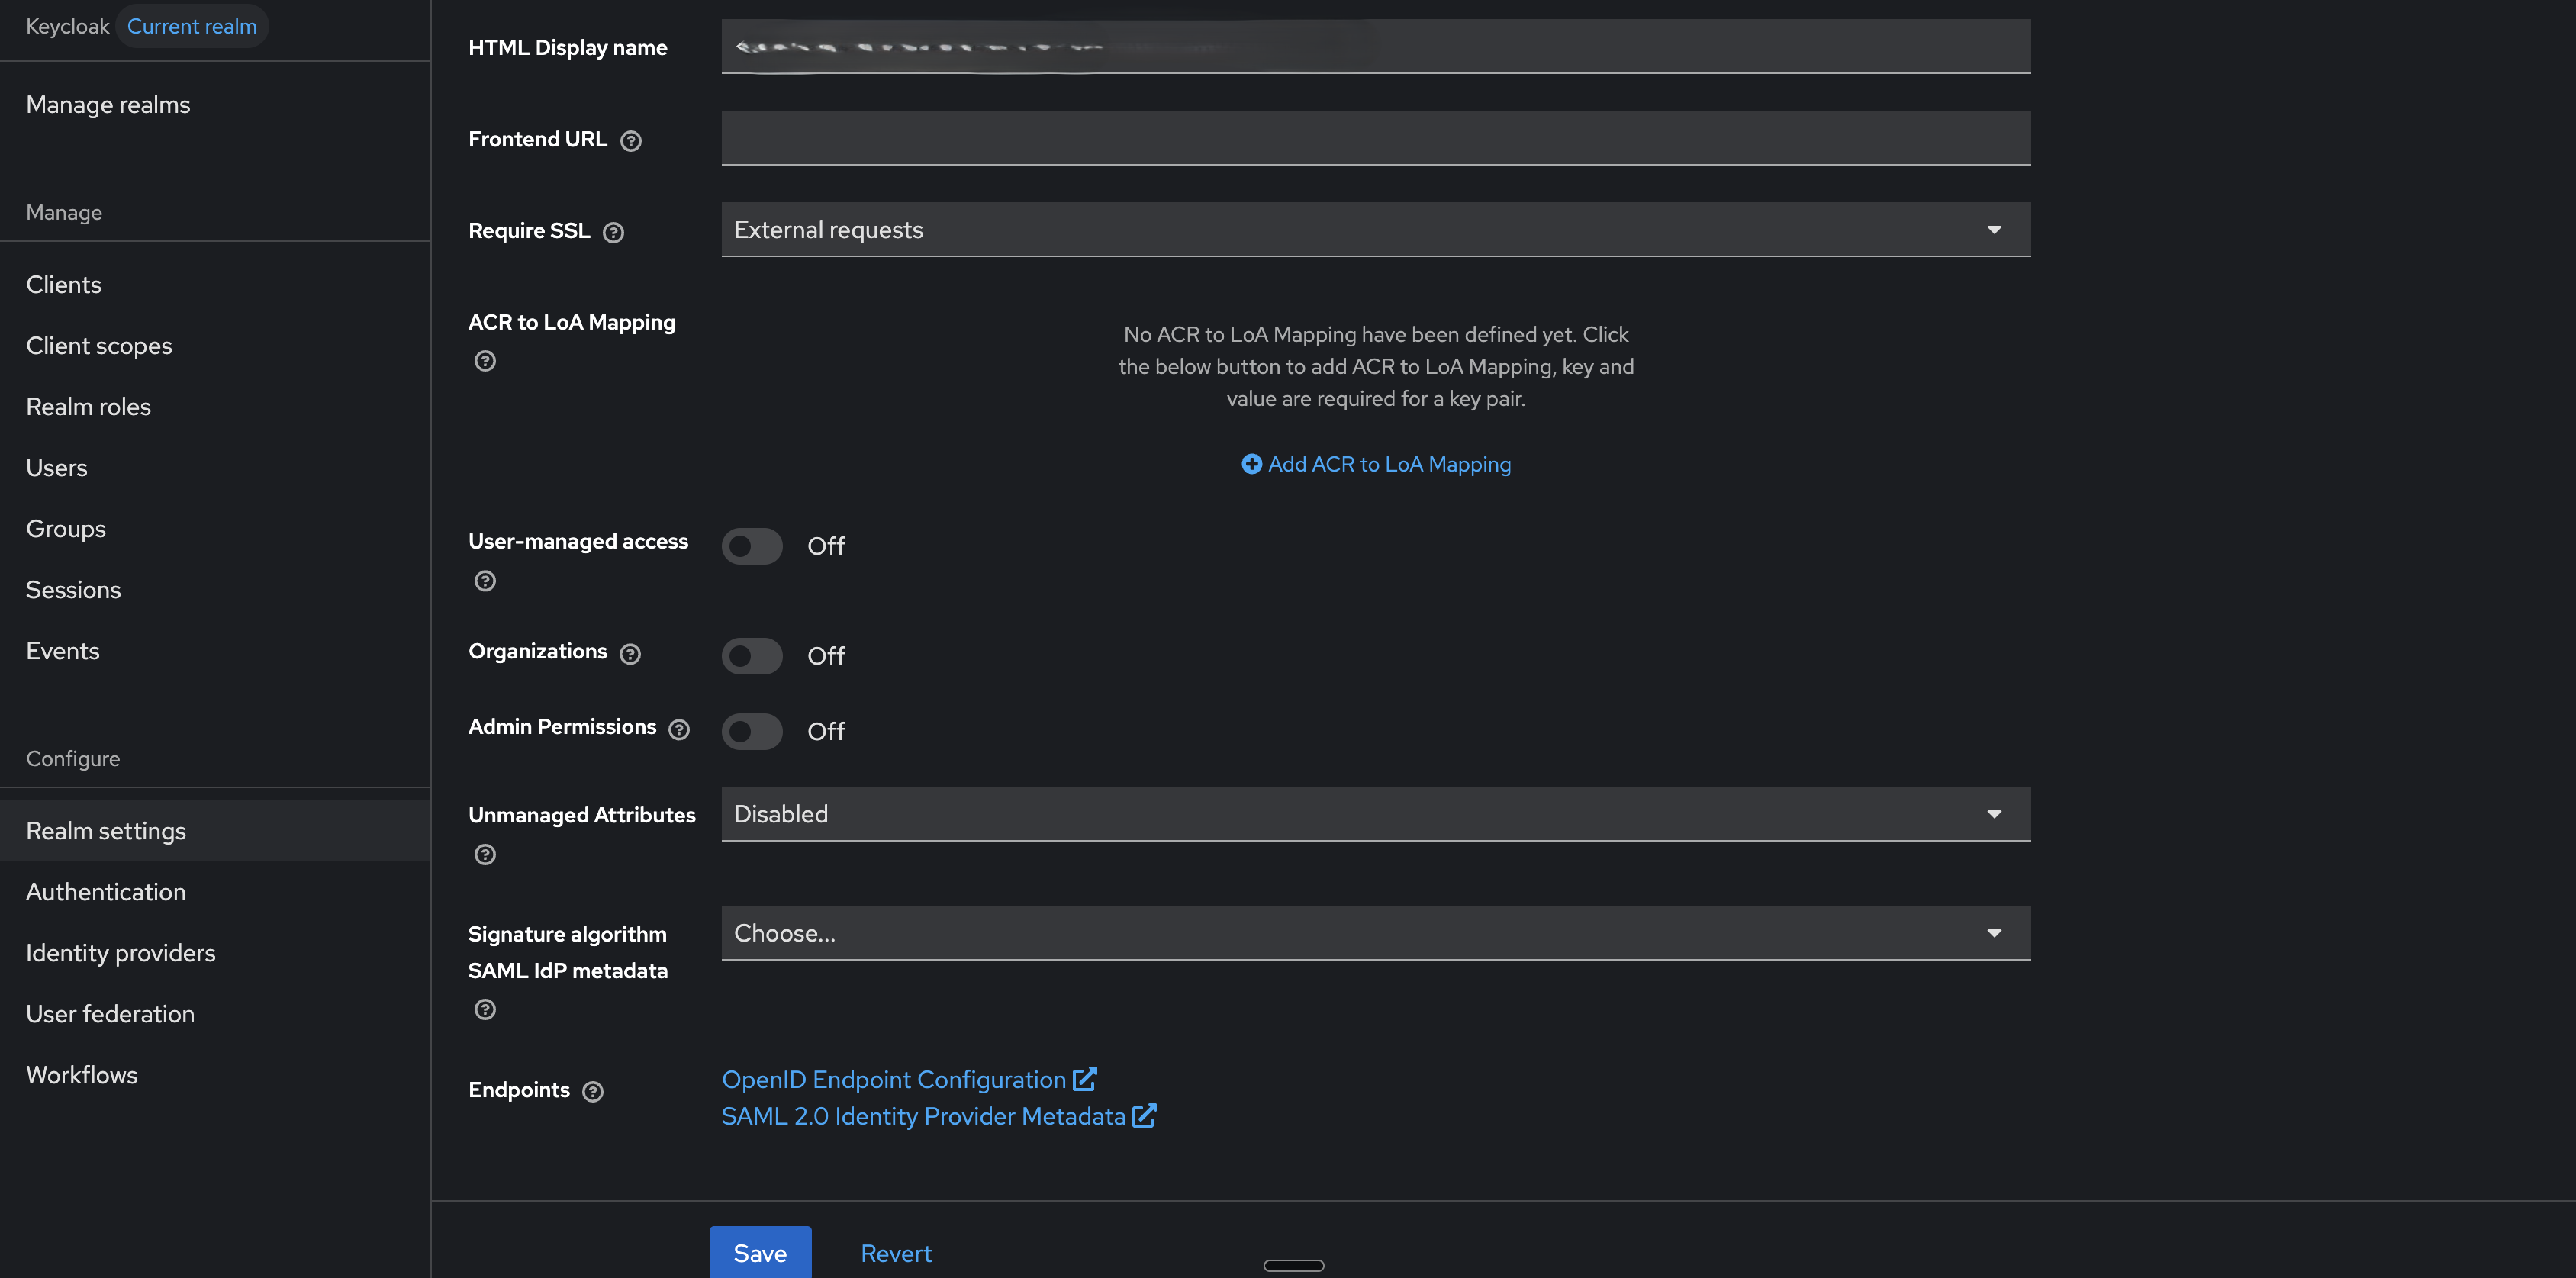
Opening that link shows the discovery document, where the issuer value confirms the Issuer URL format described above.
Configure in Dataedo
By now you should have all the necessary values:
- Issuer URL — this differs for every IdP; you can find it by checking their documentation
- Client ID
- Client Secret
Now, navigate to Settings>System Settings and switch to the Login options tab. Click Add new login method.
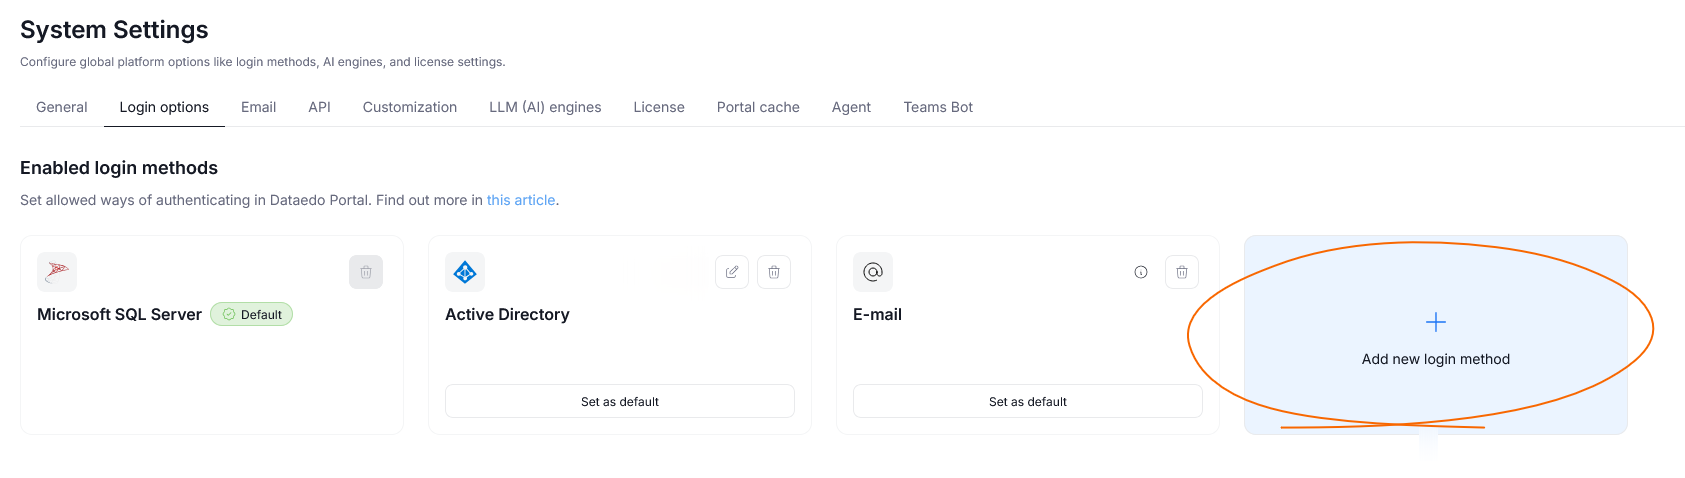
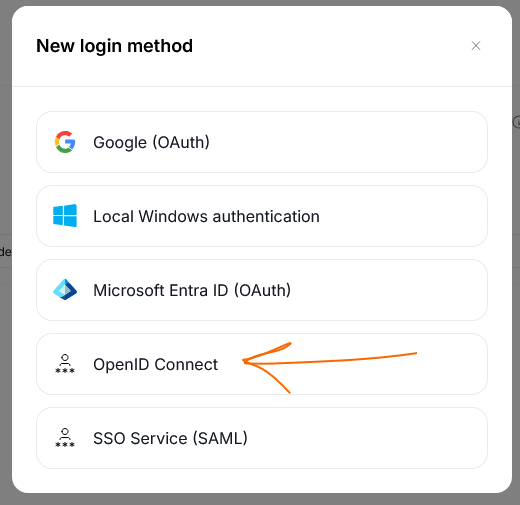
Select OpenID connect.
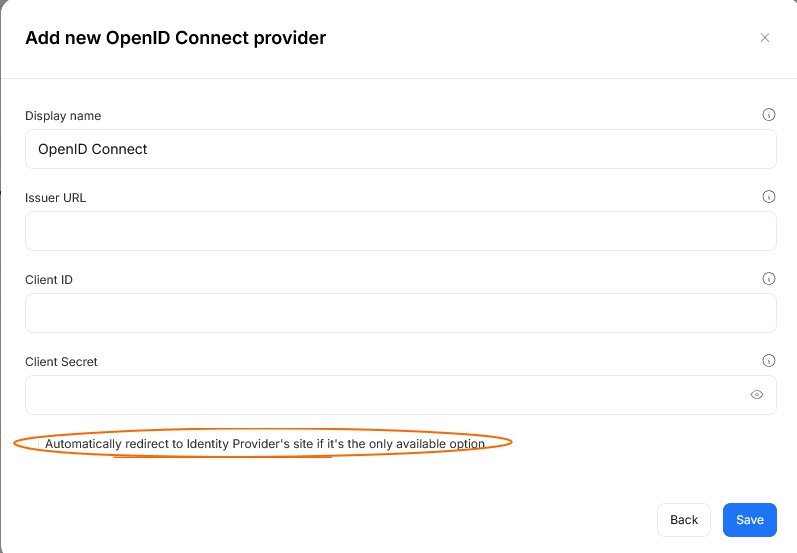
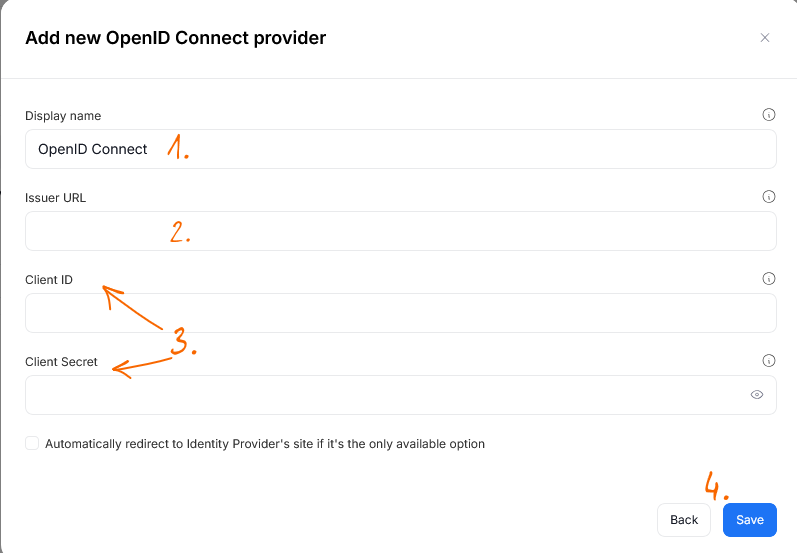
In the next window, give your connector a Display name [1]. This is mostly informational, so that you as an admin can easily recognize it if a need to edit the authentication in Dataedo appears in the future. Then provide the Issuer URL [2] of the IDp where you configured OIDC. Finally, pass the Client ID and Client Secret [3] which you copied when setting up OIDC in your IDp. Click Save [4] to add the authentication method.
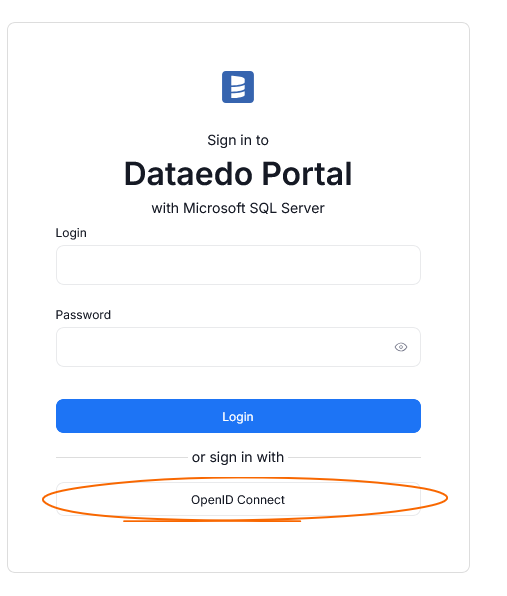
Now, you will see the option to login with OIDC when opening Dataedo.
(Optional) Automatic Redirection to IdP Service
In certain circumstances, you can set up Dataedo to automatically redirect you to the chosen Identity Provider when accessing the login page. You need to meet two conditions for this option to appear:
- only one Identity Provider is configured for IdP
- no other login methods are enabled
When those conditions are met, an Automatically redirect to Identity Provider's site if it's the only available option checkbox will appear during configuration. You can select it and save your settings to enable automatic redirection.