Configure Dataedo with Google OAuth2
This guide will show how to configure Dataedo to work with an OAuth2 identity provider.
Configuration in Google Cloud Console
Create a new project
-
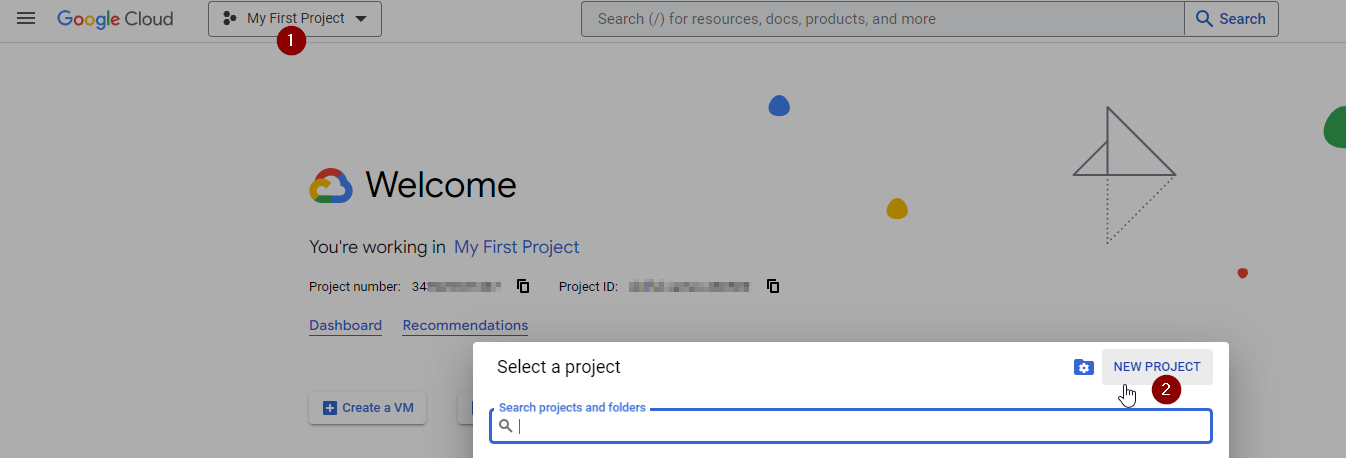
Open Google Cloud Console and create a new project:
-
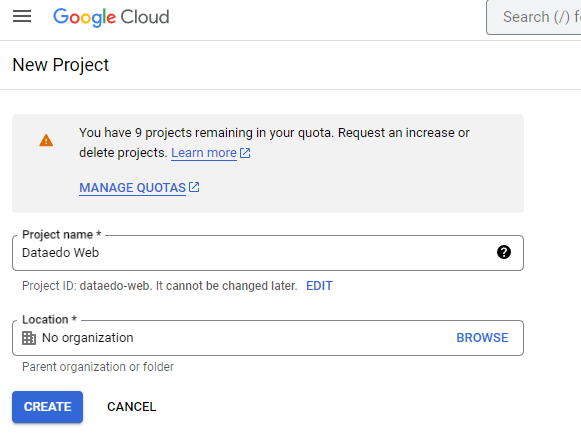
In the newly opened tab, type in the Project name for your internal use (for example, "Dataedo Portal") and choose the location if needed:
-
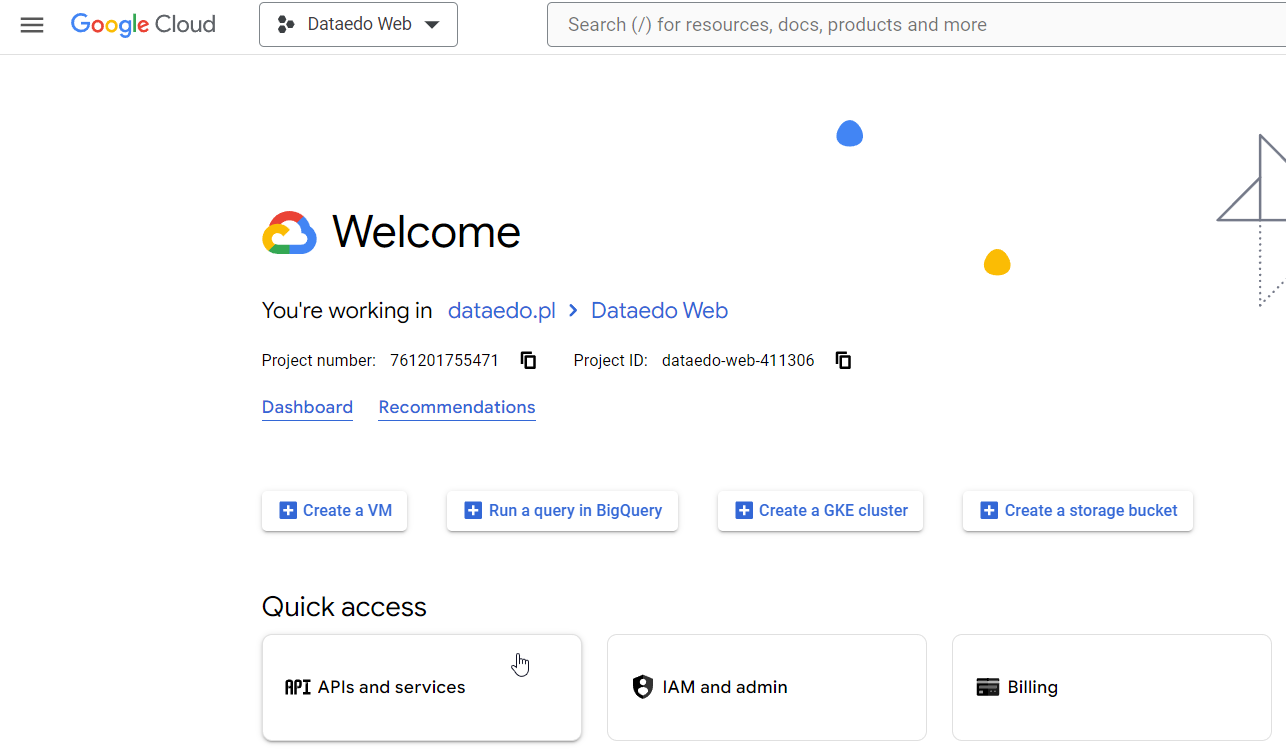
Change the project to the one you've just created, and select API & Services:
-
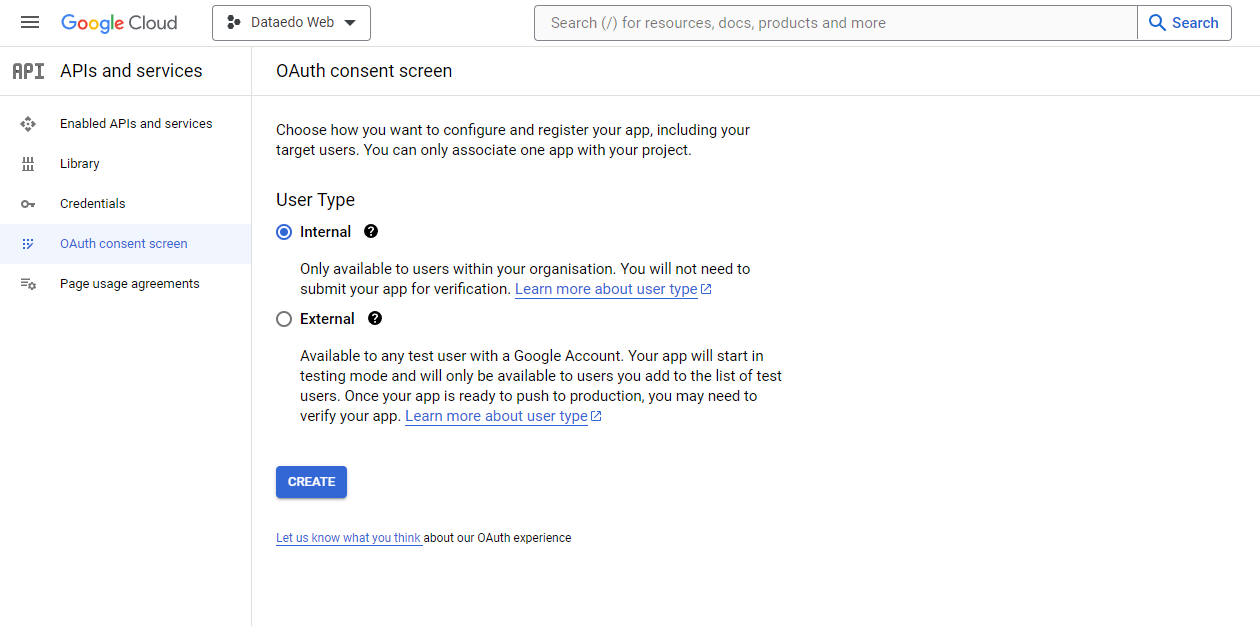
Go to OAuth consent screen, decide if you want your application for Internal or External use, and click Create:
-
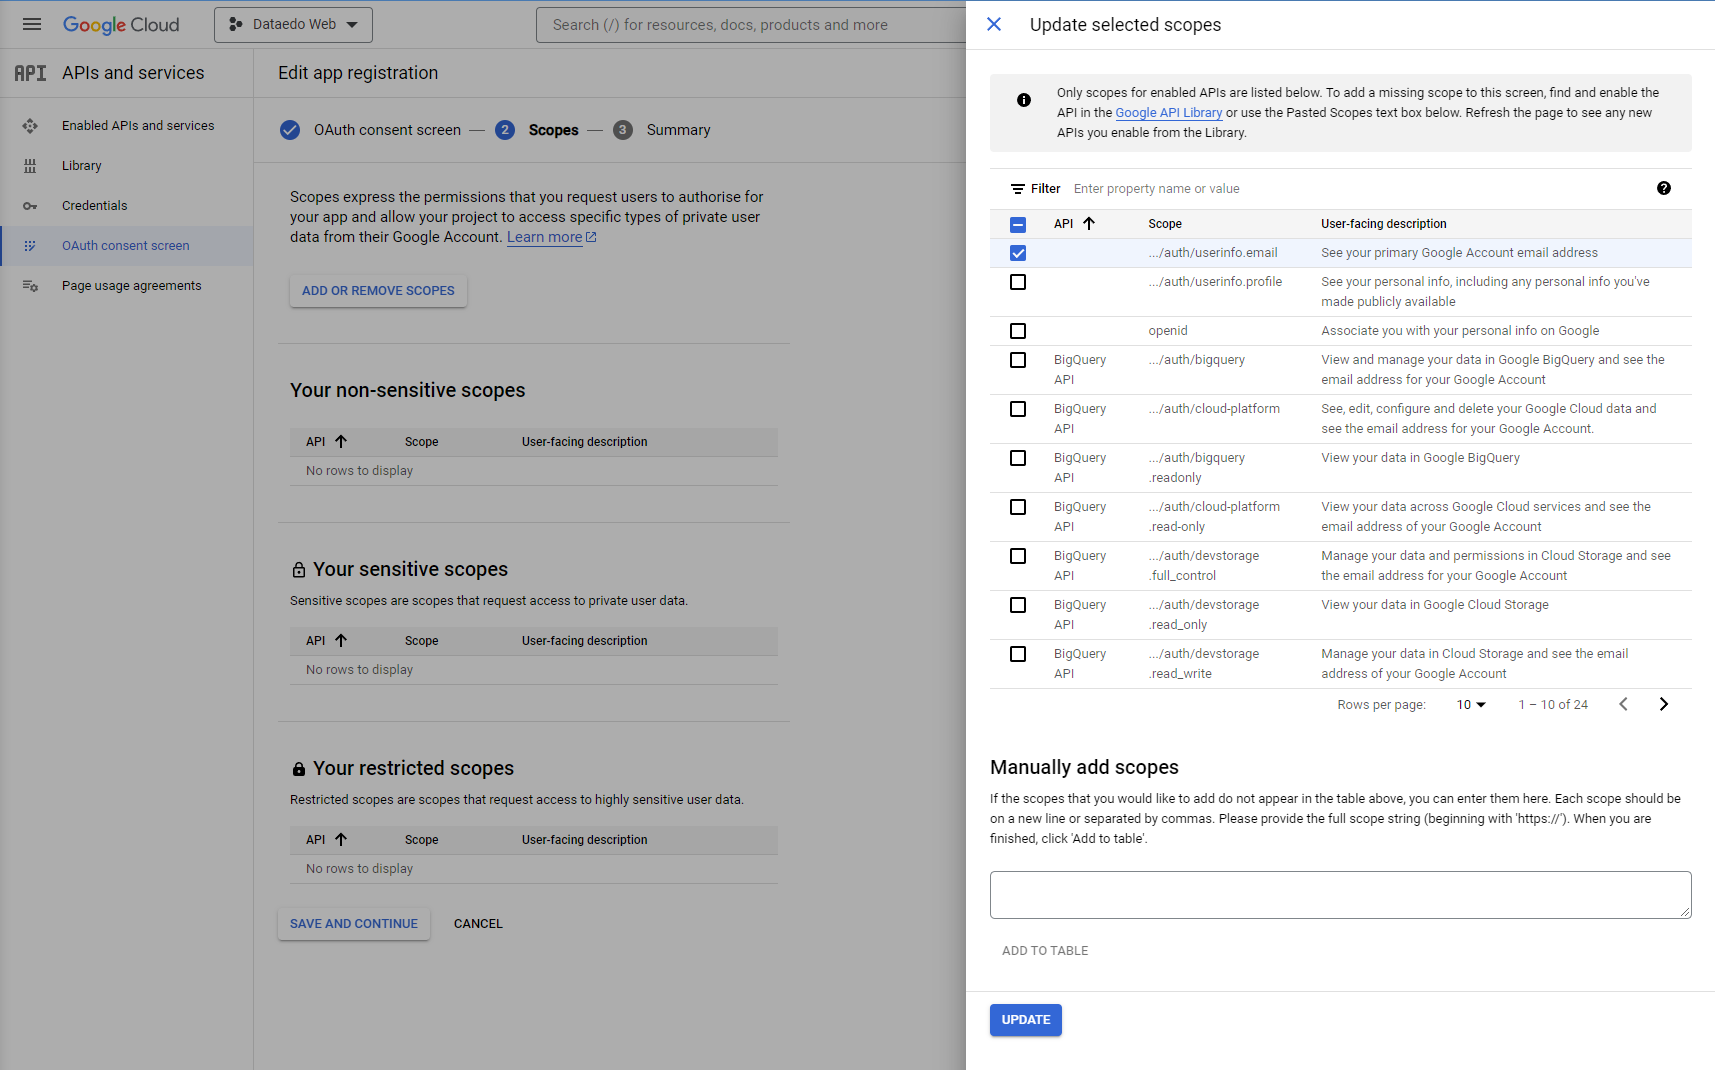
On the new screen, fill in all the required information and click Save and continue. On the next screen, select Add or remove scopes, then select .../auth/userinfo.email. After that, click Update and Save and continue:
-
On the last screen, review the summary of your configuration. If everything is correct, click Back to dashboard.
Create OAuth credentials
-
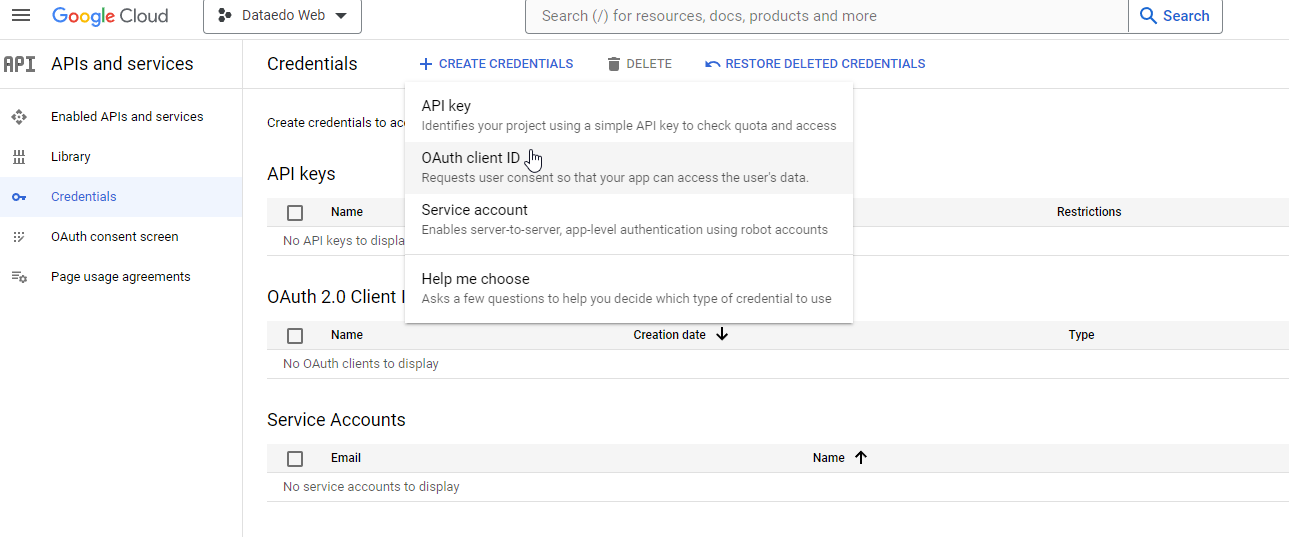
Navigate to the Credentials section, click Create credentials, and select OAuth client ID:
-
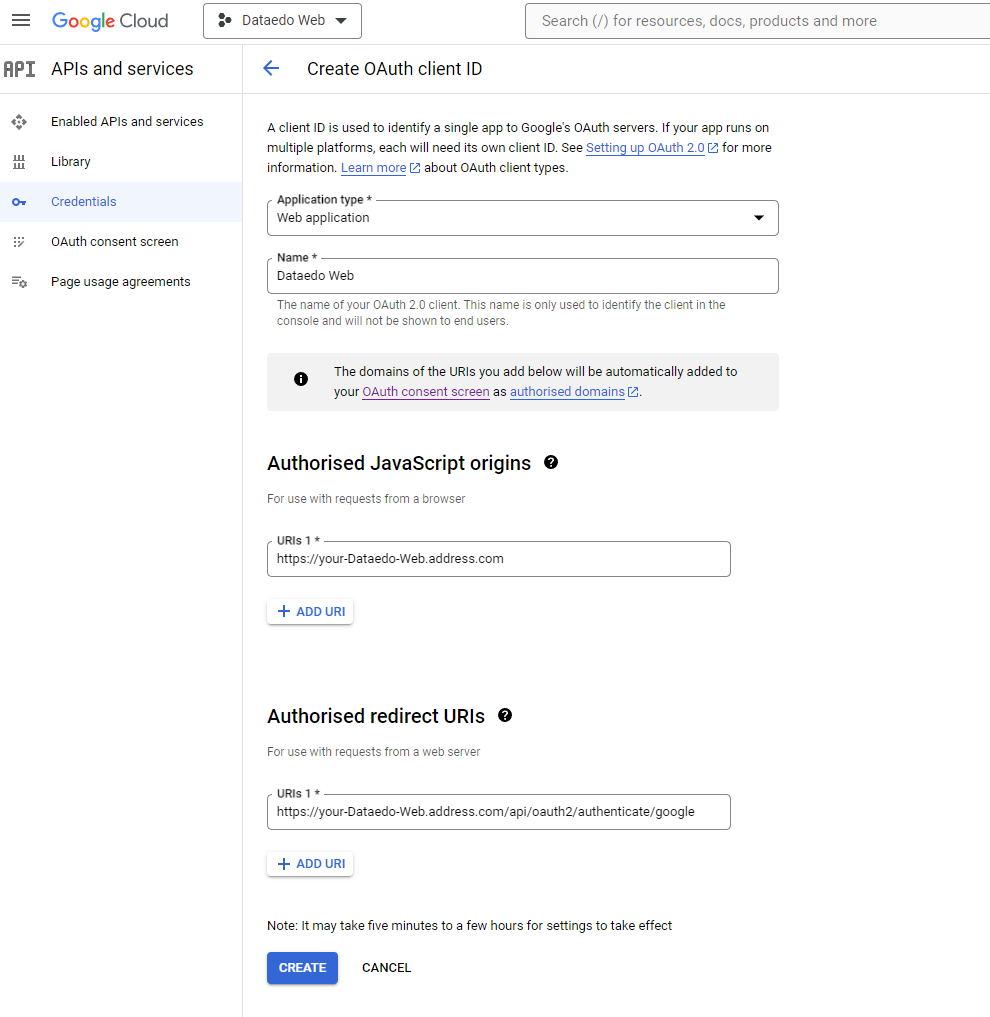
Select Web application as the Application type and enter your Dataedo Portal URL:
- In the Authorized JavaScript origins section:
https://your-dataedo-portal.address.com - In the Authorized redirect URIs section:
- Docker setup:
https://your-dataedo-portal.address.com/api/oauth2/authenticate/google - IIS setup:
https://your-dataedo-portal.address.com/api/api/oauth2/authenticate/google
- Docker setup:
Click the Create button at the bottom:
 useful tip
If you're not sure about your setup, contact our support team.
- In the Authorized JavaScript origins section:
-
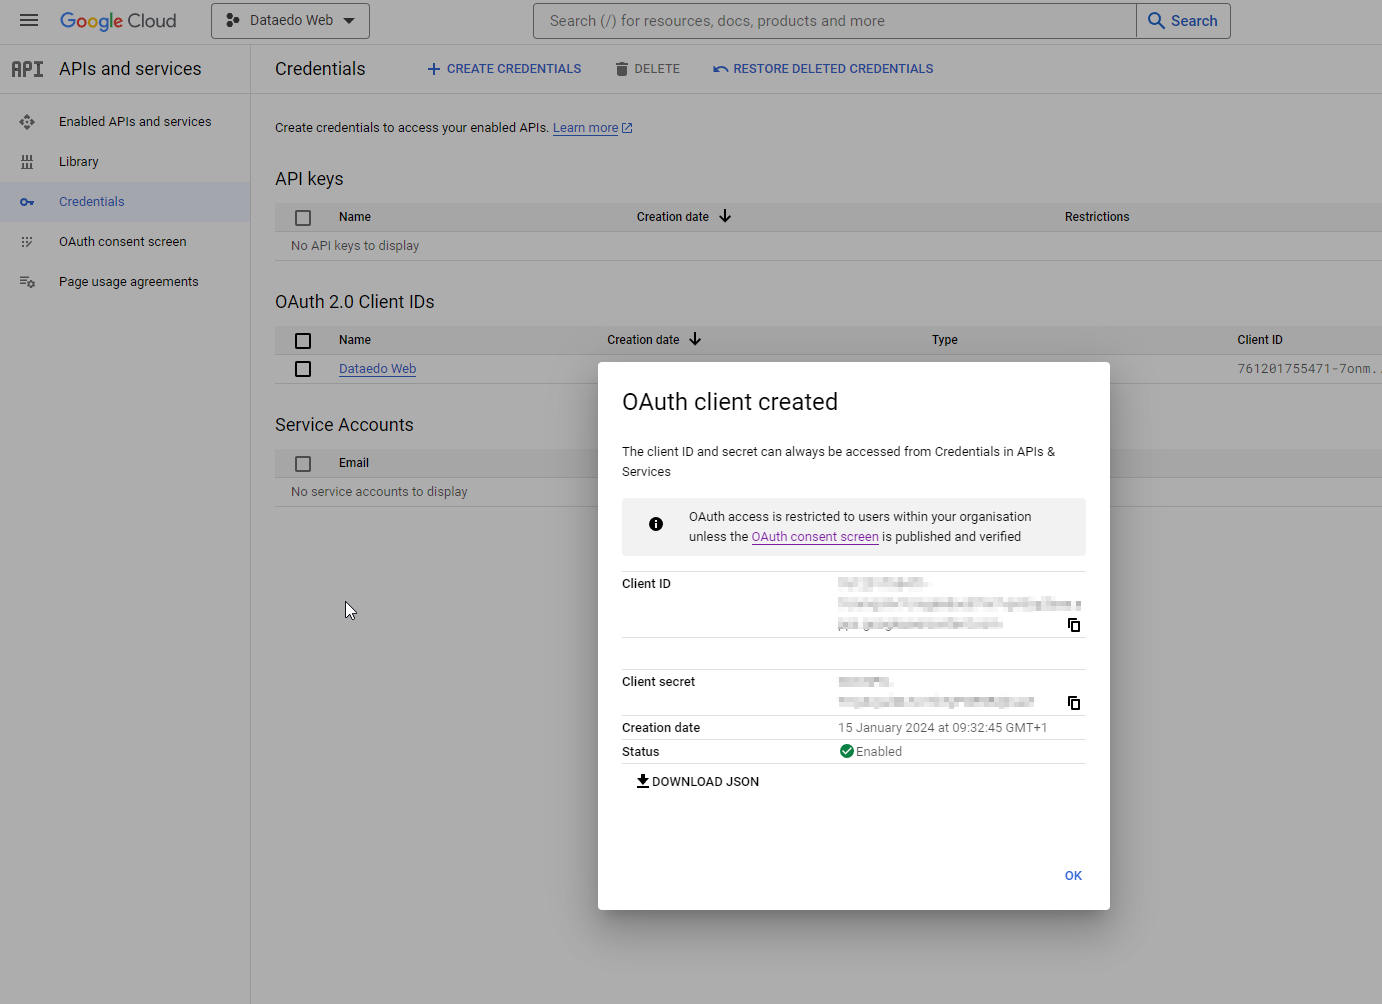
On the next screen, copy and save the Client ID and Client Secret values. You can also download them as a JSON file:
Configure OAuth in Dataedo Portal
-
Log in to your Dataedo Portal instance with admin permissions.
-
Go to System settings > Login options.
-
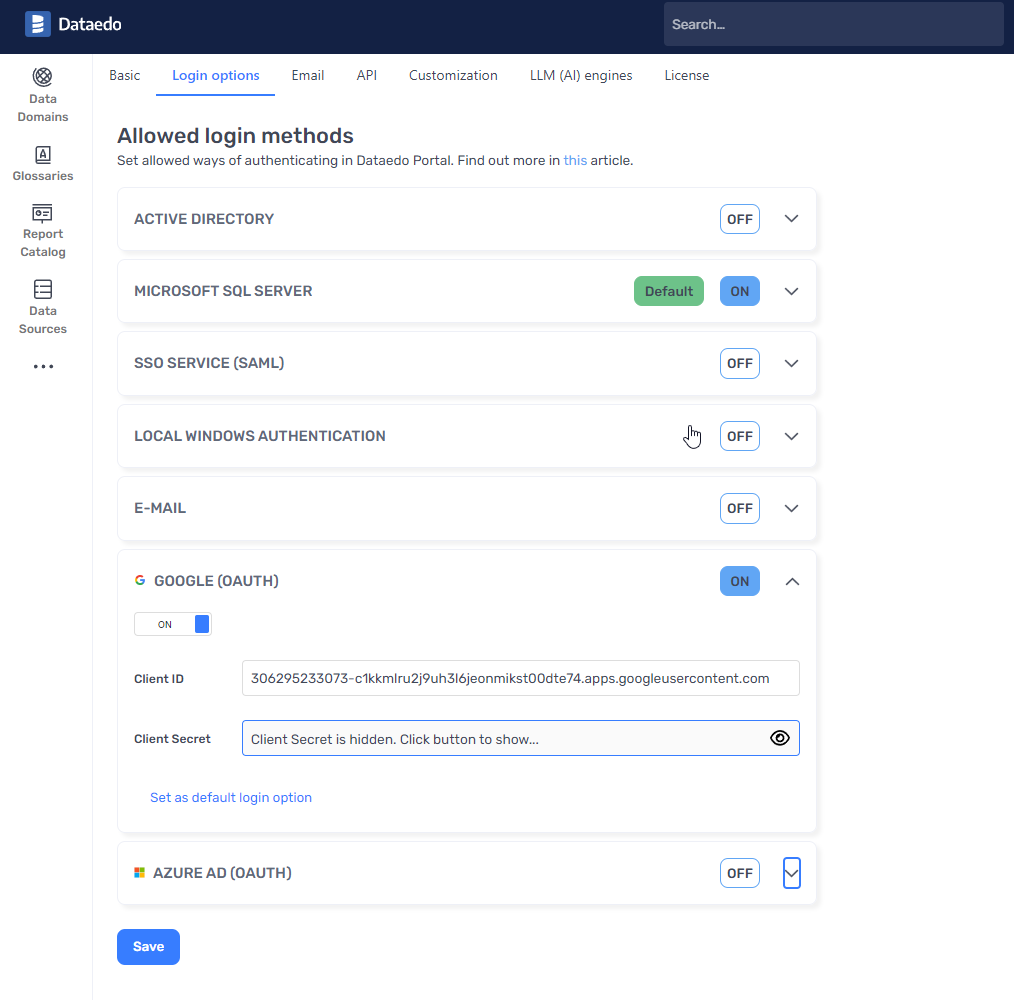
Expand the GOOGLE (OAuth2) section, then paste the Client ID and Client Secret you copied earlier.
-
Enable this authentication method by toggling the switch to ON and click Save:
Verify Google login in Dataedo Portal
When you open Dataedo Portal, you'll see the option to log in with Google:
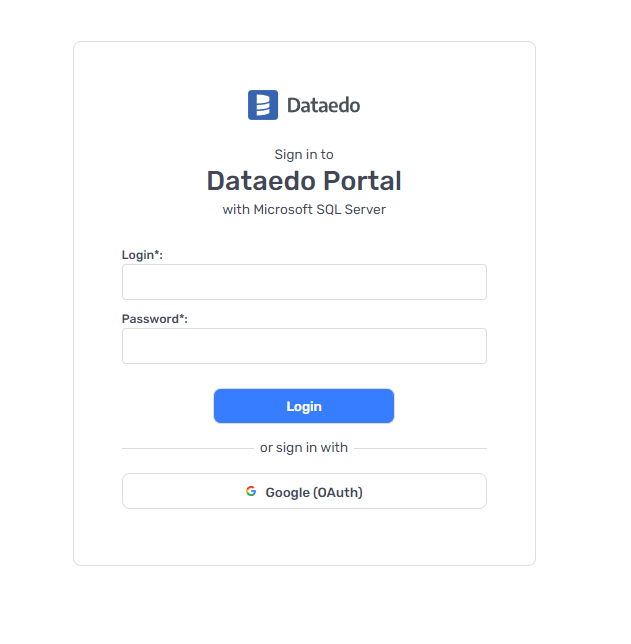
Click this option to go to the Google login page. If you're already logged in, you'll be redirected directly to your Dataedo Portal home page.
Need help?
If you run into any problems or have questions, reach out to Dataedo support.

