Authenticating Dataedo Portal with Google Workspace
This guide will show you how to set up Dataedo to work with a SAML identity provider. In this example, we'll use Google Workspace as the Identity Provider (IdP), but the steps are similar for other providers.
Initial Configuration in Google Admin Portal
-
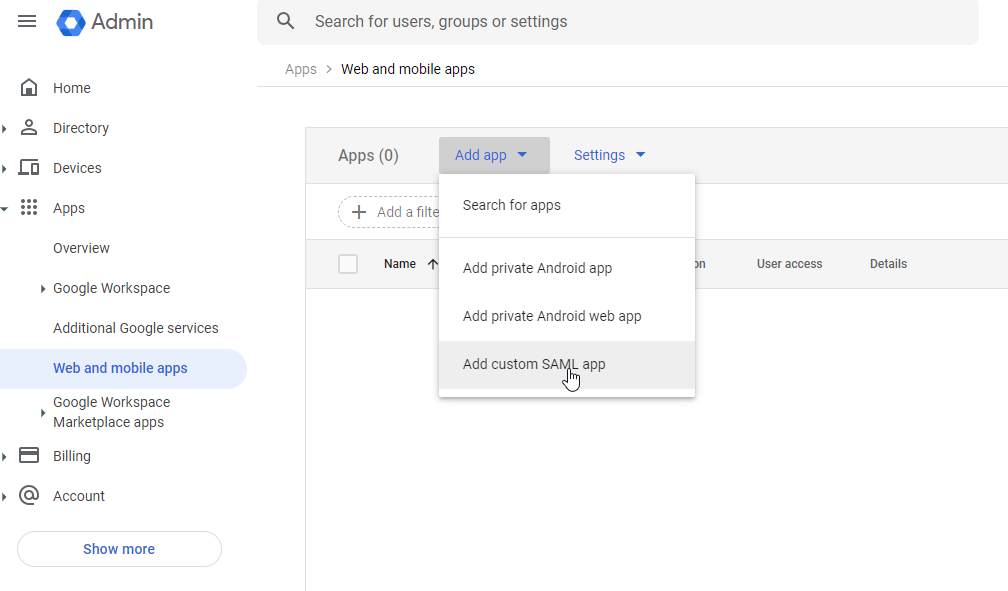
Open the Google Admin Portal.
- Navigate to Apps > Web and mobile apps.
- Click Add app > Add custom SAML app.
-
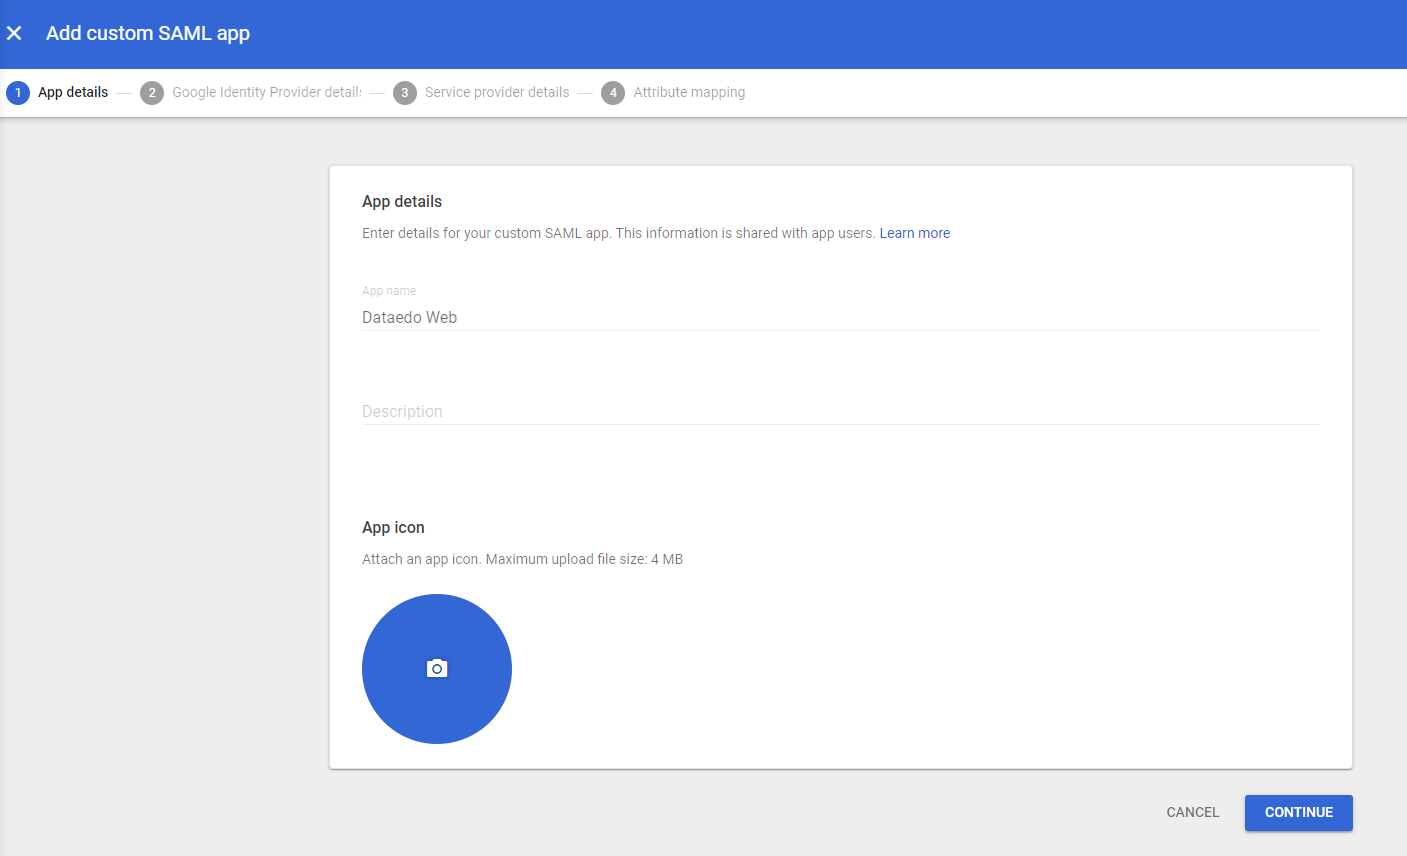
In the new tab, type a name for the application (for example, "Dataedo Portal") and click Continue.
-
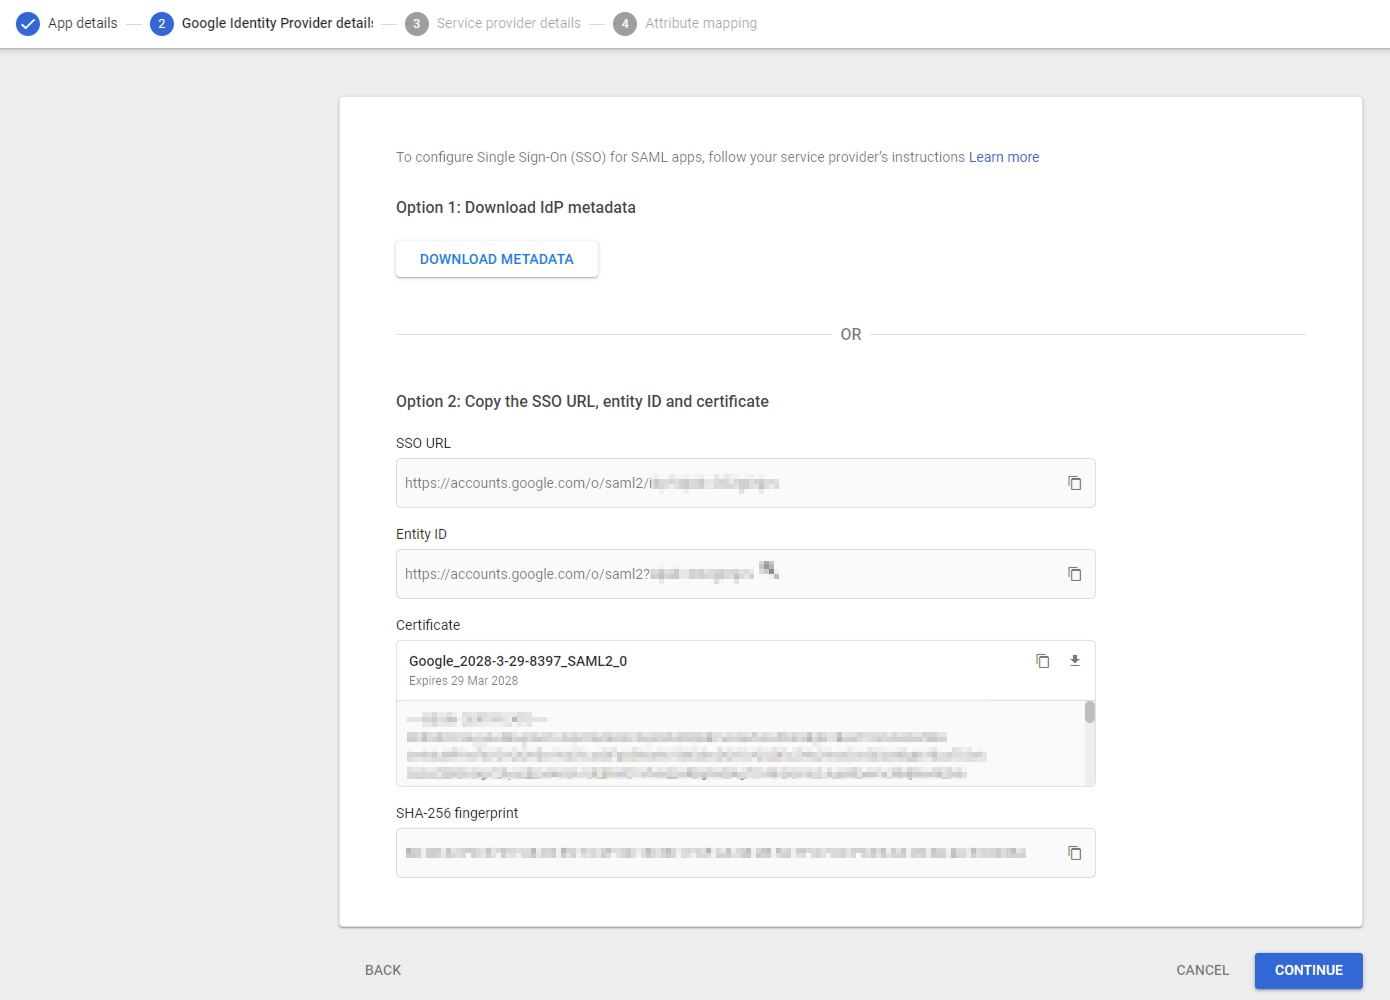
On the next page, click DOWNLOAD METADATA to save the metadata file for later use, then click Continue.
-
Configure the following fields:
- ACS URL: Enter the Dataedo Portal URL followed by
/api/api/auth/assertion-consumer(e.g.,https://your-dataedo-web.address/api/api/auth/assertion-consumer). - Entity ID: Choose a unique identifier without spaces or special characters (e.g.,
DataedoPortal). Save this value for later use.
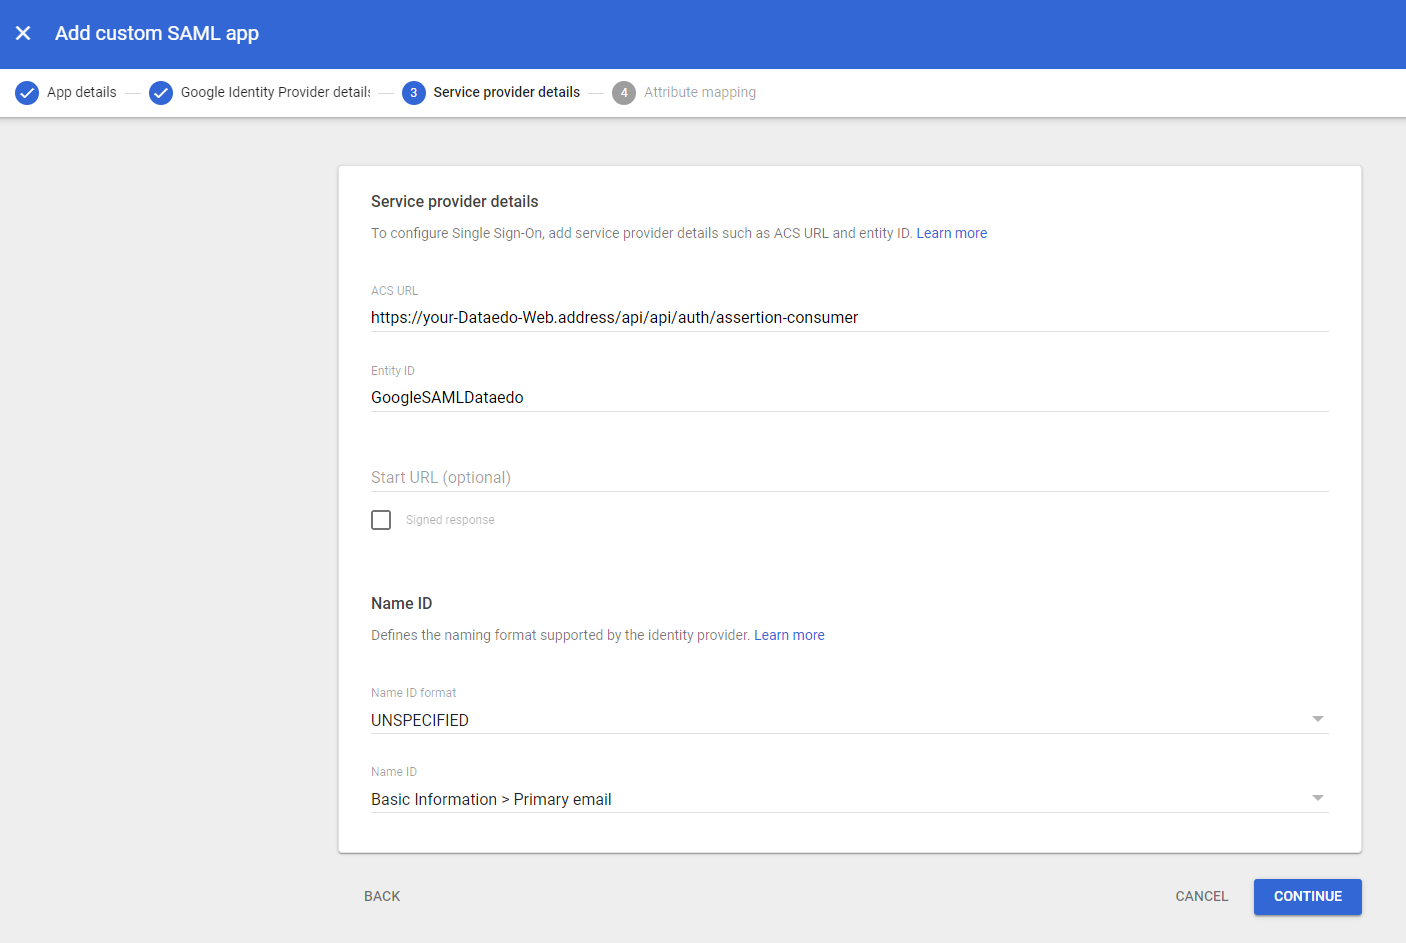
- ACS URL: Enter the Dataedo Portal URL followed by
-
Leave the last page fields empty and click Finish.
-
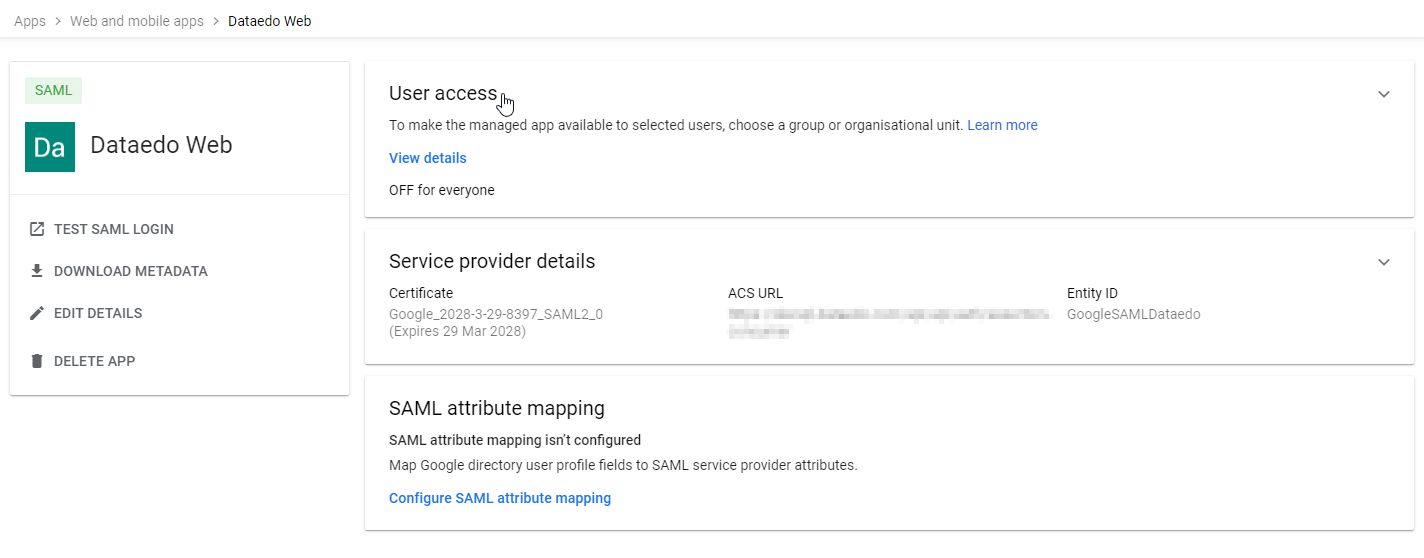
Assign access:
- Go to User access.
- Assign the users or groups allowed to log in to Dataedo Portal using Google SAML.
Configuring Group Attribute Mapping in Google Workspace (Optional)
- In the Google Admin Console, open the app and go to SAML attribute mapping.
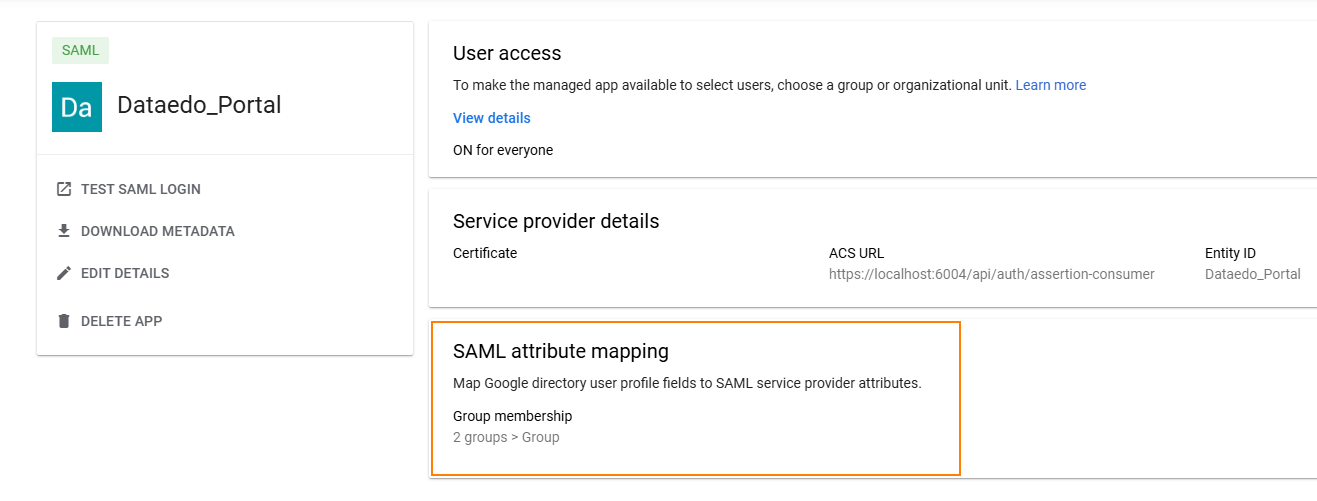
- Under Group membership, set:
- Google Groups: Select the groups to include in the SAML response
Note: Group membership is only sent if the user belongs to at least one selected group. - App attribute: Enter
"Group"
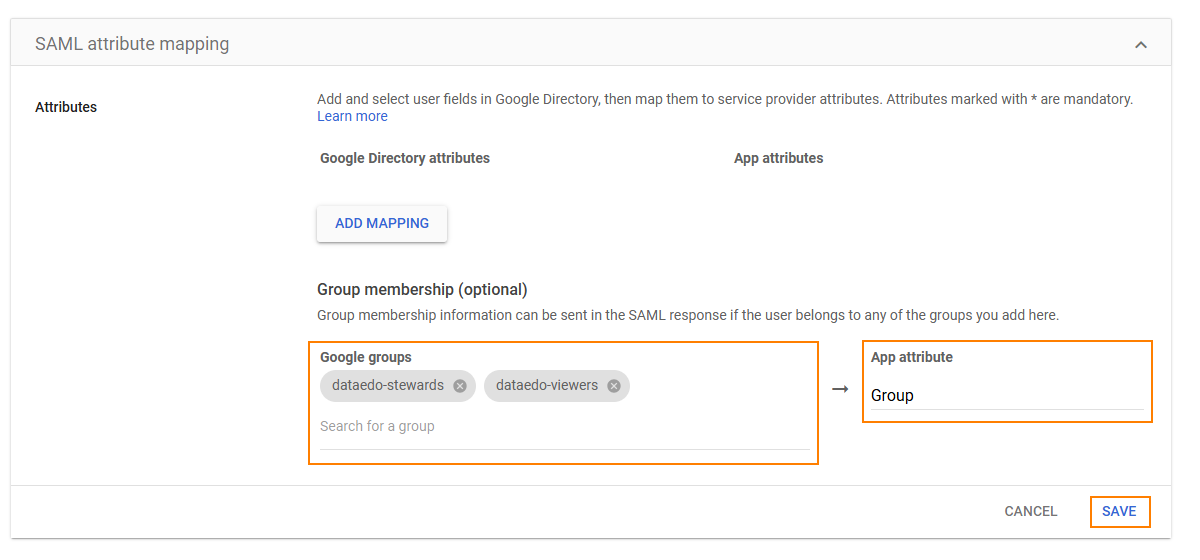
-
Click Save.
-
In the Admin Console menu, go to Directory > Groups.
-
Verify that users are correctly assigned to the groups linked to the app.

Configuring SAML in Dataedo Portal UI (version 25.2+)
Starting with version 25.2, you can configure SAML identity providers directly in the Portal interface. You no longer need to edit appsettings.json. All settings are now stored in the database and are preserved during upgrades.
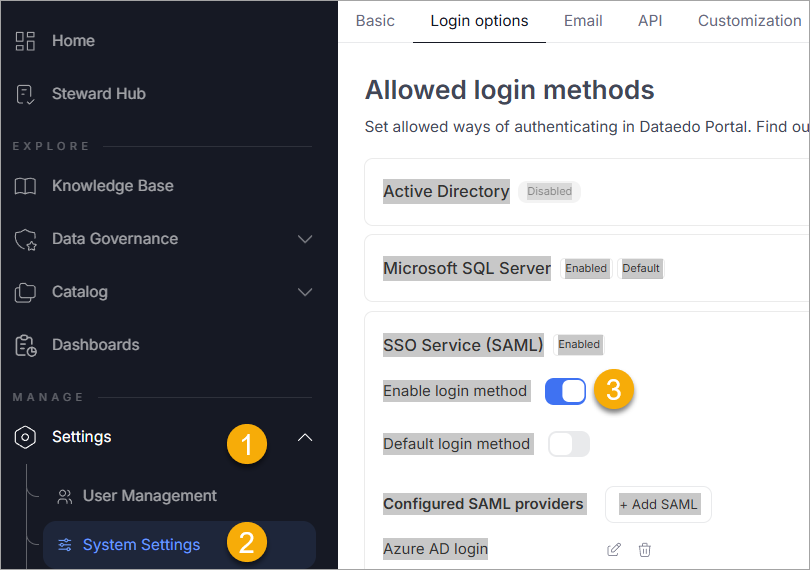
Step 1 – Open Login Options in System Settings
- In the Portal, go to Settings > System Settings > Login options.
- Expand the SSO Service (SAML) section.
- Toggle Enable login method to activate SAML login. The toggle appears blue when active.
Step 2 – Add or Edit a SAML Identity Provider
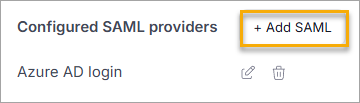
- Under Configured SAML providers, you will see a list of existing providers (if any).
- To add a new one, click Add SAML.
- Fill in the fields with values from your identity provider (for example, Entra ID):
- Display name – for example,
Azure_AD. - IdP Metadata – metadata URL or file path.
- Issuer – from your provider's SAML configuration.
- Signature algorithm – for example,
http://www.w3.org/2001/04/xmldsig-more#rsa-sha256. - Certificate validation mode – for example,
ChainTrust.
- Display name – for example,
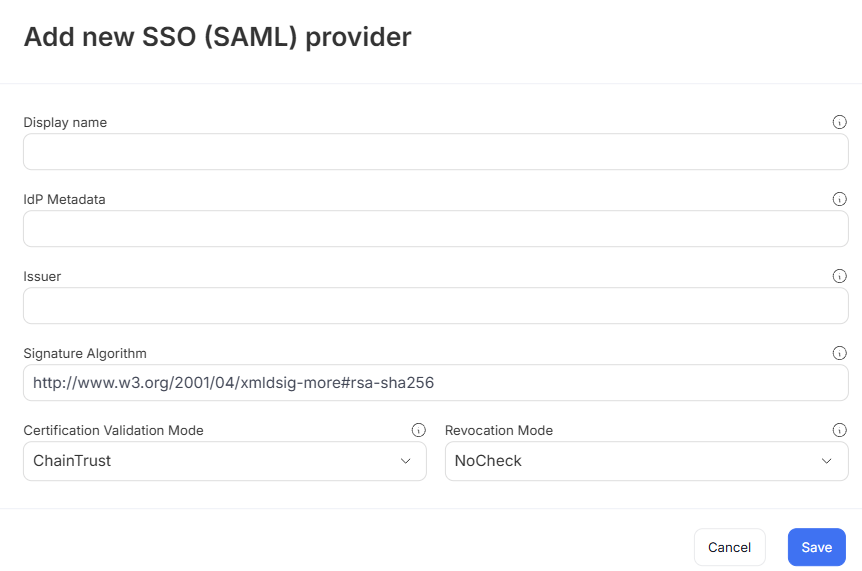
- Click Save to store your provider configuration.
Step 3 – Test the Login Option
Once configured, the login screen will display an option to log in via the added SAML provider.
Clicking this will redirect the user to the identity provider login page. Upon successful authentication, users are redirected back to the Portal.
Synchronizing User Groups via SAML
Dataedo Portal can automatically assign users to groups based on their group membership in the identity provider (such as Entra ID). This simplifies access management since group membership is maintained externally, and roles are assigned dynamically during login.
Step 1 – Configure Group Claims in Entra ID (Azure AD)
To pass group information through SAML:
- In Azure Portal, open your application and go to Single sign-on > Attributes & Claims.
- Click Edit, then Add a group claim.
- Configure it to:
- Use
Nameas the format. - Filter by assigned groups (or all groups, if preferred).
- Set the claim name to
"Group".
- Use
Make sure users are assigned to groups in Entra ID (Azure AD) that reflect their roles in Dataedo Portal.
Step 2 – Enable Group Synchronization in Portal
The Synchronize with SAML and Automatically assign group to each new user options cannot be simultaneously applied to the same user group. These two options directly contradict each other.
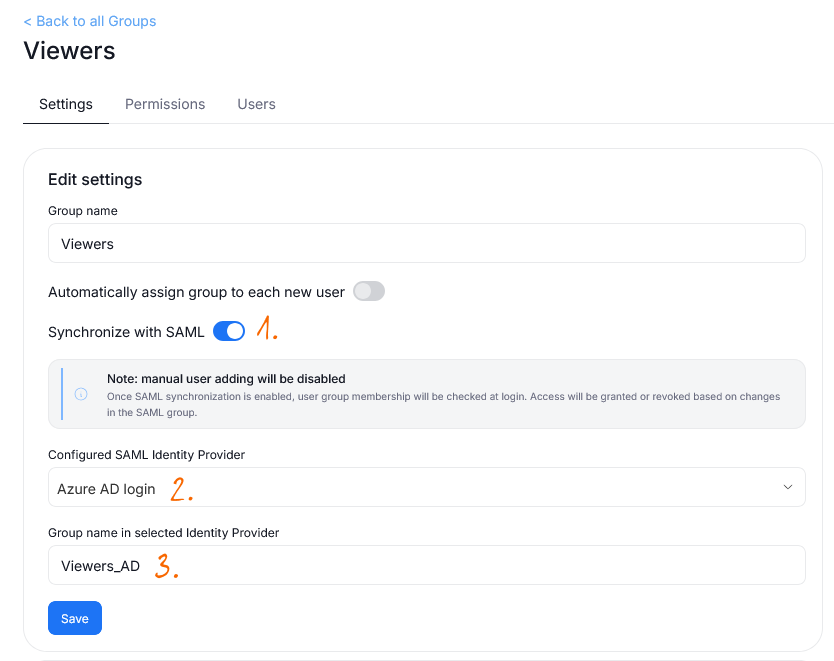
- Navigate to User Management>Groups and either create a new group or open an existing one.
- In the Settings tab:
- Enable Synchronize with SAML [1]
- Select the correct SAML provider from a drop down [2]
- Enter the group name from your identity provider that should map to this Portal group [3]
Step 3 – Assign Roles to the Group
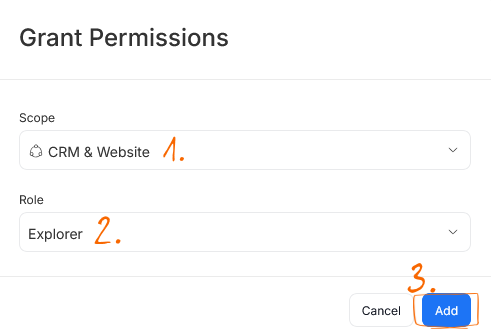
Open the group's Permissions tab and click Add Role
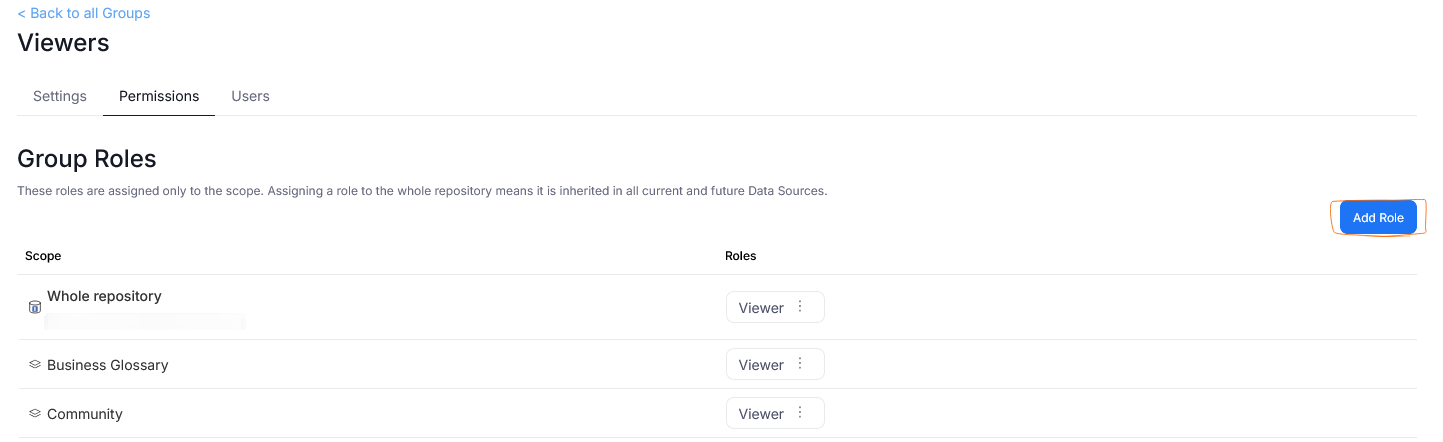
A popup will appear. You have to provide:
- The scope [1] — the scope defines where the role permissions will apply. Should this User Group have editor privileges in the entire repository or just select Domains or Data Sources?
- The role [2] — the type of role you want to give to this user group. Each role comes with different permissions.
After you define the role and its scope, save it using the Add [3] button.
Once this is set up, group membership changes in Entra ID (Azure ID) will automatically apply the correct roles the next time a user logs in.
Configuring SAML in Dataedo Portal (Docker)
Update .env
-
Open the
.envfile located alongside thedocker-compose.ymlfile. -
Update the Single Sign-On section:
Single sign-on configuration in docker-compose.yml# This sample contains inline comments for explanation purposes.
# Remove all comments (#) before using this configuration in your environment.
# Enter the path for the metadata XML file saved on your machine.
DATAEDO_SSO_IDP_METADATA="/opt/dataedo/idpmetadata/GoogleIDPMetadata.xml"
# Paste the Entity ID field from Google Admin Portal.
# This value can be found in Service provider details > Entity ID.
DATAEDO_SSO_ISSUER="GoogleSAMLDataedo"
# Specify the signature algorithm. Default is RSA_SHA256.
# For RSA_SHA1, use http://www.w3.org/2001/04/xmldsig-more#rsa-sha1.
DATAEDO_SSO_SIGNATURE_ALGORITHM=http://www.w3.org/2001/04/xmldsig-more#rsa-sha256
# Certificate validation mode. Default is ChainTrust.
DATAEDO_SSO_CERTIFICATE_VALIDATION_MODE=ChainTrust
# Revocation mode. Default is NoCheck.
DATAEDO_SSO_REVOCATION_MODE=NoCheck
# Enter the display name shown when logging in.
# This value cannot contain spaces. Use underscores (_) instead if needed.
DATAEDO_SSO_DISPLAY_NAME="GoogleSAML"
# Ensure this URL points to your Dataedo Portal application address.
DATAEDO_SSO_CLIENT_URL="https://yourwebsite.com/" -
Restart the Docker container:
docker-compose up -d -
If you open Dataedo Portal, you'll see the option to login with Google:
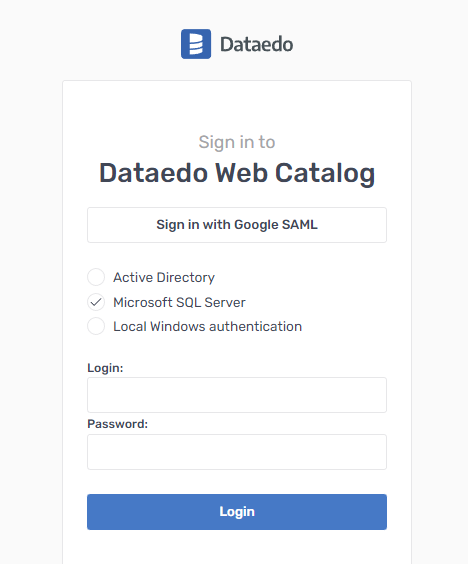
Clicking it will take you to the Google login page or directly to your Dataedo Portal page if you're already logged in.
Need help?
If you run into any problems or have questions, reach out to Dataedo support.

